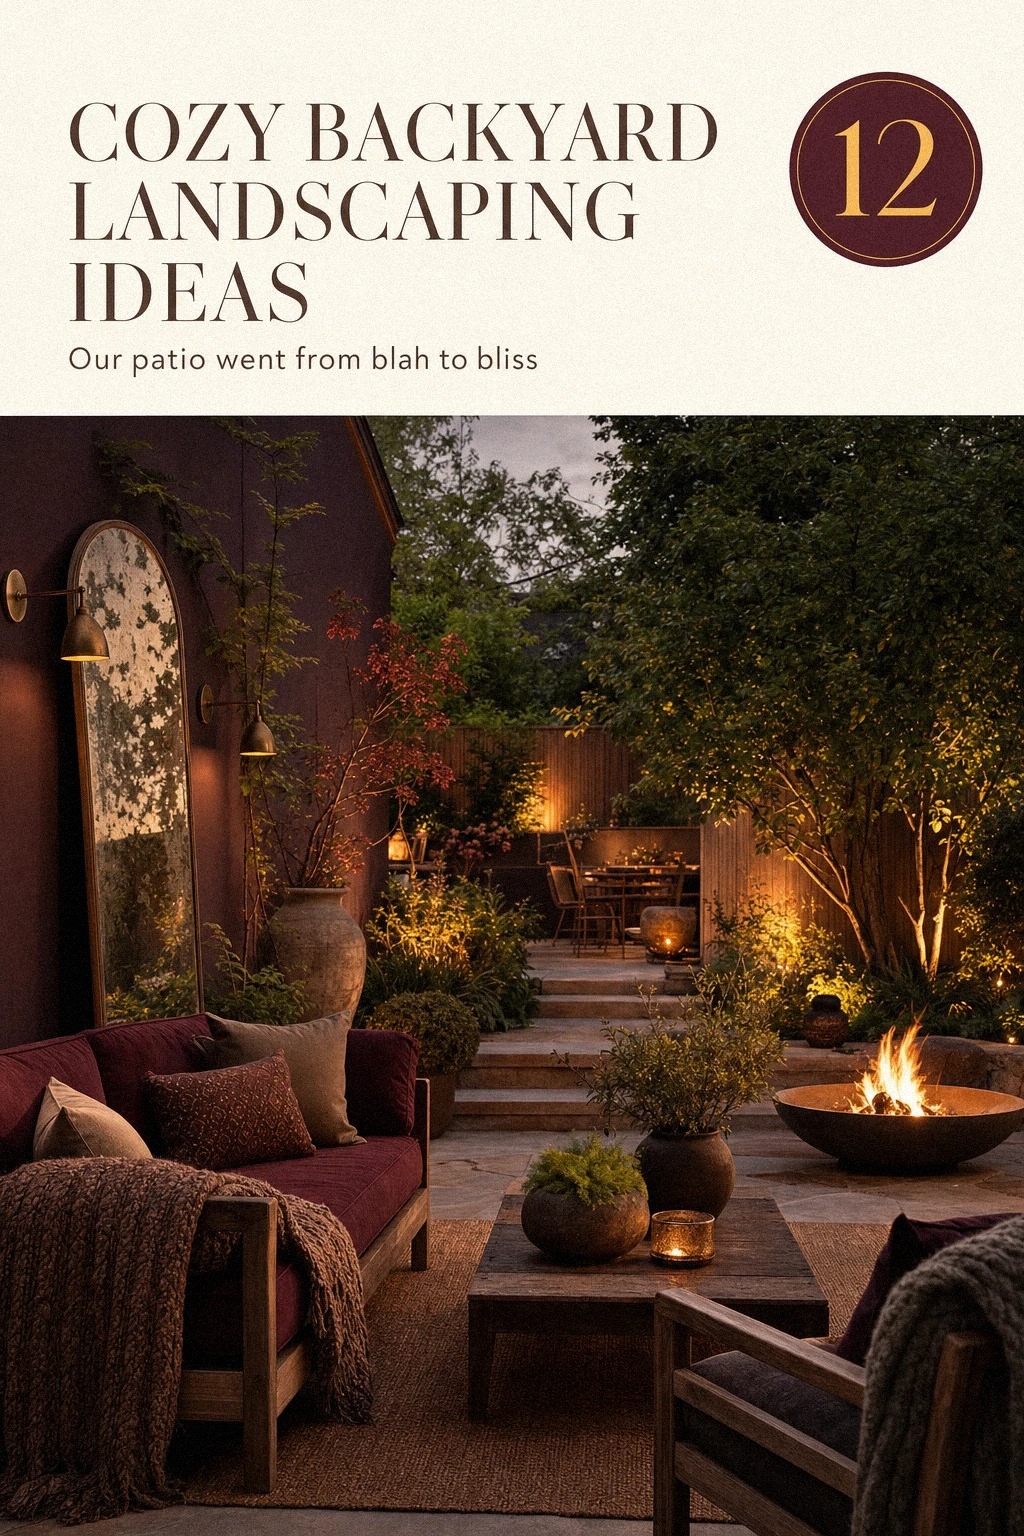
When we bought our house three years ago, the backyard was the saddest part of it. A patchy lawn, a chain-link fence, and a concrete slab that baked in the sun. We lived with it for two summers because I didn't know where to start. Then I stopped trying to renovate the whole thing at once and started working from the edges inward, one weekend at a time. These are the 12 moves that turned our cold, forgotten yard into the warmest room of the house, most of them for less than a few hundred dollars.
Don’t overthink: I laid a gravel path first so the yard had bones before any plant went in.
Editor's Note: Start With the Edges
The sections ahead cover 12 ideas, from gravel paths to stock tanks, but the pattern behind every single one is the same: fix the perimeter first, then work inward. The fence line, the garage wall, the corner that gets six hours of sun.
Get those edges intentional, and the center of the yard starts to solve itself. The ideas below are listed in roughly the order I tackled them, from cheapest to the one splurge I don't regret.
If you only read one thing before you start, make it the gravel path section. It's the skeleton that holds everything else.
Here's what it looked like before
The full 2005 starter-home package. A chain-link fence with rust spots at the bottom. A concrete patio slab that cracked down the middle.
Two sad hostas in plastic pots. A garage wall painted the same beige as the house, blank and glaring in the afternoon sun.
The grass was patchy where the dog ran, and the only light was a single bulb on the garage that attracted moths and nothing else. I wanted to rip it all out. Instead, I started at the fence line and worked my way in. (And honestly?
That was the first good decision I made.)
- I started the landscaping at the fence line and worked inward, not the other way around
- I laid a gravel path first so the yard had bones before any plant went in
- I planted a climbing hydrangea against the bare garage wall and waited two summers
- I built a raised bed from cedar planks left over from a deck project
- I strung café lights on a sagging wire between two birch trees and called it a canopy
- I set a galvanized stock tank in the sunniest corner and filled it with water
- I scattered river rock around the base of every tree instead of mulch
- I placed a weathered teak bench where the afternoon shade lands at four o'clock
- I sowed white clover into the patchy grass and let it take over
- I stacked flat stones myself for a fire pit ring, no mortar, just weight and patience
- I hung a simple mirror on the garden fence to steal depth from the neighbor's hedge
- I left one corner completely untouched, tall grass and wildflowers, for the bees
1I started the landscaping at the fence line and worked inward, not the other way around
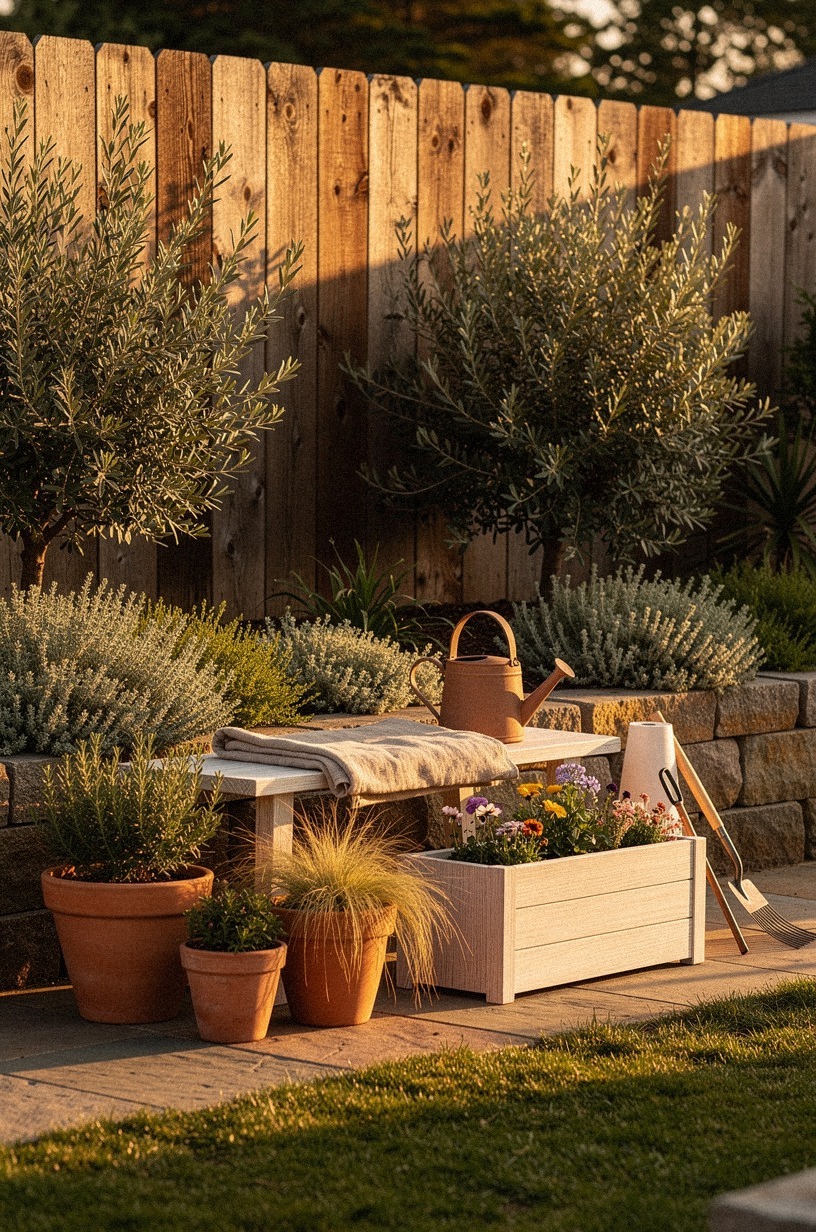
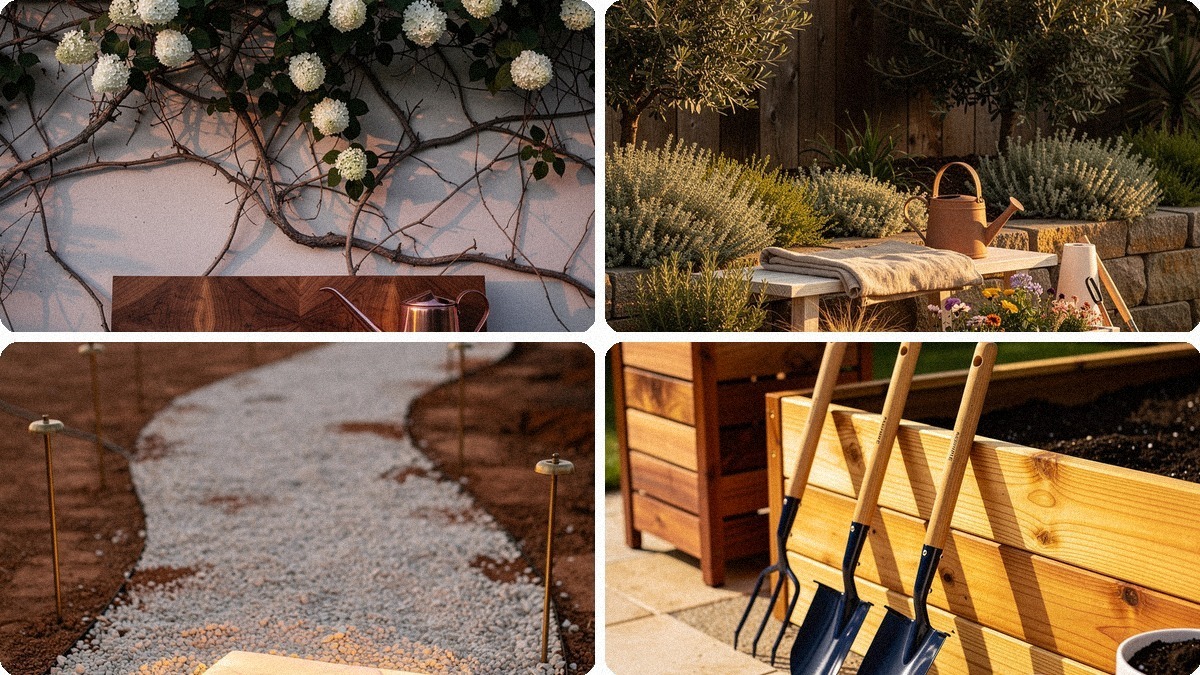
The fence was the problem I saw first, so I treated it first. I planted creeping thyme along the base where the grass wouldn't grow, and tucked olive shrubs in the corners where they'd get the most sun.
The cerused white oak planter box I built from leftover deck scraps went right in front, filled with lavender and a few trailing vines. Working from the perimeter inward gave the yard a finished feeling even when the center was still a mess. It's the same logic as painting trim before walls.
If the edges look intentional, the whole room reads as designed. The creeping thyme took two months to fill in, but the moment it did, the fence stopped looking like a boundary and started looking like a garden wall. And the olive shrubs?
They're the kind of plant that looks better the less you fuss with them. Perfect for a backyard you're rebuilding one Saturday at a time.
2I laid a gravel path first so the yard had bones before any plant went in
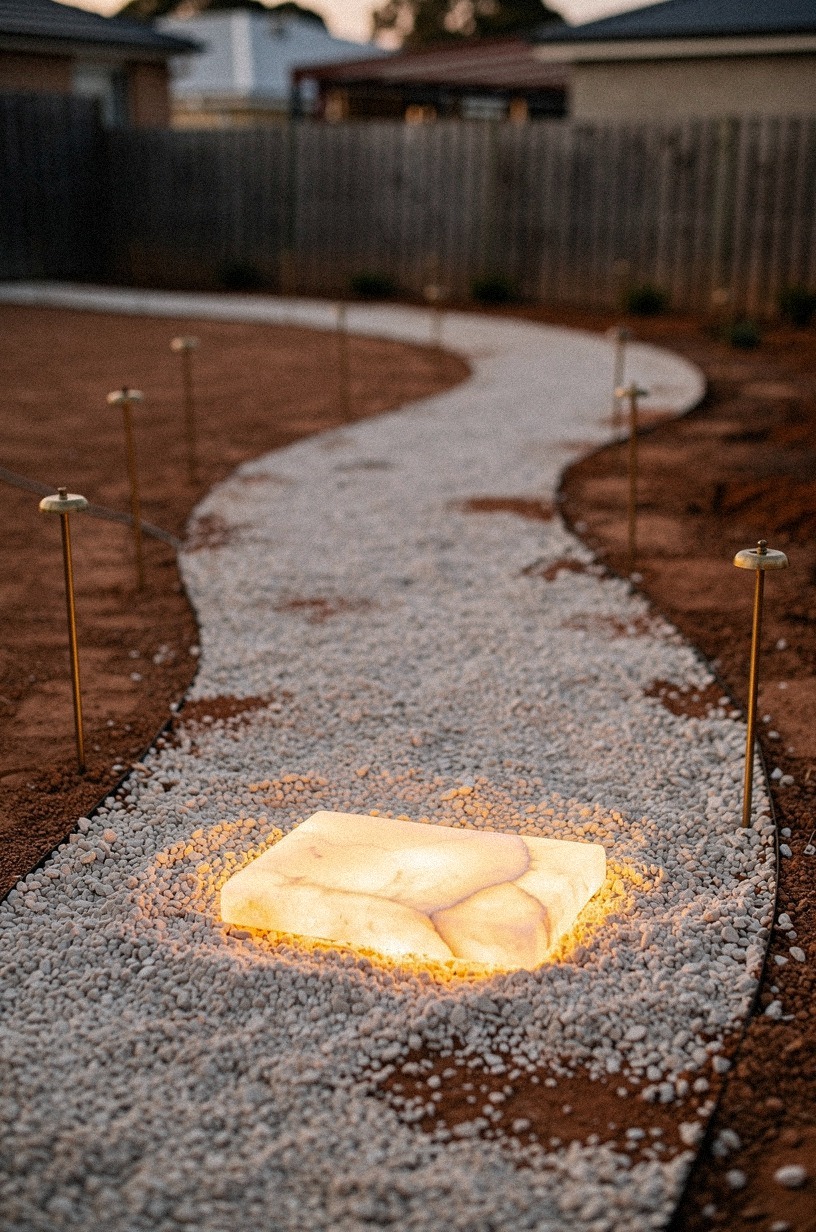
I didn't know what I wanted to plant, but I knew where I walked. So I laid the path before anything else. Linen-toned gravel in a winding curve from the back door to the garage, framed with aged brass garden stakes I found at a salvage yard for twelve dollars each. The gravel gave the yard structure.
It turned a shapeless rectangle into a space with circulation, with destinations. The single translucent onyx step I set where the path curves toward the sunniest corner catches the light in late afternoon and glows like a lantern. A path is the cheapest way to make a yard feel designed. It doesn't matter if your plants are still in nursery pots.
If the gravel is down and the curve is right, the whole thing reads as intentional. I laid this path on a Sunday for about eighty dollars in materials.
Two years later, it's still the decision I'm most glad I made first. If you're figuring out circulation in a small yard, our small backyard layout guide has the measurements that actually matter.
3I planted a climbing hydrangea against the bare garage wall and waited two summers
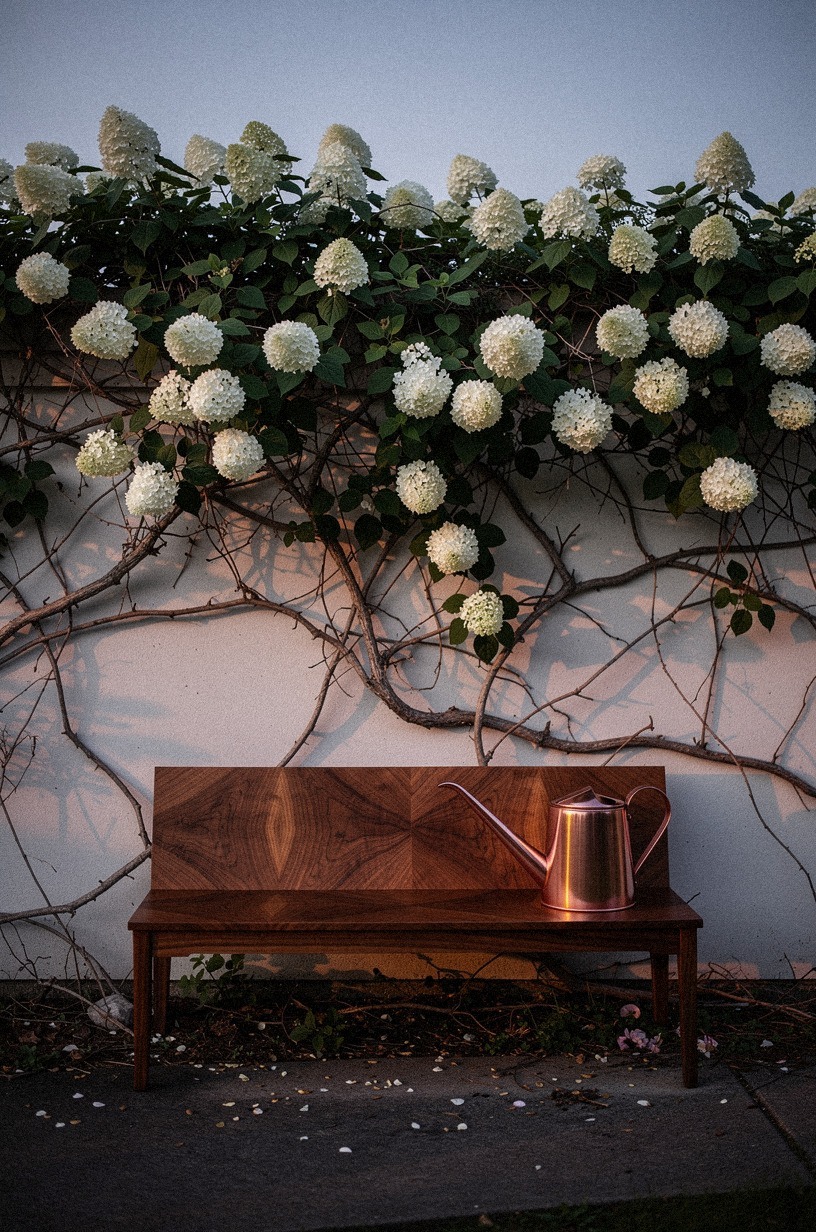
The garage wall was the biggest eyesore. Flat, beige, and eight feet of blank vertical nothing.
I planted a climbing hydrangea in early spring, trained it on a simple wire trellis, and waited. The first summer, it grew leaves and little else. The second summer, it bloomed.
Now, in June, that wall is covered in white flowers that catch the evening light and turn plum-colored as the sun drops. Beneath the vine, I placed a book-matched walnut garden bench I built from a single slab cut in two and mirrored.
The bench sits in the shade of the hydrangea by four o'clock, and that's where I read most evenings. The wait was the hard part. Everyone wants instant transformation, but a climbing vine teaches you that some things are better for the delay.
The hydrangea didn't cost much, maybe forty dollars at a local nursery. The bench was scrap walnut from a friend's mill. The combination of bloom and wood against that blank wall is now the prettiest corner of the whole property. And it took patience, not money.
For more vertical garden ideas, check our climbing plant wall guide.
4I built a raised bed from cedar planks left over from a deck project
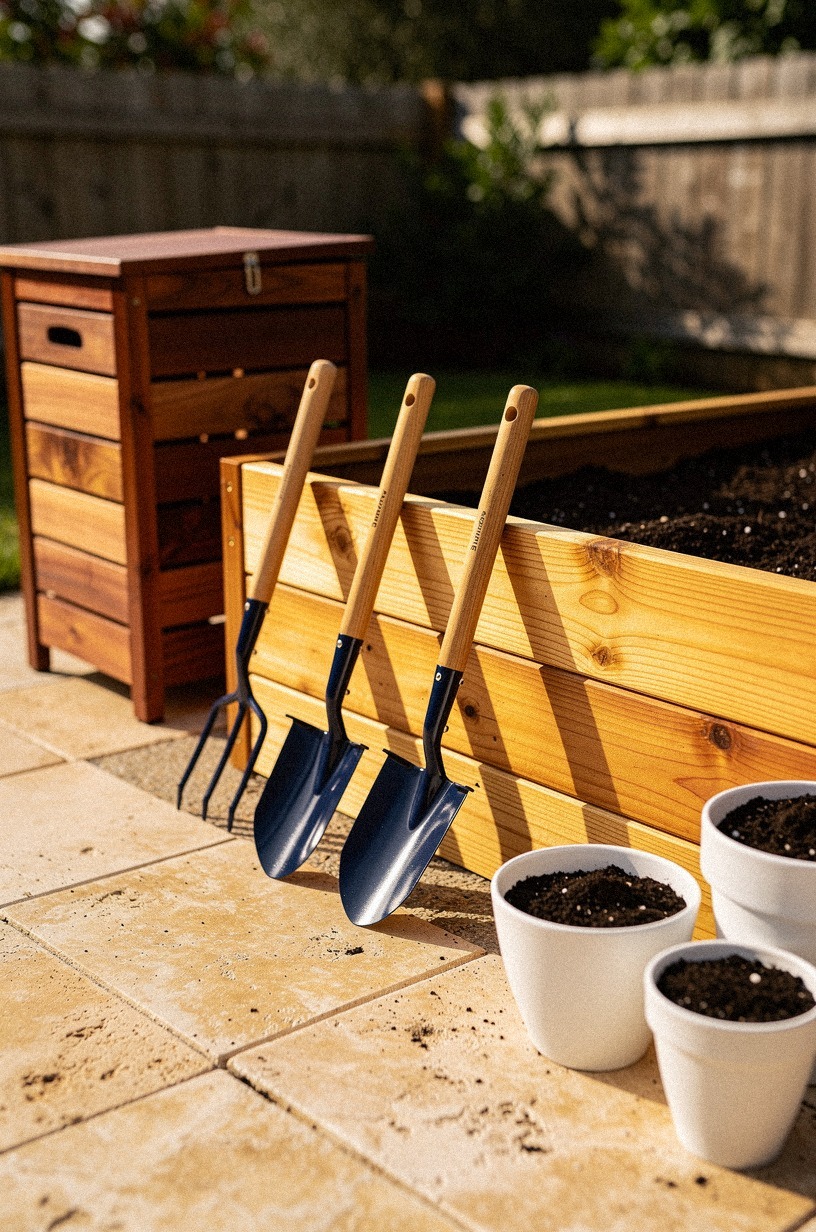
I had cedar decking left over from a neighbor's rebuild, enough for a 4×8 box. Cedar is perfect for raised beds because it resists rot without chemicals.
I built the box in an afternoon, set it in the sunniest corner of the yard, and surrounded it with warm travertine pavers I found on clearance at a stone yard. The pavers cost more than the bed, about sixty dollars, but they keep the mud down and make the whole corner look finished. My navy-painted garden tools lean against the bed on a simple hook I screwed into the frame.
White ceramic pots with herbs sit on the paver edge. The bed itself is filled with tomatoes and basil and a few nasturtiums that trail over the cedar. The whole corner cost under a hundred dollars and produces more than the rest of the yard combined. And the cedar smells good every time it rains.
That's a small detail, but it's the kind of thing that makes a space feel like yours. If you're building your first raised bed, our vegetable garden layout guide has the spacing rules I wish I'd known.
5I strung café lights on a sagging wire between two birch trees and called it a canopy
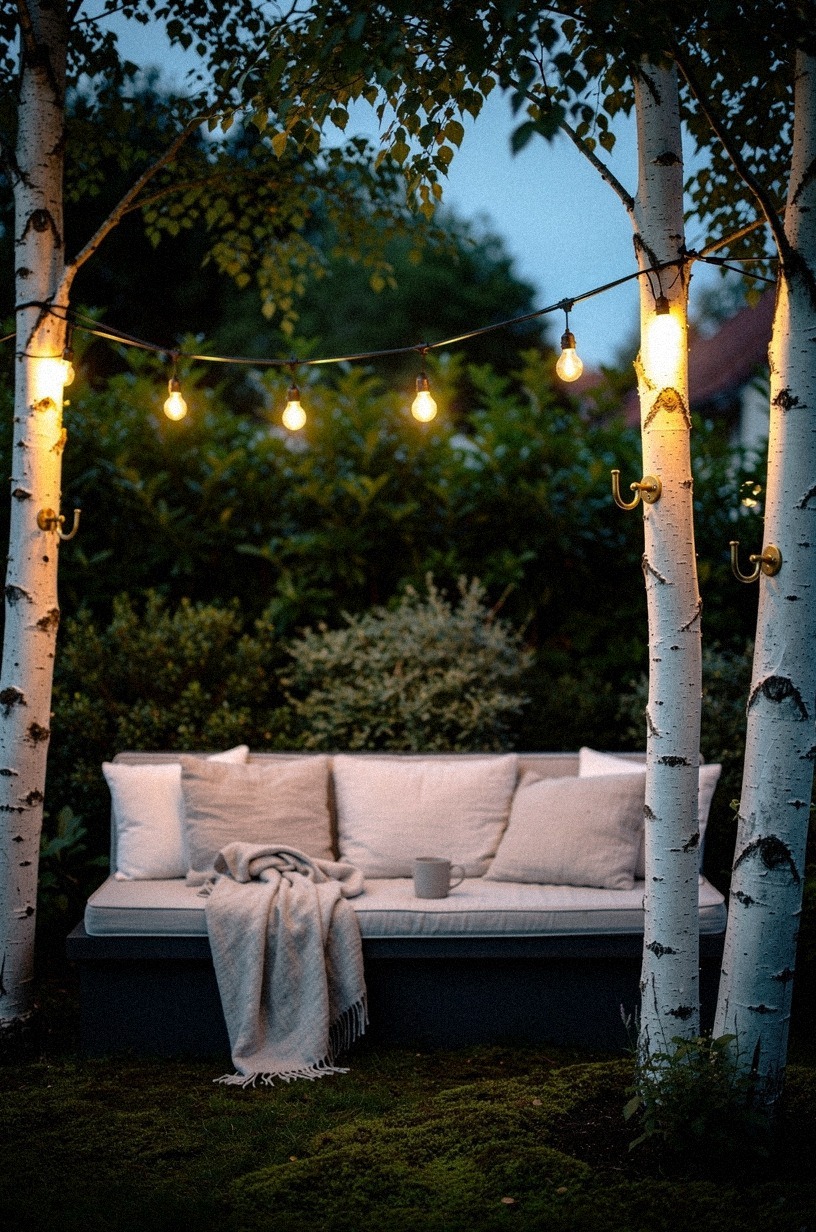
The two birch trees at the back of the yard were already there, thin and tall, dropping leaves in October. I ran a length of galvanized steel wire between them, pulled taut with a turnbuckle from the hardware store, and hung Edison-bulb café lights I found on sale at Target for twenty-three dollars. The wire sagged a little at first, so I added a center support to a fence post and got the drape I wanted. The bulbs are warm, not blue, and at dusk the whole yard changes.
The light pools under the trees and fades toward the fence, which makes the yard feel bigger than it is. I leave them up year-round. The wire goes brown with rust, the bulbs get dusty, and it still looks better than any fixture I could have installed.
The whole setup cost about forty dollars and took an hour. It's the single thing guests comment on most. If you're lighting a small yard, our outdoor string light guide has the spacing that won't leave you with dark corners.
6I set a galvanized stock tank in the sunniest corner and filled it with water
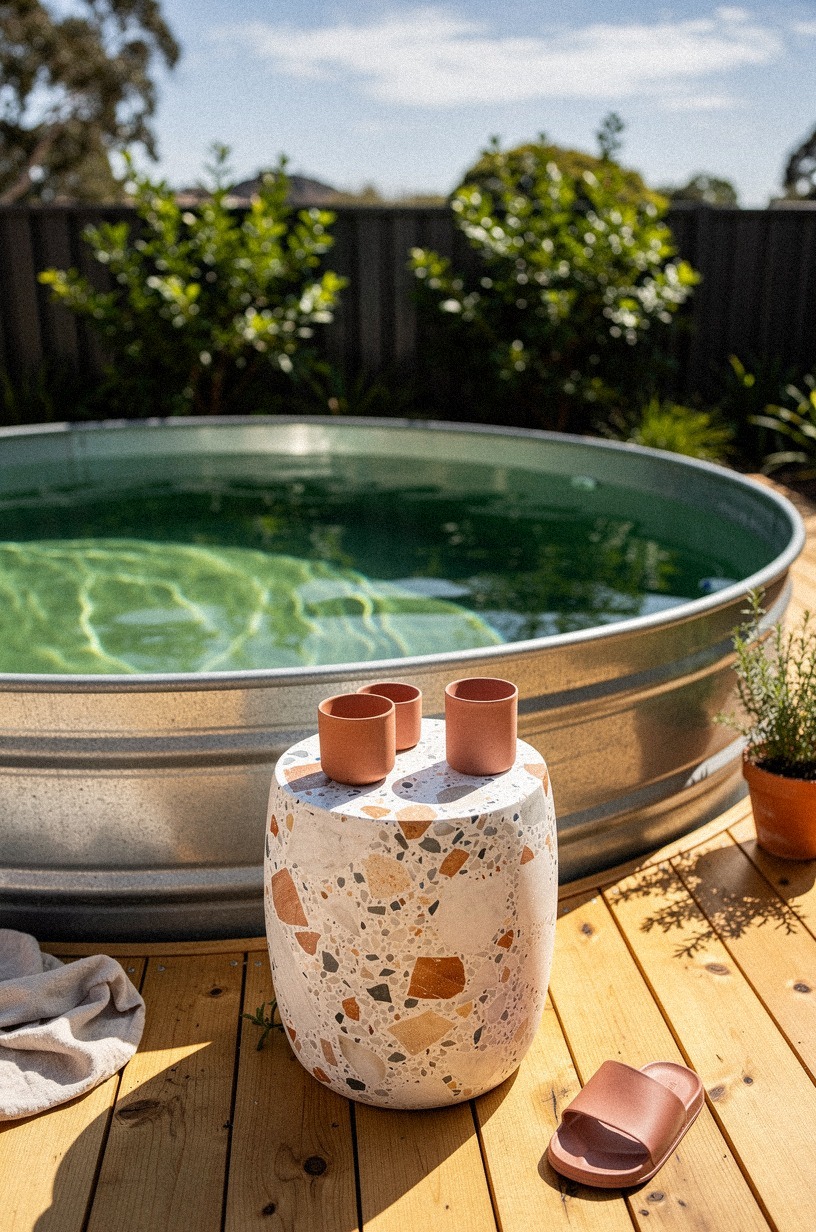
The sunniest corner gets six hours of direct light. Instead of fighting it with shade plants, I leaned in. A galvanized stock tank, the kind farmers use for water, set on a simple frame of natural oak decking. The tank is four feet across and about two feet deep, enough to sit in, not swim.
I filled it with water and let it sit for a week before adding anything else. The water stays surprisingly cool, and the galvanized surface reflects the sky. Around the tank, I laid oversized-chip terrazzo side tables I cast myself from a kit.
The whole corner cost about two hundred dollars, tank included. It's not a pool.
It's a plunge. And on a hot afternoon, it's the best seat in the yard. The oak decking around it is unfinished, and it's weathering to a soft gray that matches the galvanized steel.
I didn't plan that, but I'll take it. If you're curious about stock tank setups, our plunge pool guide has the sizing that won't overwhelm a small yard.
7I scattered river rock around the base of every tree instead of mulch
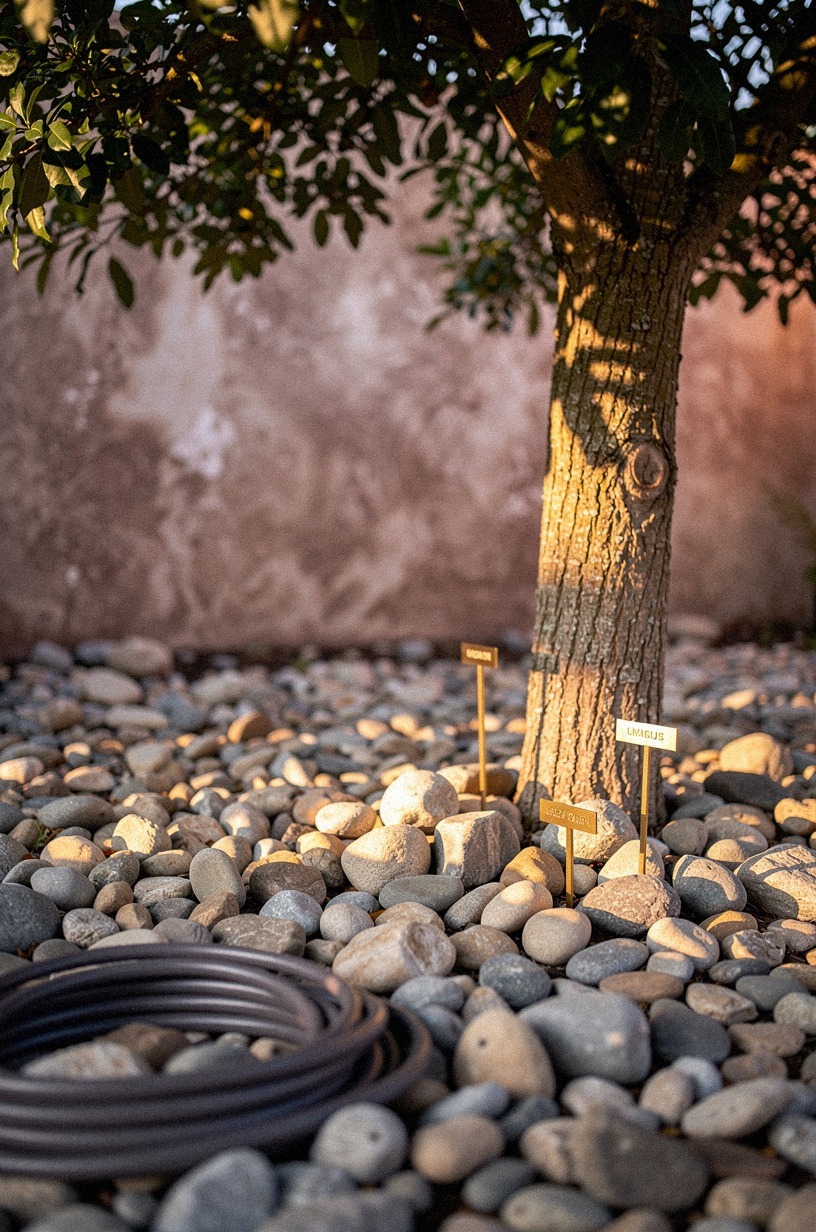
Mulch always looked temporary to me. Chips that fade, wash away, need replacing. So I switched to river rock, the smooth gray stones you find in garden centers by the bag.
I scattered them around the base of every tree, about two inches deep, and let them settle. The rocks don't decompose, don't need topping up, and they look the same in March as they do in September.
Around the mature oak in the center of the yard, the rocks are thick enough to suppress weeds and heavy enough to stay put. A charcoal garden hose coiled on the rocks looks almost intentional, like a sculpture. The rocks cost about fifty dollars per tree.
The oak took three bags. The birch trees took one each. And the look is permanent in a way mulch never is.
Plus, the rocks hold the heat of the day and radiate it back at night, which makes the yard feel warmer after sunset. That wasn't the plan, but it's the reason I keep using them. Our low-maintenance garden guide has more swaps that save weekends.
8I placed a weathered teak bench where the afternoon shade lands at four o'clock
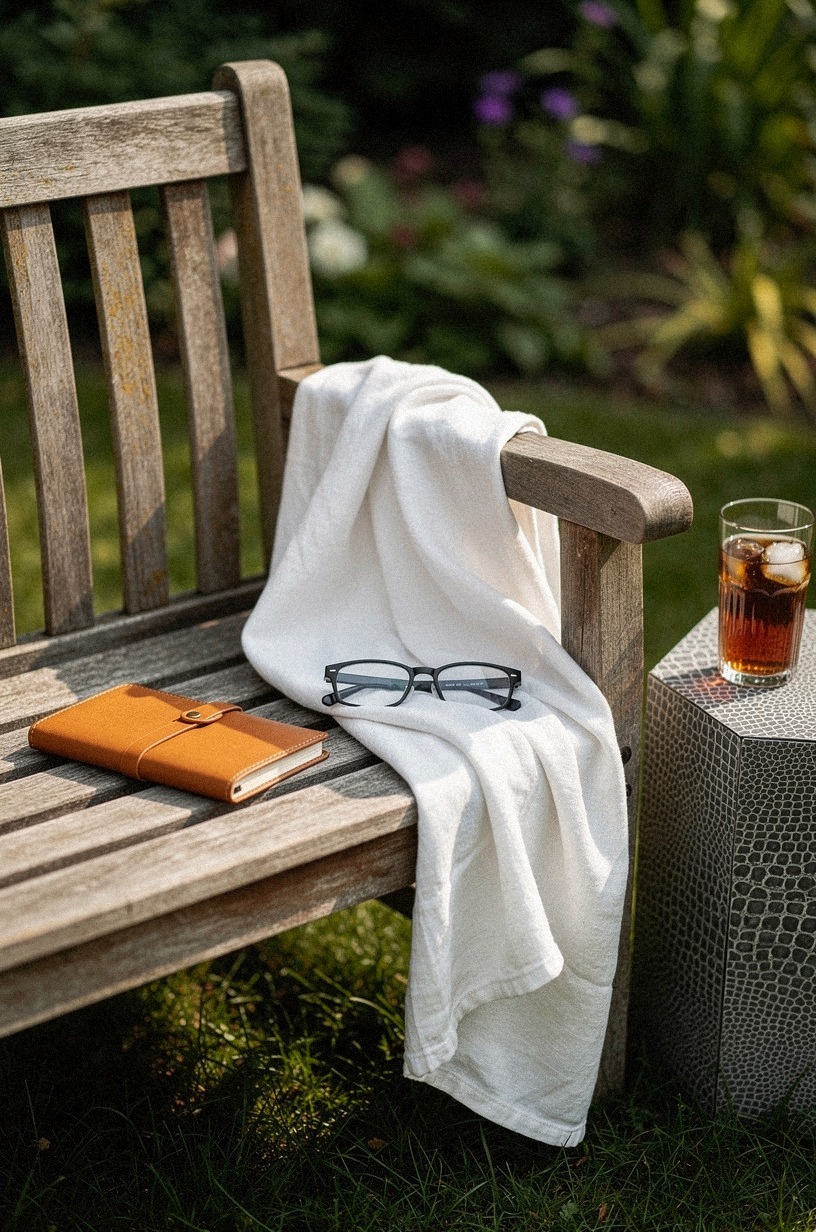
The bench is old. I found it at a estate sale, the teak grayed and cracked, the joints loose. I tightened the bolts and left the finish alone. Weathered teak has a warmth that new wood can't fake.
I placed it where the afternoon shade from the oak lands at four o'clock, and that's where it stays. A warm white linen throw drapes over one arm, and I keep a camel leather garden journal and a black fountain pen on the seat. (Yes, I write outside. It's the whole point.) The bench faces the hydrangea wall, so the view is bloom and brick and the edge of the stock tank.
It's the coolest spot in the yard at the hottest time of day, and it's where I end up every afternoon. The bench cost thirty dollars.
The throw was from a clearance bin. The journal was a gift. The spot is priceless.
If you're hunting for outdoor seating, our garden bench guide has the styles that age well.
9I sowed white clover into the patchy grass and let it take over
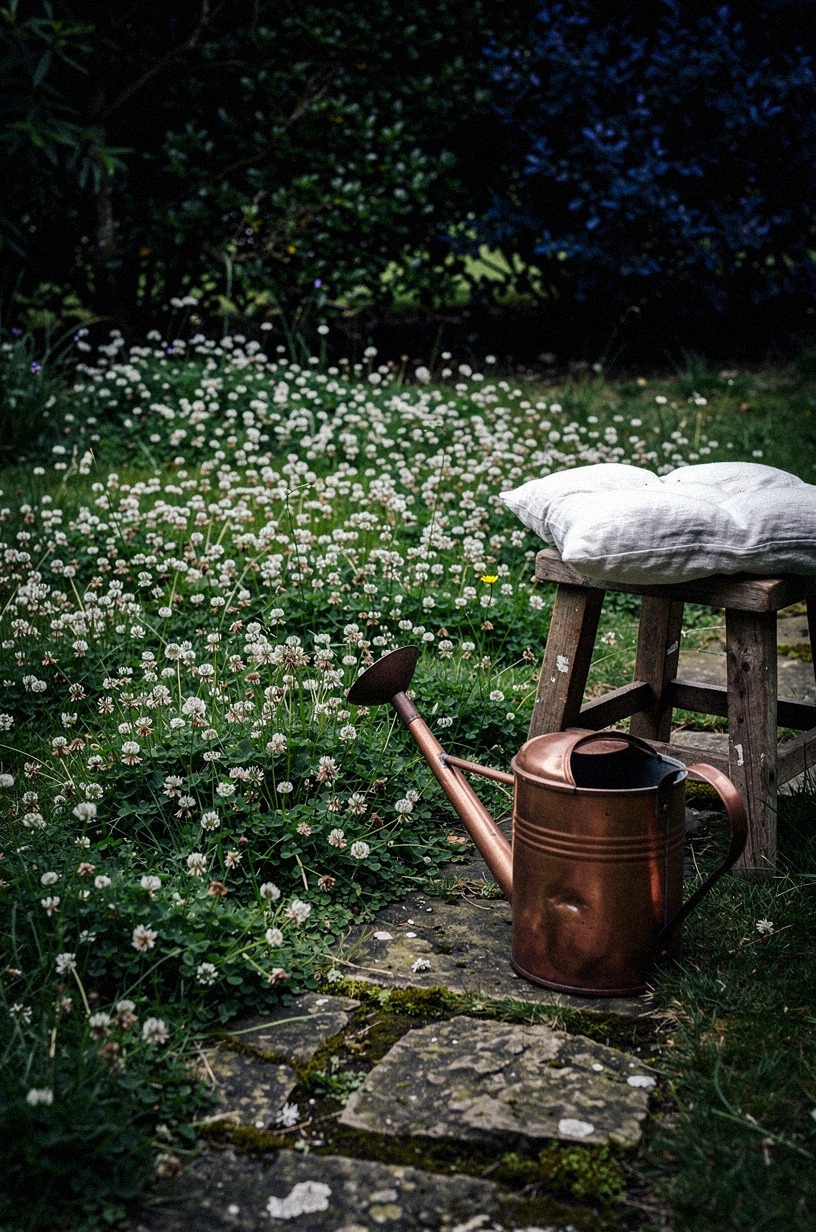
The lawn was the last thing I fixed because I wasn't sure I wanted a lawn at all. Then I read about white clover as a ground cover, and I tried it. I sowed seed into the patchy grass in early spring, watered it for two weeks, and let it go.
By summer, the clover had filled the gaps with small white blooms that bees love. The grass that was left grew thicker because clover fixes nitrogen in the soil.
The whole lawn looks intentional now, like a meadow, not a failed golf course. Under the garden hedge, the shadows go midnight blue by late afternoon, and the copper watering can I leave on the stone path picks up the last light. An ivory-washed Belgian linen cushion on the teak bench ties the whole palette together.
The clover seed cost about fifteen dollars. The watering can was vintage, maybe twenty.
The look is cottage, not curated. And it's the easiest thing I did. Our ground cover guide has more lawn alternatives that don't need mowing.
10I stacked flat stones myself for a fire pit ring, no mortar, just weight and patience
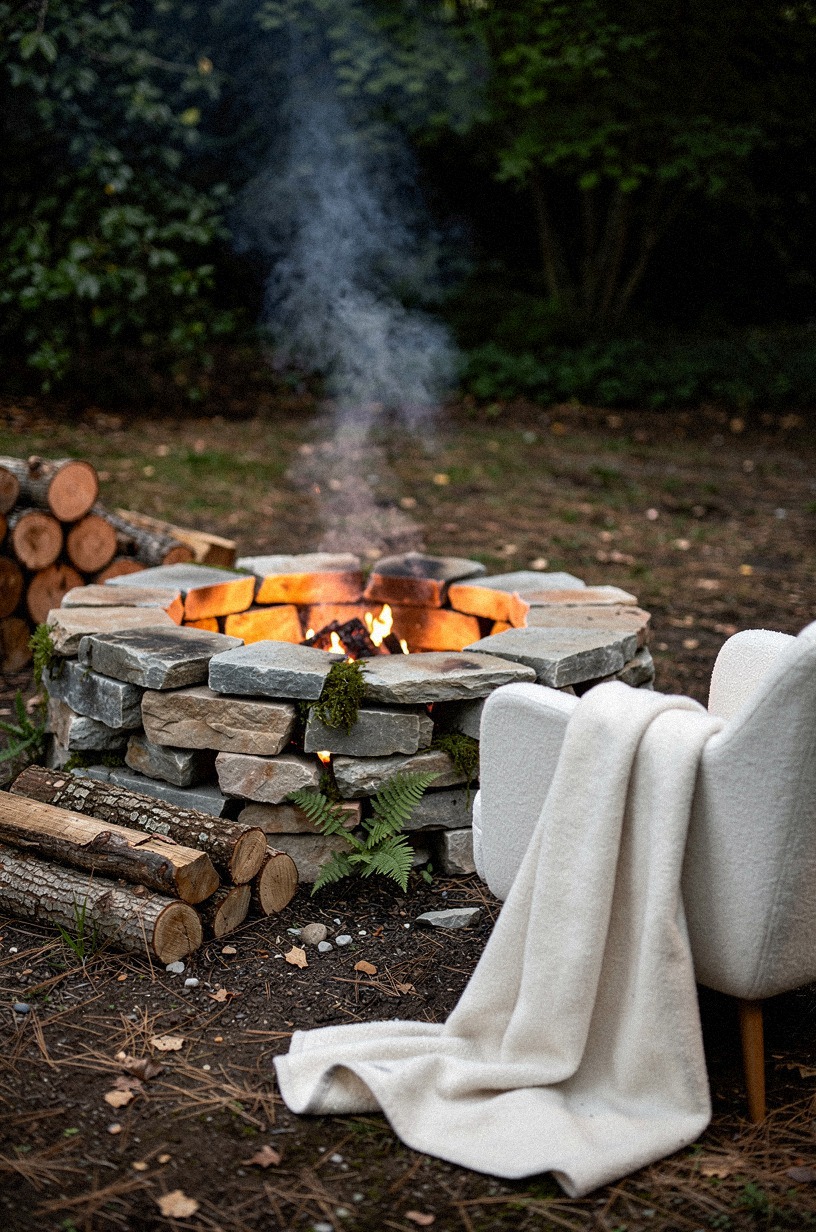
The fire pit is the center of the yard now. I cleared a circle about six feet across, dug down three inches, and laid Pennsylvania fieldstone I hauled from a farm about an hour away. The stones are flat, irregular, and heavy enough to stay put without mortar.
I stacked two rings, offset the joints like brickwork, and left the center open for logs. The first fire took an hour to get right because the stones were still damp.
Now it draws in seconds, and the heat radiates through the stone even after the logs burn down. Around the pit, I placed four folding teak camp stools I found at a garage sale for eight dollars each. A galvanized steel bucket holds kindling.
The whole setup cost about sixty dollars in fuel and time. It's not fancy. It's a ring of stone and a place to sit. But on a cool night, it's the only part of the yard that matters.
If you're building your first pit, our fire pit guide has the safety spacing I learned the hard way.
11I hung a simple mirror on the garden fence to steal depth from the neighbor's hedge

The yard is small. The neighbor's hedge is tall.
I hung a simple round mirror on the weathered garden fence, facing the hedge, and the hedge doubled. The reflection steals depth from the neighbor's yard and gives it back to mine.
It's an old designer move, and it works outside as well as in. Beside the mirror, a terracotta planter with a small olive tree sits on a cedar bracket.
The olive, the mirror, and the fence create a little composition that reads like a room, not a boundary. The mirror was twenty dollars at a flea market. The planter was ten. The olive was a gift from a friend.
And the illusion of space is free. The mirror catches the morning light and throws it into the yard for about an hour, which is the best time to sit out with coffee. That wasn't the plan either, but it's now the reason the mirror stays where it is.
If you're working with a tiny yard, our small garden mirror guide has the sizes that won't look ridiculous.
12I left one corner completely untouched, tall grass and wildflowers, for the bees
The last corner is the one I'm proudest of, because I did nothing. I stopped mowing. I stopped weeding.
I let the grass grow tall and the wildflowers seed themselves. Now it's a patch of bee-friendly wildflowers in bloom from May to September, with a clay-colored earth path leading in from the gravel.
A linen-textured outdoor throw in oatmeal sits on a folding chair at the edge, where I watch the bees work. The wild corner is maybe eight by ten feet. It's not pretty in a conventional sense.
It's messy, alive, and completely different from the rest of the yard. And it's the proof that not every inch needs to be designed.
Some corners just need to be left alone. The wildflowers are free. The path is just compacted dirt.
The chair was in the garage. And the bees are the reason I started this whole project in the first place. Our pollinator garden guide has the native plants that bring butterflies too.
Why Small Backyards Feel More Like Resorts Than Big Ones
A big yard is a liability. I've been in enough of them to know.
The lawn stretches, the patio sits empty, the furniture looks lost. You spend money filling space instead of shaping it. A small backyard forces you to choose.
Every element earns its place because it has to. That's the resort feeling, and it has nothing to do with square footage.
The first thing I learned is that warmth comes from edges, not center. A fire pit works because it's a ring, a boundary you sit inside.
The stock tank works because it's a corner, a destination at the end of a path. The hydrangea wall works because it's a vertical edge, a surface that catches light and throws it back.
Big yards have no edges. They have middle, and middle is hard to make feel intimate.
The second thing is material honesty. I used cedar because it smells like something.
Weathered teak because it carries time. River rock because it holds heat. Galvanized steel because it reflects sky.
These are not expensive choices. They're specific ones. A resort doesn't feel expensive because it used marble. It feels expensive because every material was chosen for what it does, not what it says.
My yard has no marble. It has a thirty-dollar bench and a fifteen-dollar bag of clover seed. And the material honesty is the same.
The third thing is patience as a material. I waited two summers for the hydrangea.
I let the teak gray. I left the oak decking unfinished so it could match the stock tank. A resort was built over time, even if you checked in yesterday.
The layering of decisions, the settling of materials, the growth of plants. That's the warmth you feel, and it can't be installed in a weekend.
It accumulates.
The last thing is the mirror principle. Small spaces feel bigger when they reflect. The mirror on the fence doubles the hedge.
The stock tank reflects the sky. The fire pit reflects the faces around it.
Every warm backyard I've been in has this quality of echo, of a space talking back to itself. Big yards are monologues. Small backyards, done right, are conversations.
What I learned after two summers of fixing it slowly
The thing nobody tells you about backyard makeovers is that the pace matters more than the plan. I started with a list of twelve projects and finished maybe eight. The other four changed or got abandoned or turned into something else.
The hydrangea was supposed to be a clematis. The stock tank was supposed to be a fountain. The fire pit was supposed to be a pizza oven. Every change came from watching the yard for a season before deciding.
That's the part that doesn't fit in a before-and-after photo. The waiting.
The looking. The letting something grow before you build around it.
I made the mistake of planting too close to the fence the first year. The thyme choked.
I pulled it, replanted, and gave it room. The second try worked.
That's the kind of failure that teaches you more than any guide. And it's the reason I trust the yard now. I know where the sun hits at four o'clock. I know which corner drains slow after rain.
I know the birch drops branches in August and the oak acorns in October. That knowledge is what makes the space feel warm. Not the lights.
Not the throw pillows. The attention.
The time. The fact that I was there, watching, adjusting, failing, trying again. A backyard isn't a room you decorate.
It's a relationship you build. And like any relationship, it's better for the slow start.
What People Always Want to Know
What is the best cozy backyard landscaping idea for a small backyard?
The mirror move wins in tight spaces. A round mirror on the fence doubles the visual depth and bounces light into shaded corners.
Pair it with a single raised bed in the sunniest spot and a gravel path that curves to create circulation. Small yards read bigger when they have layers, not clutter.
If you're working with less than four hundred square feet, skip the lawn entirely and go clover or gravel. Our small backyard layout guide has the exact measurements that work.
Where can I buy backyard landscaping pieces on a budget?
IKEA has solid outdoor textiles and simple planters that look more expensive than they are. Target Threshold carries string lights and cushions in warm neutrals that match most palettes.
Wayfair is good for larger pieces like stock tanks or fire pit rings if you watch for sales. And Facebook Marketplace is where I found my teak bench and the brass garden stakes.
The best budget move is buying materials, not finished products. Gravel, cedar planks, and river rock cost less than pre-built kits and look more custom.
For more budget outdoor buys, our budget backyard guide has the pieces under fifty dollars that look intentional.
How much does a cozy backyard landscaping makeover cost?
About two hundred to nine hundred dollars for a budget refresh that actually changes how the space feels. That's gravel, lights, plants, a stock tank, and a few secondhand pieces. My own yard cost roughly six hundred dollars over two years, spread across maybe a dozen purchases.
The mid-range tier, with a patio set and outdoor rug, runs fifteen hundred to six thousand. The high end, with paving and a pergola, starts at ten thousand.
Start at the bottom. You'll be surprised how far it goes.
Can I create a cozy backyard on a budget?
Yes, and the best moves are free or close to it. Stop mowing one corner and let wildflowers grow. Scatter river rock instead of buying mulch.
Sow clover into patchy grass. String lights on existing trees. Build a fire pit from flat stones. The stock tank is the biggest splurge at eighty dollars, and everything else in my yard was under fifty.
The warmth comes from attention, not money. Our budget backyard guide has the full list of swaps under twenty-five dollars.
Is a cozy backyard worth it in a small space?
Worth it, and small spaces actually help. A compact yard forces you to edit. You can't hide bad choices behind square footage.
Every element has to earn its place. The mirror, the gravel path, the single bench. In a small yard, those reads as intentional because they have to be. The stock tank works better in a corner than a center.
The fire pit becomes a focal point instead of an accessory. Small is an advantage if you treat it like one.
Check our small backyard layout guide for the arrangements that feel bigger than they are.
Is cozy backyard landscaping a good idea for a rental?
Yes, with swaps that leave no trace. Use gravel instead of paving. Choose container plants over in-ground beds.
String lights on trees, not structures. A stock tank on a deck frame is removable.
The mirror hangs on a fence with a simple hook. Everything I did could be undone in a weekend. The only permanent change is the clover, and that's just grass seed.
Our rental garden guide has the full list of reversible upgrades.
If I had to pick one, I'd start with the gravel path
You can't layer warmth on top of a cold layout. The path gives the yard bones, circulation, and a reason to walk through it.
Everything else, the lights, the bench, the fire pit, lands better when the ground is already figured out. Get the path right first. Pin it for later and start this weekend with a bag of gravel and a garden hose to mark the curve.