A mattress moved without proper wrapping can arrive with tears, moisture damage, or stains that are impossible to reverse. The wrap itself is cheap - a mattress bag costs $10–$20 - but the technique matters as much as the material. This guide covers every step, from choosing the right bag to preventing bending damage in transit.
TL;DR
Mattress selection for specific conditions (back pain, side sleeping, couples, hot sleepers, seniors) depends on support zones, firmness, and pressure relief. Saatva Rx ($2,095) is designed specifically for chronic pain sleepers with lumbar zone support.
Jump to section
For context on whether moving the mattress at all is worth it, see our guide on how to move a mattress safely. This guide focuses specifically on the wrapping and packing preparation steps.
Our Top Pick
Skip the wrapping entirely - Saatva delivers white-glove with professional setup and removes your old mattress, so moving is handled for you.
What You Need Before You Start
- Mattress bag: Sized to your mattress (Twin, Full, Queen, King, Cal King). Poly bags run $8–$15; reinforced bags $15–$25.
- Packing tape: At least 2–3 rolls. Don't use tape directly on the mattress fabric.
- A helper: Mattresses are awkward to bag solo. You need a second person.
- A flat surface: The floor or a low platform bed frame works best.
Step 1: Choose the Right Mattress Bag
Standard poly mattress bags work for innerspring and hybrid mattresses. For memory foam or latex, buy a thicker reinforced bag - foam edges are more vulnerable to puncture during loading.
Buy the right size. A Queen bag on a King mattress won't seal properly. The bag should slip on with minimal stretching.
Step 2: Clean the Mattress First
Vacuum both sides before bagging. Any debris sealed inside the bag can work into the fabric during transit. If there are any damp areas, air the mattress for several hours before bagging - sealing in moisture causes mold.
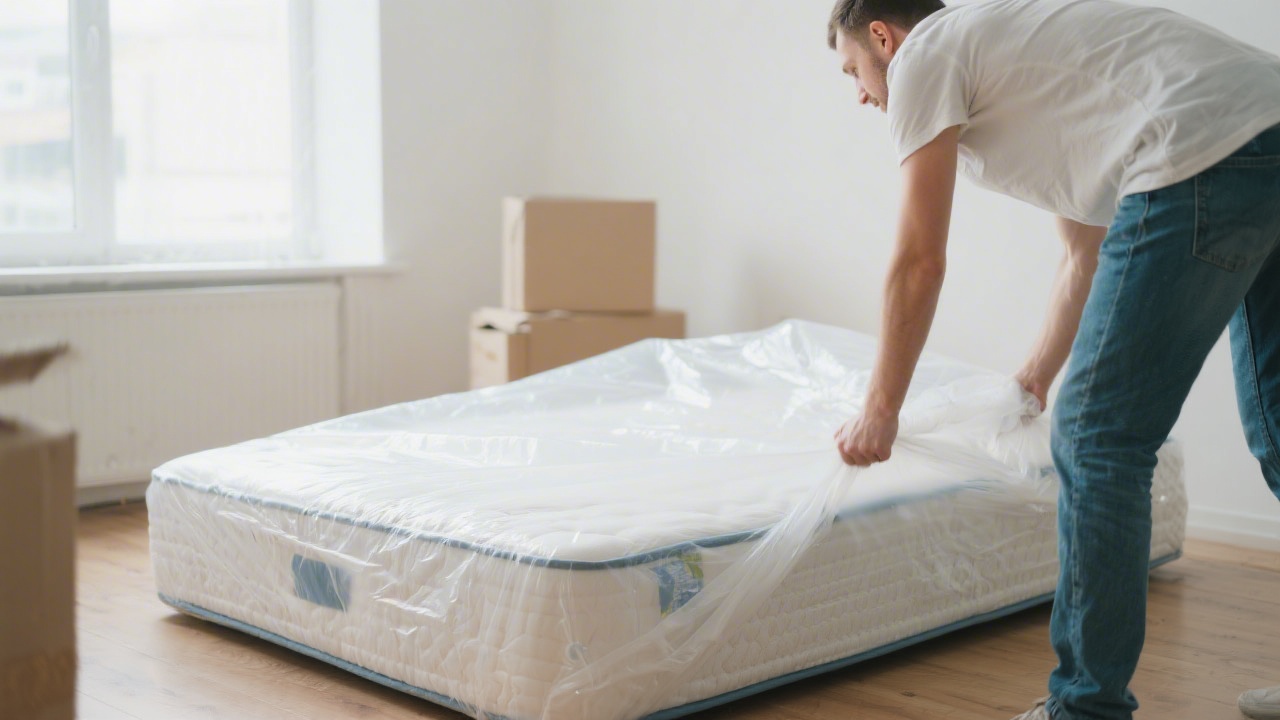
Step 3: Bag the Mattress
- Stand the mattress on one short end with a helper holding it steady.
- Slide the open end of the bag over the top and pull it down toward the floor.
- Lay the mattress flat and pull the bag over the remaining exposed end.
- Smooth out air pockets before sealing - trapped air can pop the bag during compression.
- Fold the open end over twice and seal with tape across the full width.
Step 4: Seal Seams and Corners
Run tape along every seam join. Corners are where bags fail - reinforce them with extra tape strips. Do not tape directly to the mattress fabric itself; only tape the plastic-to-plastic joins.
Step 5: Loading Without Bending
This is where most mattress damage happens. Foam mattresses can be bent briefly; innerspring and hybrid mattresses should not be bent at all - it deforms the coil grid permanently.
- Load mattresses flat if the truck space allows. This is the safest position.
- If standing upright, strap it against the truck wall with moving straps so it doesn't sway.
- Never lay other heavy items on top of a mattress in a bag - they puncture the bag and compress the foam unevenly.
Special Notes for Foam Mattresses
Memory foam and latex mattresses are more moisture-sensitive than innerspring. Ensure the bag is fully sealed and consider placing the bagged mattress inside the truck first so it's against a dry wall, not the floor where condensation can accumulate. See also our guide on whether you can fold a mattress if you're tight on truck space.
After Moving: Before You Unwrap
Don't unwrap until you're in the final room. Moving a mattress through hallways without the bag creates friction tears. Once in position, cut the bag lengthwise with scissors (not a knife - knife slips damage mattress fabric).
Our Top Pick
Skip the wrapping entirely - Saatva delivers white-glove with professional setup and removes your old mattress, so moving is handled for you.