
 by
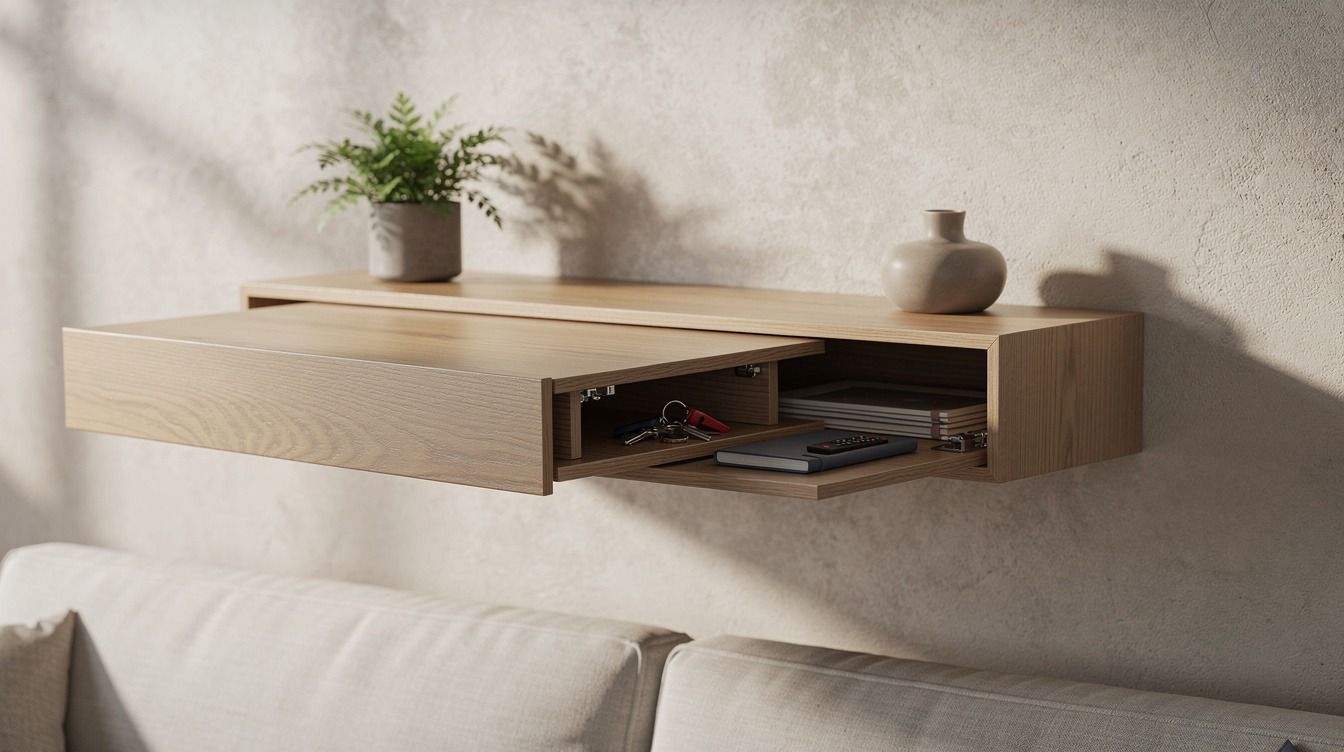
by How to build genius DIY hidden compartments and detail storage spots starts with one shallow, believable cavity you can reach without thinking. I've overbuilt these before, and the fussy versions always get ignored. The good ones disappear into the room, save your floor space, and still open in a second. That's what this guide walks you through, step by step.
The IKEA-Width Test Before You Cut
Before you cut a single panel, size your project against something real. I use the IKEA KALLAX test because if your hidden cavity steals more visual width than a slim storage unit would, the room stops feeling calm and starts feeling overworked. For most first projects, a depth of 1 1/2 to 3 1/2 inches is enough for papers, keys, keepsakes, cords, and the small clutter you don't want sitting out.
If you're folding hidden storage into a bigger living room refresh, keep the typical budget picture in view so your trim work doesn't outrun the room around it. You don't need custom millwork money to get the feeling.
And if your hidden compartment sits near seating, remember the surrounding furniture still has to work. A coffee table usually lands best at 16 to 18 inches tall and about two thirds the sofa length, so don't build a lift top or bench lid that fights those everyday proportions.
- Start with a hollow floating shelf
- Anchor a toe kick drawer under cabinets
- Build a sliding lid detail keepsake box
- Hide a shallow tray behind framed art
- Convert a stair riser into storage
- Hang a mirror over recessed wall cubbies
- Layer a false book row on hinges
- Fit a drawer divider with lift out base
- Build a tilt out panel behind trim
- Mount a magnetic key cubby under shelving
- Carve a detail pocket inside molding
- Add a hinged seat to a bench
- Slip a rolling bin beneath the bed
- Install a false back inside nightstands
- Turn a picture ledge into stash storage
- Create a lift top coffee table compartment
- Tuck a narrow drawer behind baseboards
- Build a planter box with hidden liner
- Finish with labeled zones inside each compartment
1Start with a hollow floating shelf
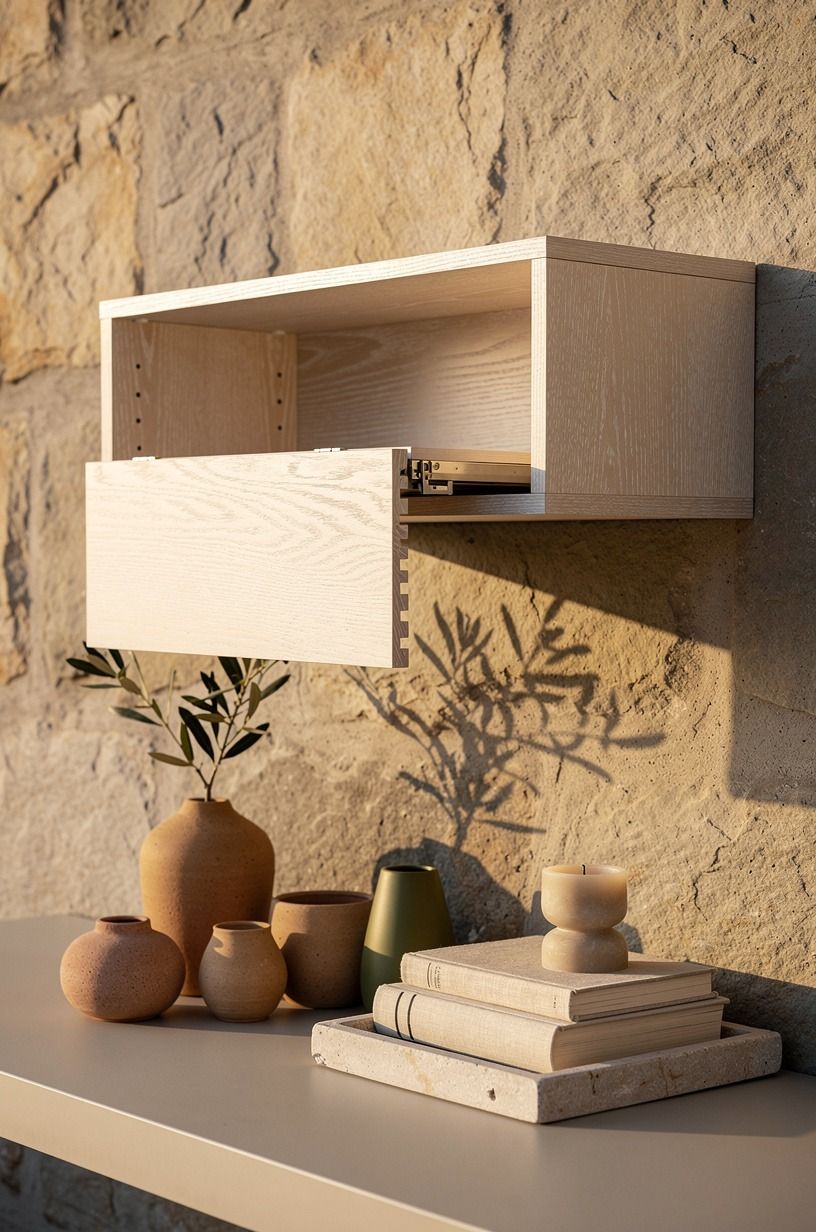
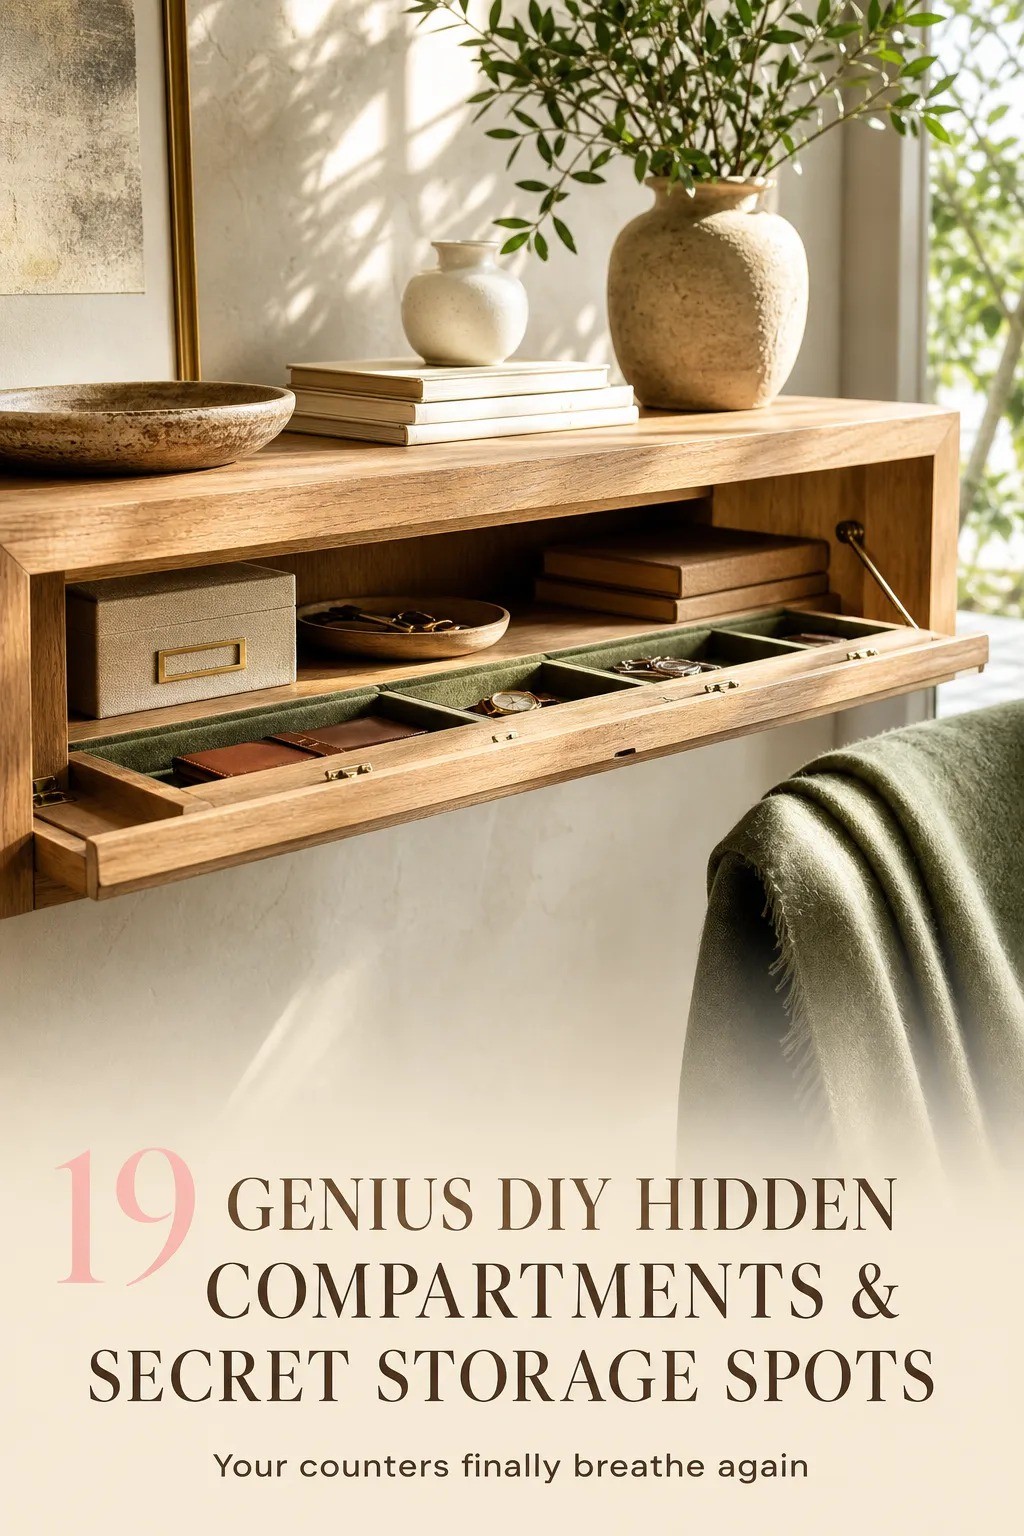
Start with the easiest build that still feels grown up: a shallow shelf box in cerused white oak. In the photo, the shelf reads symmetrical first and clever second, which is exactly what you want. Keep the cavity slim, around 1 1/2 to 2 inches clear inside, so the profile stays believable when the front drops open.
Use a French cleat, a touch latch, and a face grain panel that matches the room instead of screaming for attention. I like a 3/4-inch solid oak wrap here because the edges take finish well and the seam nearly disappears once you wax it. If you're mapping more built-ins after this, the hidden storage ideas that will make your home feel twice as big article is a smart next stop.
2Anchor a toe kick drawer under cabinets
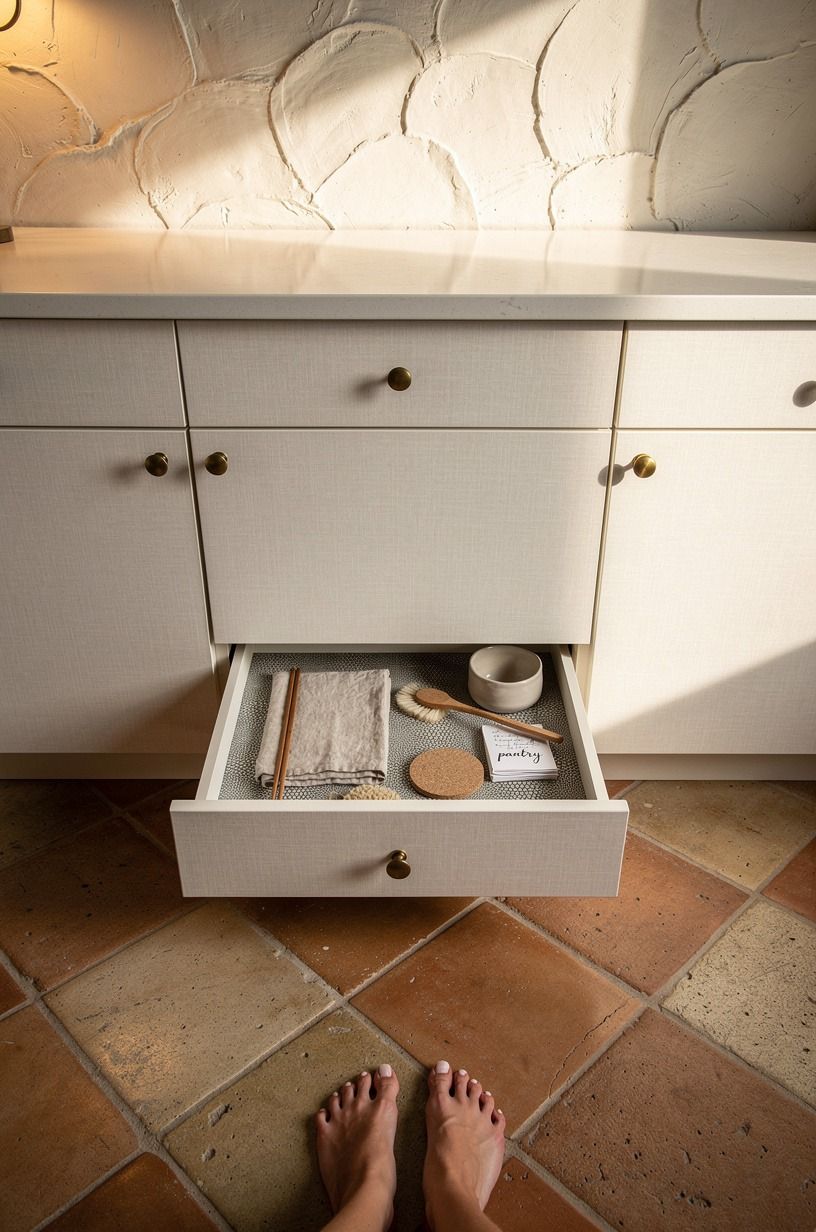
Anchor your first kitchen compartment where nobody looks twice: the toe kick. That linen cabinetry and clay tile palette only works if the drawer front sits flush and keeps the same quiet shadow line. Give yourself about 3 1/2 to 4 inches of usable height, then use low-profile full-extension slides so you can pull it open from a standing position without scraping the floor.
I wouldn't waste this space on heavy pans. Use it for placemats, pet bowls, or the odd flat tools that never fit anywhere else, and finish the front in Benjamin Moore Revere Pewter HC-172 if your kitchen needs that soft putty bridge between white uppers and warmer tile.
But test the travel before you face the drawer, especially if you've got uneven grout lines. For more layout ideas, I keep coming back to small kitchen cabinet ideas that maximize storage.
3Build a sliding lid detail keepsake box
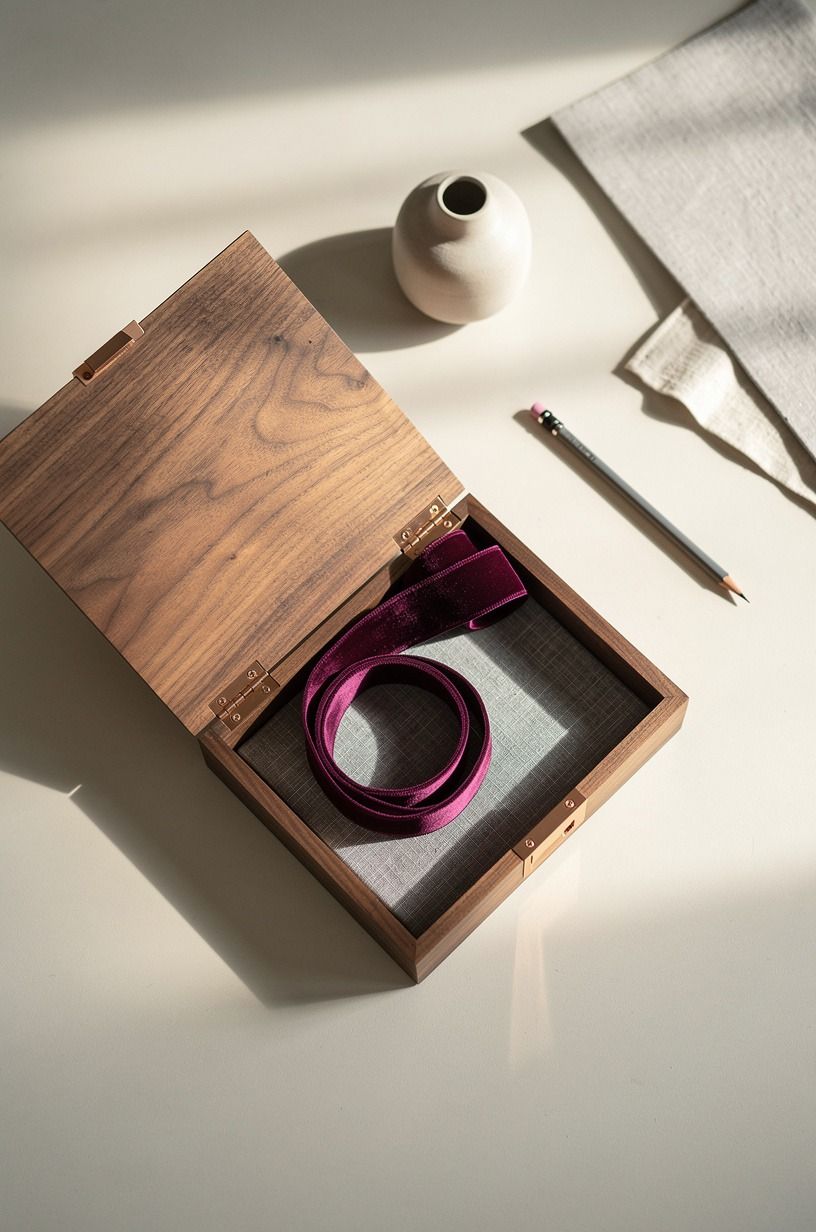
Build this one like a piece you'd leave on the table all year. The book-matched lid in walnut veneer does most of the visual work, so keep your joinery plain and your reveal tight, about 1/16 inch if you can manage it. A sliding top feels better than a hinged one here because you don't need overhead clearance and the movement stays quiet.
But line the cavity with plum velvet ribbon or a thin velvet pull so rings, notes, and tiny photos don't rattle around. I made one too deep once, and all it did was swallow the things I meant to protect.
Better to keep it shallow, use dividers, and let the grain stay the star. Small move. Big relief!
4Hide a shallow tray behind framed art
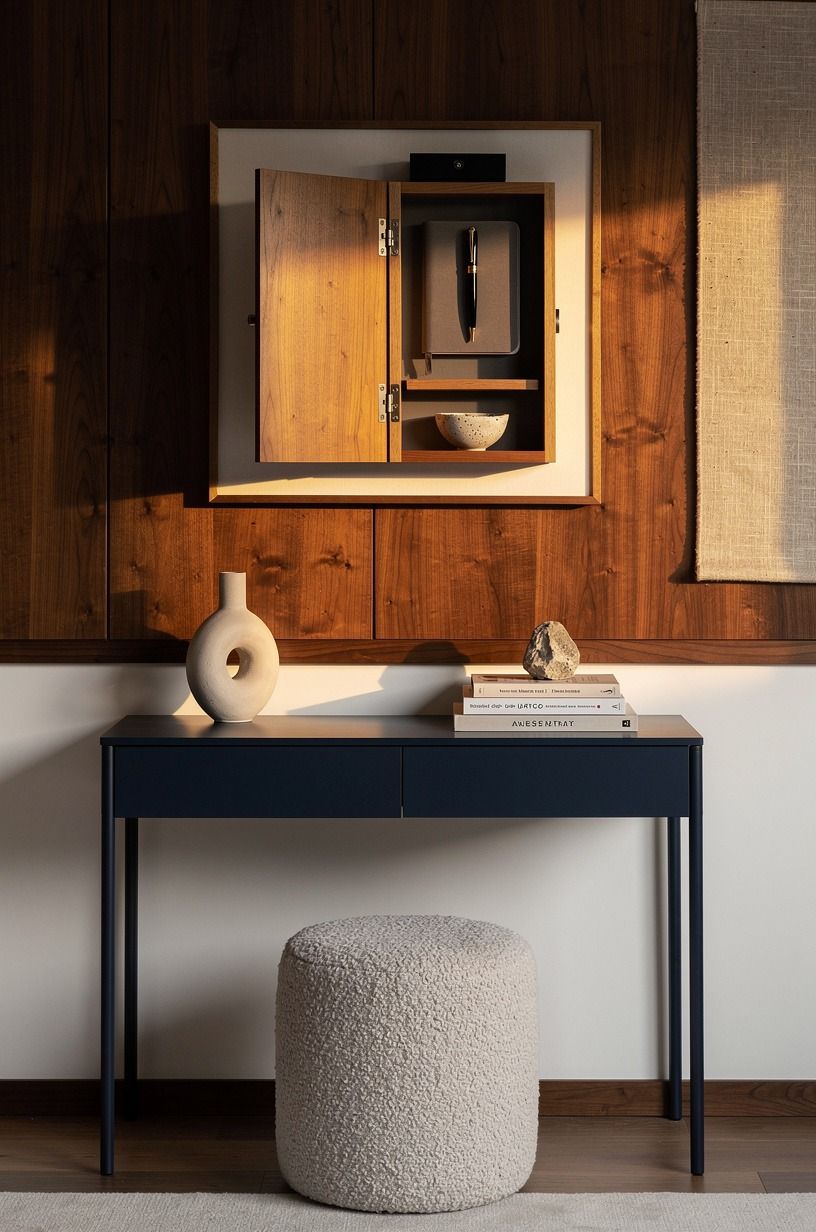
Hide the tray where the wall already has visual depth.
5Convert a stair riser into storage
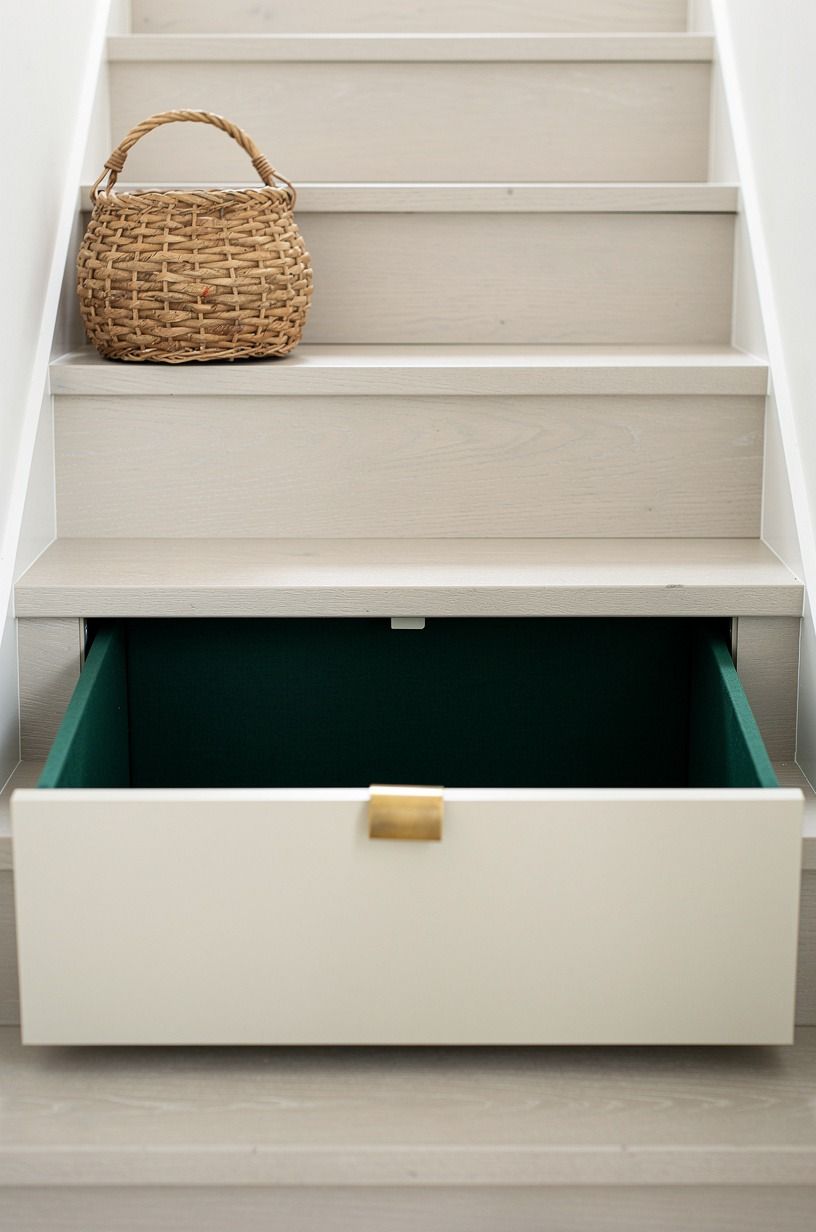
Convert one riser, not the whole staircase, and place it near the bottom where you can reach it without climbing. The cream front and the little flash of emerald linen inside work because the opening is shallow and disciplined, not gimmicky. Standard risers usually sit around 7 to 7 3/4 inches high, so treat that space like a narrow drawer, not a mini cabinet.
Use heavy-duty slides, then add an unlacquered brass pull that feels intentional against the worn oak tread. I keep shoe care, dog leashes, or the small items that tend to colonize an entry here.
But don't hide daily shoes in the compartment if your household is rushing out the door every morning, because a jammed riser becomes a mood fast. Worth it!
6Hang a mirror over recessed wall cubbies
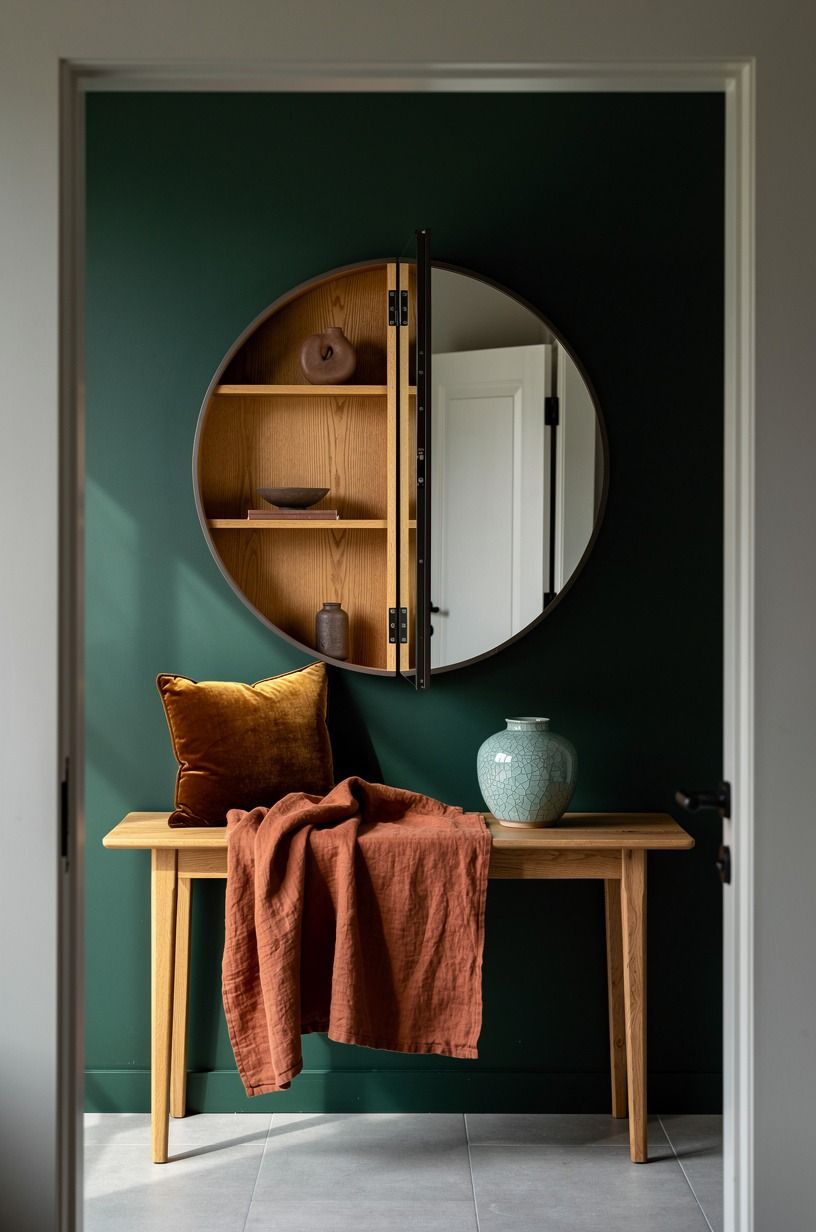
Hang the mirror where the architecture already gives you cover, ideally between studs on a wall you were going to dress anyway. In that forest green hall, the round mirror works because the hinge line hides inside the frame and the oak-backed cubbies look finished even when open. Keep recess depth close to stud space, roughly 3 1/2 inches, and trim the niche cleanly.
I like Sherwin-Williams Evergreen Fog SW 9130 on the surrounding wall when you want the hardware to disappear a little, and a rust runner underneath warms up the whole composition. Use this for chargers, spare candles, or papers you need but don't want in sight. If you're building a bench nearby too, breakfast nook storage ideas with hidden bench storage is full of the same tucked-away logic.
7Layer a false book row on hinges
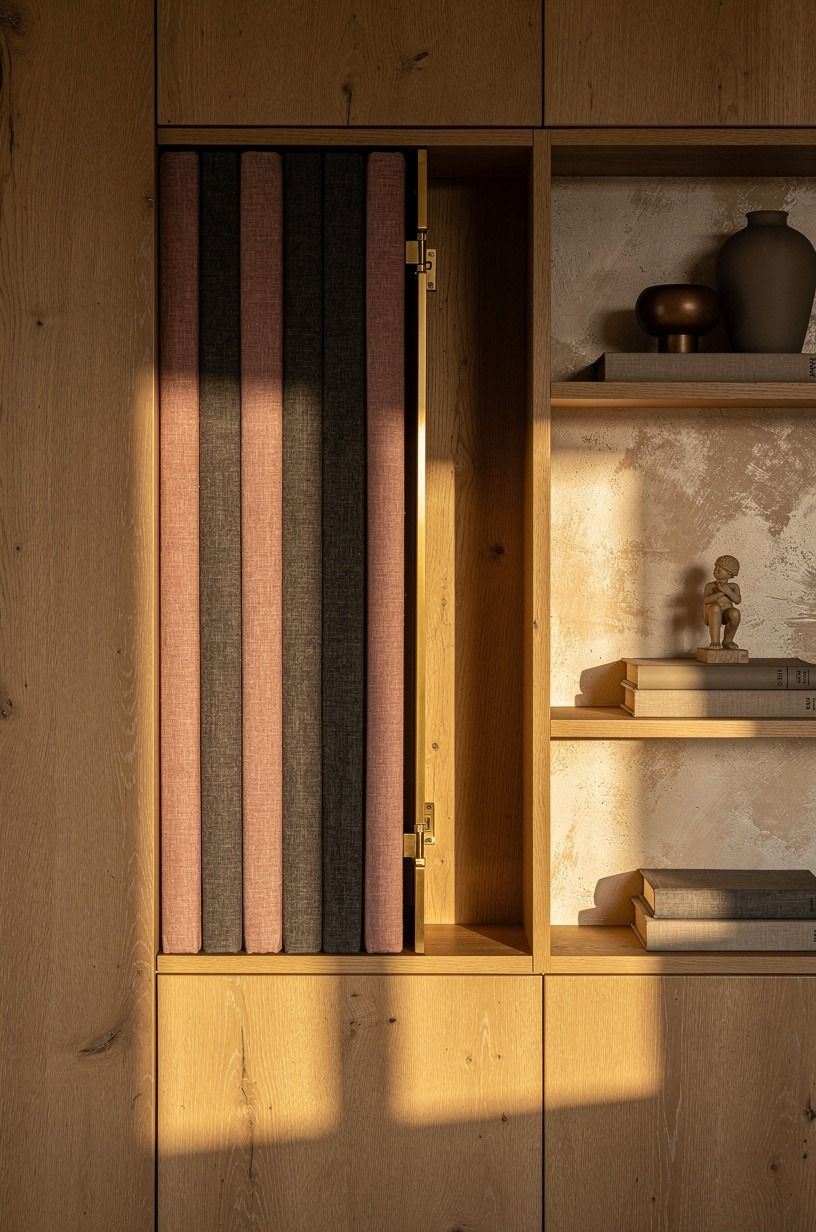
Layer your false row onto a backing panel instead of trying to hinge individual books. The dusty rose and charcoal spines in the photo read like a real library because they sit proud of the compartment by only a hair. Use thrifted hardbacks, trim them to a shared depth, and glue them to a lightweight face built from birch plywood with a continuous piano hinge.
What matters most is the swing path. If the panel opens into a chair arm or lamp, you'll stop using it.
I keep this move for flat documents, backup cash, or the little electronics boxes you never want to see again, and a brass catch on the inside keeps the shut line crisp. For more wall-integrated storage, these hidden storage ideas that make a home feel twice as big solve the same problem without adding visual noise.
8Fit a drawer divider with lift out base
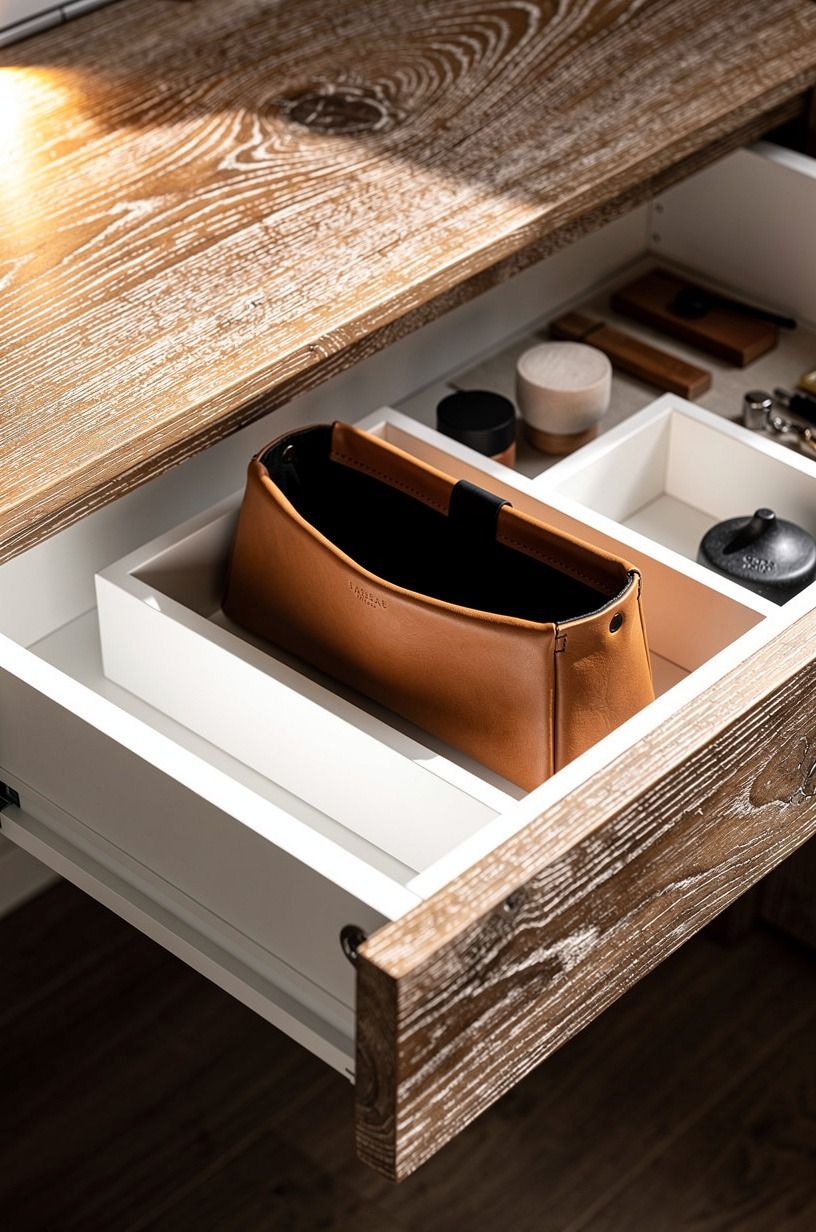
Fit the organizer first, then hide the lower cavity under it.
9Build a tilt out panel behind trim
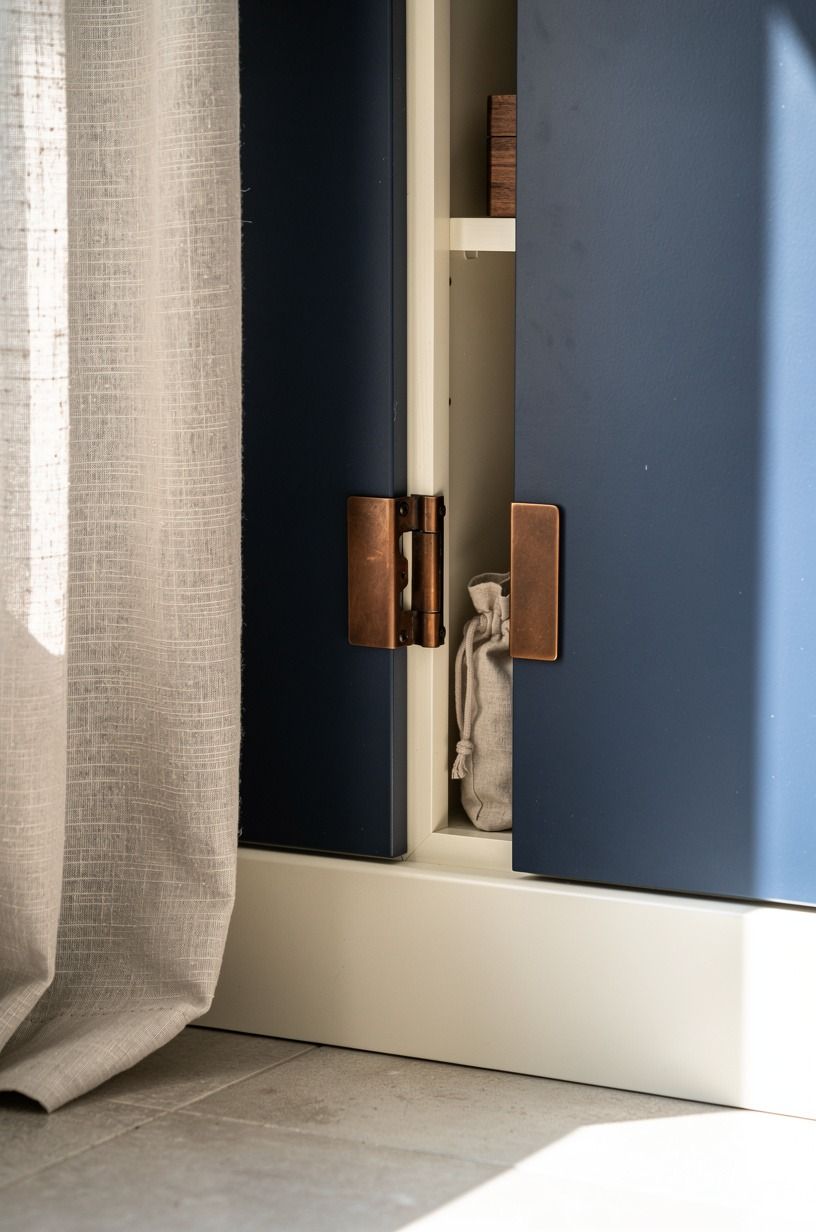
Build the panel behind trim where the wall already has a baseboard-and-built-in rhythm. That midnight blue face with ivory trim works because the reveal reads like architecture first and storage second. Use a slim back box, a pivot hinge, and a magnet catch strong enough to hold tight at floor level, where vacuum bumps and shoe kicks happen.
I like a copper-toned cup or envelope tucked inside because metal catches the light when the panel opens and helps you spot what you stored there. But keep the panel narrow. A long tilt-out front gets flexy and starts looking fake, especially against a deep paint like Farrow & Ball Hague Blue No. 30.
If you're planning more low-line storage, small kitchen cabinet ideas that maximize storage has the same discipline in another room.
10Mount a magnetic key cubby under shelving
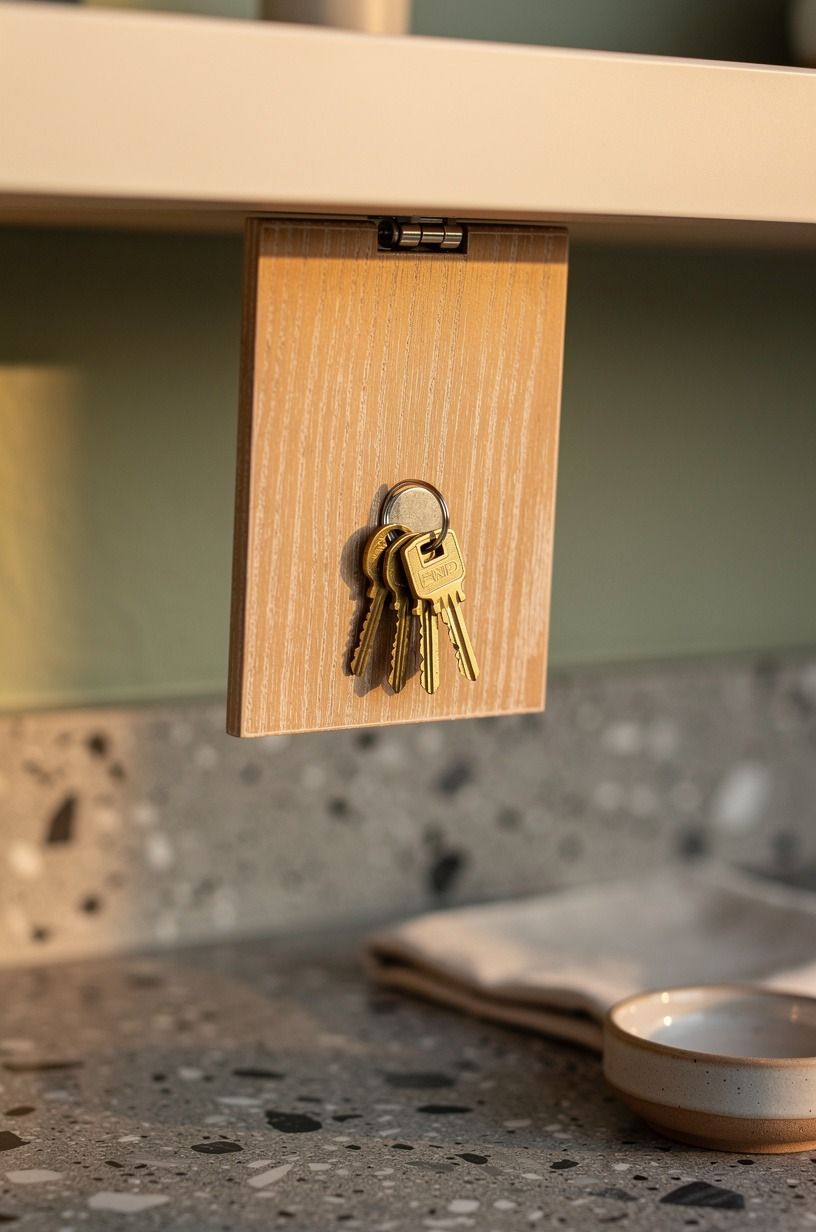
Mount this cubby under a shelf you already touch on the way in, not in some heroic spot across the room.
11Carve a detail pocket inside molding
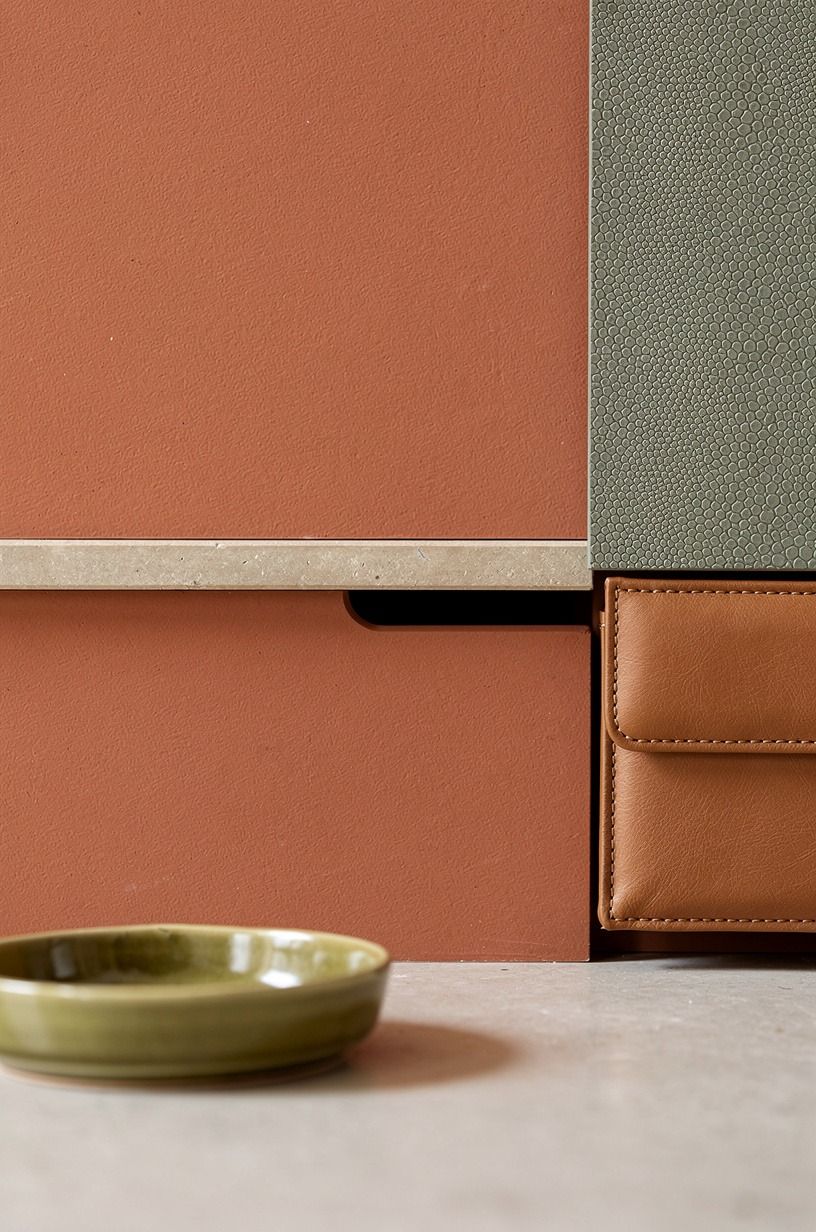
Carve the pocket into chunky molding only if the trim profile is deep enough to carry it. The terracotta wall and stone-toned strip in the image are a good reminder that color can help the seam disappear, especially down near the floor where light rakes across every mistake. Keep the cavity narrow, usually for a document, a spare key, or one small jewelry pouch.
A sliding action beats a hinged one here because you don't need clearance and the molding stays neat from the front. I prefer Benjamin Moore Revere Pewter HC-172 or another muted trim tone if the wall is warm, since sharp white makes every cut line louder. But do a dry fit three times before painting.
One stubborn bind at floor level will make you swear.
12Add a hinged seat to a bench
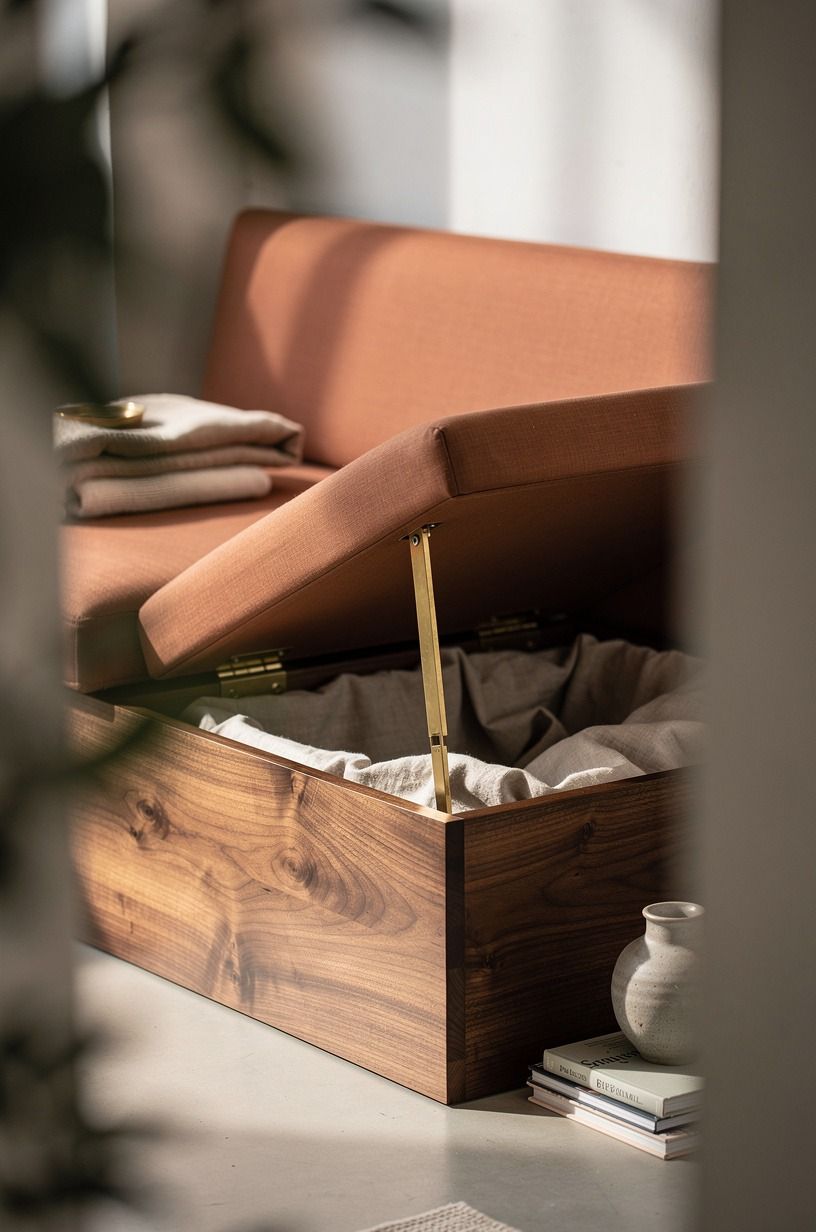
Add the hinge where a bench already earns its keep, not as an isolated project with no daily use.
13Slip a rolling bin beneath the bed
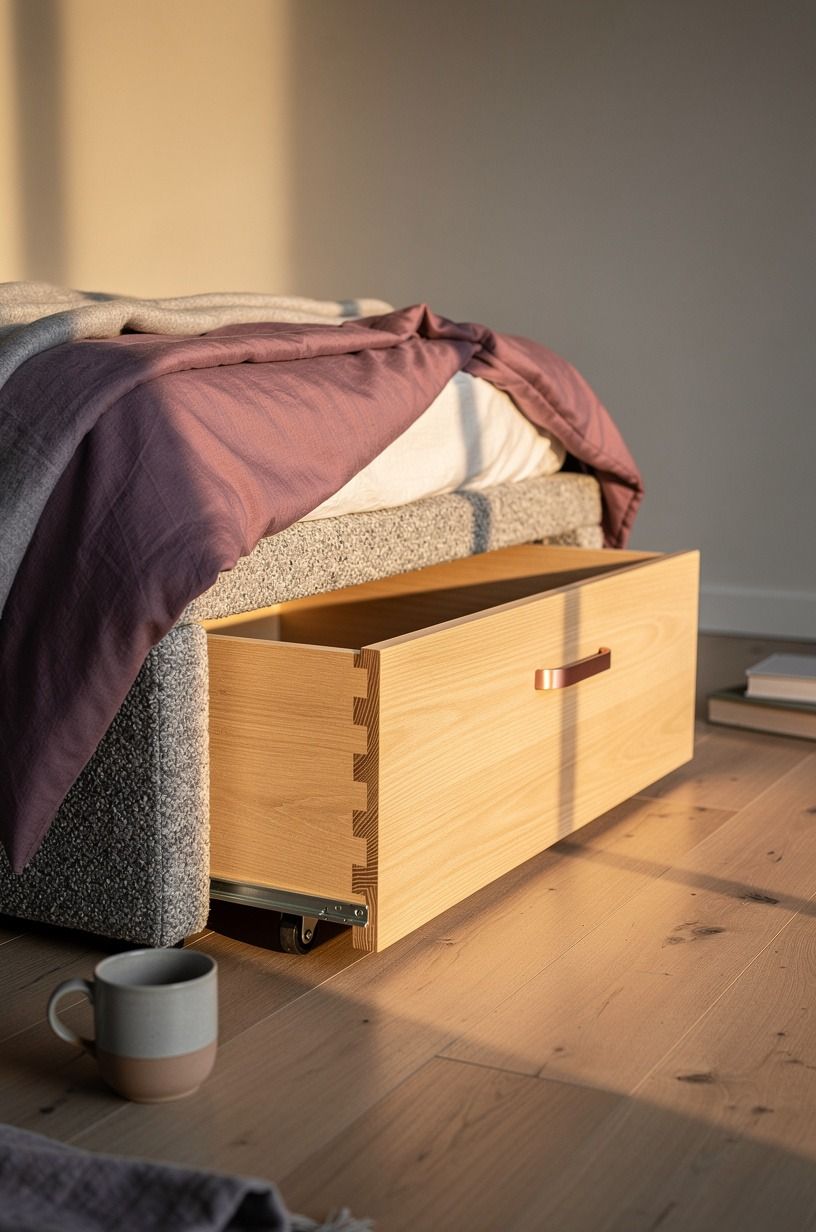
Slip the bin under the bed only after you measure the true clearance, from floor to the lowest upholstered rail, not just what you think you see. With plum and gray bedding over an organic boucle bed frame, the scene in the photo hides the storage because the handle stays low and the bedding skims right over it. Anything taller than about 5 to 6 inches can start catching.
Use rose-gold or brass pulls, low casters, and a lid if you're storing fabric so dust stays out. This is one place where I think mobility matters more than pretty joinery, because you will use it on tired nights. For sizing and categories, both under-bed storage tips and under-bed storage ideas are worth opening before you build the box.
14Install a false back inside nightstands
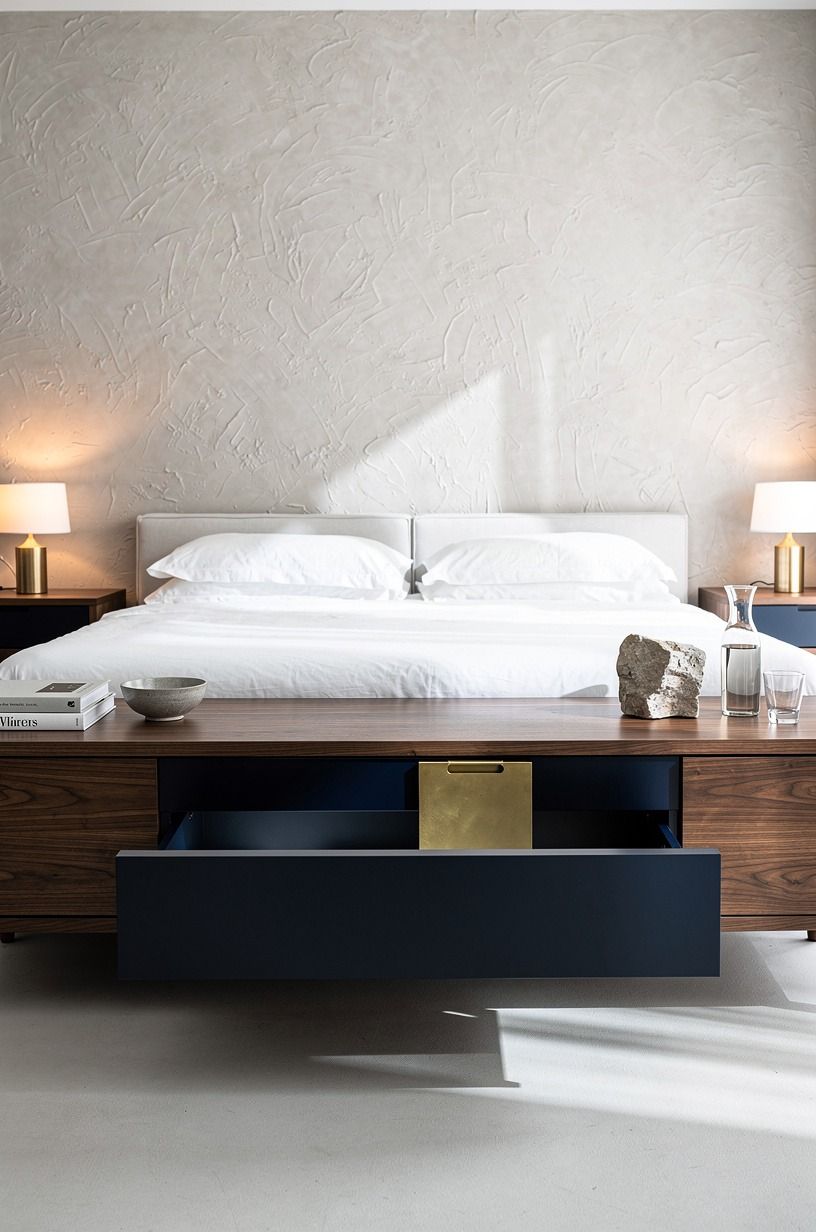
Install the false back only after you check how much depth the drawer can lose without becoming annoying. In that navy-and-walnut bedroom, the front drawer still looks generous because the concealed void stays behind the normal stop line. A 1 1/2 to 2 inch hidden channel is usually enough for documents, jewelry rolls, or the things you want close but not visible.
Use unlacquered brass knobs if the room already has warm metal elsewhere, and finish the panel in the same stain as the drawer interior so the shift isn't obvious. I like this move better than overstuffing a storage bed when the bedside clutter is the real problem. And if your room still needs deeper capacity, the Saatva Amalfi storage bed shows how a bigger concealed piece can stay visually calm.
15Turn a picture ledge into stash storage
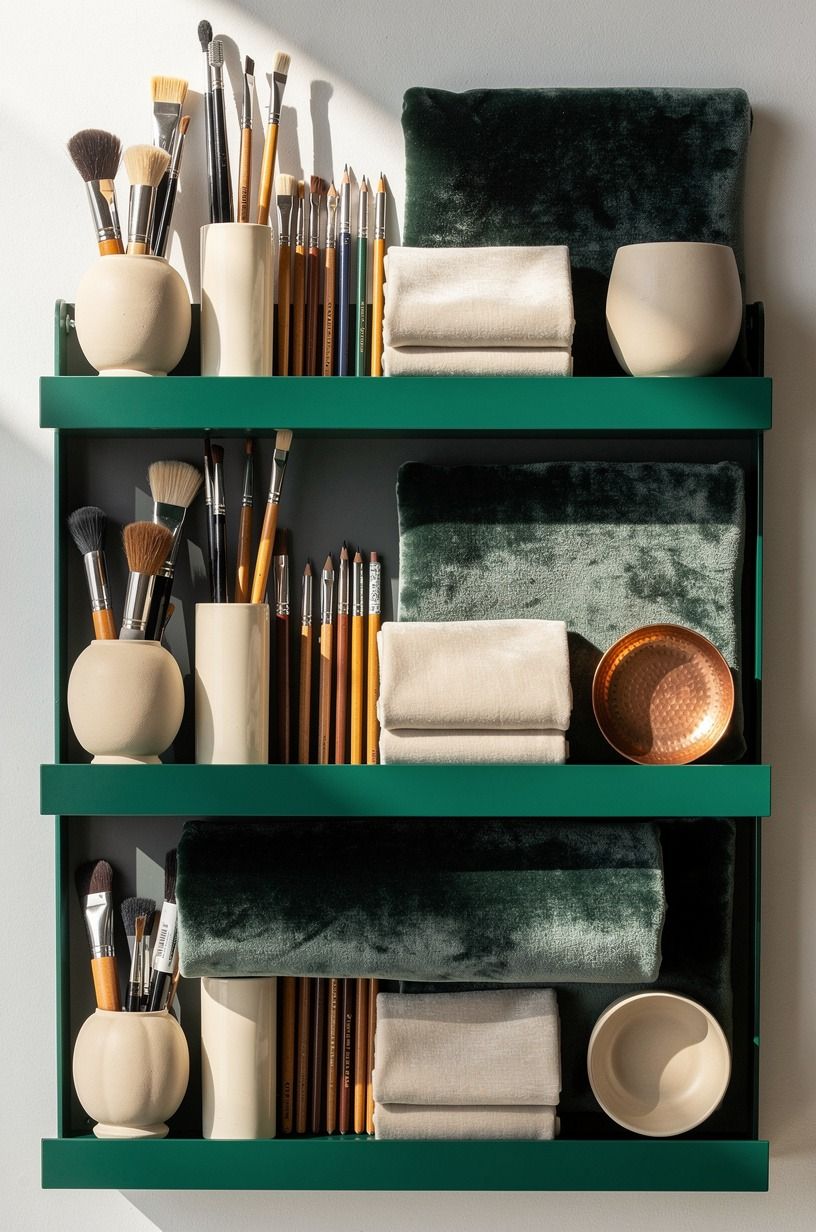
Turn the ledge into a tray only if it already belongs on the wall. The emerald ledge in the overhead photo works because art supplies and cream ceramics sit lightly on top, so the lift-out section feels plausible. Build the tray with a shallow rabbeted rim in painted poplar, and keep the depth closer to paper, stamps, or photos than anything bulky.
I wouldn't put heavy frames on the moving section. That gets old fast, and one slipped corner will chip the paint.
Better to style it with small pieces you can set aside in five seconds, then keep the hidden cavity neat enough that you can see every item at once. For more visual storage that doesn't crowd a room, hidden storage ideas that will make your home feel twice as big leans in the same direction.
16Create a lift top coffee table compartment
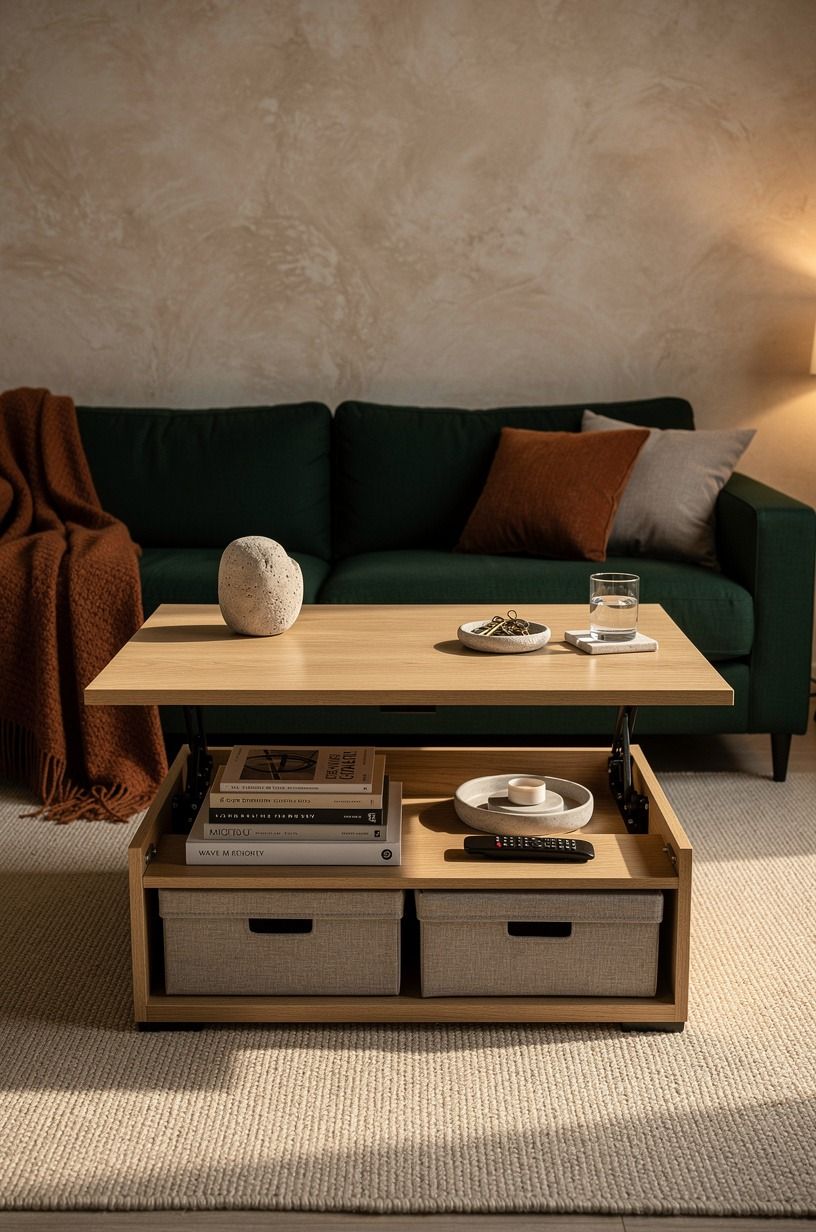
Create the lift top only if the table already fits your seating zone.
17Tuck a narrow drawer behind baseboards
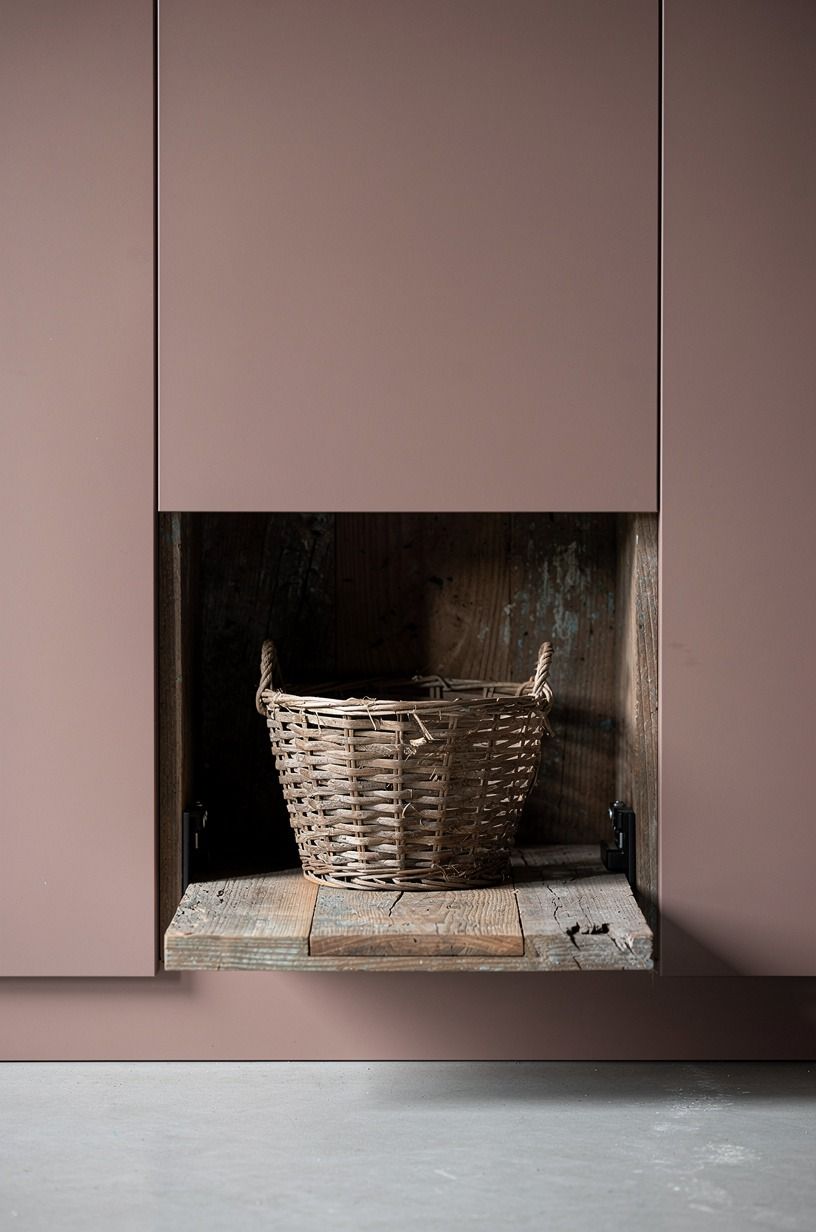
Tuck this drawer into a hallway stretch that already has panel rhythm, because the dusty rose wall and charcoal baseboard in the photo prove how much the surrounding lines matter. A narrow pull-out works best for flat household extras: batteries, tape, spare bulbs, warranty cards. Keep the front no taller than the baseboard itself, then add a tiny brass finger pull off-center so it looks intentional.
The drawer box can be simple reclaimed oak ply on side-mount slides, but you need to test the travel with your actual floor. Hallways magnify every rub. And if you live with kids or pets, avoid the busiest run and choose the quieter end of the corridor instead.
That's the difference between clever and constantly kicked.
18Build a planter box with hidden liner
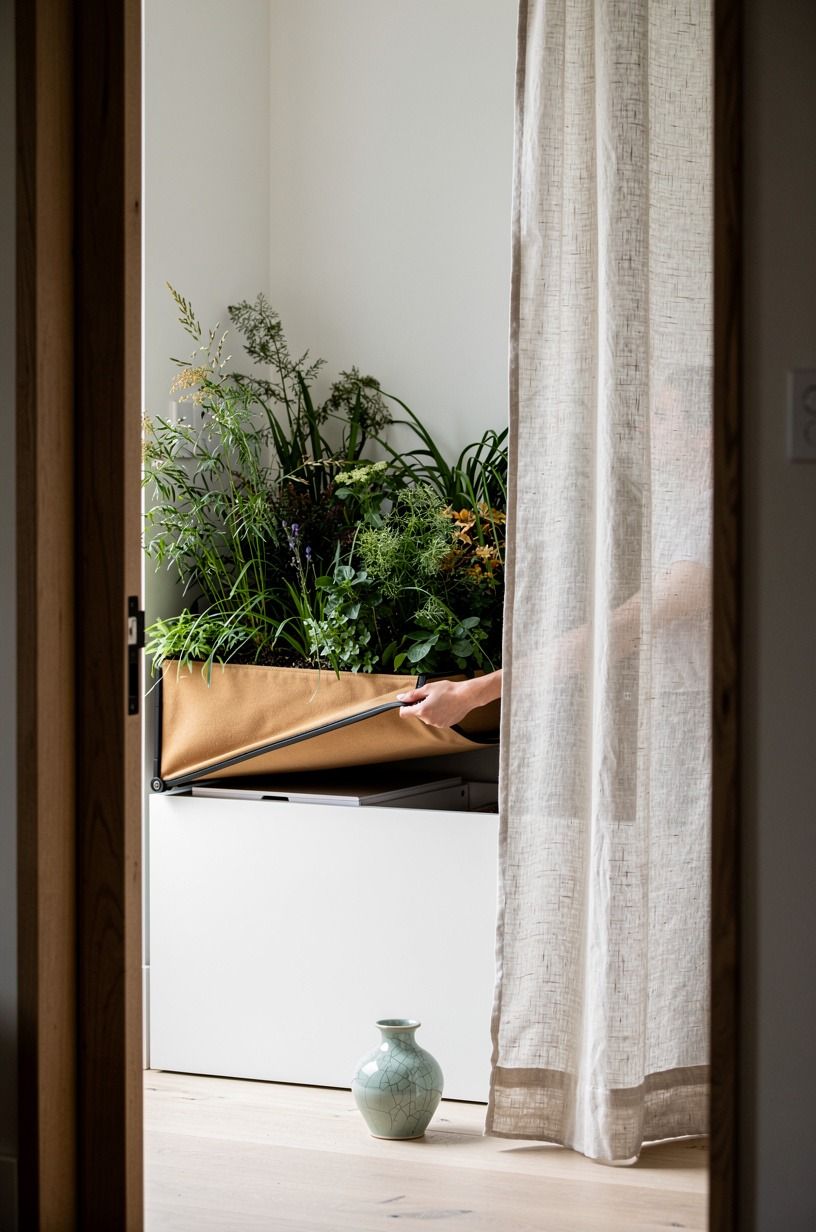
Build the planter so the removable liner looks like part of the design and not a bucket dropped into a box. In that warm white built-in, the camel-toned liner gives the opening a clear edge, which helps the concealed cavity underneath read cleanly. Use a waterproof tray for the plant itself, then lift that insert out to access the dry compartment below.
This is a good place for extension cords, plant care tools, or the small dining pieces that don't need to live out all day. I wouldn't store paper here unless the liner is truly sealed, because moisture always wins eventually. If you're already mixing storage with seating or dining, breakfast nook storage ideas with hidden bench storage shows the same multi-use mindset in a more family-heavy zone.
19Finish with labeled zones inside each compartment
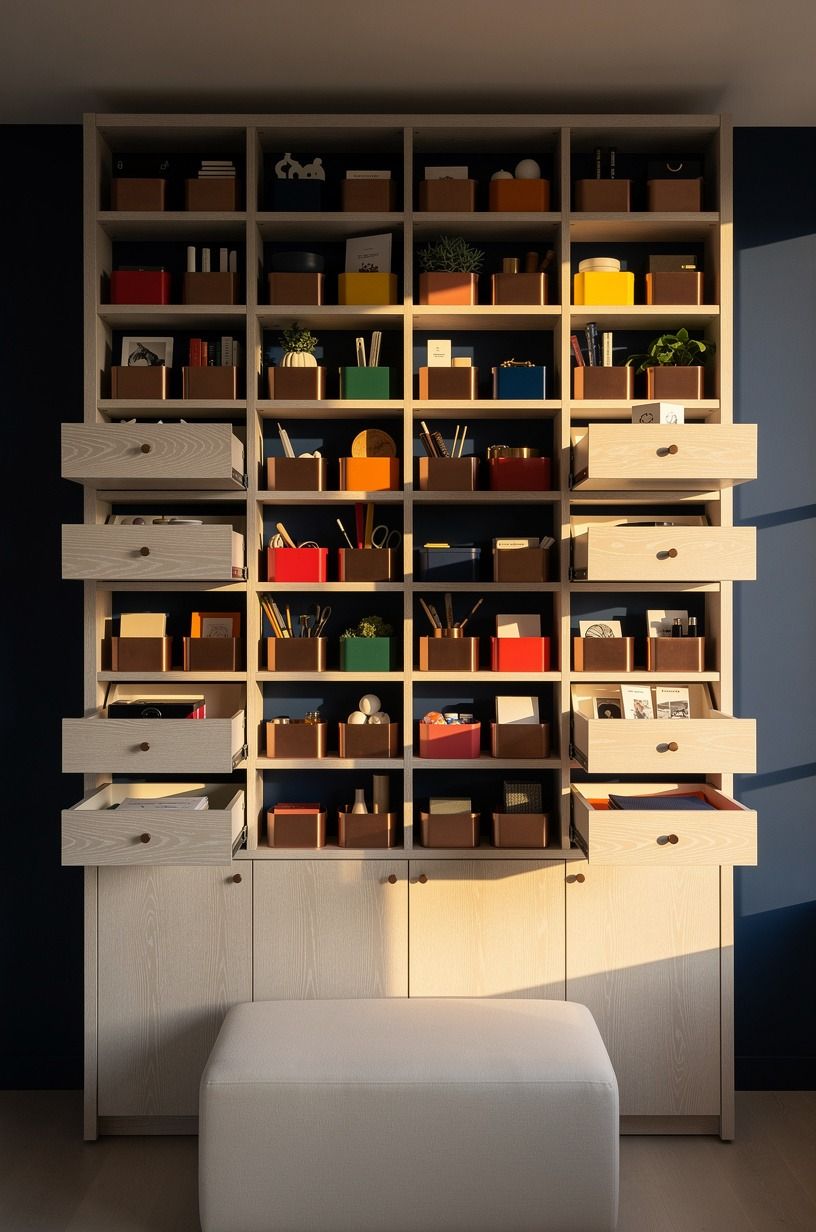
Finish every build by labeling the inside, even if the outside stays invisible.
Why does the Two-Reach Rule make hidden storage feel natural?
The hidden compartments people keep using are almost never the deepest or the most dramatic. They're the ones that respect the way you move.
I call it the Two-Reach Rule: if you can open the compartment and grab the item in two easy motions, you'll keep using it. If it takes kneeling, shifting furniture, lifting something fragile, and then digging through a dark cavity, you won't.
The build may impress you for a weekend, but your habits will tell the truth by week three.
I've made that mistake more than once. I built a bench cavity that could hold half a season's worth of throws, and it looked great in photos.
In real life, the lid was wide, the baskets inside were heavy, and nobody wanted to clear the seat just to grab one blanket. Later, I rebuilt the same bench with smaller zones, a lighter top, and a linen pull on each basket. Suddenly it worked every day.
Same bench. Better reach!
And that's why I push shallow storage so hard. A 2-inch wall pocket, a 3 1/2-inch niche between studs, a 5-inch rolling bin under the bed, those sizes don't sound exciting, but they ask less from the room and less from you.
Do you really want to remove a stack of art books just to get a charging cable? Probably not.
The best concealed storage should feel like a quiet convenience, not a performance.
The other piece nobody respects enough is visual calm. Once a compartment gets too big, you start shaping the whole room around the hiding place instead of the other way around. That's backwards.
I would rather see a modest floating shelf in cerused white oak, a bench in book-matched walnut, or a painted panel in Farrow & Ball Hague Blue No. 30 that disappears into the wall than a bulky build that announces itself from the doorway. Hidden storage isn't valuable because it's clever. It's valuable because it lets the room stay soft, useful, and easy to live in.
The Questions I Get Asked Most
What is the best 27 Genius DIY Hidden Compartments & Detail Storage Spots for a small genius diy hidden compartments?
A floating shelf or an under-bed bin is the best first move because both save floor space and stay easy to reach. The payoff is instant storage without visual clutter.
- Slim shelf box in cerused white oak - Low rolling bin under a standard bed - Compact scale borrowed from under-bed storage ideas
Where can I buy 27 Genius DIY Hidden Compartments & Detail Storage Spots pieces on a budget?
Start at IKEA, Target, and Wayfair for the parts that don't need custom milling. The win is mixing plain basics with one better finish.
- IKEA KALLAX sizing reference and basic hardware - Target bins, felt liners, simple mirrors - Facebook Marketplace benches and nightstands worth modifying
How much does a 27 Genius DIY Hidden Compartments & Detail Storage Spots makeover cost?
Most small projects land around $100 to $300, and you can spend less if you're reusing a bench, shelf, or nightstand you already own. Paint, slides, hinges, and liners add up faster than lumber.
- Paint and wax - Slides, hinges, touch latches - Reused furniture for the cheapest start
Can I create a 27 Genius DIY Hidden Compartments & Detail Storage Spots on a budget?
Yes, and the cheapest wins are usually the smartest. You save money by hiding inside furniture you already own instead of building from scratch.
- Lift-out drawer base from scrap ply - Under-bed bin on budget casters - Picture ledge tray with leftover paint
Is a 27 Genius DIY Hidden Compartments & Detail Storage Spots worth it in a small space?
Yes, especially in a small space, because shallow storage uses wall thickness and dead gaps instead of stealing walking room. That means your room stays open while your clutter disappears.
- Between-stud mirror cubbies - Toe kick drawer under cabinets - Narrow baseboard pull-out along a quiet wall
Is 27 Genius DIY Hidden Compartments & Detail Storage Spots a good idea for a rental?
Yes, if you keep the changes reversible and focus on movable pieces. You can get the hidden look without damaging the shell of the room.
- Lift-top table instead of built-in millwork - Rolling under-bed storage instead of cutting trim - Freestanding bench with a hinged seat
Start with the One-Hour Rule
If I had to pick one step to start with, I'd start with the hollow floating shelf. You get daily-use storage without bending, and the shallow profile keeps the wall from looking engineered around your clutter.
Build that first. Then copy the same discipline everywhere.