Outdoor kitchen with TV ideas for the ultimate game-day setup work best when the screen sits under cover, the counter holds at 36 inches, and the path around the island stays a real 42 to 48 inches. I learned that the sweaty way. Last fall, I was trying to host friends in a backyard living setup that looked generous in photos and felt awkward the second anyone carried wings and drinks at the same time.
Here's what it looked like before
Before this makeover, the patio had the full almost-there package. A lonely grill.
One wall that caught glare by 4pm. A folding table pretending to be a bar. I could cook, sure, but you couldn't watch the game unless you stood in one exact spot with a plate in your hand.
I kept moving furniture instead of fixing the layout, and that was the mistake. The old setup split the outside area into two bad halves: a cooking corner with no social energy, and a seating corner where nobody could hear the sizzle or see the score.
If you've ever hosted like that, you know how annoying it gets fast. And the value wasn't there either, because nobody stayed past halftime.
- Start with the TV wall under cover
- Anchor the screen above a stone grill run
- Frame the viewing zone with cedar slats
- Build the bar facing the outdoor screen
- Run a slim counter beneath the TV
- Add swivel stools beside the prep island
- Mount the TV inside a recessed niche
- Hide cables behind a tiled backsplash
- Set the grill at the screen's side
- Hang sconces around the viewing wall
- Layer pavers toward the cooking bar
- Tuck speakers into the pergola beams
- Install a hood that clears the sightline
- Wrap lounge seating around the kitchen edge
- Plant tall grasses behind the TV wall
- Style open shelves below the screen
- Pour a concrete ledge for game snacks
- Add a mini fridge under the viewing counter
- Finish with lanterns over the watch party
1Start with the TV wall under cover
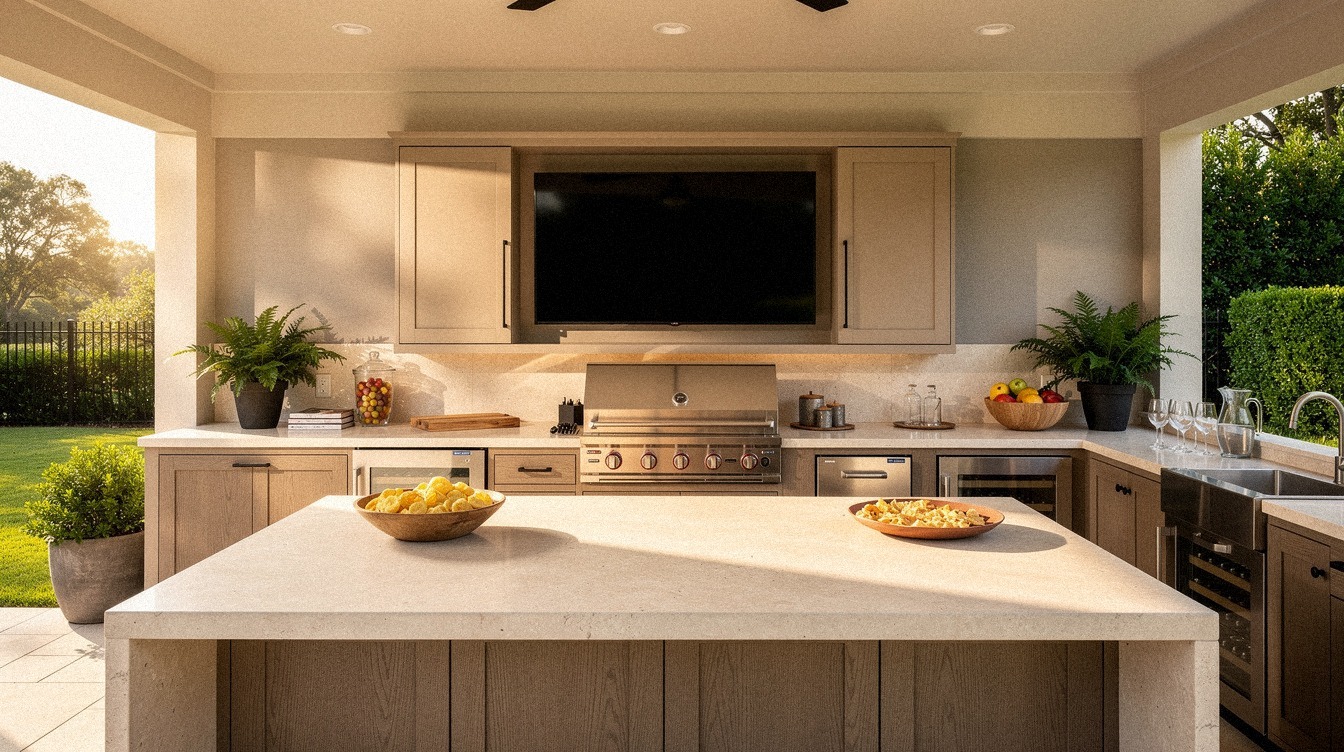
This was the first call that made the whole outdoor house design click. I stopped treating the TV like a bonus object and gave it the best protected wall on the patio, right under the roofline where rain drift couldn't reach it and afternoon glare stayed manageable. Terracotta stone counters grounded the whole view, and two tall olive planters kept the wall from feeling flat or too sports-bar.
You want the screen where your body already wants to pause, not where the leftover outlet happens to be. I almost mounted ours on the open side at first. Bad idea.
Once I put it under cover, the whole room finally had a center, and you could see the game from the grill, the bar, and the lounge. If you're planning a bigger entertaining zone, indoor outdoor kitchen ideas for seamless entertaining shows the same principle in a more open footprint.
And for the budget-minded, this single move costs almost nothing if you've already got a roofline.
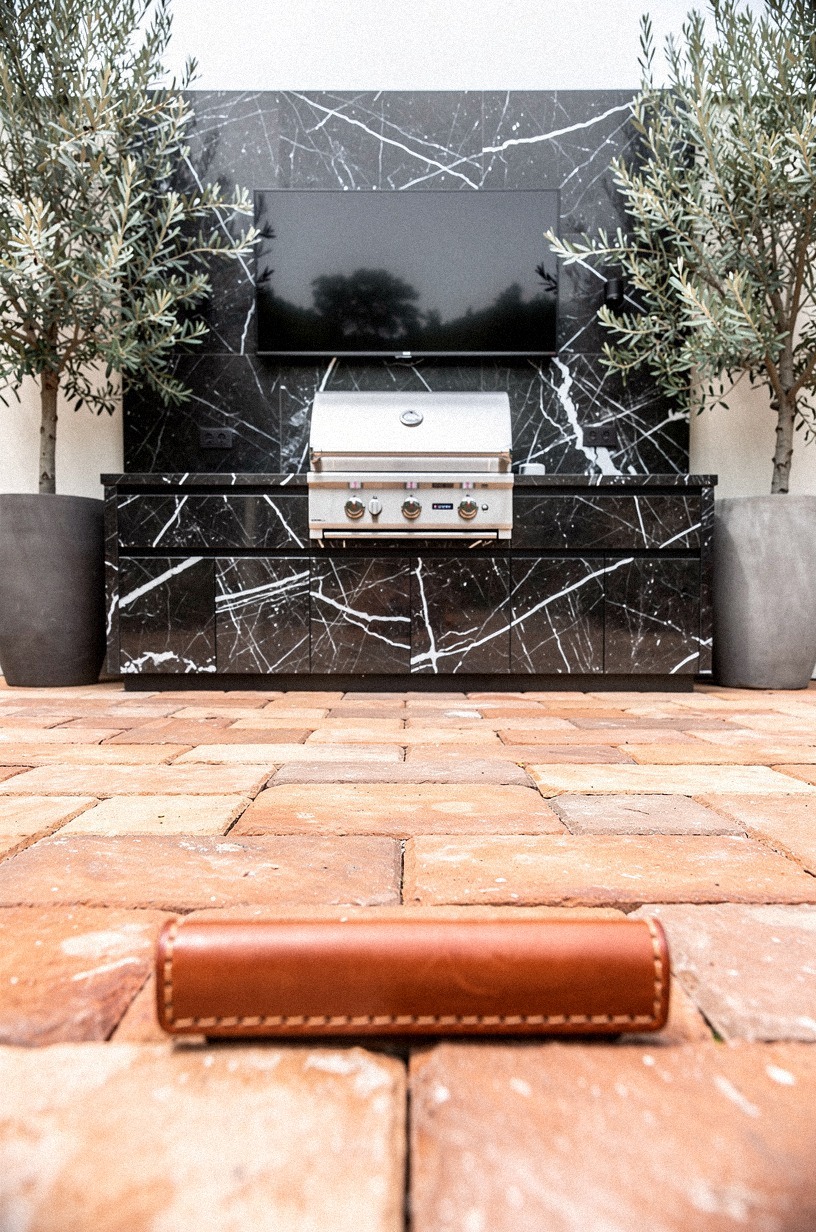
2Anchor the screen above a stone grill run

A TV floating on a blank wall looks temporary. Mounting it above a real stone grill run made ours feel built in, like it belonged there from day one. I used a creamy stone base with a backlit onyx backsplash behind the grill zone, and that glow at dusk did more for the mood than any giant decor buy ever could.
You don't need a massive grill island for this to work, but you do need visual weight under the screen. That is why I would skip a skinny cart and go for a proper run, even if the cooking zone is compact. The stone gives your eye somewhere to land, and the grill decor stops looking like a pile of equipment.
For tighter layouts, small outdoor kitchen ideas that maximize every inch has good examples of that grounded look. Worth it, every time.
3Frame the viewing zone with cedar slats

Cedar slats were my cheat code for making the viewing wall feel finished without boxing it in. I pushed the screen to one edge, then used vertical cedar slats to frame the zone and visually separate it from the grill counter. From above, the plan finally looked intentional instead of random.
And cedar does something paint can't. It warms up the hard surfaces and makes your TV wall read as furniture, not tech.
I kept the spacing slightly open so air still moved through the pergola, and the slats tied nicely into the book matched stone nearby. If your backyard living space is narrow, you can steal the same move from outdoor kitchen ideas for small backyards big function littl.
You get structure without losing breathing room. The cost runs about $8 to $14 per square foot for the slats alone, which lands well below a custom wall build.
4Build the bar facing the outdoor screen
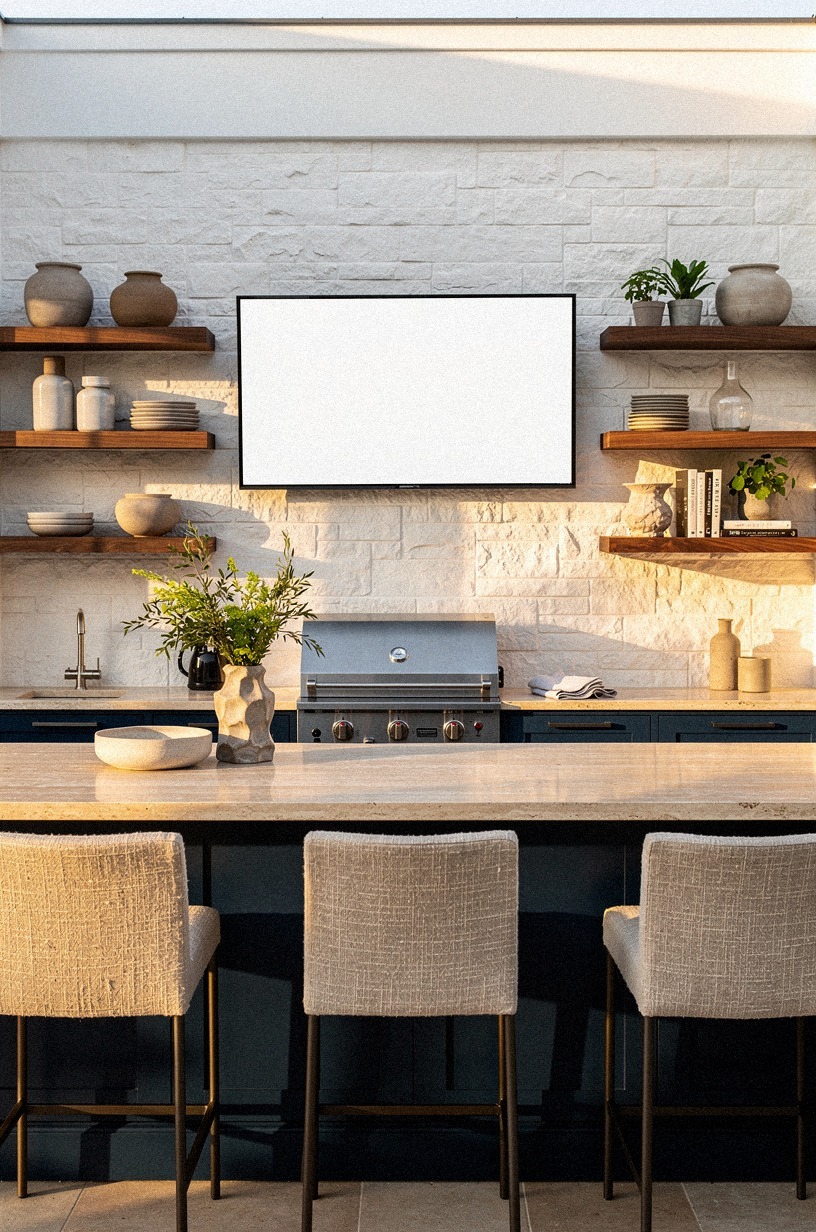
The bar changed how people used the patio more than the grill did. Once I turned the warm travertine bar to face the outdoor screen, guests stopped hovering behind me while I cooked and started settling in like they meant to stay. Navy cabinetry under the bar gave the whole thing enough contrast that it didn't wash out at night.
You want people facing the action, not each other in a perfect little dead circle. That sounds harsh, but it's true. Game-day hosting works better when the seating direction is obvious.
I learned that after one Sunday of everyone twisting on stools and missing every replay. If you like a more resort feel, outdoor kitchen hot tub ideas for a resort style yard uses the same face-the-view logic in a softer way.
Honest take: this is where the value of the whole setup doubles for the price of one countertop turn.
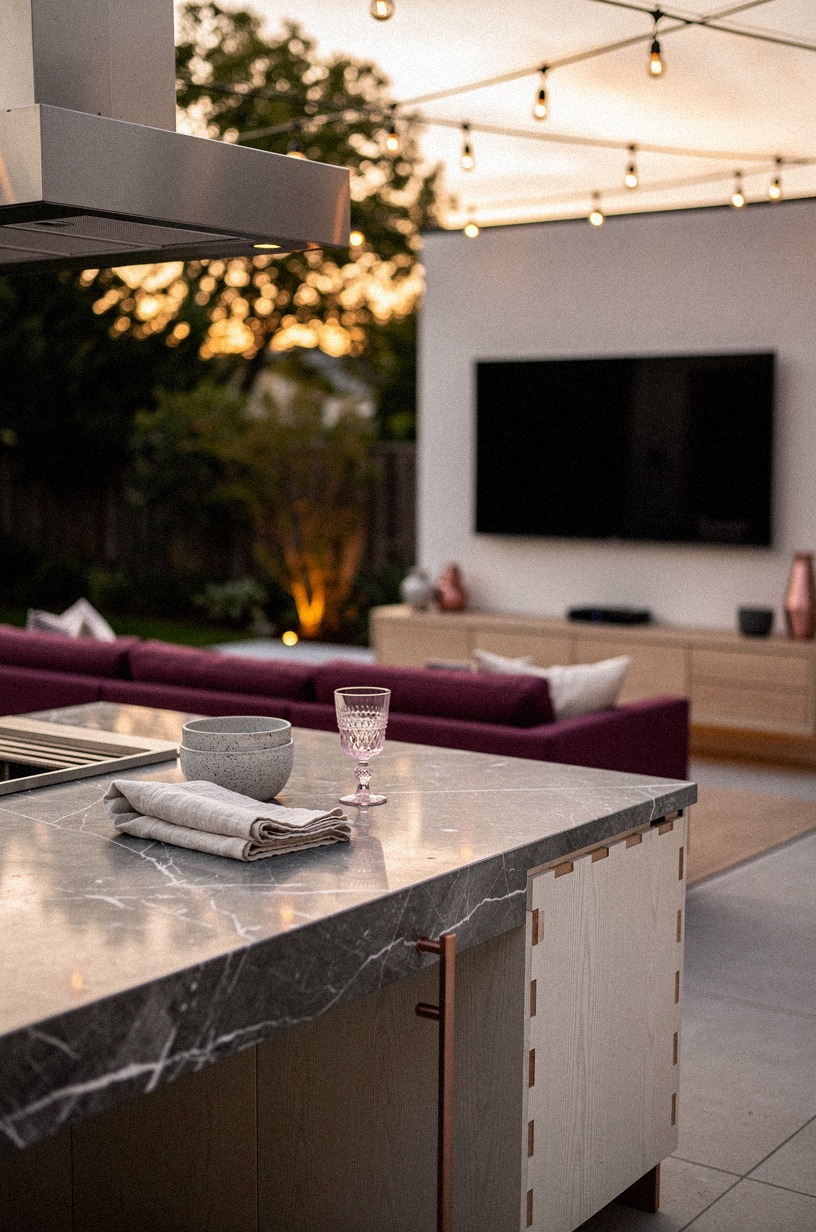
5Run a slim counter beneath the TV
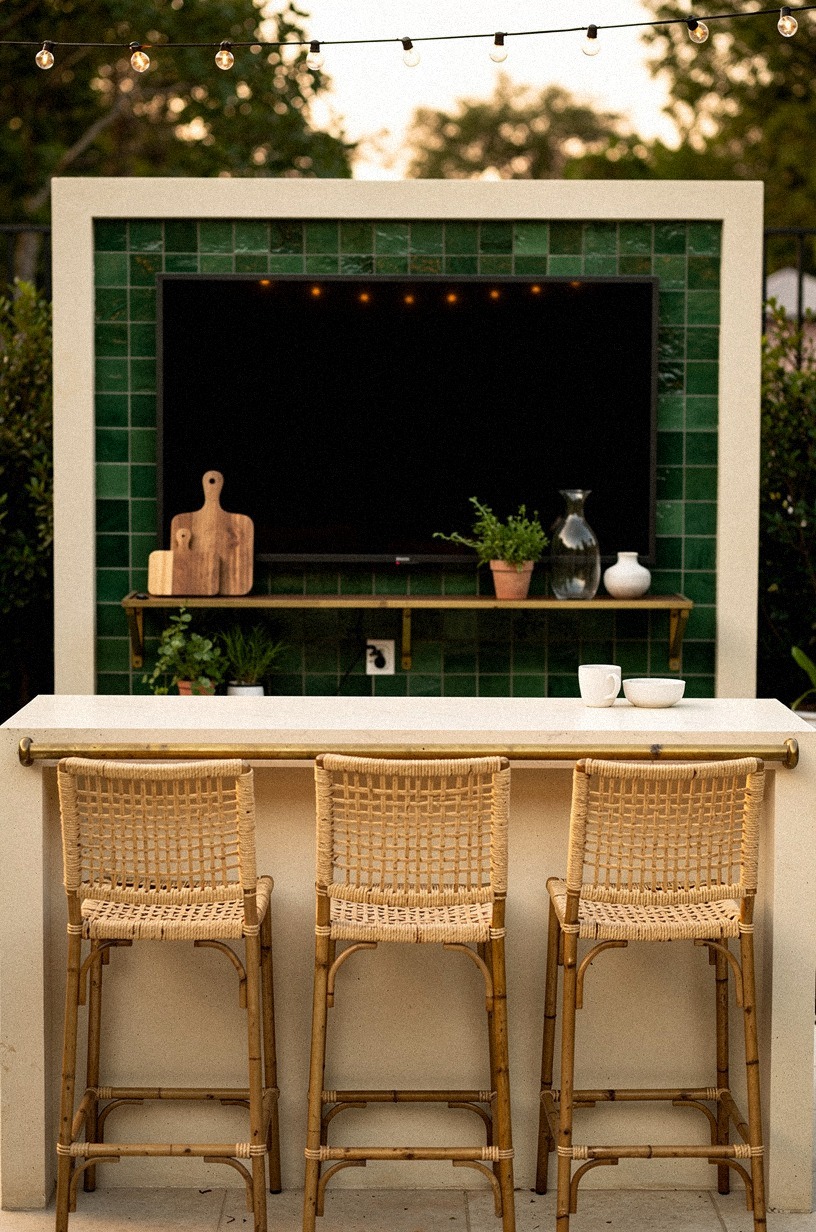
A slim counter under the screen solved three problems at once: remotes, serving space, and that awkward blank stretch below the TV. I kept it shallow on purpose, just deep enough for plates and a pitcher, with emerald tile behind it and cream stone around it so the wall stayed airy instead of bulky.
This is where dimensions matter. Standard counter height is 36 inches, and keeping the counter lean made the media wall calmer to look at from every angle.
You don't want a giant cabinet block under the screen if your patio isn't huge. I would rather have a narrow ledge that works than a deep counter that steals legroom.
The same discipline shows up in how to build an outdoor kitchen on a deck ideas tips, especially if you're balancing structure and clearance. And the cost?
A slim poured ledge in concrete lands around $200 to $400 installed.
6Add swivel stools beside the prep island
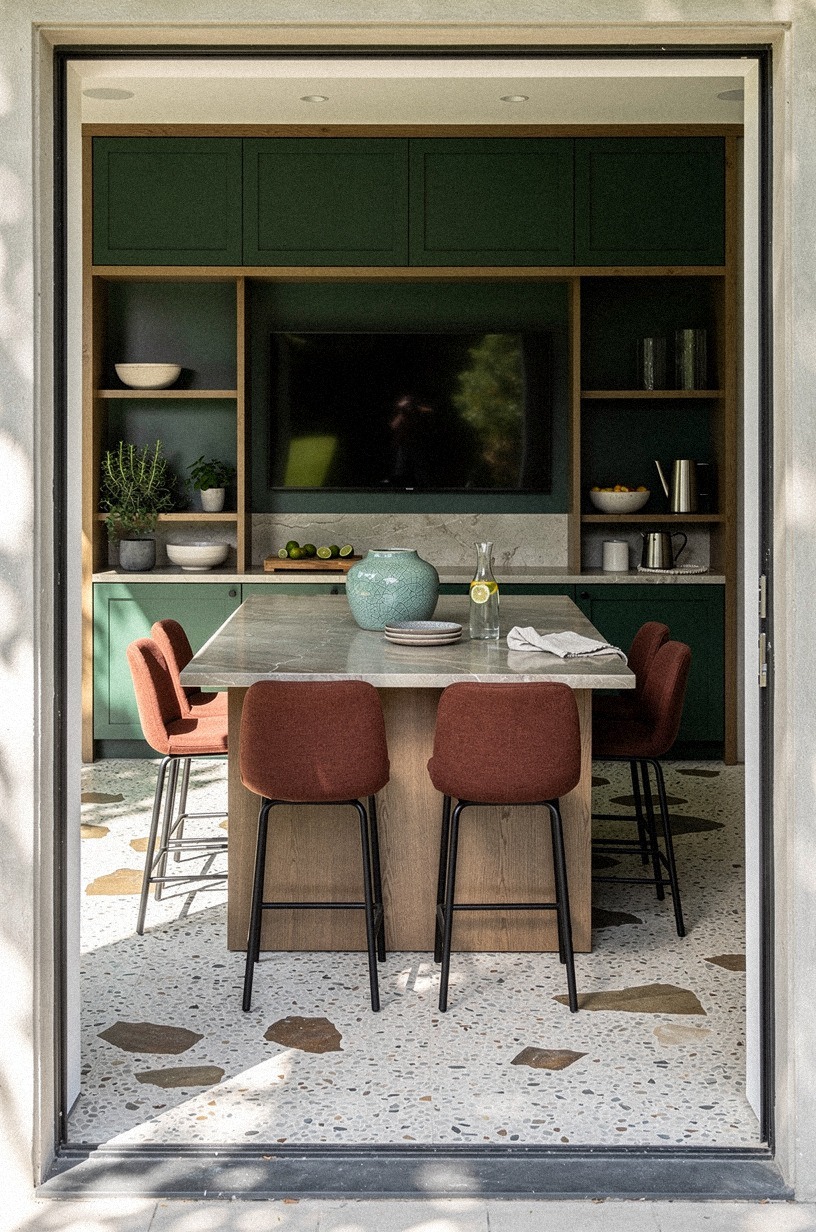
Swivel stools beside the island were one of those moves I resisted for too long. I thought fixed stools looked cleaner.
They do, in empty photos. But real people want to turn, talk, grab chips, and glance at the screen without dragging furniture across the pavers.
Once I added deep green swivel seats beside the prep island, the whole covered room got easier to use.
You could feel the difference right away. Friends stayed planted longer, and I wasn't constantly stepping around knees while carrying a tray.
I went with weather-safe stools in a dark tone that played nicely with forest green cabinetry and stone underfoot. If your grill side is cramped, small outdoor kitchen ideas that maximize every inch is worth a look before you buy anything.
Worth it on the cheap, too: most swivel sets under $400 outperform fixed stools at twice the price.
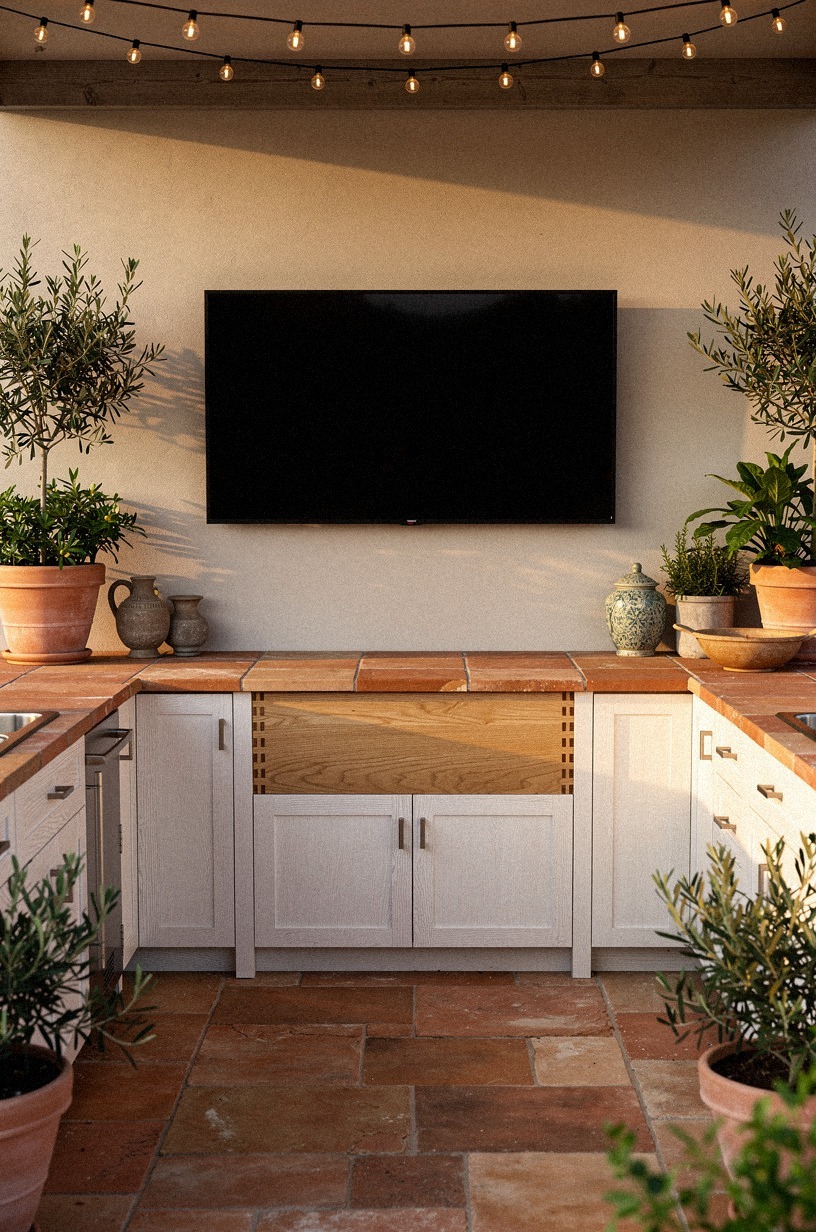
7Mount the TV inside a recessed niche
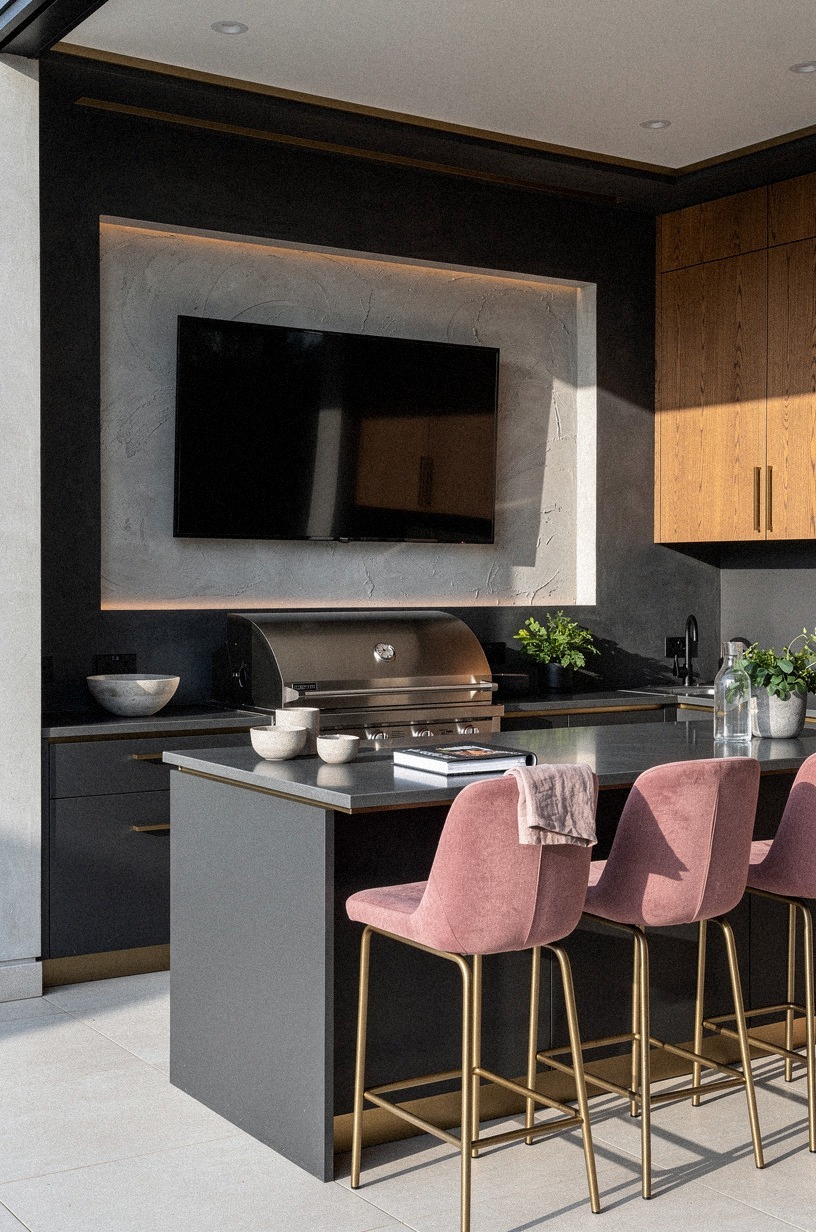
A recessed niche makes the screen feel quieter, and quiet is exactly what a big TV needs in an outdoor kitchen. I built a shallow surround so the screen sat tucked into the wall instead of pasted on top of it, with warm plaster wrapping the opening and the island still reading clean from corner to corner.
But here's the part nobody respects enough: recessing the screen helps with sightlines more than style. The niche cut glare, protected the edges, and kept the wall from looking top heavy when you stood by the grill run.
You don't need a dramatic cavity either. Even a modest recess can make the whole zone feel custom.
If you love that built-in look, outdoor kitchen pool combos for the ultimate backyard pairs strong architecture with better viewing axes.
8Hide cables behind a tiled backsplash
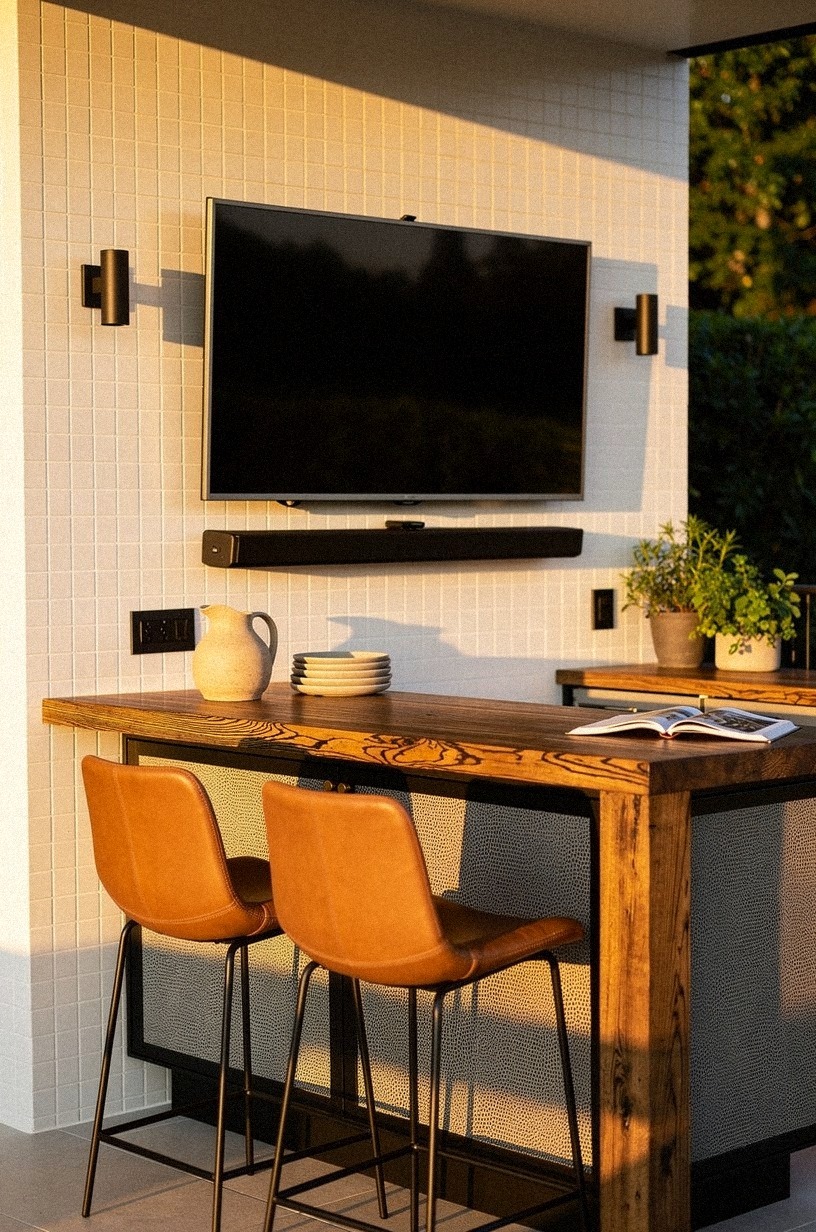
Visible cords can ruin an expensive patio in one second. I knew that, and somehow I still procrastinated until the first test mount. The fix was simple: route everything behind a tiled backsplash, then let warm white tile carry the whole wall visually so you noticed the texture first, not the tech.
I used a clean tile field behind the grill counter and tucked the cable path where the eye already expected a vertical break. Camel leather stools brought in a little softness, which helped because an all-hard outdoor kitchen can turn cold fast.
If you're reworking surfaces anyway, indoor outdoor kitchen ideas for seamless entertaining shows how to hide functional stuff without losing warmth. Worth every dollar on a tight budget, because the visible upgrade is huge for almost zero added cost.
9Set the grill at the screen's side

Putting the grill to the side of the screen, instead of directly under it, was a better call for our outside area.
10Hang sconces around the viewing wall
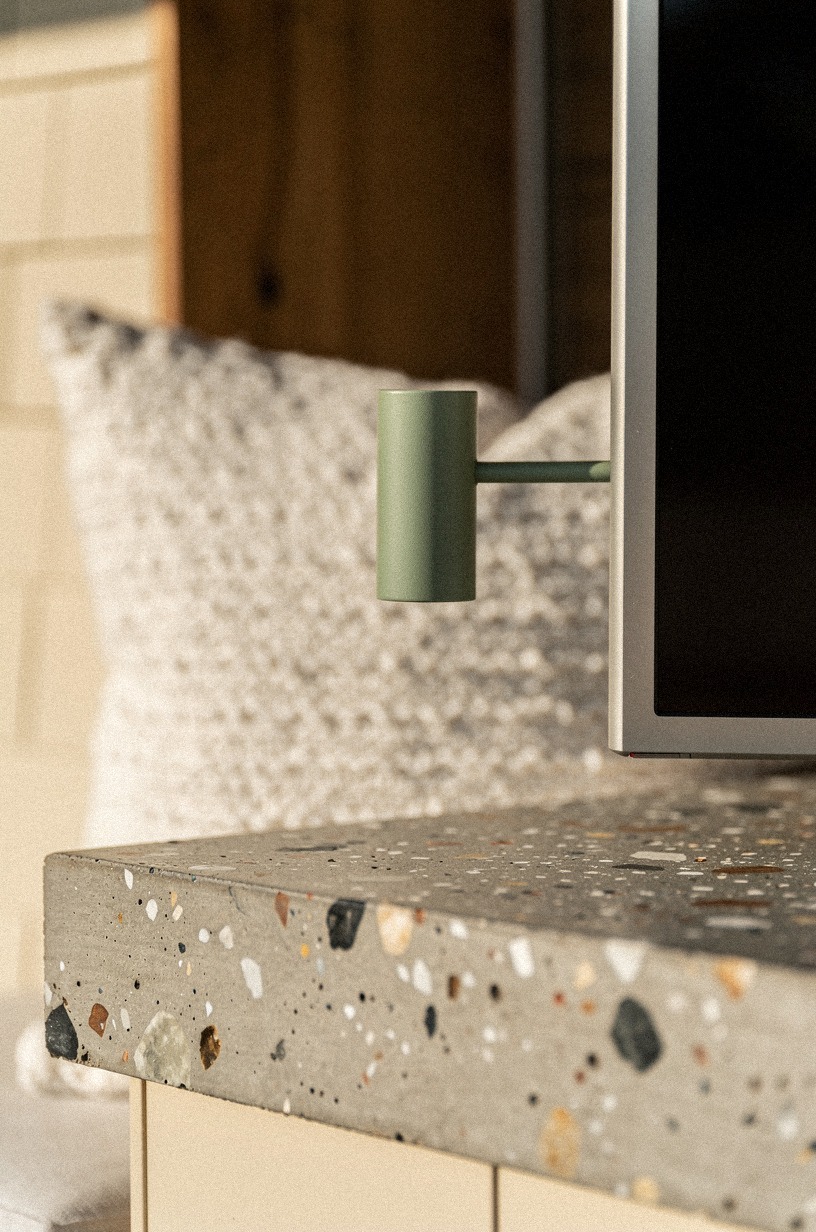
Lighting around the screen matters more than people think, especially once the sun drops and the patio has to carry the party. I hung a pair of sage green sconces with long arms near the viewing wall, then kept the bulbs warm and low so the light kissed the concrete counter instead of bouncing off the screen.
This is where I finally used a paint color I had been saving. Sherwin-Williams Evergreen Fog SW 9130 on the sconce arms looked soft in daylight and richer at night, especially next to a bouclé cushion and poured concrete.
You don't need giant fixtures. You need the right glow. If you love layered lighting, indoor outdoor kitchen ideas for seamless entertaining has more ideas you can adapt outdoors.
A solid pair of outdoor sconces costs around $120 to $280, which is a quiet splurge for the value it adds.
11Layer pavers toward the cooking bar
The patio started feeling bigger when I stopped treating the floor like background.
12Tuck speakers into the pergola beams
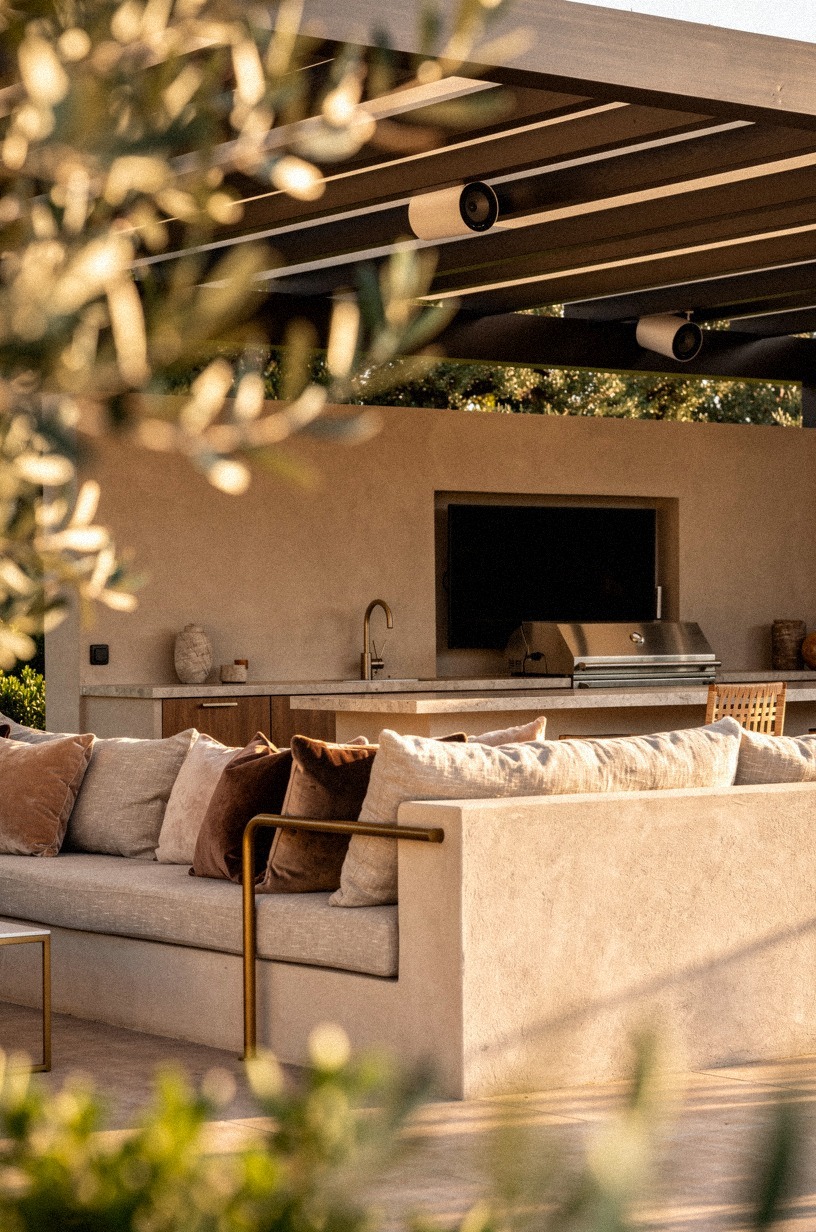
I didn't want a giant speaker tower shouting at the whole yard, so I tucked compact speakers into the pergola beams where they almost disappeared. Framed through the olive foliage, the TV wall still read clean, and the sound landed where people were sitting instead of bouncing off the fence.
This was one of those less sexy purchases that changed everything. You don't need club volume.
You need clear commentary and enough bass that the space feels alive! Clay plaster around the screen, linen cushions at the bar, and hidden audio made the setup feel more grown up than I expected. If you're blending tech into structure, how to build an outdoor kitchen on a deck ideas tips is a practical place to start.
A decent pair of outdoor-rated speakers runs about $200 to $500, which is a fair cost for the value they bring to every game day.
13Install a hood that clears the sightline
A hood can wreck the whole view if it drops too low or gets too bulky. I picked one with a cleaner profile and made sure the sightline to the TV stayed open from the prep side, the bar, and the lounge edge. That choice mattered more than the finish, honestly.
The grill counter wore soft gray Carrara marble with subtle veining, and the seating nearby leaned plum so the palette didn't go flat. I considered a heavier statement hood.
Glad I didn't. The right hood should do its job and then shut up visually. If you're comparing layouts, small outdoor kitchen ideas that maximize every inch proves that quiet overhead pieces often win in compact plans.
Worth the splurge if you cook a lot, but skip it if hood venting already runs through an indoor return.
14Wrap lounge seating around the kitchen edge
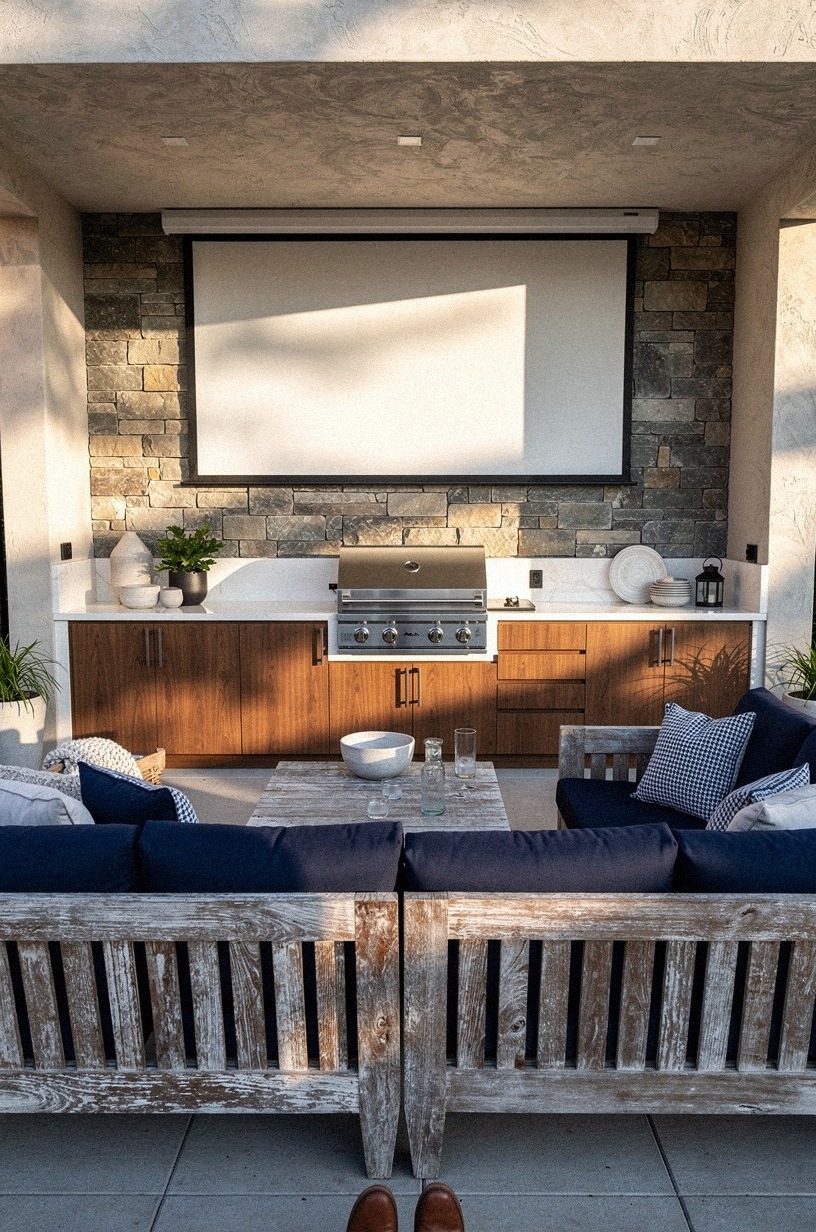
This was the move that made the whole patio feel like a room instead of a work zone. I wrapped lounge seating around the kitchen edge with weathered teak, walnut accents, and crisp navy and white cushions, so the people who weren't eating at the bar still felt connected to the screen and the grill.
You want soft seating close enough to hear the game but far enough that the cook isn't trapped in a crowd. That balance is hard! I kept the chairs low and open so they didn't block the TV wall from the entry side.
If you've got a longer patio, outdoor kitchen hot tub ideas for a resort style yard shows how perimeter seating can hold a bigger social zone together. Worth it if you actually entertain; skip it if it's mostly family.
15Plant tall grasses behind the TV wall
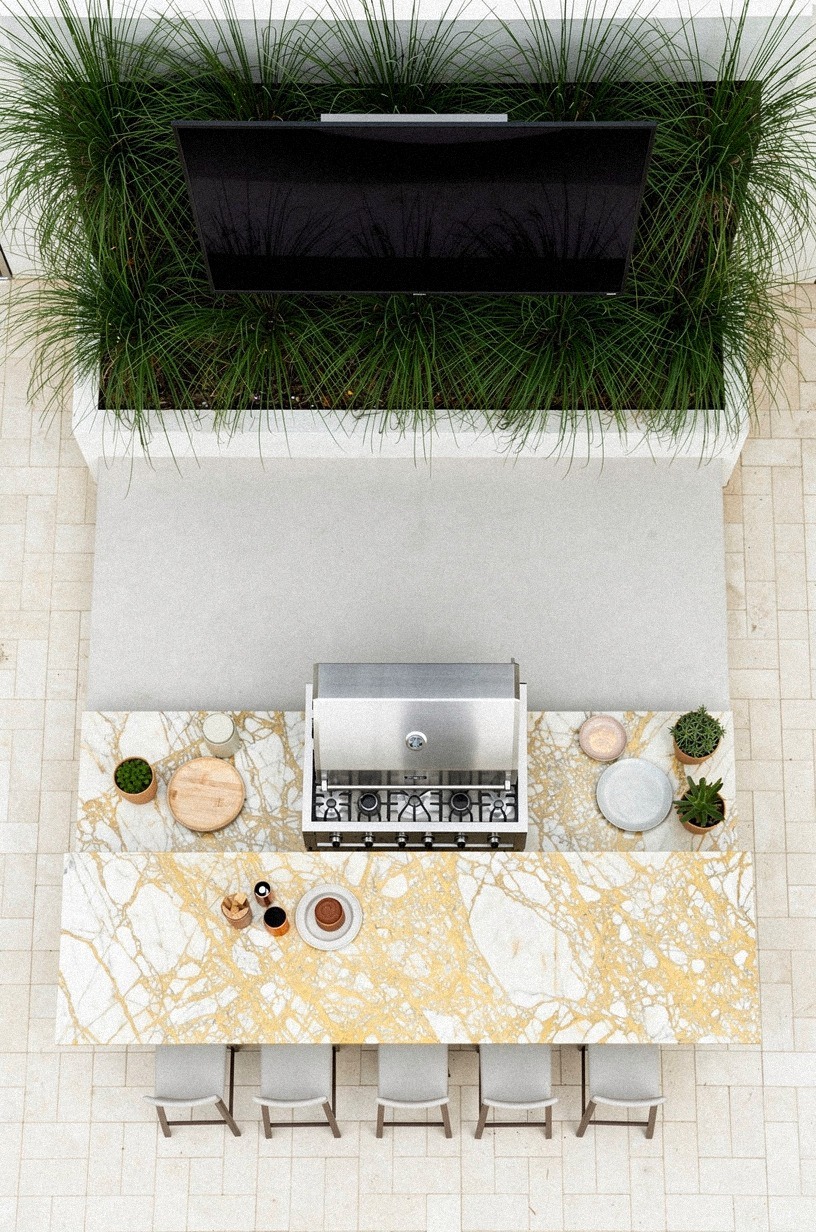
Tall grasses behind the viewing wall gave the compact layout depth without asking for more square footage.
16Style open shelves below the screen
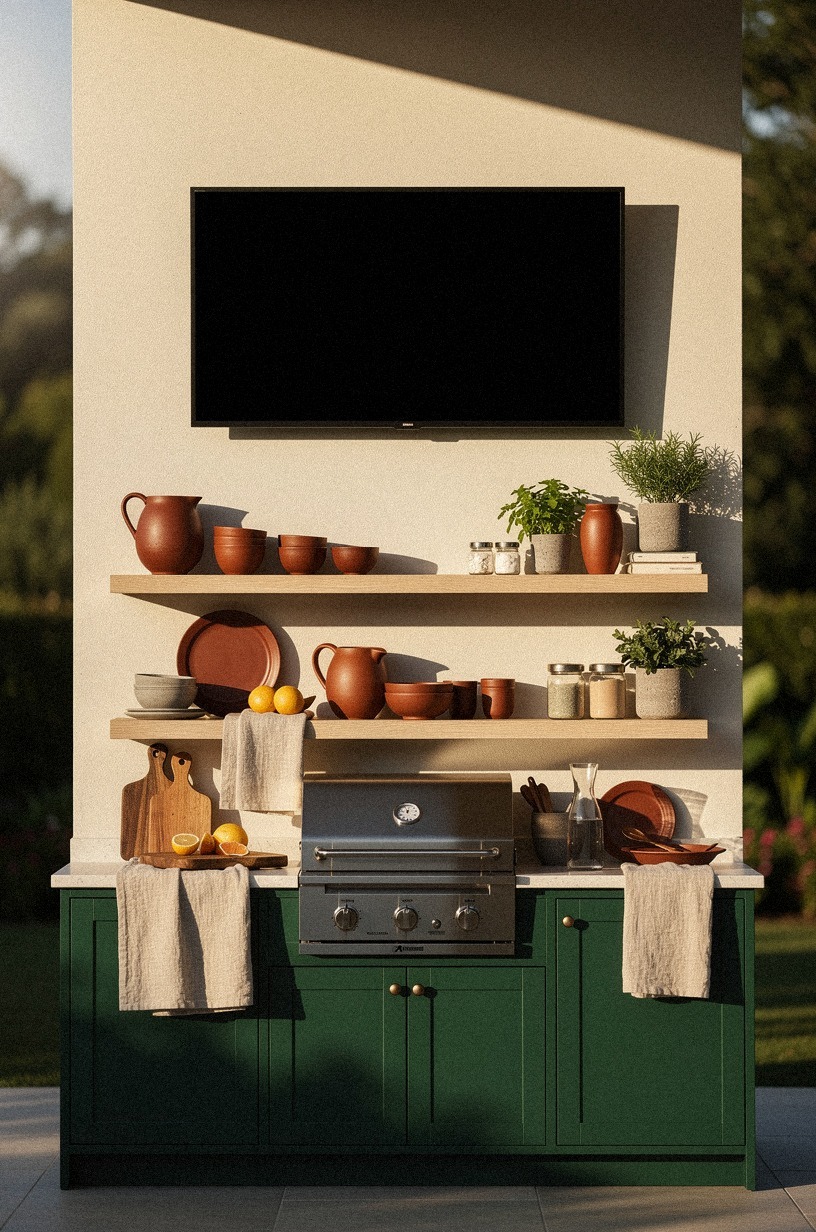
Open shelves under the TV gave me a place for the good-looking useful stuff: rust ceramics, navy tumblers, grill towels, a stack of melamine plates that didn't scream tailgate. The lower cabinets stayed forest green, and that darker base helped the shelves feel collected instead of messy.
But you have to edit hard here. Too many objects and the TV wall starts reading like a store display.
I kept the styling tight, with practical pieces you could reach during a game, and skipped anything fragile or too tiny. Want a calmer version of that layered look? indoor outdoor kitchen ideas for seamless entertaining handles open storage well.
17Pour a concrete ledge for game snacks
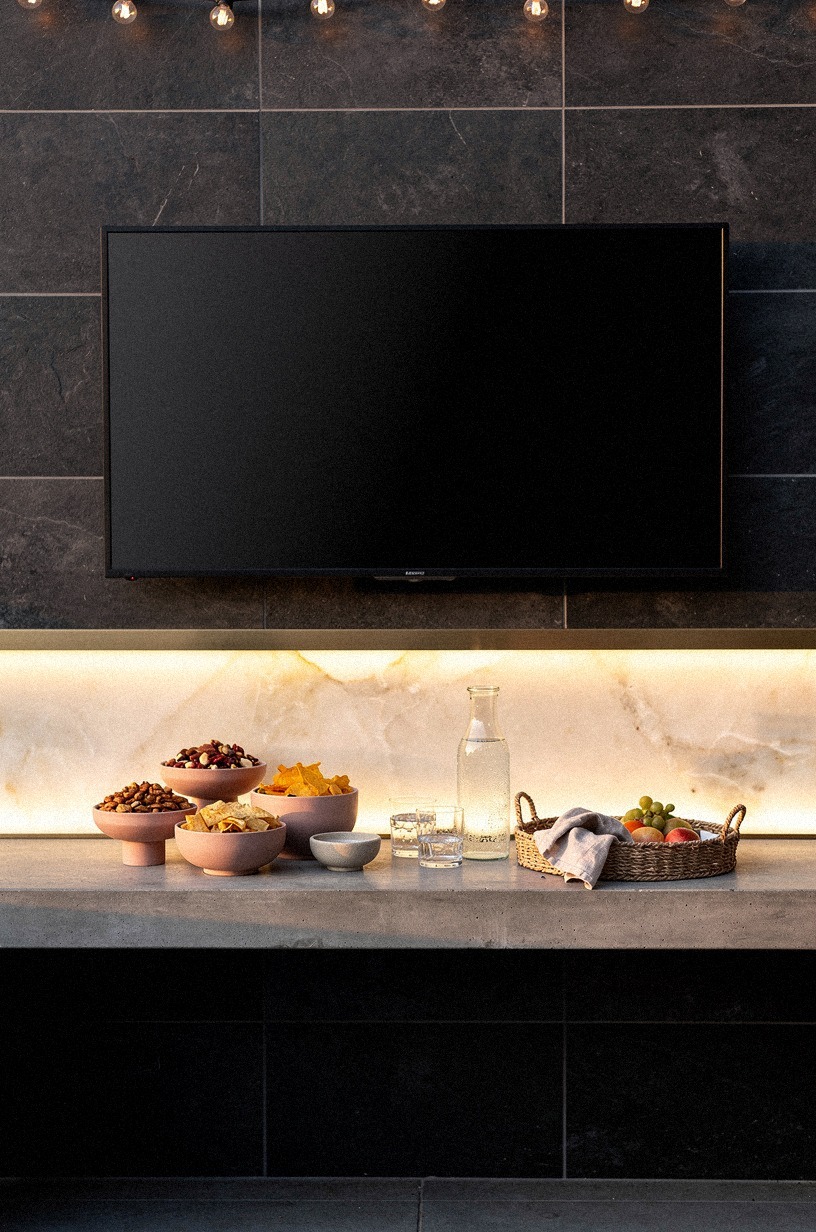
The concrete ledge under the screen looked like a small move on paper. In real life, it became the MVP. Dusty rose serving bowls, charcoal platters, and little stacks of napkins finally had a home that wasn't the main prep zone, so I could cook without guarding every inch of counter.
You don't need anything fussy here. A clean ledge in concrete works because it can handle heat, mess, and repeated use without needing babying.
I centered ours under the TV but offset the styling slightly, which kept the whole front view from feeling stiff. If you're trying to add function without rebuilding everything, how to build an outdoor kitchen on a deck ideas tips is full of smart small moves.
A poured concrete ledge runs about $80 to $150 per linear foot once you factor forming and finishing, which is honest value for what it does on game day.
18Add a mini fridge under the viewing counter

A mini fridge under the viewing counter sounds obvious, but I waited months to do it because I thought the main kitchen inside was close enough. It wasn't. Once cold drinks lived under the walnut counter in the patio zone, traffic back into the house dropped immediately and the party finally stayed where it was supposed to.
I wrapped the area in warm white finishes with camel seating and black accents so the appliance disappeared a bit. That is the move I would recommend to you too.
Don't feature the fridge. Absorb it.
In a smaller outside area, this one upgrade buys more ease than a fancy faucet ever will. Small outdoor kitchen ideas that maximize every inch has more on hiding utility in plain sight.
Worth it on the cheap: a decent outdoor-rated mini fridge lands around $450 to $700.
19Finish with lanterns over the watch party
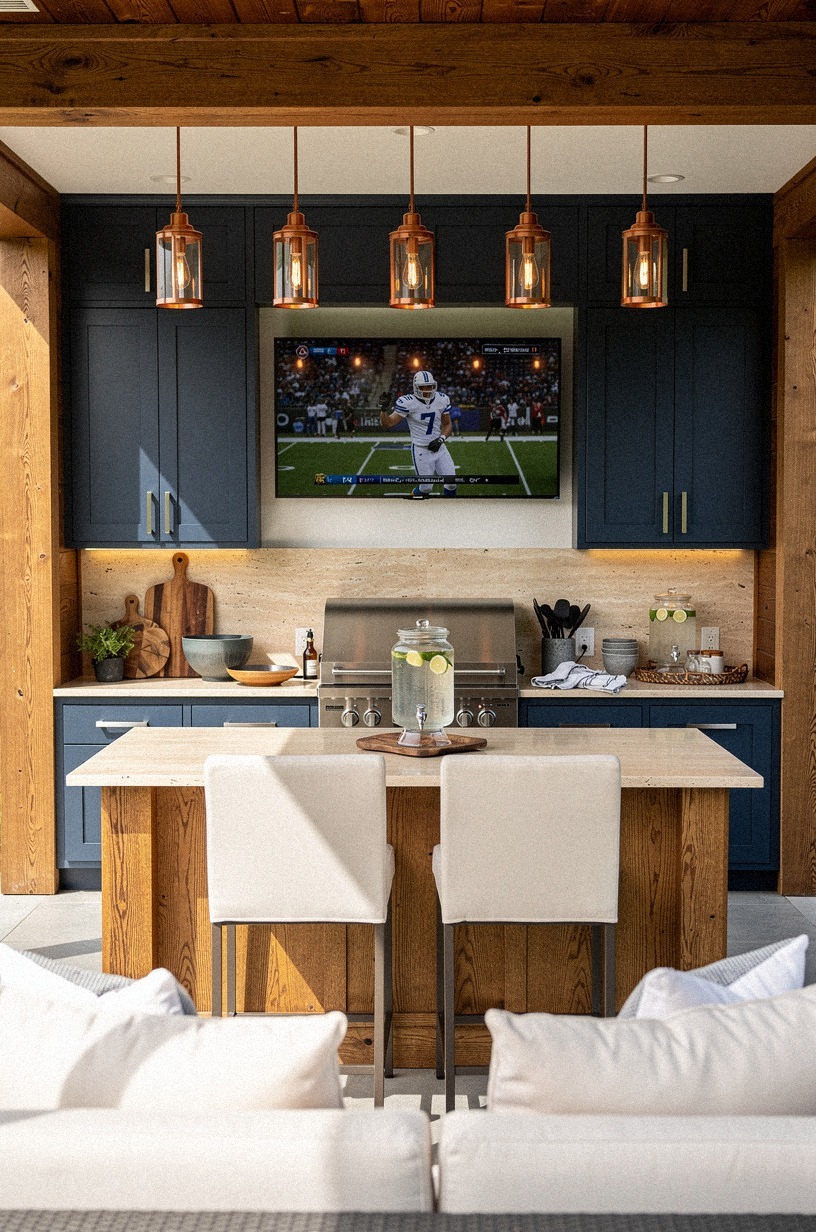
Lanterns were the last layer, and I wish I had done them sooner. Hanging warm lanterns above the watch-party zone pulled the whole patio together once dusk hit, especially with the travertine counters catching that low glow and the TV wall staying just bright enough to read from the bar.
This wasn't about decoration for decoration's sake. It was about making the space feel finished after dark, when game-day hosting either gets magical or falls apart.
I used a mix of sizes so the ceiling line felt relaxed, not too matched, and suddenly the whole setup had that come-stay-awhile energy. If you want the bigger picture on outdoor entertaining flow, outdoor kitchen pool combos for the ultimate backyard is worth saving.
Lanterns cost almost nothing for the value they add once the sun drops.
Is an outdoor kitchen with a TV actually worth the cost?
It depends on how you entertain, but for most homeowners who host more than four times a season, the value is real. A covered TV wall, a slim serving counter, and a swivel stool set will run you around $1,200 to $2,800 all in, and they'll buy you back every weekend you don't have to drag a folding chair across the yard. Skip the stone, skip the custom hood, and you can land closer to $600 if your grill is already in good shape.
Where the cost stops being worth it: full masonry rebuilds north of $25,000, premium appliances you won't use outdoors, and any screen mounted in direct sun. Cheap wins cover most of the upgrade. Splurge only on the items you can feel with your hands every game day.
What budget actually makes sense for a game-day setup?
If you've got $500 or less, focus on the covered wall, a slim ledge, paint, and lighting. That alone turns a tired patio into a watchable space. $1,500 to $3,000 opens up a mini fridge, swivel stools, layered lighting, and a clean tile backsplash without touching the structure. $5,000 and up is when stone, a real grill run, and built-in seating start making sense.
The honest truth is most people stop seeing returns past the $4,000 mark, because the eye stops noticing upgrades after that point. Spend on the layout and the screen protection first; that's where the budget goes farthest.
The Saturday-Only Budget Framework
Here's what I spent first, what I delayed, and what the real ranges look like if you're planning your own outdoor kitchen with TV setup. The short version: you can fake a lot with paint, hardware, and layout, but sightline fixes are where the value starts.
My exact spend landed in the cosmetic end because I reused the grill, kept the shell, and focused on what you could see and feel first. The TV wall, stools, lighting, planter layer, and mini fridge were the stars.
If you're choosing where to start, spend on the layout and the counter heights before you spend on decorative extras. You can recover from plain hardware.
You can't recover from a bar nobody wants to sit at.
The Covered-Screen Rule
If I had to explain the makeover in one sentence, this would be it: protect the screen first, then style around it. Once the TV sat under cover, the rest of the palette made sense. Benjamin Moore White Dove OC-17 on the trim kept the shell bright, while Farrow & Ball Studio Green No.93 gave the lower cabinetry enough depth to feel settled after dark.
You can spend a fortune on stone and still lose if the screen catches glare or the walkway pinches. I would rather have a basic counter in the right place than premium finishes fighting bad sightlines. That is the whole rule.
And the budget advice is the same: spend where the screen lives, save where the eye doesn't linger.
The Two-Zone Game-Day Rule
What fixed this patio wasn't the television by itself. It was the decision to stop asking one wall to do everything.
I split the layout into two honest zones: the cooking run and the viewing run. They talk to each other, but they don't compete. That sounds simple, and maybe it is, but I had to fail at it first before I understood why the old setup felt so frustrating.
I used to think a game-day patio kitchen had to be symmetrical from every angle. Not true. It has to be legible.
When you walk in, you should know where drinks go, where hot food lands, where people sit, and where your eyes rest. That is why the TV wall mattered so much.
It gave the whole backyard living plan a visual north, then every other choice got easier. The cedar slats could frame it. The sconces could warm it.
The stools could orbit it. Even the grasses behind it had a job.
And here is the money point nobody loves hearing: a patio can look expensive and still host badly. I have seen stone counters, a gorgeous hood, and premium bar stools fail because the screen was exposed to glare or the aisle pinched down below 42 inches once people sat down.
That is not luxury. That is a traffic jam with better materials.
If you are designing your own, ask one question before you buy a single finish sample: where will people look when the food is hot and the game is close? Once you answer that, the rest gets sharper.
I made fewer dumb purchases the second I worked that way. You probably will too!
The honest cost of getting this wrong is wasted stone; the honest value of getting it right is every Sunday from September through February.
A Few Things Worth Answering
What is the best Outdoor Kitchen With TV Ideas for the Ultimate Game-Day Setup for a small kitchen?
The best small-space move is a covered TV wall with a slim counter below it and swivel stools at the side. You get view, serving space, and easier traffic without asking for a giant footprint. A compact IKEA style stool or a narrow Article bar seat works well.
Where can I buy Outdoor Kitchen With TV Ideas for the Ultimate Game-Day Setup pieces on a budget?
Target, IKEA, and Wayfair are usually the easiest starting points for stools, planters, and serving pieces. Facebook Marketplace is the cheat code for teak and metal stools if you're patient.
I also check end-of-season outdoor clearance because that's where the good basics hide. Worth checking each spring before you commit to full-price orders.
How much does a Outdoor Kitchen With TV Ideas for the Ultimate Game-Day Setup makeover cost?
A cosmetic makeover usually lands around $300 to $1,500, and a fuller refresh can run $3,000 to $12,000. The free part is layout editing.
Move what you own first. Then buy only what fixes sightlines, serving flow, or weather protection.
Anything past the mid range starts to lose value unless you're rebuilding the shell.
Can I create a Outdoor Kitchen With TV Ideas for the Ultimate Game-Day Setup on a budget?
Yes, and you don't need a full remodel to make it work. Start with the covered wall, a narrow counter, and better lighting.
Cheap wins: paint the base, add lanterns, and repot tall grasses in bigger planters so the space feels more built. You'll see more return from those moves than from a costly stone install.
Is a Outdoor Kitchen With TV Ideas for the Ultimate Game-Day Setup worth it in a small space?
Yes, especially in a smaller patio. Small spaces force better decisions, and that usually means better hosting.
Keep your island clearance near 42 to 48 inches, turn the stools toward the screen, and let one wall do the visual heavy lifting. That's where the value lives.
Is Outdoor Kitchen With TV Ideas for the Ultimate Game-Day Setup a good idea for a rental?
Yes, if you keep the changes reversible. Freestanding counters, removable sconces, peel-and-stick backsplash, and planters do a lot without permanent damage. I would skip built-in stone work in a rental and focus on furniture, lighting, and portable storage instead.
The cost stays low and the landlord stays happy.
If You Only Copy One Move
If I had to pick one, I'd start with the covered TV wall. It fixed glare, traffic, and the whole room's center in one shot.
Get that wall right first. Everything else finally has somewhere to belong.