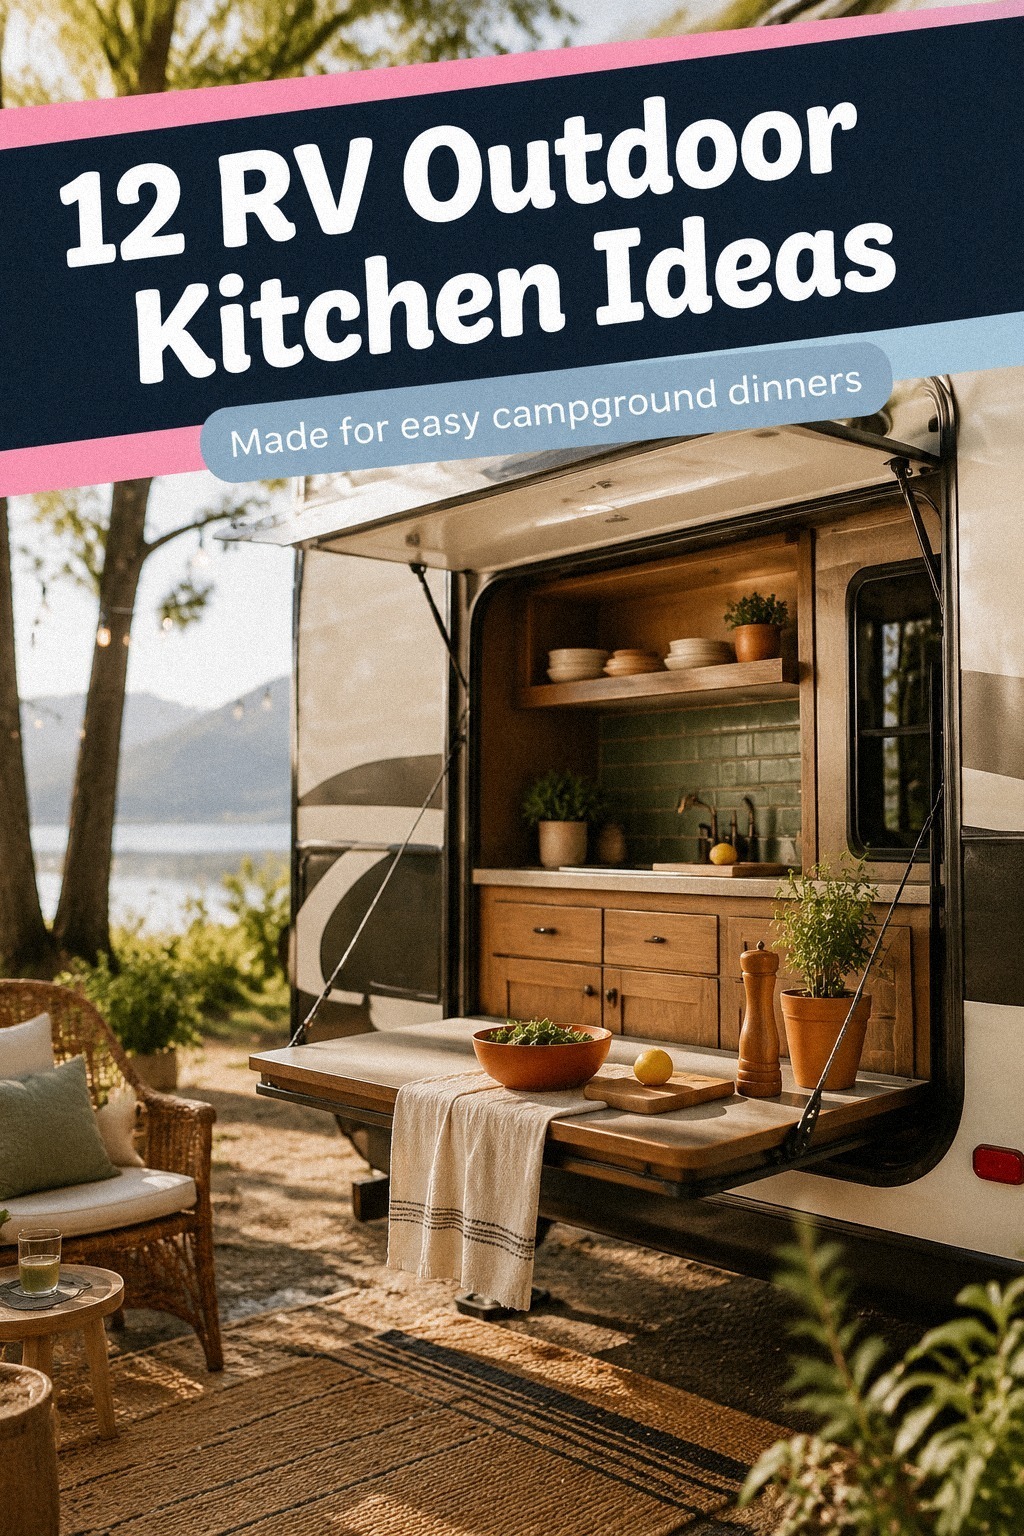
The short answer: the best RV outdoor kitchen ideas make prep faster, cleanup lighter, and dinner feel less cramped. I learned that after trying to cook inside a narrow aisle with two hot burners and one cutting board. It was not the menu that failed, it was the layout. So if your road meals feel fussier than they should, these 12 moves fix the part that slows you down.
- Unfold a side hatch into a prep counter
- Clamp a slim spice rail beside the grill
- Roll out a butcher block cart under awning
- Mount magnetic utensil strips on the exterior panel
- Nest a cooler drawer beneath the cooktop
- Hang lanterns above the slide out kitchen
- Frame the grill bay with cedar slats
- Stack folding shelves beside the service window
- Add a pegboard backsplash for camp cookware
- Tuck collapsible bins under the prep ledge
- Run rope lighting beneath the counter lip
- Style a portable herb tray by the sink
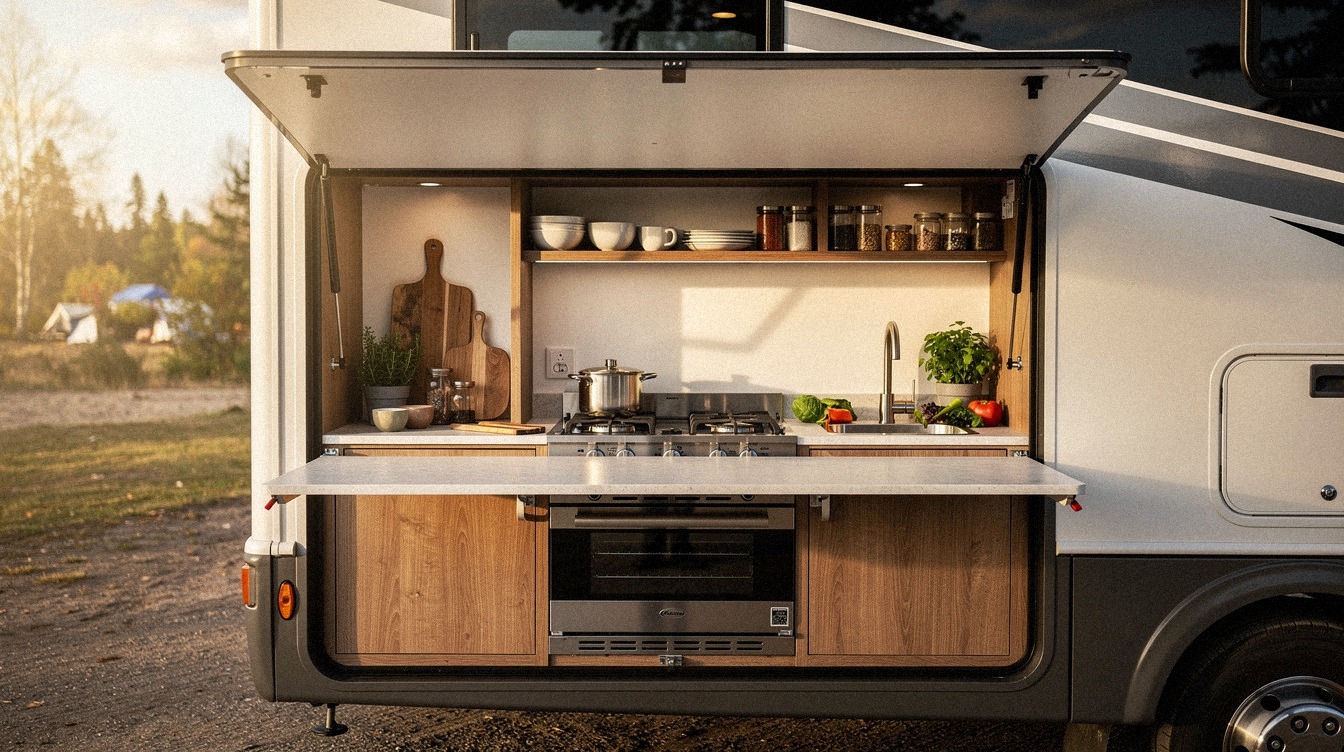
1Unfold a side hatch into a prep counter
Start with the hatch you already have, then treat it like a real prep station instead of a flimsy lid. In the photo, the open panel sits dead center with the compact grill, sink, and work surface balanced around it, and that symmetry is exactly why it works.
You want your outdoor cooking space to feel intentional, soft, and welcoming, not like you dumped gear on the RV wall and hoped for the best. I like keeping the counter close to the standard 36 in working height when I add a topper, because your shoulders don't tense up after ten minutes of chopping.
Use a sealed acacia butcher block topper or a cut-to-fit HDPE marine board insert, mounted on stainless steel piano hinge hardware, if your factory hatch feels too slick. A shallow tray for oil. One folded towel by the sink.
Tongs within reach. If you're planning a tighter footprint, the ideas in small outdoor kitchen ideas that maximize every inch make the same case on a bigger scale.
But don't pile three appliances here. One grill, one prep zone, one landing spot for plates, and you'll move faster every single time.
The honest cost of this move lands between $40 and $120 depending on whether you go sealed acacia or HDPE, and the value it adds is real because it shortens every single cook session.
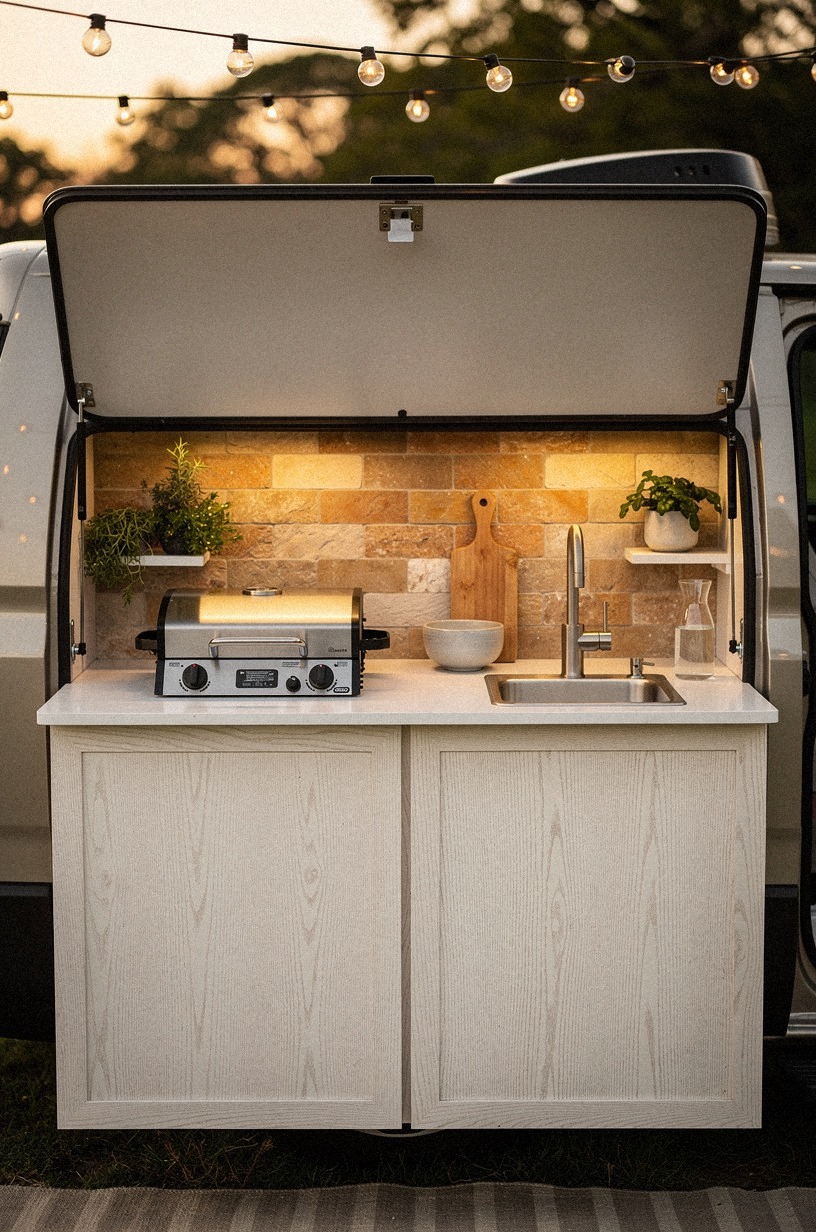
2Clamp a slim spice rail beside the grill
Clamp a narrow rail right beside the grill controls, not behind you, not buried in a cabinet. The first-person view in the image makes that clear, because you can see the jars, the control knobs, the prep ledge, and the RV service wall all in one glance.
That's the part most people miss. If your seasonings live two steps away, your grill setup turns into a constant back-and-forth shuffle, and dinner cools while you hunt for cumin in a dim, moody corner.
I prefer a matte stainless steel rail with 2-inch jars and low-profile clamps so the wall still feels clean and orderly. Three jars are plenty: salt, pepper, one blend you use on repeat.
More than that and it starts reading like clutter in a tiny outside cooking area. For more compact workflow ideas, outdoor kitchen ideas for small backyards big function littl has the same lesson in a fixed yard.
And if you paint the rail backing Sherwin-Williams Evergreen Fog SW 9130, the jars pop without screaming for attention, and the whole wall reads more serene.
Worth it? For about $25 to $60 you get a faster, calmer grill. That's a solid value for a clamp-on piece you can move rig to rig.
3Roll out a butcher block cart under awning
Roll a small cart under the awning and let it do the job your built-in kitchen can't.
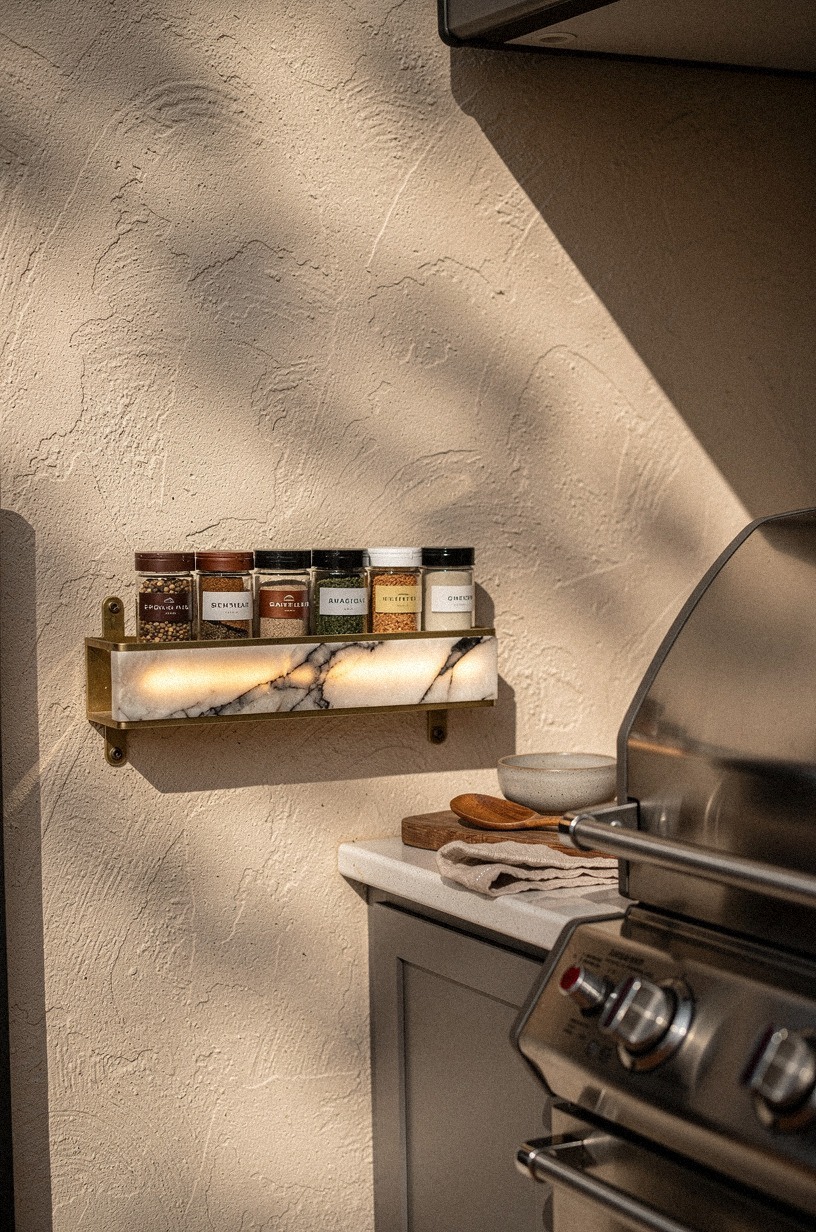
4Mount magnetic utensil strips on the exterior panel
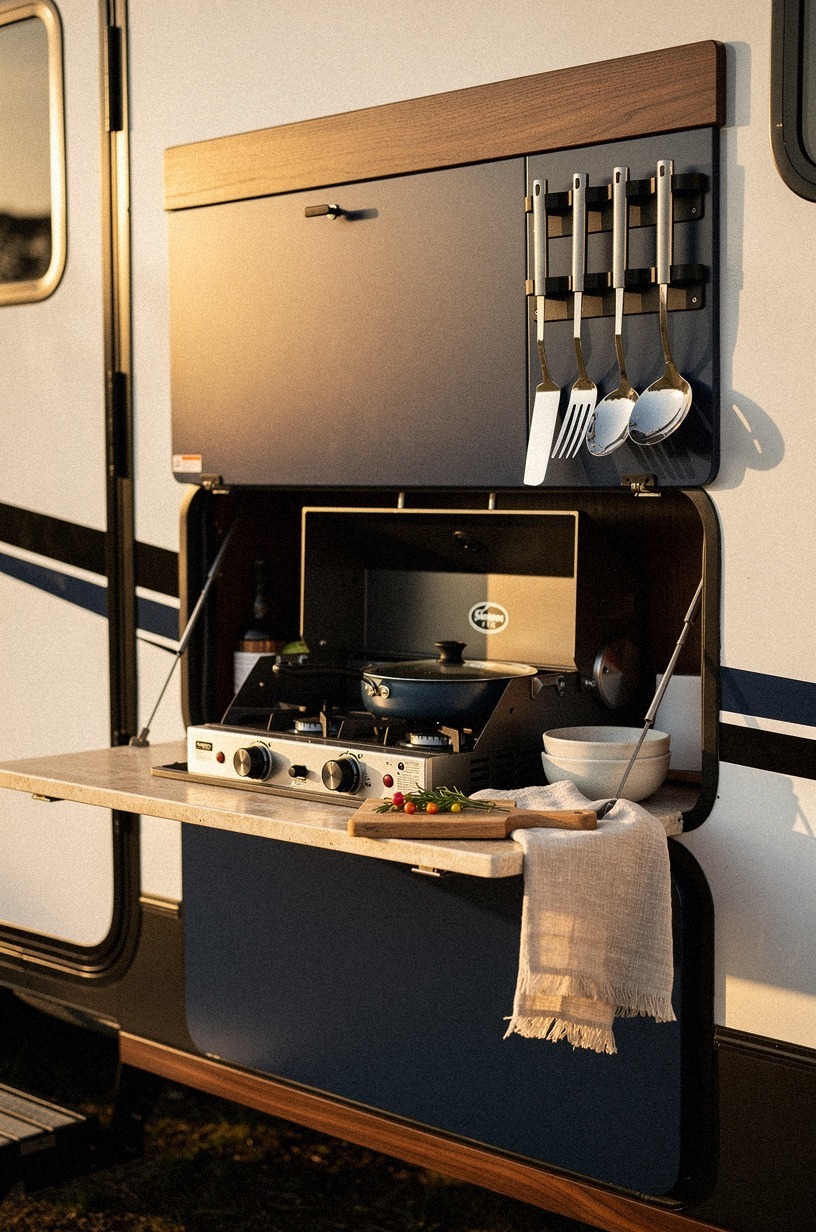
Mount magnetic strips on the exterior panel so your most-used tools sit at eye level, right beside the cook station. In the angled editorial shot, you can still see the grill bay, prep ledge, and storage, which keeps the setup grounded in real use instead of gadget hype.
This is one of my favorite handmade outdoor kitchen moves because it clears the drawer without adding bulk, and the steel strip reads elegant against most RV wall finishes. Why let tongs eat your whole shallow cabinet when the wall can do the work?
Go for a slim powder-coated steel strip and keep it to four or five pieces max: spatula, tongs, shears, bottle opener, thermometer. I wouldn't hang heavy cast iron here, because road vibration wins eventually.
A painted backing board in Benjamin Moore White Dove OC-17 looks crisp against darker trim and makes the metal read cleaner. For more wall-smart planning, how to build an outdoor kitchen on a deck ideas tips breaks down similar vertical thinking. And yes, it feels a little chef-y in the best way.
It's cheap ($15 to $40), renter-friendly, and the value shows up every time you reach for a spatula without digging.
The Road-Rate Budget Rule
You don't need a full remodel mindset for an RV outdoor kitchen, but it helps to know the real cost ladders before you buy random parts. I use this table as a gut check when a simple refresh starts creeping into appliance territory. Spend smart, edit first, then add.
For RV work, most of your wins land in that first bucket. A rail, better light, sealed wood, removable bins, and one durable cart can change the whole mood without dragging you into a $3,000 spiral. If you're studying where to spend and where to stop, small outdoor kitchen ideas that maximize every inch is a smart companion read.
5Nest a cooler drawer beneath the cooktop
Slide a cooler drawer right beneath the cooktop so cold ingredients stay in the same zone as the heat.
6Hang lanterns above the slide out kitchen
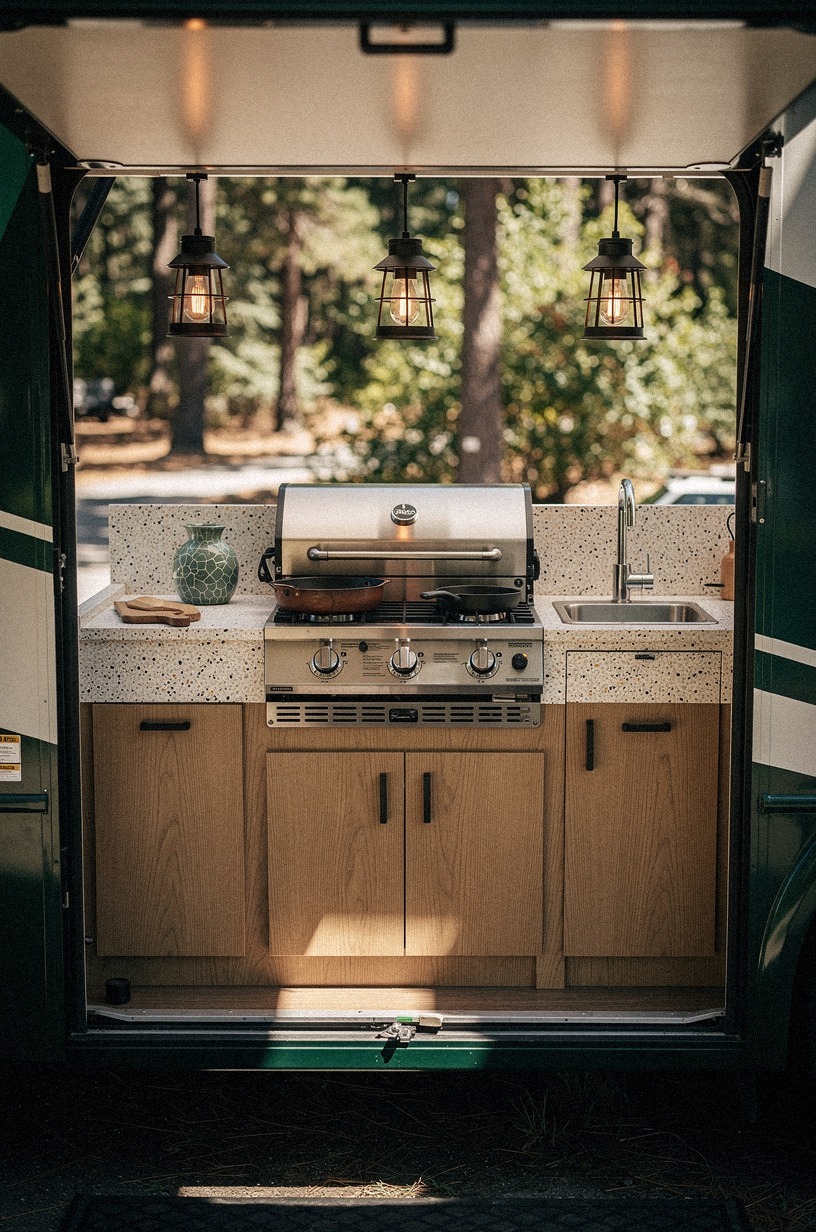
Hang lanterns above the slide-out kitchen so the whole station stays usable after sunset. The image looks through the RV doorway toward the exterior kitchen, and that layered view is exactly how you experience camp dinner in real life: inside, outside, back and forth, plates moving, someone reaching for foil.
Overhead light alone is usually too harsh. You want a soft, calming stack of glow that makes the counter readable without flattening the scene.
This is where I use what I call the Three-Height Light Stack. One lantern above the center line, one lower glow near the prep edge, one dim source farther back on the table.
A pair of rechargeable LED lanterns in warm 2700K light works better than icy white bulbs, and a Sunyear canvas strap keeps the hang clean. If you like nighttime setups that spill into lounging, outdoor kitchen hot tub ideas for a resort style yard has the same layered-light logic.
Two solid lanterns run $40 to $90 each. The value isn't the brightness, it's how much longer you'll cook outside.
7Frame the grill bay with cedar slats
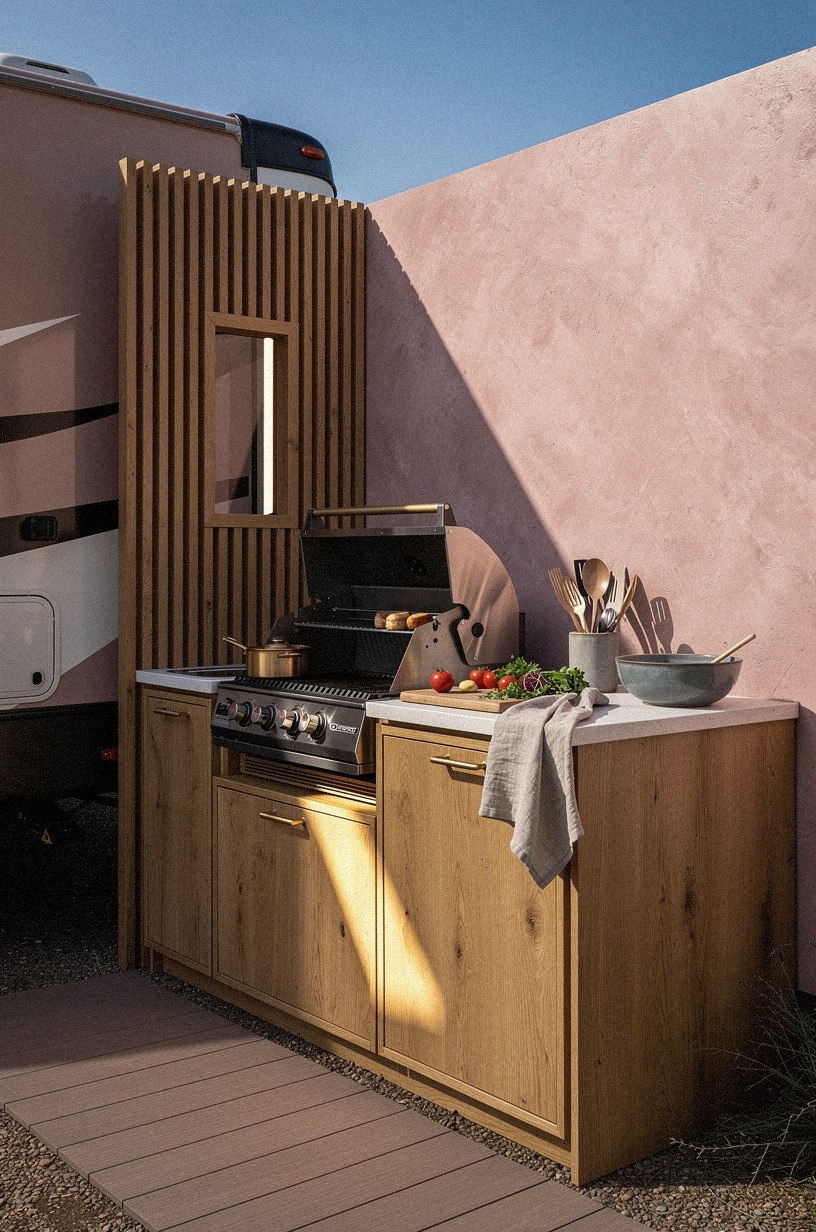
Frame the grill bay with vertical cedar slats so the cooking zone looks deliberate from across camp.
8Stack folding shelves beside the service window
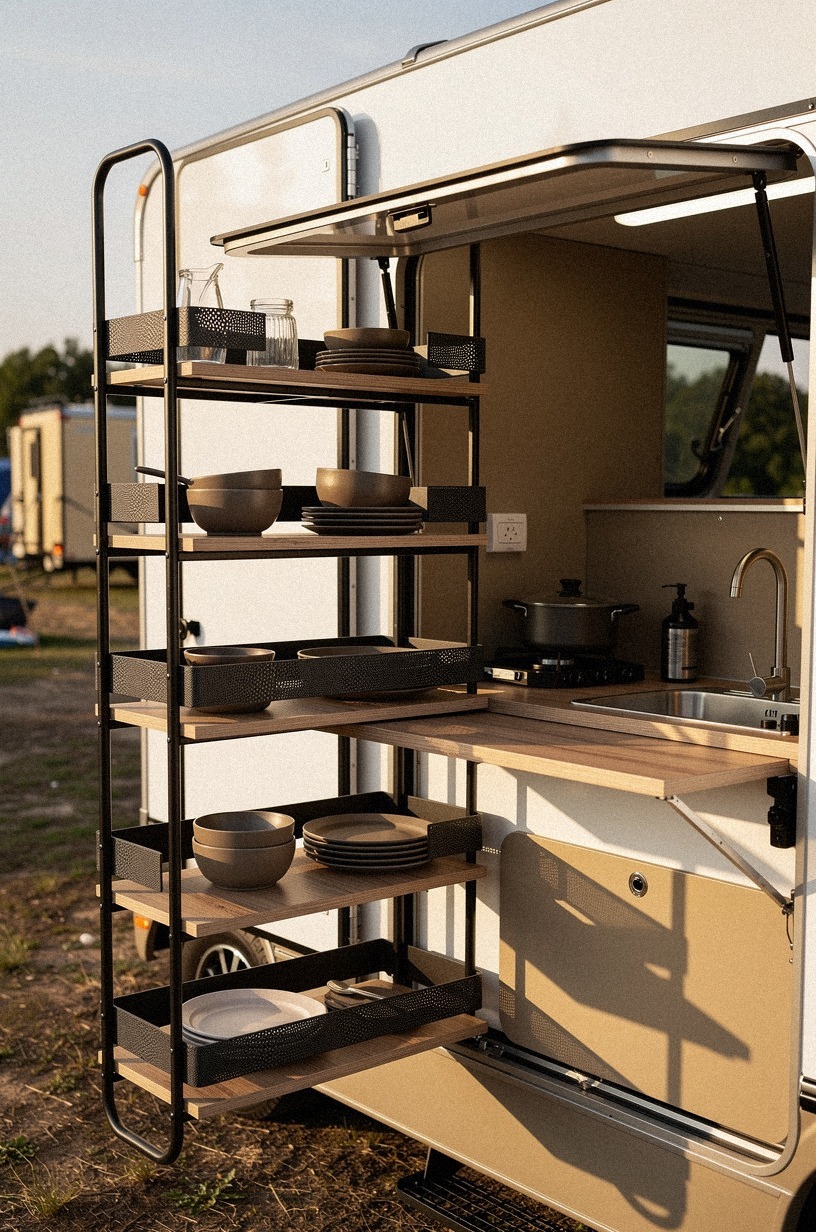
Stack folding shelves beside the service window and let them open only when you need them. The relaxed three-quarter view in the photo shows the open window, shelves, prep counter, compact sink, and that valuable vertical strip of wall that usually goes wasted.
In a small outside cooking area, temporary landing space beats permanent bulk every time. I made the mistake of adding one chunky fixed shelf years ago, and it caught elbows, chair backs, and shirts nonstop until I tore it out and started over.
Slim powder-coated aluminum shelves with locking hinges are the move here, especially if each shelf is shallow enough for plates, buns, or a coffee tray. Top shelf for serving.
Middle for prep. Bottom for cleanup supplies in a low bin.
If your service window already feels busy, paint the bracket area Benjamin Moore White Dove OC-17 so the hardware disappears and the rig feels brighter and more welcoming. For more tiny-footprint planning, outdoor kitchen ideas for small backyards big function littl translates surprisingly well to RV life.
A set of two folding aluminum shelves runs $50 to $150. Worth it the first time you stack a plate without bumping a chair.
9Add a pegboard backsplash for camp cookware
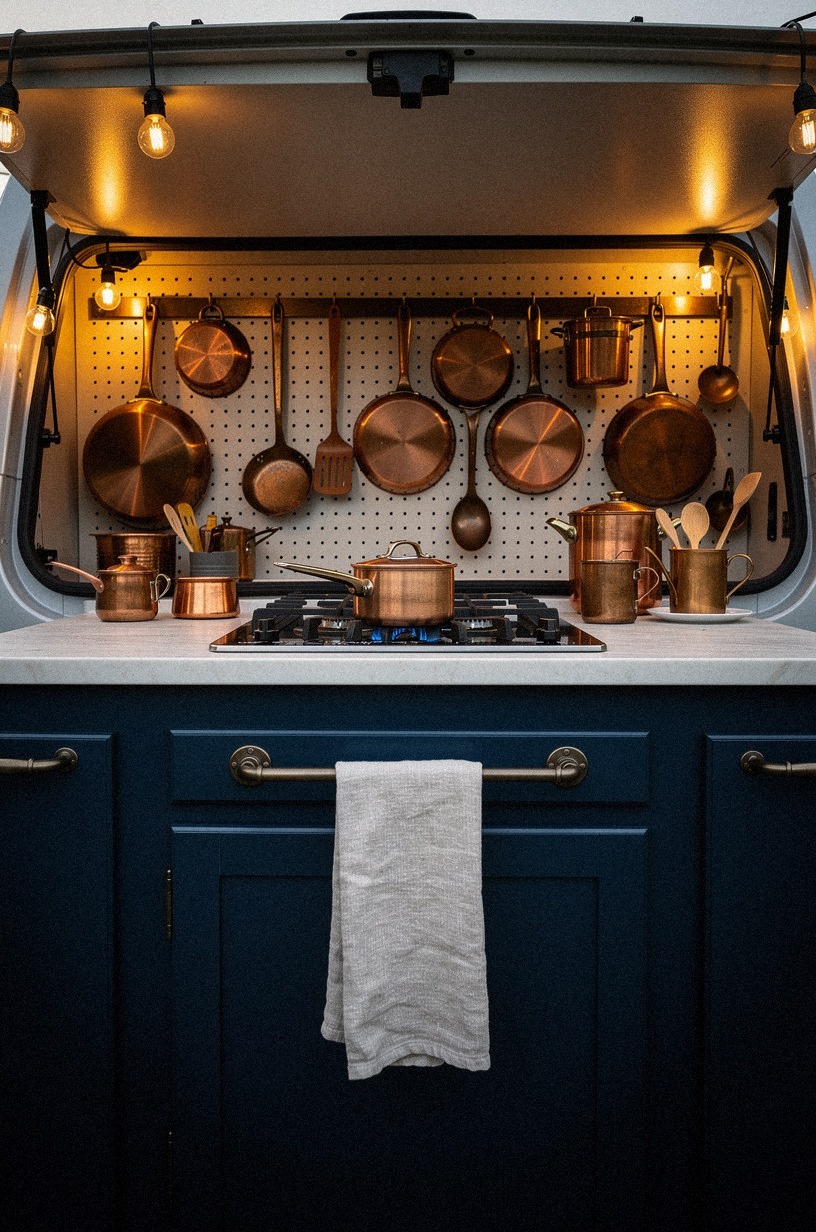
Add a pegboard backsplash when your cookware keeps swallowing drawer space. The low floor-level shot looks up at the grill bay, the hanging pans, and the prep counter, so the storage reads like part of the architecture instead of extra stuff clipped on at the end.
That's the sweet spot. You want your camp cookware visible enough to grab fast, but ordered enough that the wall still feels calm.
A painted steel pegboard panel handles road wear better than thin hardboard, and black hooks disappear nicely against a darker finish. One skillet.
One saucepan. A mesh basket for scrubbers.
A narrow shelf for oil. That is plenty. If you're building out more of a permanent-feeling cooking wall, how to build an outdoor kitchen on a deck ideas tips gives you larger-scale storage ideas to borrow.
And if you want the panel to feel softer and more organic, Sherwin-Williams Evergreen Fog SW 9130 is a smart color because it plays well with metal, cedar, and stainless.
Pegboard panel plus hooks: $30 to $80. A real value play for the visibility gain.
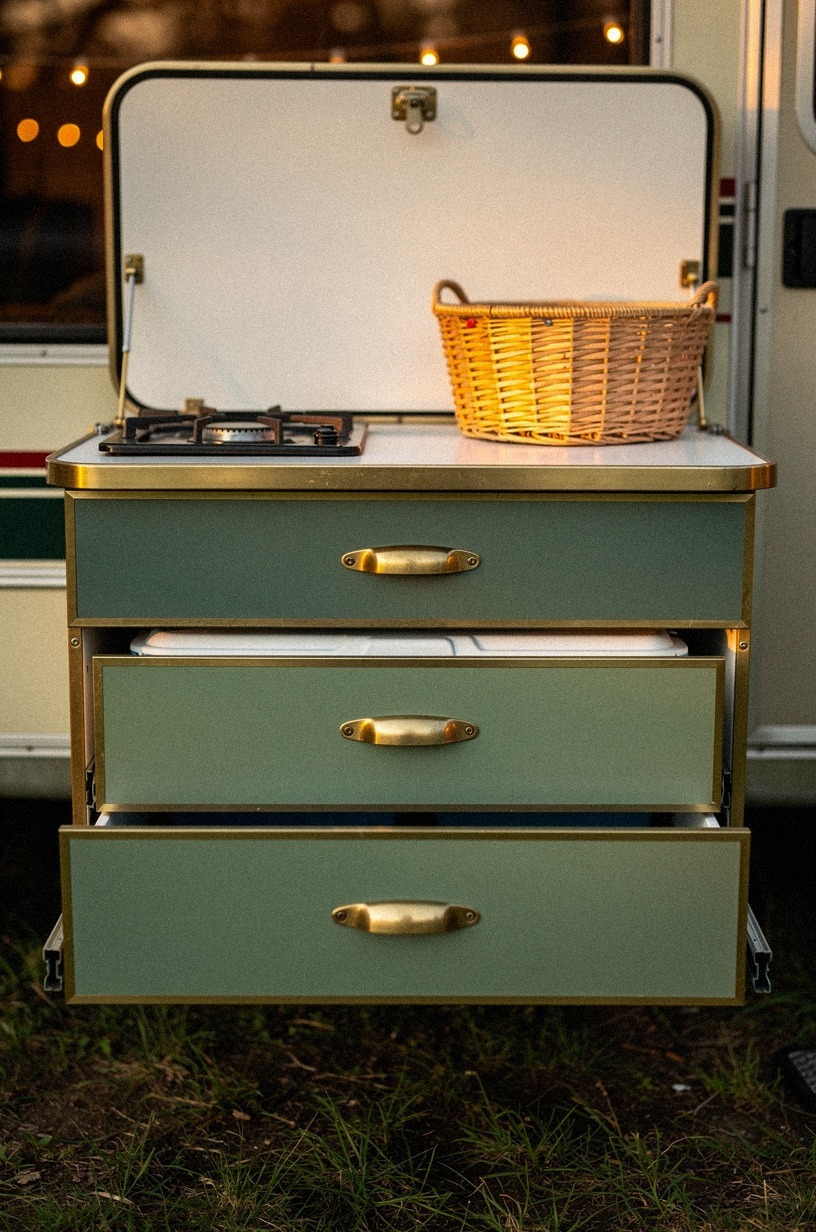
10Tuck collapsible bins under the prep ledge
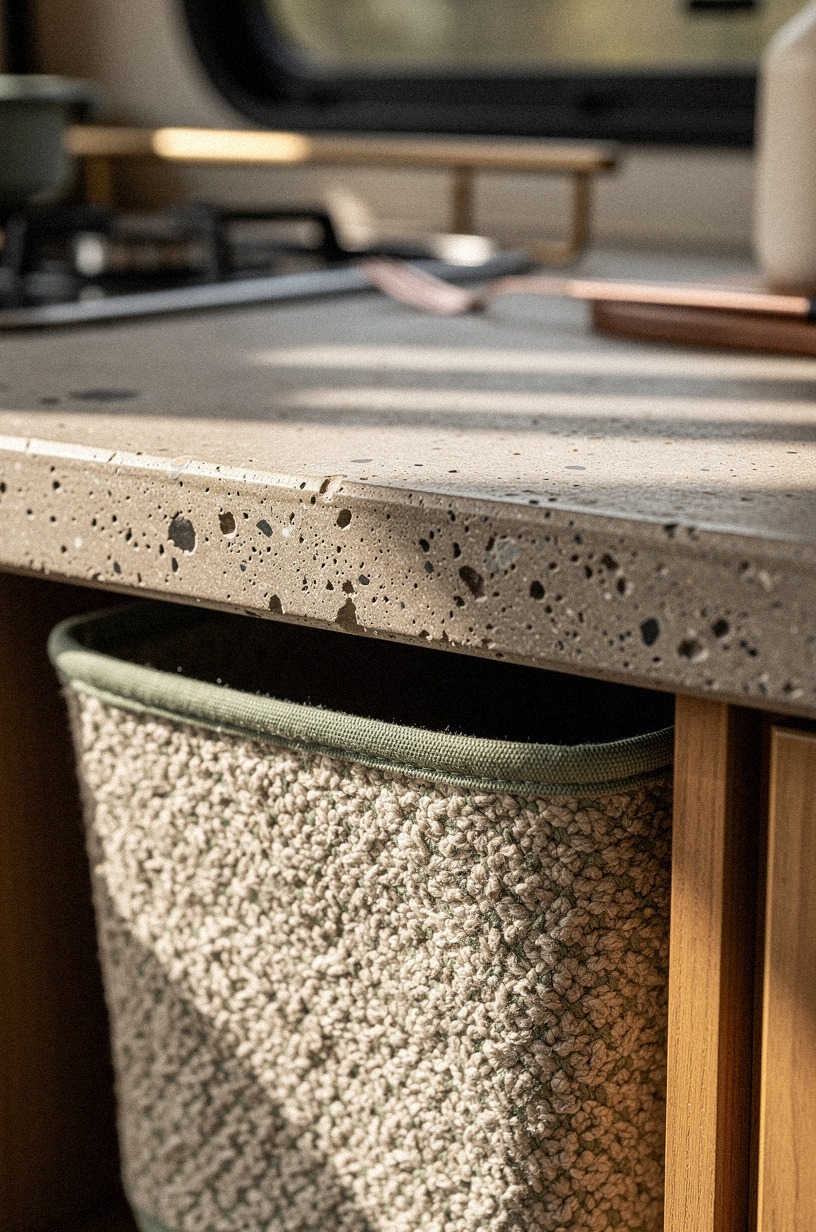
Tuck collapsible bins under the prep ledge so the mess disappears before it spreads. The close-up image zeroes in on the bin rim, the bouclé liner texture, and the poured-concrete-look counter edge, which tells you this idea works on texture as much as function. A good bin shouldn't scream utility.
It should slide in, hold produce or trash bags, and vanish when you're done. But the liner matters too, because rattly plastic is annoying in a small rig.
I like a soft canvas bin liner or a washable bouclé-look insert inside a silicone collapsible frame, especially under a gray concrete-laminate counter. One bin for towels. One for pantry overflow.
One for trash only if you can vent it fast. The same hidden-storage logic shows up in small outdoor kitchen ideas that maximize every inch, and it works just as well on the road.
Little change, modern look, huge relief!
Three quality bins run about $25 to $70 total. Cheap fix, real relief.
11Run rope lighting beneath the counter lip
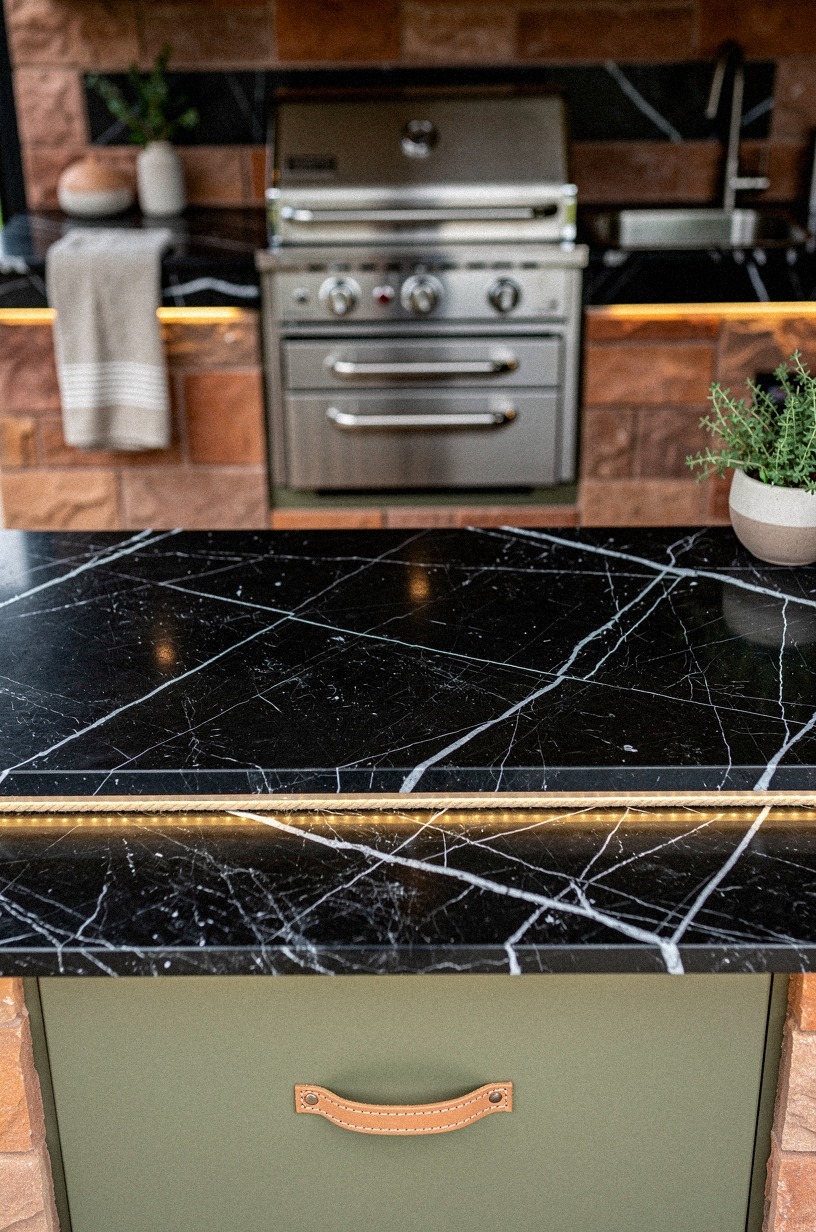
Run rope lighting beneath the counter lip if you want the kitchen to feel finished after dark. The ground-level shot skims across the Nero Marquina marble look surface with its sharp white veining, then catches the glow tucked under the edge.
That's why under-counter light beats another overhead puck. It traces the form of the station and lights your hands without blasting the whole campsite.
If you've ever diced onions under a glaring porch light, you know how tiring bad light gets.
But I stick with flexible 12V warm rope light and hide it behind a slim aluminum channel so you don't see dots, only wash. Keep the run on the front lip, then stop before corners get fussy. A dimmer is worth it, full stop, because the difference between glaring and soothing is just a few clicks.
For bigger entertaining layouts where light guides movement, indoor outdoor kitchen ideas for seamless entertaining and outdoor kitchen with tv ideas for the ultimate game day setu both show how glow can organize a zone.
Rope light plus channel plus dimmer: about $35 to $90. Worth it for the calm after sunset.
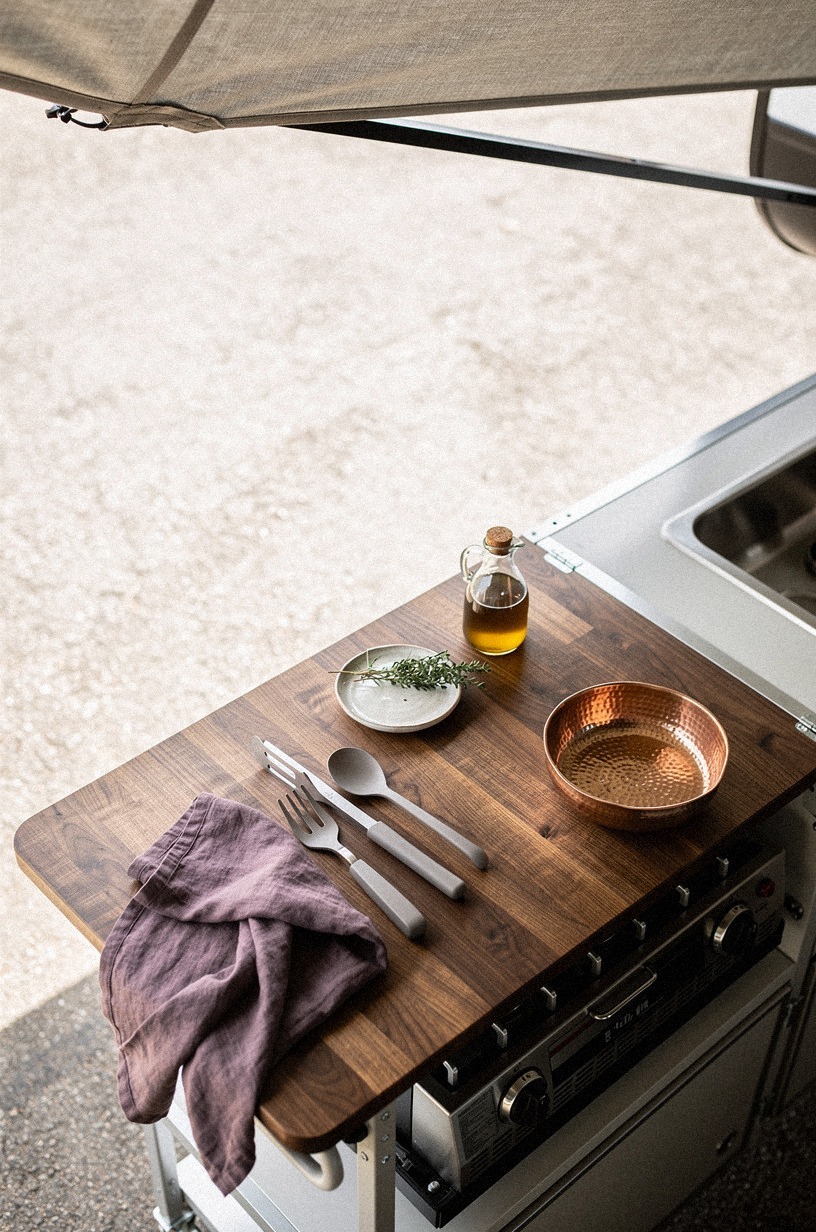
12Style a portable herb tray by the sink
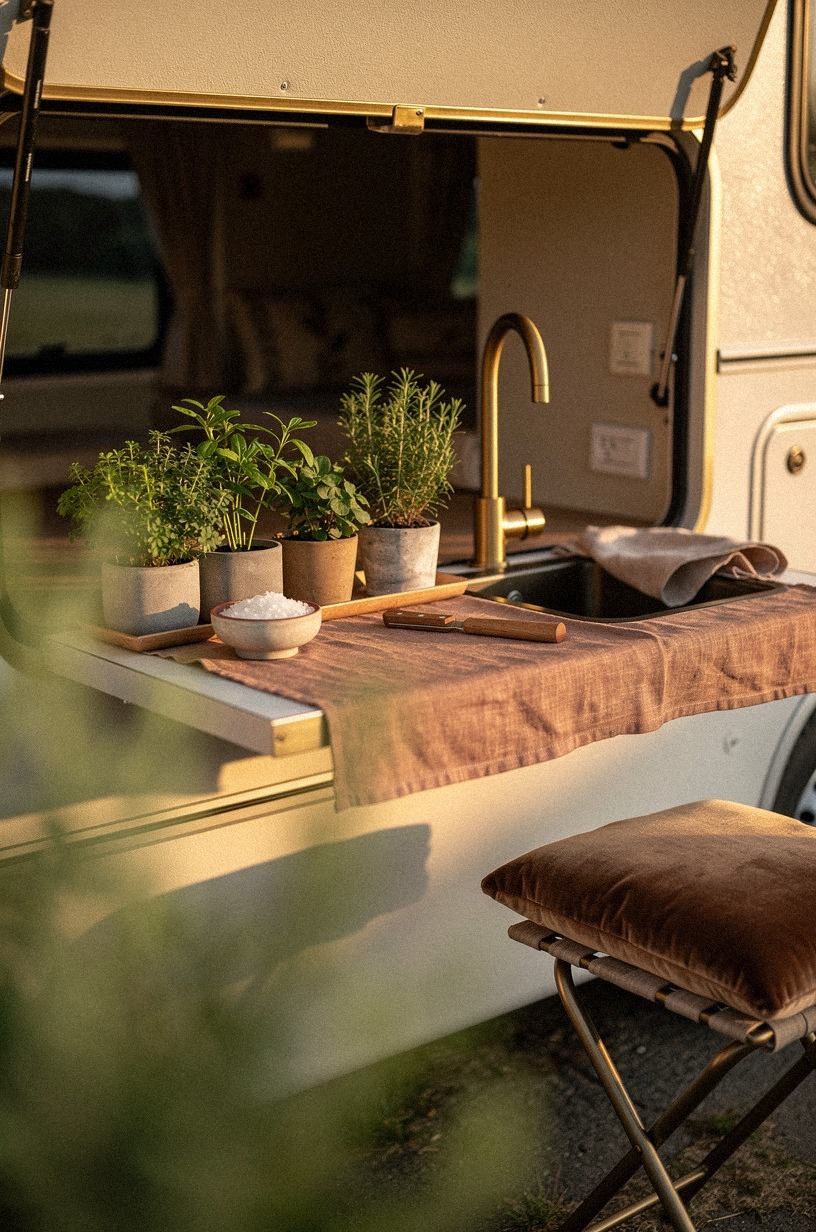
Style a portable herb tray by the sink so the kitchen looks alive even before dinner starts.
The Campground Gravity Rule I Keep Coming Back To
What I keep relearning with RV kitchens is that the best setup isn't the one with the most gear. It is the one that pulls you into the same calm, soothing sequence every time: set down the bag, rinse produce, chop, reach left for salt, turn, cook, plate.
When that sequence is broken, road cooking feels harder than it is. When it's clean, even a simple burger night feels oddly generous.
I used to think the fix was more storage. More hooks, more caddies, more clever little organizers clipped onto every spare inch.
That wasn't it. The real shift came when I started editing the zone by motion instead of by category. If your spices are pretty but two steps away, they aren't helping you.
If your lantern looks nice but throws no light on the board, it's decor posing as function. And in a tiny outdoor cooking space, posing gets old fast and feels more cramped than charming.
This is also where money can go sideways. People see a handsome counter and immediately think stone, faucet swap, or a full cabinet redo.
Sometimes that's right. But on the road, value usually comes from fixing friction first.
A better prep surface. Light at the right height.
A drawer or bin where you stop dropping things. The glamorous stuff can wait. The move that saves your back and your patience is almost always worth more.
I've also learned that warmth matters, maybe more than I expected. Not fake cabin props.
Real warmth. Cedar that tones down the metal.
Lantern light that softens the service wall. Herbs by the sink that make breakfast look inviting, even if it's just eggs and toast.
That's why so many fixed-home ideas in outdoor kitchen pool combos for the ultimate backyard or indoor outdoor kitchen ideas for seamless entertaining still translate here. The square footage changes, the mood stays elegant, and the psychology doesn't.
And if you're torn between adding one more gadget and making the zone easier to move through, I'd choose movement. Every time.
A kitchen that lets you cook without little irritations piling up is the one you'll keep using, and a soft, inviting mood is the side effect that makes the whole rig feel more like home. And that's the whole point, isn't it?
The Questions I Get Asked Most
What is the best 12 RV Outdoor Kitchen Ideas for Cooking on the Road for a small kitchen?
The best one for a small kitchen is the hatch prep counter plus the slim spice rail, because together they create more working room without stealing floor space. Think one surface, one reach zone. A IKEA BROR cart is a smart third piece if you need extra landing space, and the total budget stays well under $300.
Where can I buy 12 RV Outdoor Kitchen Ideas for Cooking on the Road pieces on a budget?
Target, IKEA, and Wayfair are the easiest starting points for shelves, carts, bins, and lighting. Amazon handles quick-ship rope light and lantern straps. Facebook Marketplace is great for cheaper solid wood carts if you're willing to seal them yourself.
I also check West Marine when I want hardware that won't rattle loose on rough roads.
How much does a 12 RV Outdoor Kitchen Ideas for Cooking on the Road makeover cost?
Most RV outdoor kitchen makeovers land around about $100 to $300 if you're sticking to lighting, rails, bins, and surface upgrades. Free wins count too: editing clutter, re-zoning tools, and moving serving pieces closer to the hatch. That's where I'd start before buying anything big.
Can I create a 12 RV Outdoor Kitchen Ideas for Cooking on the Road on a budget?
Yes, and you don't need a giant shopping list to get there. Focus on one free reset and two cheap upgrades totaling around $60 to $120.
Reassign one drawer. Add a clamp-on rail.
Bring in a collapsible bin or warm lantern. That mix usually changes the space more than a random gadget haul.
Is a 12 RV Outdoor Kitchen Ideas for Cooking on the Road worth it in a small space?
Yes, it's worth it because a small space rewards layout fixes fast. You feel every inch working harder right away, and the value compounds every trip. Keep 42 to 48 in of clearance in front of the main prep zone if you can, and avoid anything that blocks the hatch swing or service window.
Is 12 RV Outdoor Kitchen Ideas for Cooking on the Road a good idea for a rental?
Yes, especially if you stick to no-damage upgrades that cost less than $200 total. Think clamp-on storage, removable lights, and freestanding carts.
Peel-and-stick backsplash film can work on protected panels, and tension-hung accessories are easier to undo later than drilled hardware. Small outdoor kitchen ideas that maximize every inch has more renter-friendly thinking.
The First-Motion Fix I'd Do Tonight
If I had to pick one, I'd start with the side hatch prep counter. It fixes cooking flow first, so every other upgrade works harder. Pin that move for later and save this small outdoor kitchen guide.