
 by
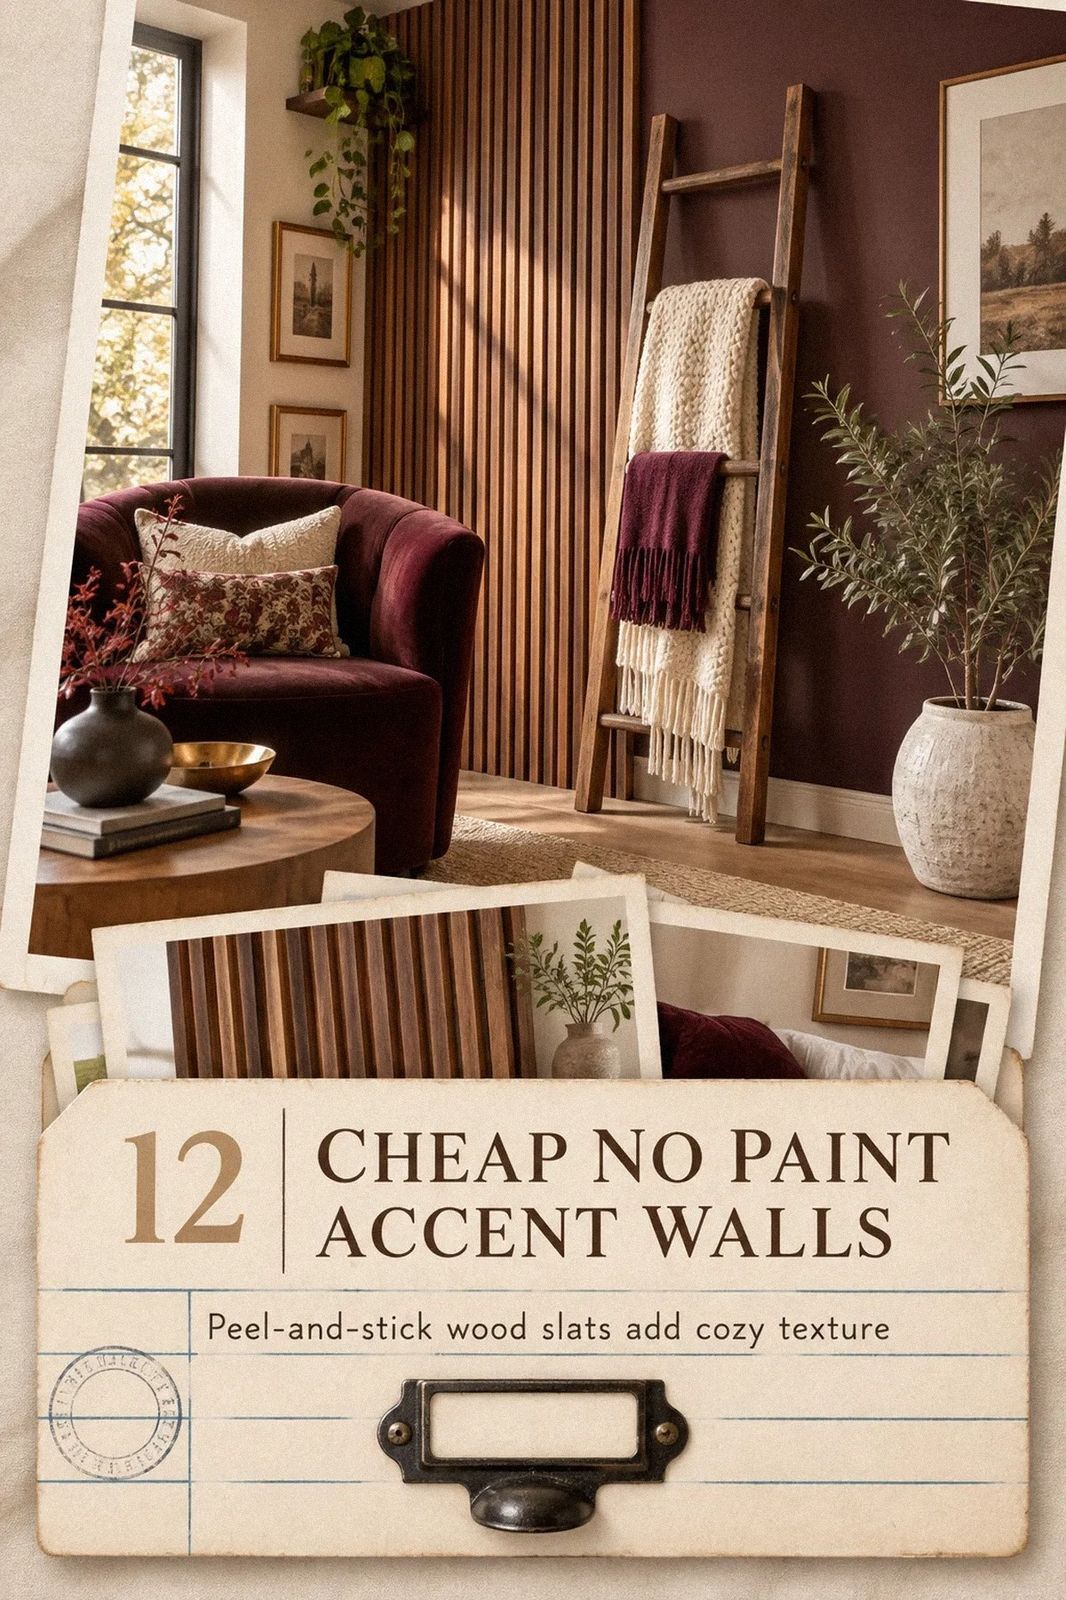
Cheap accent wall ideas under $50 with no paint at all can change a room for about the cost of one casual dinner. I tested removable layers, thrifted art, fabric, and warm lighting on one tired wall, and the result felt surprisingly inviting without a brush, fumes, or landlord conversation. No paint, no fumes, no lease drama!
Editor's note
Start with the largest removable layer you can borrow, thrift, or make. Then add one useful vertical element and one living or tactile detail. That order keeps a budget wall intentional instead of crowded.
Here's what it looked like before
The wall was blank, cold, and slightly awkward beside the sofa. The furniture floated too far away from it, the lamp sat in the wrong corner, and the overhead light made the whole room feel flatter after sunset.
I lived with that wall longer than I’d admit. You don’t need a renovation to fix a space like this. You need one visual decision that gives the wall some weight, then a few smaller choices that support it.
The surrounding walls were Sherwin-Williams Agreeable Gray SW 7029, so I didn’t want a dark permanent accent color competing with them. I wanted warmth, texture, and a setup I could remove without repairing drywall.
- Layer the No-Paint Wall Ladder
- Swap Bare Wall Space for a Textile Grid
- Anchor the Wall With One Oversized Thrift Find
- Build the Three-Height Light Stack
- Skip Symmetry and Use the Texture Echo Rule
- Frame a Removable Fabric Panel
- Float a Narrow Shelf Above the Furniture
- Can You Make a Bold Wall With Paper Layers?
- Mix Wood Tones Instead of Matching Them
- Hang Thrifted Plates With the 57-Inch Rule
- Frame a Folded Quilt Instead of Mounting It
- Finish With the Warm Corner Method
1Layer the No-Paint Wall Ladder
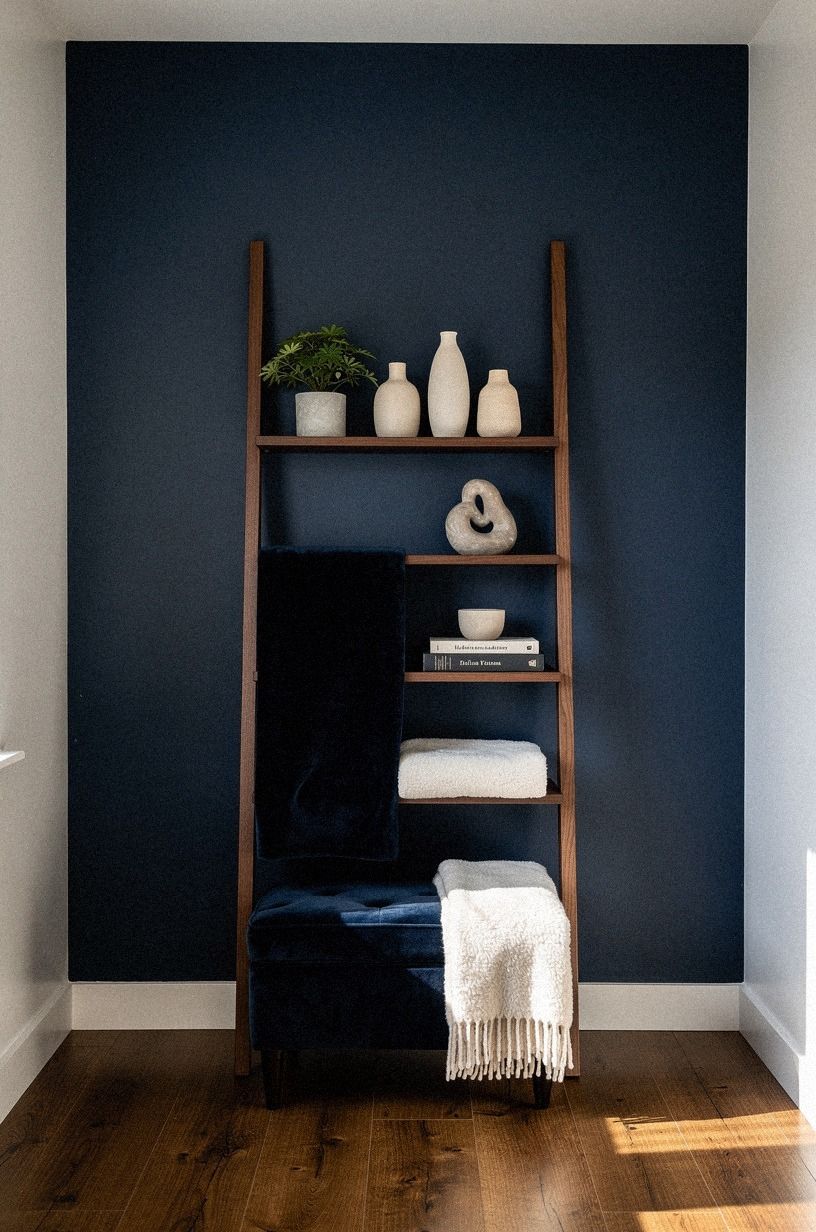
I started with the simplest of these cheap accent wall ideas: a large textile, one narrow shelf, and something organic below it. The first layer was a deep-pile mohair velvet textile in navy, white, and walnut, draped over a tension rod. It created a broad, tactile surface without adhesive, and the wall stopped looking unfinished almost immediately.
The throw cost $12 at a secondhand shop. The tension rod was $9, and the clips were $4. I’d choose a textile with a little unevenness rather than a perfectly printed piece.
A soft velvet edge gives the arrangement character, while a stiff synthetic blanket can make the wall feel like a temporary backdrop.
The second layer was a slim IKEA MOSSLANDA picture ledge, which cost $15. I used it for one small frame, a brass cup, and a short branch.
You’ll want about four inches between the textile and the ledge. Too little space makes the layers merge, while too much makes the wall feel disconnected.
I kept the objects low and quiet because a crowded shelf would’ve made the wall feel busy. The arrangement also borrowed the removable, graphic spirit of these DIY checkered wall ideas for renters, though I preferred the softer result of velvet.
The total effect was warm, not precious. That distinction matters. I’d rather have a relaxed wall with one imperfect textile than a collection of tiny decorations trying to prove that the room is finished.
2Swap Bare Wall Space for a Textile Grid
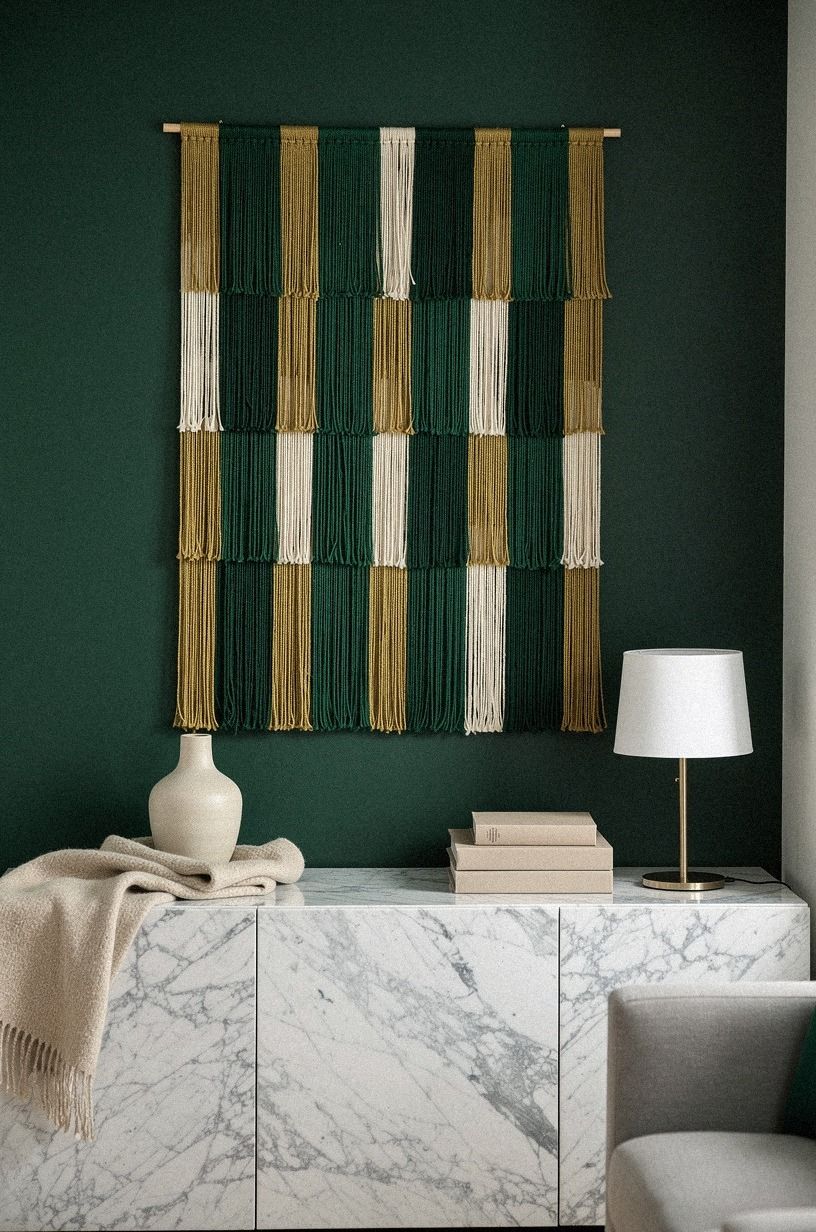
A textile grid gave me the biggest visual change for the least effort. I used small emerald, gold, and cream textile panels above a narrow Carrara marble ledge with subtle gray veining.
The marble detail added polish without making the arrangement feel formal. I’d keep the textiles varied in scale but connected by one color, then let the pale stone provide a quiet pause between them.
3Anchor the Wall With One Oversized Thrift Find
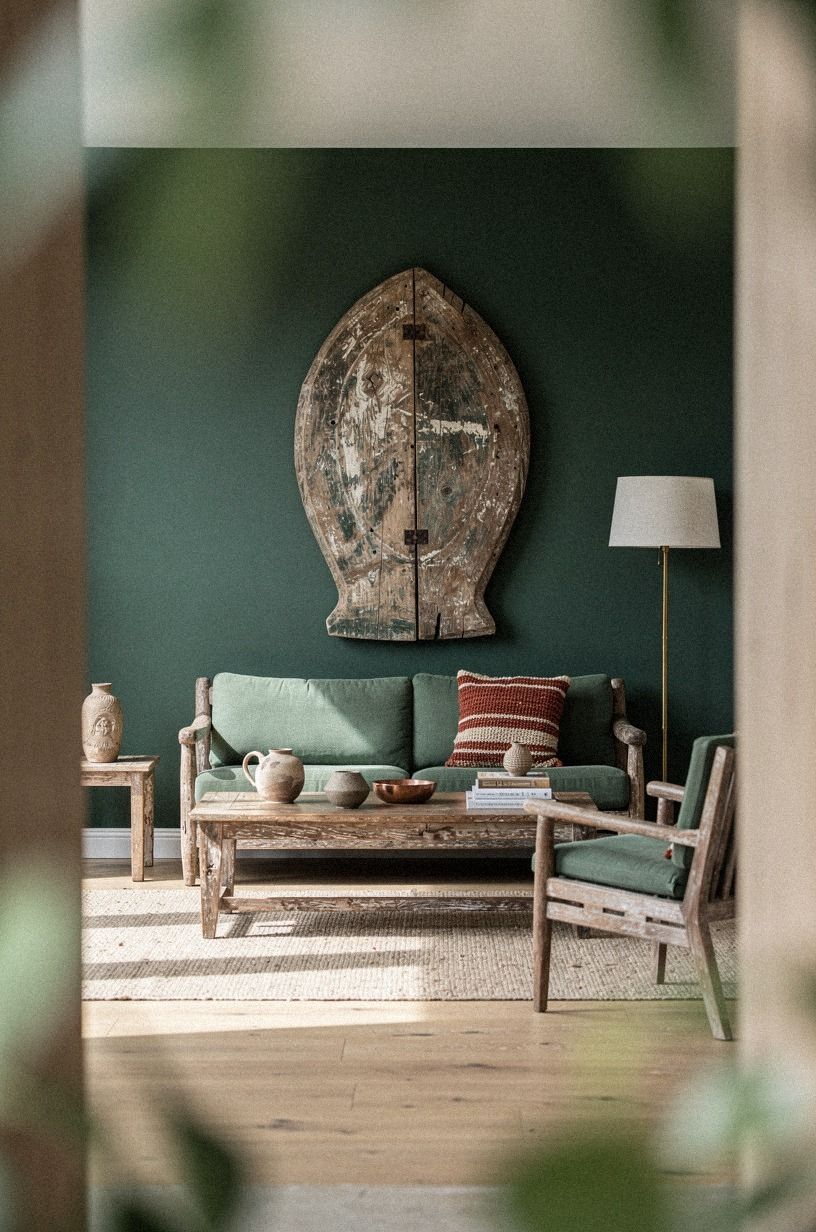
One oversized piece can beat a dozen tiny decorations. I found a secondhand landscape canvas with forest green, rust, and natural oak tones, then placed it above the sofa. It cost $18, which was less than a new decorative print in my area, and the slightly weathered reclaimed teak frame gave the wall a lived-in edge.
Your art doesn’t need to match the room exactly. It needs to repeat one color you already own.
In my case, the forest green echoed a cushion, while the rust picked up the wood floor. You’ll want the center of the art around 57 to 60 inches from the floor, which keeps it comfortable to view while standing or sitting.
The mistake I made was choosing a piece that was too narrow at first. It looked polite and disappeared. I’d choose one large shape over three small ones every time, especially when the budget is tight.
Look for oil-painted canvas, reclaimed weathered teak, and textured paper rather than a specific subject. A landscape, abstract, botanical study, or old architectural print can all work when the scale is right. The frame should feel substantial enough to hold the wall, but not so ornate that it becomes the only thing you notice.
This is also where the idea of hidden support becomes useful. A room can feel visually unstable when the wall and furniture do not relate. Even an unrelated guide about what goes under a mattress makes the same basic point in another context: what supports something matters, even when you don’t see it first.
4Build the Three-Height Light Stack
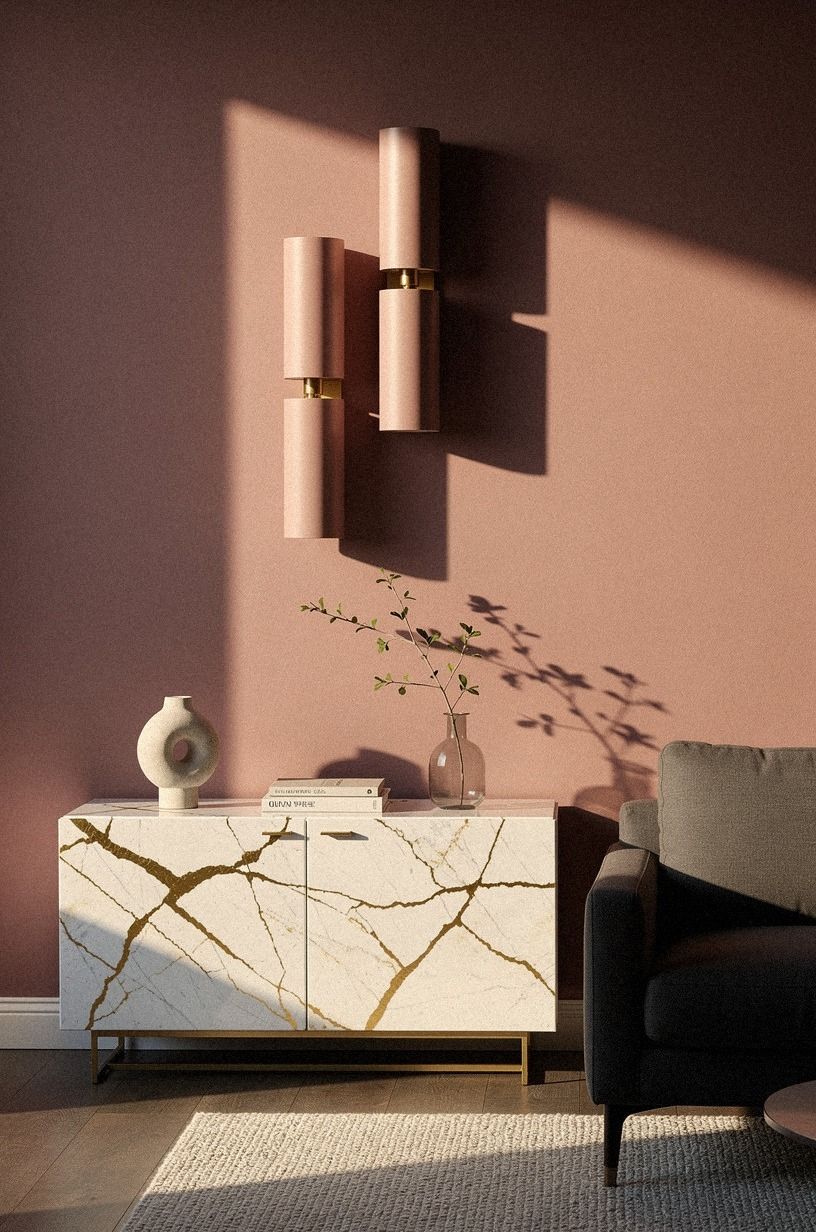
Lighting became the moment the wall started feeling genuinely inviting. I built a three-height stack with a floor lamp, a small table lamp, and one battery-operated warm LED picture light above the art. The room needed overhead, task, and ambient light, but I kept the overhead fixture off after dinner.
The warm LED bulb cost $7, and the small picture light cost $13. I’d spend money on temperature before I spent it on another object. A cheap lamp with warm light can improve a wall more than an expensive accessory under a blue-white bulb.
Your wall will look different under amber light than it does at noon. That’s why you should test the setup after dark before adding more decor. I tried a cool bulb first, and it made the dusty rose textile look gray and the brass look dull.
A 2700K light gave the charcoal, brass, and Calacatta marble with gold veining a gentler glow.
I didn’t hide the cord perfectly. I used a narrow cane cable cover and let it follow the furniture line.
That small compromise looked more relaxed than a badly stretched cord. You’ll want the cable to disappear from the main sightline, not necessarily vanish from the room.
The same principle works in utility spaces. These cheap bathroom floor ideas show how a low-cost material choice can change the mood of a room without a full renovation. Here, the material choice was light.
5Skip Symmetry and Use the Texture Echo Rule
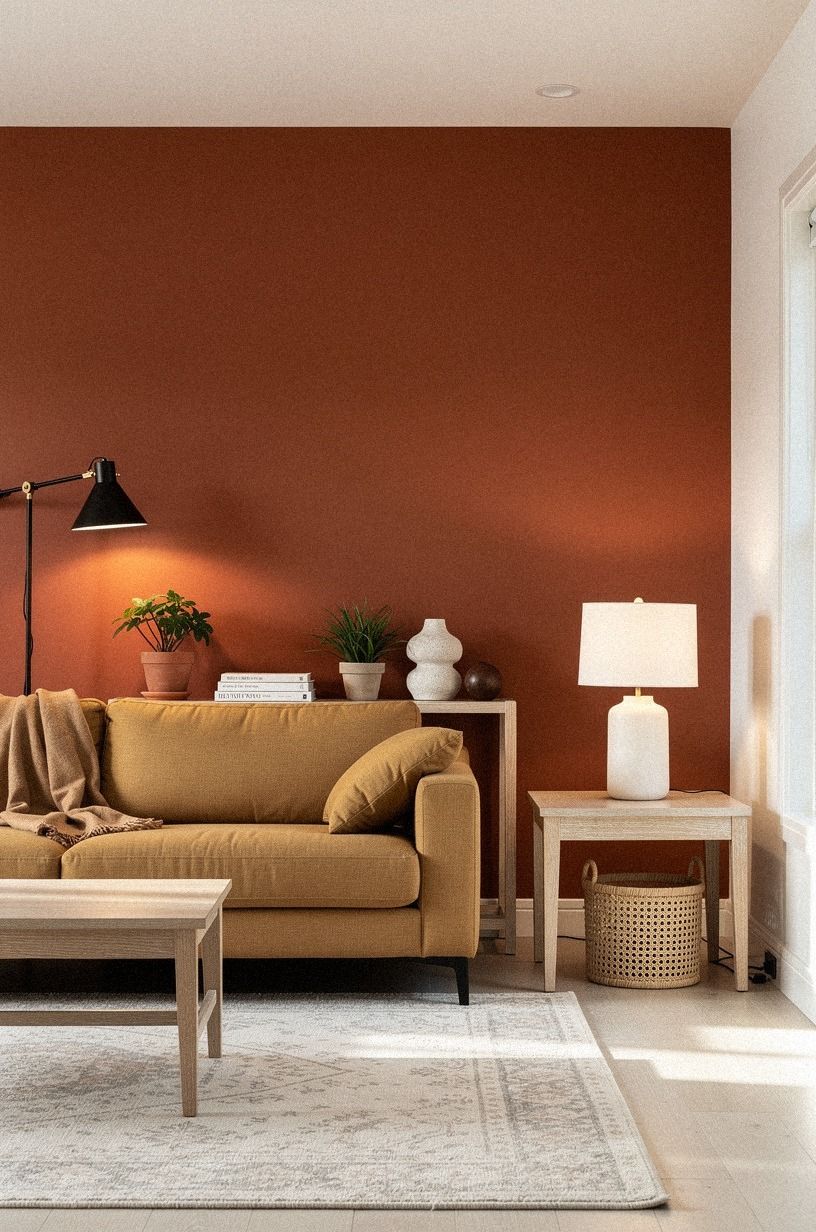
Symmetry was my first instinct, but it made the wall feel staged. I found a better balance by repeating warm white, camel, and black accents, then adding the grain of cerused white oak in one narrow shelf.
The textures did more work than matching shapes. One soft textile, one dark accent, and one pale wood element were enough to make the arrangement feel deliberate without becoming rigid.
6Frame a Removable Fabric Panel
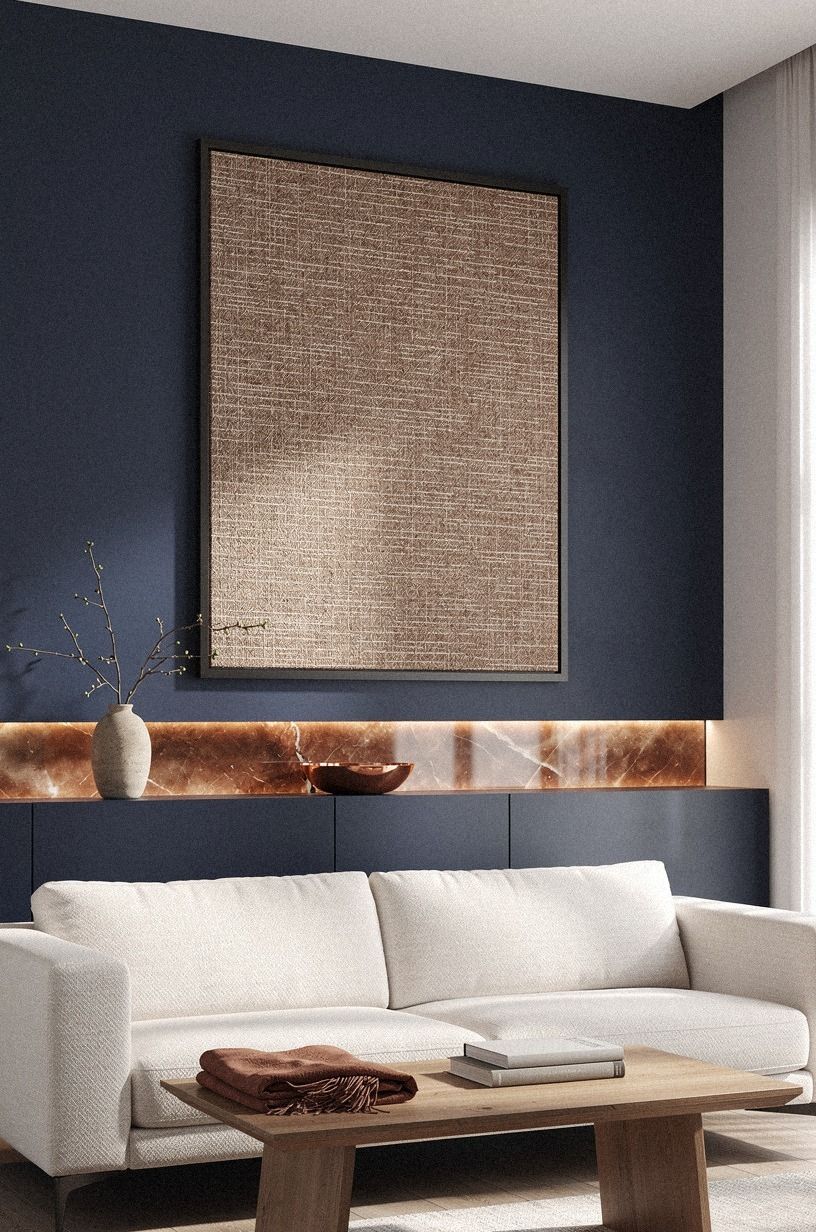
A removable panel solved the widest blank section without making a permanent change. I used a lightweight midnight-blue surround with copper and ivory details, plus a thin backlit translucent onyx insert that gave the arrangement a soft internal glow.
The panel cost $11, and the onyx-toned remnant cost $8. I’d choose a surface with enough body to stay flat. Thin muslin may ripple, while heavy upholstery fabric can become difficult to hang safely.
A medium-weight backing gave me the best balance.
Your panel can be plain, striped, or printed. I chose a muted midnight blue because it felt calm beside the warm wood, while the copper and ivory kept the wall from feeling too dark.
You don’t need to paint the wall to introduce color. You only need a surface large enough to carry it.
The first panel I made sagged at the corners, and I had to pull the backing tighter. That little repair took minutes, but it taught me to check the back before hanging anything. Honestly, a slightly imperfect edge can feel more human than a factory-sharp one.
I’d use two small panels only when the wall is unusually wide. On a standard apartment wall, one broad panel has more impact and fewer alignment problems. If you want a seasonal variation, the lightweight construction in these dollar-store Halloween door hangers is useful inspiration.
7Float a Narrow Shelf Above the Furniture
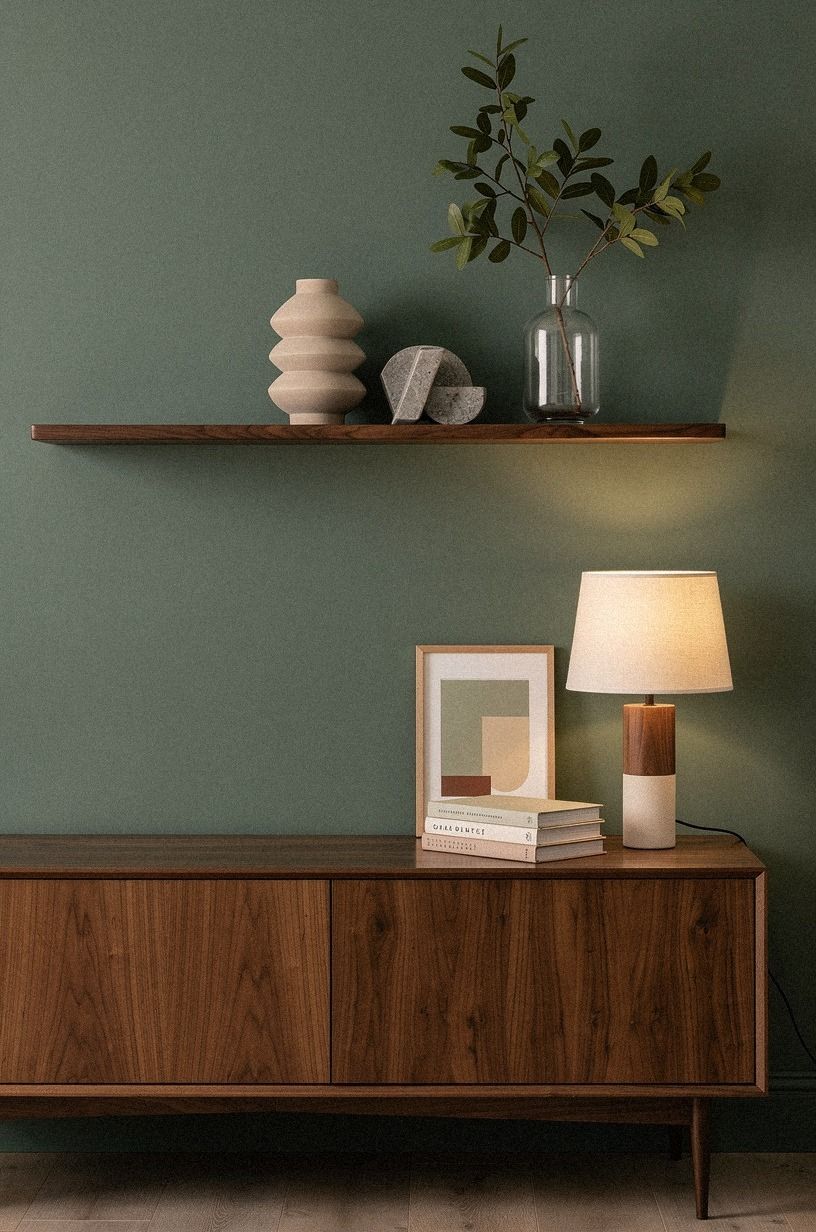
A narrow shelf gave the wall structure, but I kept it shallow so it wouldn’t turn into a storage ledge. The sage green, warm cream, and natural wood palette felt especially calm, while a book-matched walnut detail made the shelf look more considered.
You’ll want the shelf to echo something already in the room. The walnut connected it to the furniture, while the pale cream objects kept the arrangement from becoming too heavy.
8Can You Make a Bold Wall With Paper Layers?
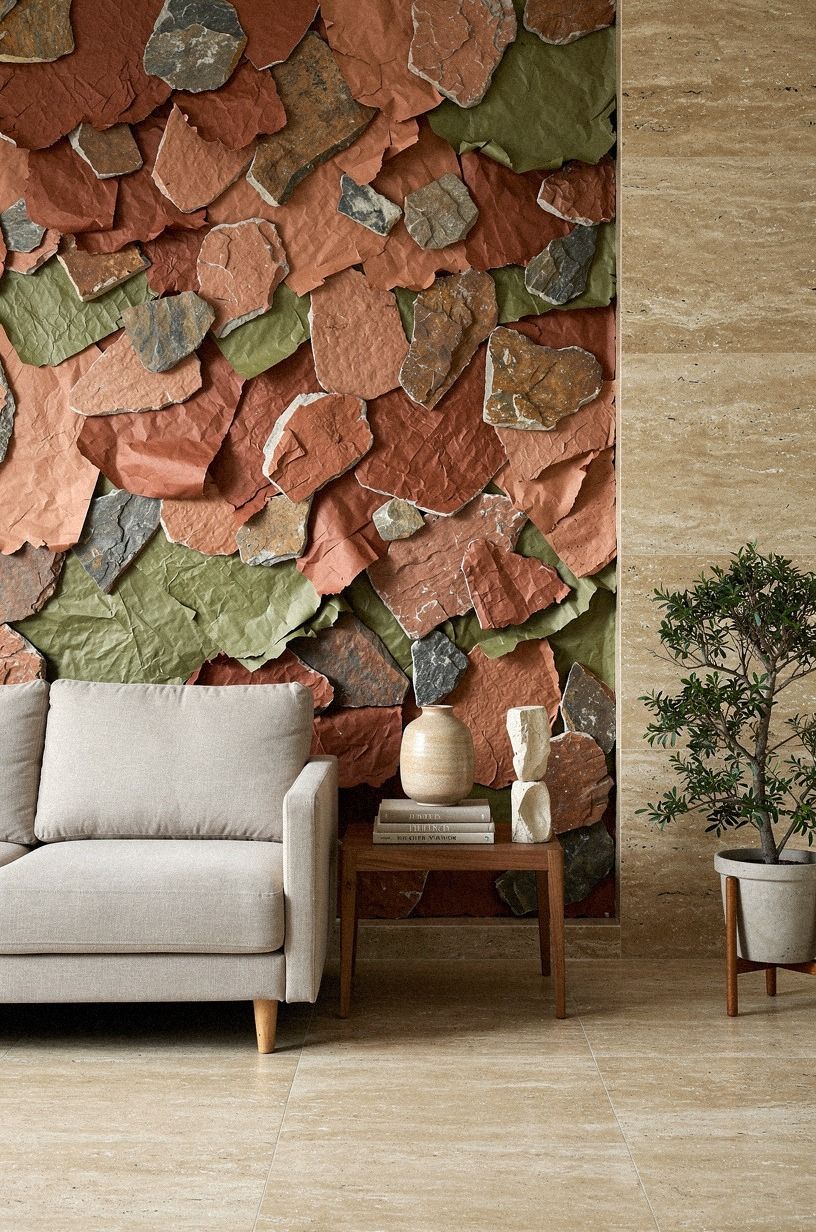
Yes, but the paper needs to be treated like artwork, not a temporary patch. I used removable botanical wrapping paper in terracotta, stone, and olive inside three inexpensive frames, then arranged the frames in a loose vertical line. A narrow ledge in warm travertine grounded the group without covering the whole wall.
The paper cost $5, and the frames were $4 each. I’d spend more time choosing the background color than the pattern. A warm stone ground worked better beside Benjamin Moore White Dove OC-17 trim because the contrast stayed soft.
Your paper choice should have one quiet background color. I tried a busy print with bright white behind it, and the wall looked restless. A muted olive botanical print made the arrangement feel more collected.
I’d skip covering an entire wall with small paper squares. The seams become the focus, and your eye never settles. Three larger panels looked more sophisticated and were easier to remove.
Before using adhesive paper directly, check the wall texture and test a hidden corner. This guide to peel-and-stick wallpaper on textured walls explains why surface condition matters. I’d rather frame paper than risk pulling off a layer of finish.
The boldness should come from scale or pattern, not both at once. A large quiet print can be dramatic, while a small high-contrast print can become fussy. That distinction saved me from buying another roll.
9Mix Wood Tones Instead of Matching Them
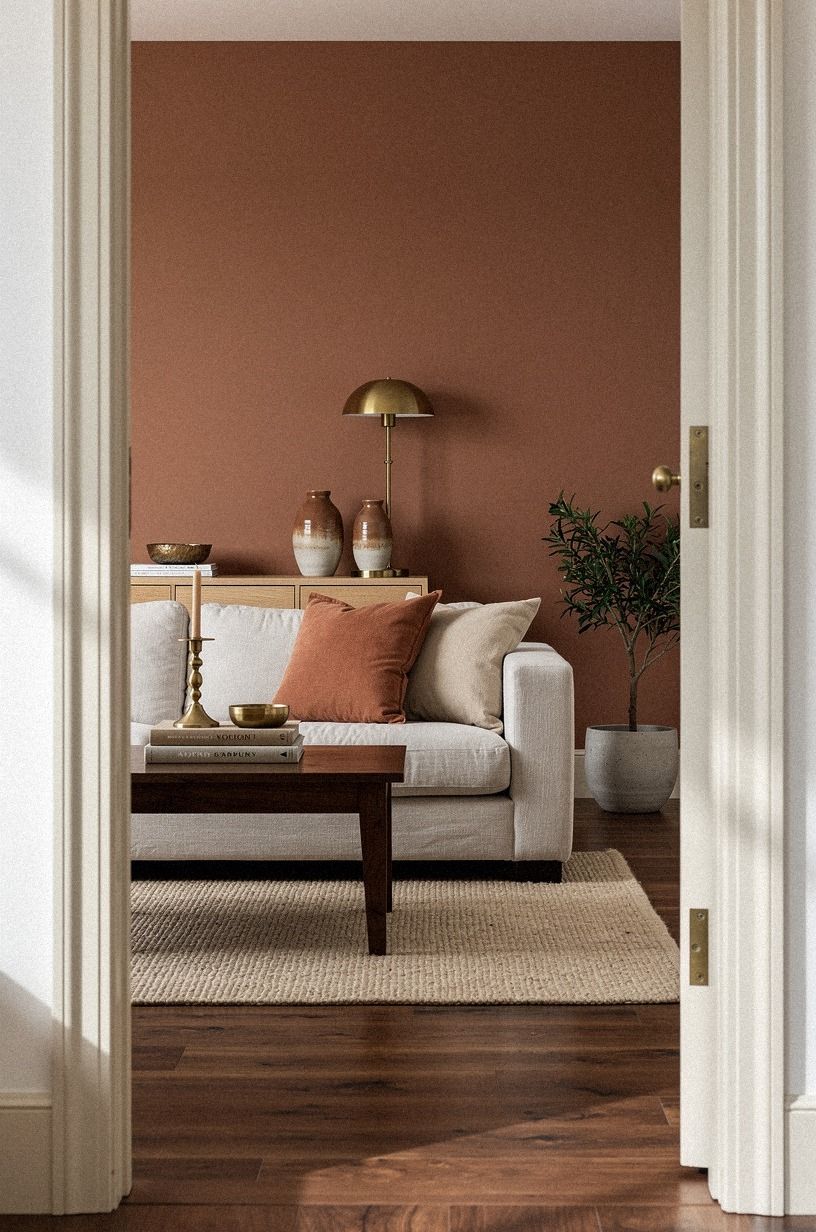
I used two wood tones to make the wall feel collected. Clay, linen, and aged brass kept the palette warm, while unlacquered brass added a finish that will develop a natural patina over time.
The mixed tones looked more relaxed than a perfectly matched set. I’d repeat one wood near the furniture and let the second tone appear in a smaller object, shelf, or frame.
10Hang Thrifted Plates With the 57-Inch Rule
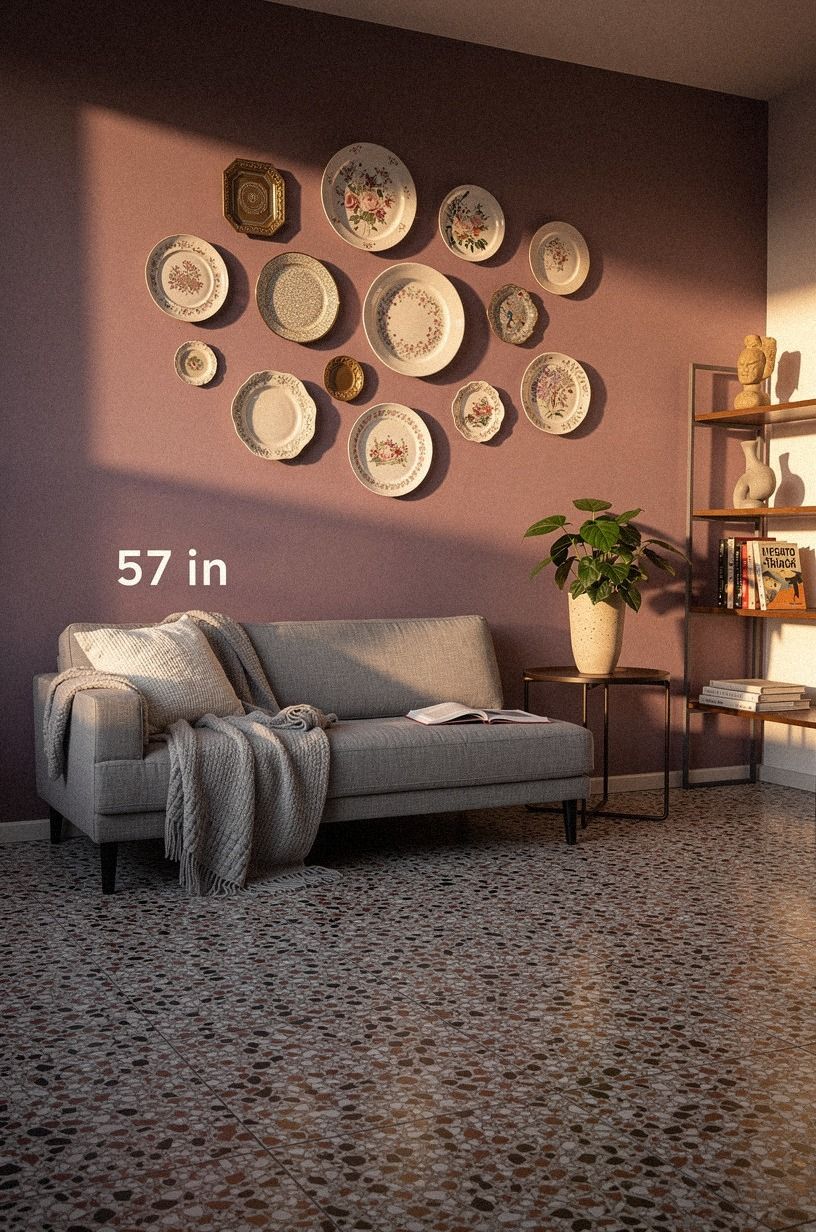
Thrifted plates can make a wall feel charming when you keep the palette narrow. I chose plum, gray, and rose-gold pieces, then placed them above an oversized-chip terrazzo ledge. The varied surfaces brought a little history into the room, and the uneven edges made the arrangement feel collected rather than manufactured.
The full group cost $16. You’ll want to trace each plate on paper before hanging it.
Move the paper shapes around until the group feels balanced, then use removable hooks rated for the weight. Your largest plate should sit near the center, with smaller pieces stepping outward.
I’d avoid using more than one strong pattern in the group. Too many motifs turn the wall into visual noise.
One plum plate was enough, and the rest stayed quiet. A gray plate became the visual anchor because it had the largest surface area.
The 57-inch rule is a starting point, not a commandment. If the furniture is low, the group may need to sit slightly lower.
If the ceiling is tall, you can give the arrangement more air above it. I’d judge the relationship between the plates and the sofa before measuring from the floor.
For another low-cost seasonal display, browse these cheap Halloween decor finds under $25. The useful lesson is restraint: one repeated motif can carry a display without filling every inch.
11Frame a Folded Quilt Instead of Mounting It
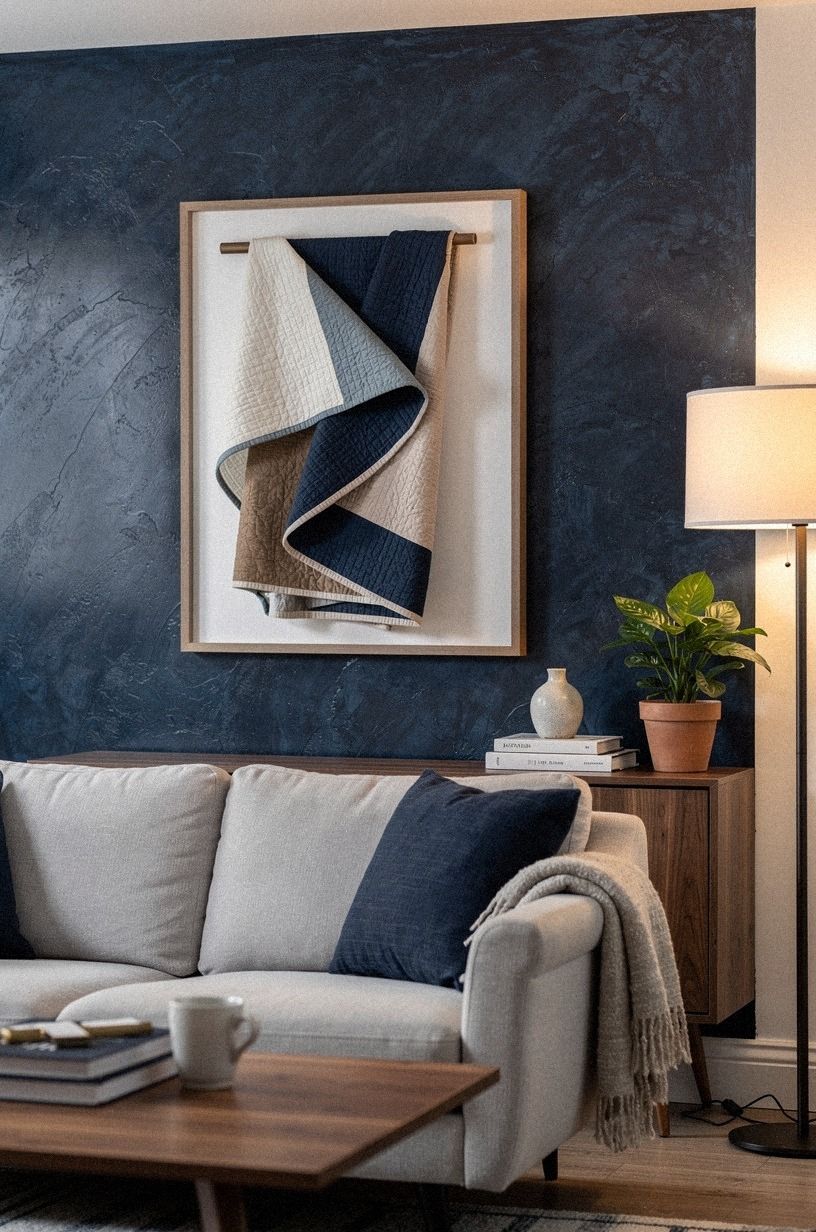
A folded quilt gave me the softest version of an accent wall. The navy and white textile sat against warm walnut, while the surrounding hand-applied Venetian plaster added enough variation to keep the arrangement from feeling flat.
I’d let the quilt remain the tactile element and keep the supporting pieces simple. One walnut ledge or narrow brass hook is enough when the textile already carries the wall.
12Finish With the Warm Corner Method
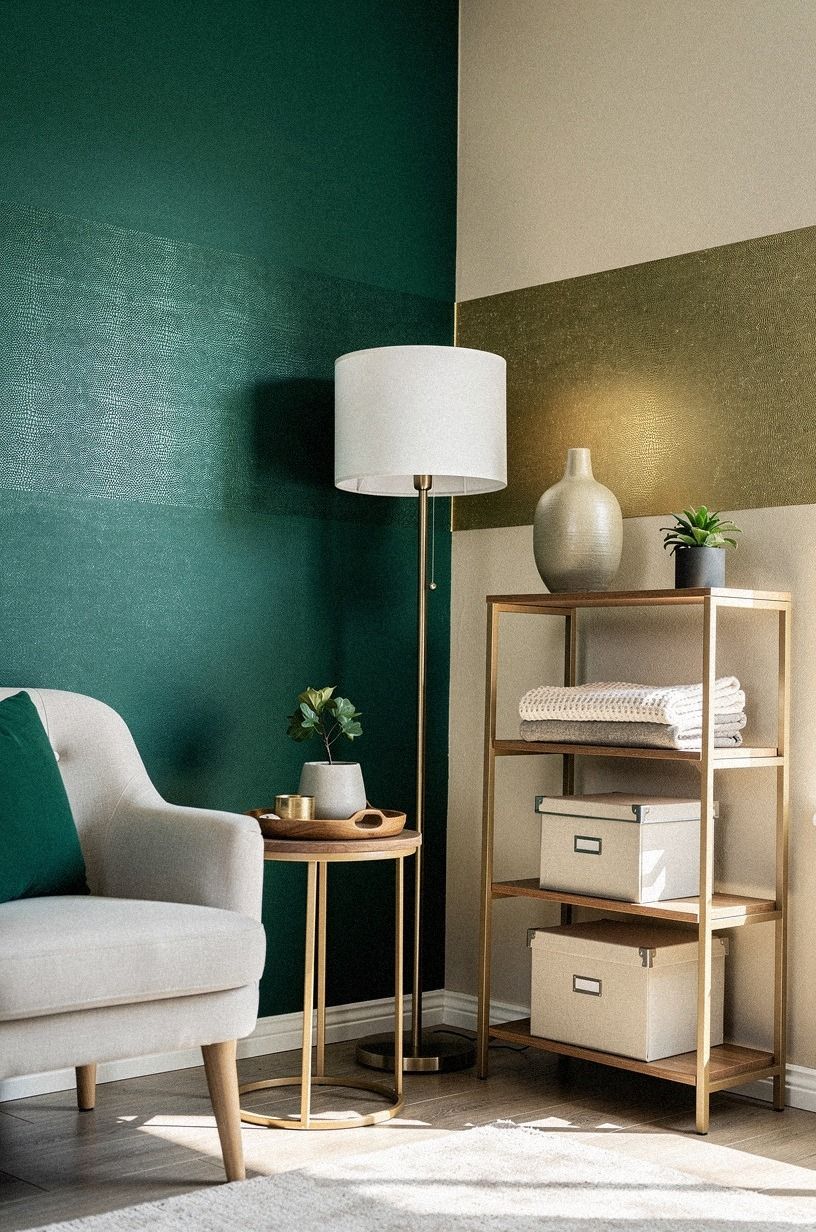
I finished with a warm corner method: one tall plant, one low basket, and one small piece of art. Shagreen accents softened the bottom of the wall, while the emerald, gold, and cream palette made the corner feel brighter in the morning and moodier at night.
Your final layer should connect the floor to the wall. A plant alone can look stranded, so I placed it beside a low stool and a folded cream cotton throw.
You’ll want enough empty wall around the grouping to let the shapes breathe. More objects would’ve made the corner feel crowded.
The plant cost $8, the basket cost $6, and the stool was already in the room. I’d spend the last part of the budget on something alive or useful instead of another decorative object. Movement from real leaves changed the room, especially near the window.
I’d skip artificial greenery here. If your plant isn’t thriving, choose a sculptural branch or a dried olive stem instead. These accent wall bedroom ideas also make a useful point about keeping a focal wall restful rather than overloaded.
If you’re working with adhesive materials elsewhere in the room, this guide to peel-and-stick wallpaper on textured walls is worth reading before you commit. My corner worked because the largest changes were removable and the smallest changes stayed practical.
How much it cost
I gave myself a hard $50 ceiling, and the goal was to make the wall feel finished without buying a full new decor set. Free materials did most of the work: a frame I already owned, leftover fabric, a thrifted plate, and a plant cutting.
The paid pieces were the tension rod at $9, removable hooks at $4, the thrifted canvas at $18, and a warm LED light at $13. That brought the total to $44 before tax. You’ll spend less if you already own a basket or can borrow a frame.
Your own total will depend on what you already have. The typical US room costs below are much higher because they cover a whole room, not one no-paint wall.
For reference, a wool rug can run $400-$1,500, linen drapes for a pair can cost $120-$400, a statement light fixture often lands between $150-$800, and DIY room paint can cost $200-$600. You don’t need those purchases for this makeover.
You need one strong surface, one practical light source, and enough restraint to stop before the wall gets noisy. If you’re planning a graphic version later, save these DIY checkered wall ideas for renters for layout inspiration. For seasonal changes, these cheap Halloween decor finds under $25 can help you keep the same structure while changing only the accents.
Why This No-Paint Wall Still Feels Finished
I used to think an accent wall needed a dramatic color to feel intentional. After this project, I think the real work is giving your eye a clear order: broad texture first, useful height second, and small personality last. That sequence made the wall feel sophisticated without making it formal.
The no-paint approach also suited the room better. Sherwin-Williams Agreeable Gray SW 7029 already kept the surrounding walls calm, so adding a darker permanent color would’ve made the space feel divided. A removable textile gave me warmth while preserving the light.
I’ve made the mistake of buying small decorations before solving scale. They looked charming in the store, then vanished on the wall.
Now I start with the largest layer I can afford or borrow. You should do the same because one oversized textile or canvas changes the visual proportion faster than a row of tiny objects.
The most satisfying part was the evening shift. The natural linen, warm bulb, and dark wood shelf looked better together as the light changed. The plant shadow moved across the wall, and the room felt calmer without becoming precious.
The wall also became easier to edit. I could remove the plates, swap the textile, or move the shelf without rebuilding the room around one permanent choice. That flexibility matters in a rental, but it’s useful in any home where your taste keeps moving.
For another low-commitment reference, these cheap bathroom floor ideas show how surface changes can shift a room’s atmosphere. I’d use the same mindset here: change the layer that has the most visual influence first.
What People Always Want to Know
What is the best cheap accent wall ideas under $50 with no paint at all for a small accent wall?
A framed textile or one oversized thrifted canvas is the best choice for a small wall because each creates scale without clutter. IKEA MOSSLANDA ledges also work when your wall needs depth.
Keep your largest piece centered near 57 to 60 inches from the floor, then leave open space around it. For a bedroom, these accent wall bedroom ideas can help you keep the focal point restful.
Where can I buy cheap accent wall ideas under $50 with no paint at all pieces on a budget?
Check IKEA, Wayfair, Target, Facebook Marketplace, and local thrift stores. Secondhand frames are often the best value because you’re paying for the structure, not a trend.
I’d also look at seasonal clearance for baskets, fabric, and lightweight panels. These minimalist Halloween decor ideas show how inexpensive pieces can work outside their original season.
How much does a cheap accent wall ideas under $50 with no paint at all makeover cost?
A small makeover can stay under $50 when you reuse frames, fabric, plants, and baskets you already own. Free materials should lead your plan, with paid money reserved for removable hooks, one structural piece, or warm lighting.
A thrifted canvas can replace several smaller purchases. If you’re extending the project into another room, these cheap renter-friendly bathroom floor ideas offer more low-cost surface inspiration.
Can I create cheap accent wall ideas under $50 with no paint at all on a budget?
Yes, and you can start with three free moves: rearrange your furniture, group existing art by color, and use a blanket or scarf as a textile layer. A borrowed frame can add scale, while a plant cutting adds height.
Your wall doesn’t need a shopping trip before it needs a better arrangement. For a removable pattern, begin with these DIY checkered wall ideas for renters.
Is a cheap accent wall ideas under $50 with no paint at all makeover worth it in a small space?
Yes, because a small space benefits from one clear focal point instead of many competing objects. A vertical textile can make your wall feel taller, especially when the furniture sits low.
Keep the floor layer narrow, repeat one color, and avoid deep shelves that steal walking space. If you’re considering adhesive materials, read this guide to peel-and-stick wallpaper on textured walls before ordering supplies.
Is cheap accent wall ideas under $50 with no paint at all a good idea for a rental?
Yes, especially when you use removable hooks, tension rods, lightweight frames, and peel-and-stick materials tested on your wall type. Damage-conscious layers let you create warmth without committing to a color.
I’d photograph the wall before installation, keep product packaging, and test adhesive in a hidden spot. These dollar-store Halloween door hangers are another example of using lightweight pieces that can come down easily.
Where I’d Start First
If I had to pick one, I’d start with the oversized thrifted canvas. It gives your wall scale, color, and personality in one move, while tiny decor pieces tend to disappear. Pin the idea for later, then measure your furniture before you buy anything.
A good frame can carry the whole room. Add a warm light only after the main layer feels right, then stop when the wall has one clear story.