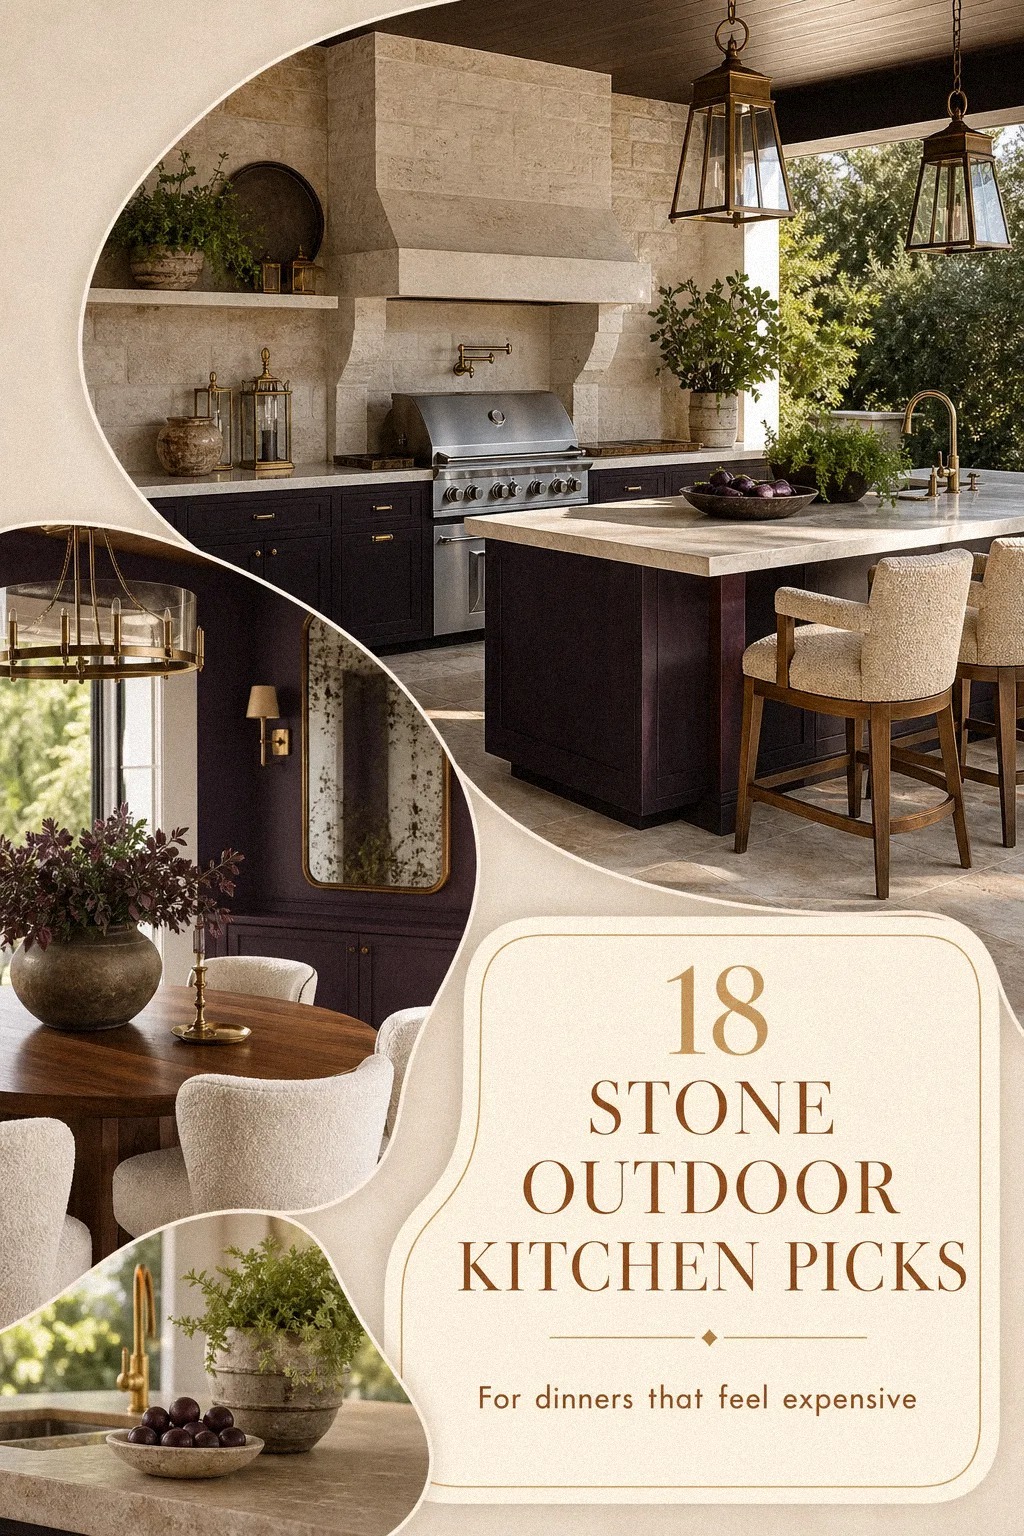
Stone outdoor kitchen ideas for a timeless, rugged look last when you build around real stone, standard clearances, and lighting you still love after midnight. I started ours after one windy July dinner sent dust across the old cart and into the pasta. That was it. I wanted a kitchen outside that felt grounded, hard-wearing, and worth cleaning up for.
Here's what it looked like before: The Temporary Kitchen Trap?
Before this makeover, our setup was the full temporary-backyard package. A rolling grill, a skinny metal cart, two mismatched planters, and one outlet doing too much.
The old prep surface had gone soft at the corners, and every time I set down a hot sheet pan I wondered if that would be the day it warped for good. You know that feeling when a space works just enough to keep you from fixing it? That was us.
I also kept making the classic mistake of treating the kitchen exterior like patio furniture instead of architecture. Once I saw that, the fix got clearer. I stopped shopping for more little accessories and started studying small outdoor kitchen ideas that maximize every inch so I could give the yard one sturdy line instead of five weak ones.
- Open the corner with a limestone grill wall
- Set the stone island facing the garden
- Build the pizza oven into rough fieldstone
- Run granite counters along the exterior wall
- Frame the grill with stacked ledgestone columns
- Tuck firewood beneath the oven arch
- Add a hammered copper sink in stone
- Mount black sconces over the barbecue wall
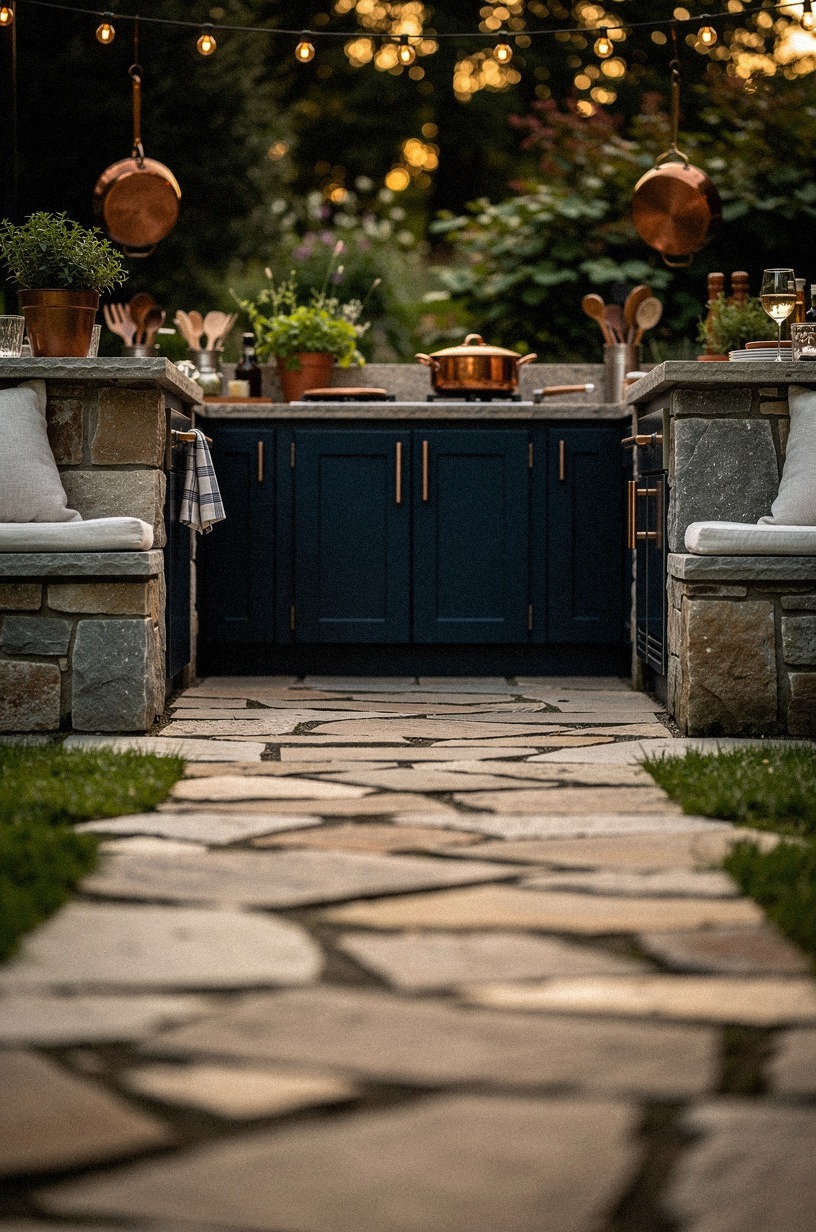
- Lay flagstone pavers through the cook zone
- Wrap the fridge bay in river rock
- Install open shelves on the stone backsplash
- Pour a polished concrete serving ledge
- Plant rosemary beside the prep counter
- Hang iron hooks above the oven tools
- Style clay pots along the counter edge
- Build a pergola over the stone run
- Set bar stools against the granite overhang
- Finish with lanterns above the cooking wall
1Open the corner with a limestone grill wall
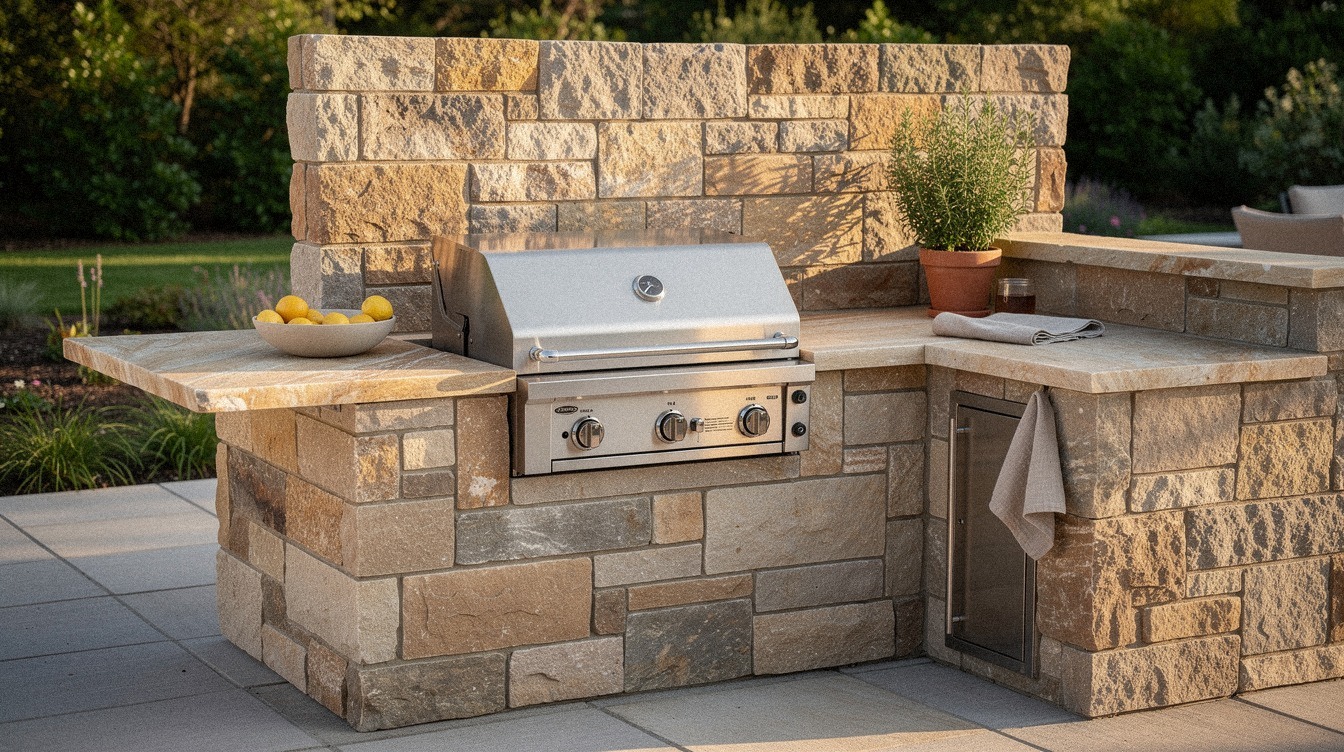
I began with the grill wall because the corner had always felt blocked, and you notice that every single time you carry a tray outside. A pale limestone grill wall changed the whole diagonal of the yard in one move.
Instead of reading like a bulky block, it opened the corner because the color bounced light back into the cook zone and made the masonry feel cut, not heavy. If you're working with a small run, that visual lift matters more than one extra cabinet door.
I also kept the wall deeper than the grill body but not absurdly thick, then left breathing room on both sides so the stainless box sat small inside the stone. That negative space is what gives you the expensive look.
I almost packed it tight. Glad I didn't.
And if you like the warm restraint of rustic outdoor kitchen ideas for a charming cookout space, this is the version that feels cleaner and lasts longer in bright sun.
2Set the stone island facing the garden
Turning the island toward the garden fixed a problem I hadn't named yet: I was cooking with my back to the best part of the yard.
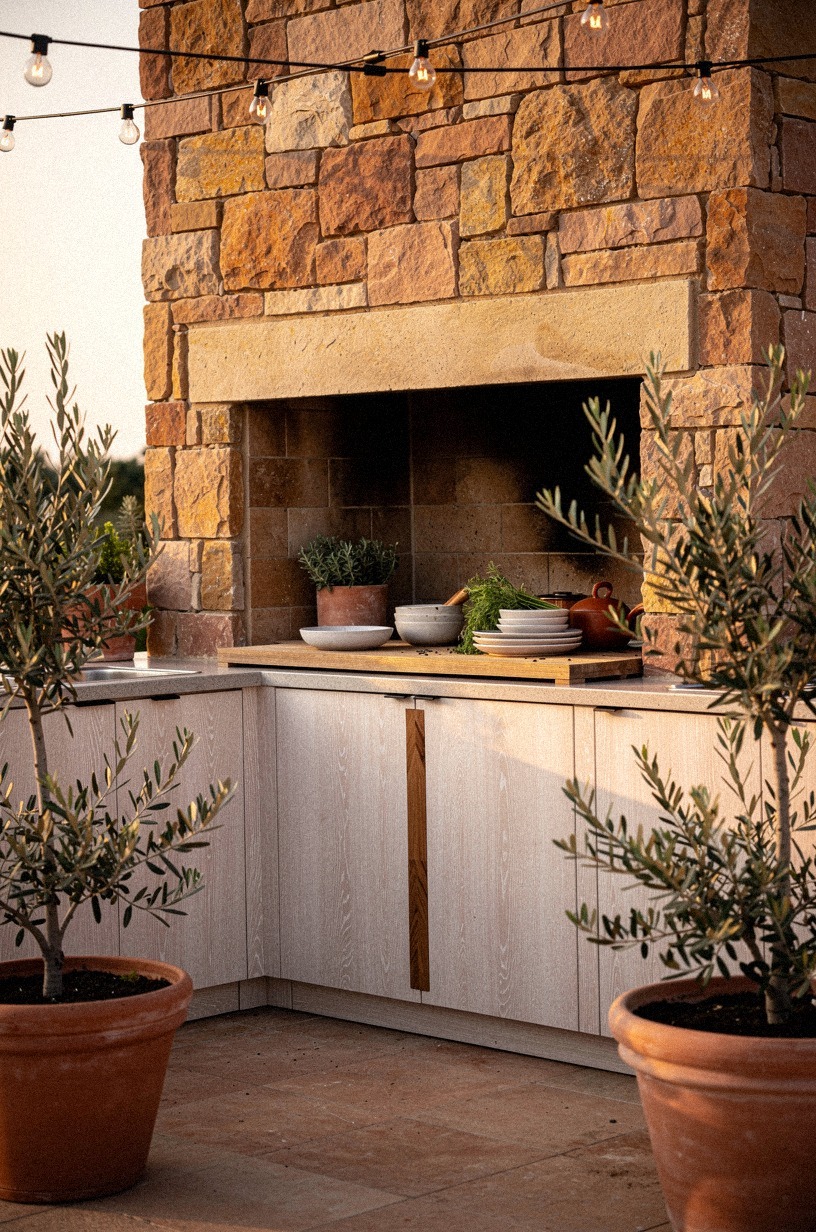
3Build the pizza oven into rough fieldstone
The pizza oven was the emotional turning point. Until that went in, the project still felt like a nicer grill station.
Once I wrapped the dome in rough fieldstone, the whole space stopped reading as temporary and started feeling inherited. You could see the rough edges, the color shifts, the soot-prone mouth of the oven.
Good. Too smooth would've looked fake against the yard.
I also learned not to over-style this section. The oven mouth, peel, and surrounding stone already do enough.
One wood board. One towel.
Done. If you love a rustic outdoor oven design, skip the glossy tile border and let the masonry stay honest. I kept coming back to outdoor kitchen ideas on a budget diy friendly while planning this part, mostly to remind myself that one strong material beats a bunch of little upgrades every time.
4Run granite counters along the exterior wall
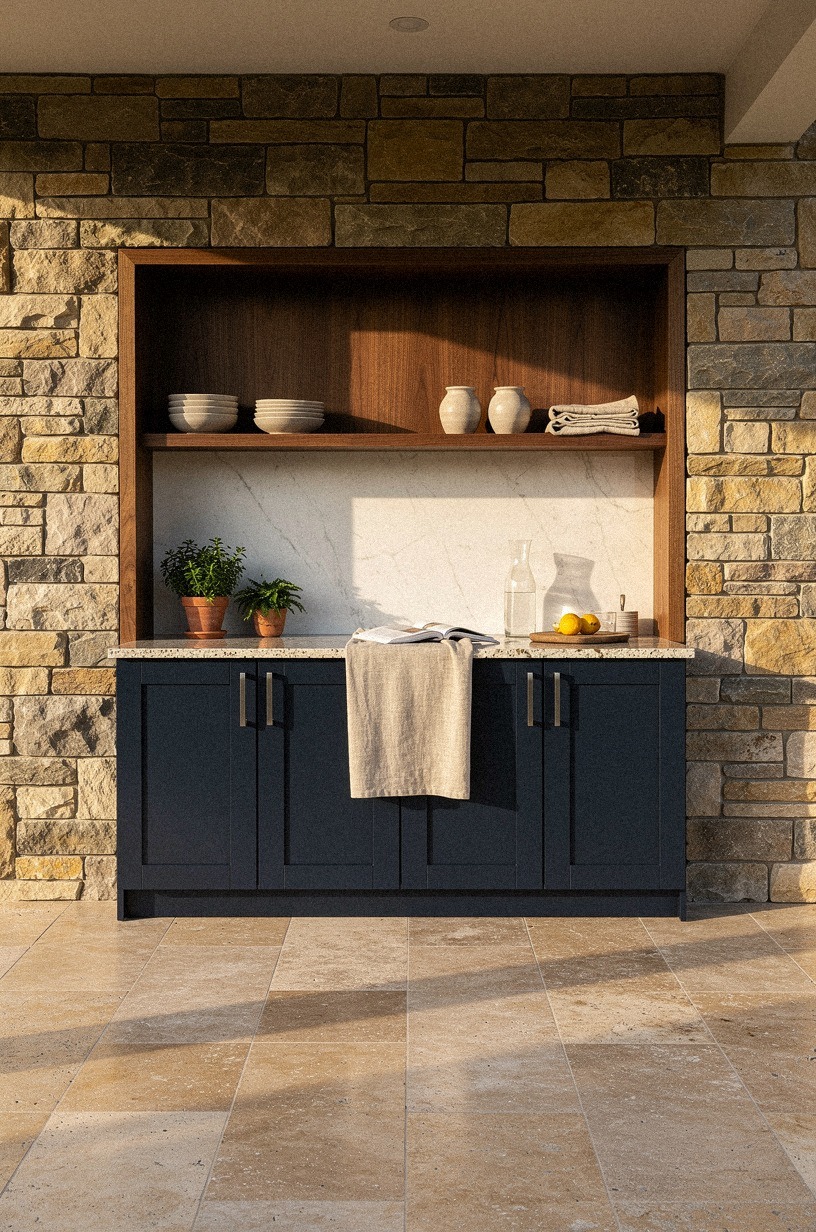
Running the counters along the exterior wall made the kitchen exterior feel permanent in a way the freestanding cart never did. I chose leathered granite because polished tops look sharp on day one, but outdoors they can read cold and show every smudge by lunch. Leathered stone has more forgiveness, and the textured finish plays nicely with rougher wall stone without turning the whole thing into visual mush.
I kept the line straight and quiet, then used the house wall almost like a built-in backdrop. That move gave me more prep room than I expected, and it stopped the center of the patio from becoming an obstacle course.
If you're deciding between wall run or oversized island, I'd take the wall run first. It works harder.
The long line also pairs well with outdoor kitchen with tv ideas for the ultimate game day setu because you keep the social side open instead of burying it under stone.
5Frame the grill with stacked ledgestone columns

Framing the grill with stacked ledgestone columns gave it the kind of scale that makes a standard stainless insert look intentional instead of lost. I didn't want a giant appliance shrine.
I wanted the grill to sit inside a stone composition with airy side margins, and the columns did exactly that. The lines are vertical, the texture is tight, and your eye reads the grill as one piece of a larger outdoor grill wall.
This was also one of those places where restraint won. I skipped chunky corbels, skipped extra trim, skipped the fake Tuscan stuff that dates a build in five minutes.
Just columns, clean cap, and enough width to make the center feel framed. If you've ever seen a grill wedged into masonry and thought it looked weirdly cramped, that's why.
Give the appliance room to breathe and the whole bbq design outdoor setup feels more confident.
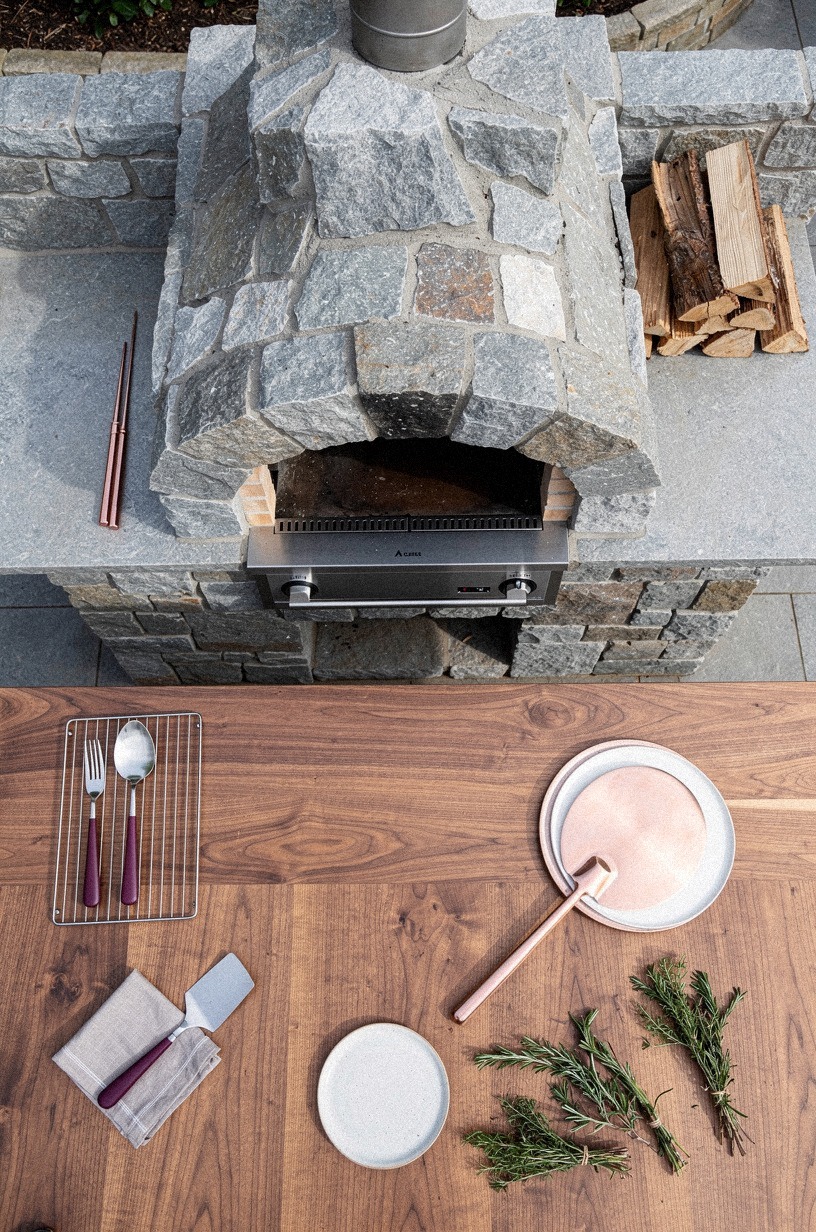
6Tuck firewood beneath the oven arch
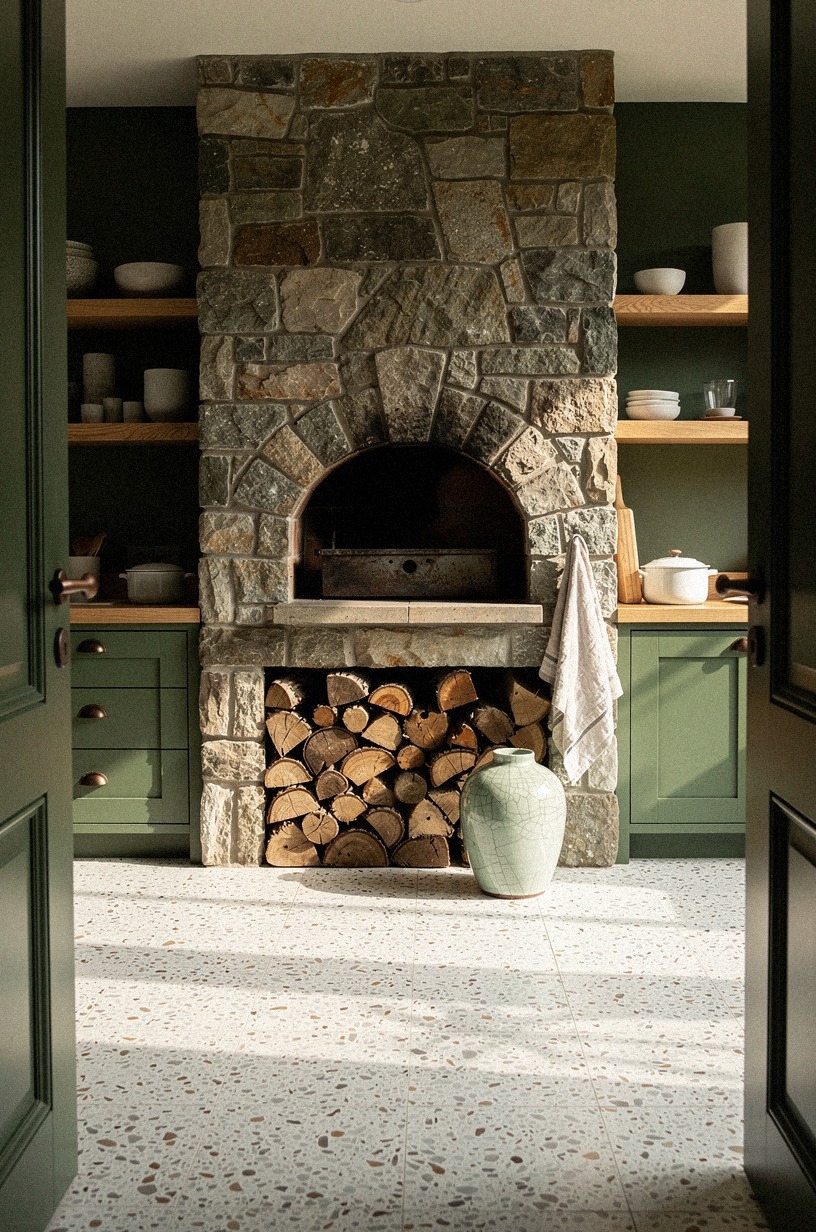
Sliding firewood beneath the oven arch sounds minor until you see it done right. Suddenly the stone oven has a base story, not just a top story.
I used split oak firewood with the cut ends facing out because the warm grain and rough bark give the arch a lived-in rhythm. And yes, it helps practically too.
Dry logs within reach mean you stop making three extra trips once the dough is stretched and everyone's hungry.
The key is not to stuff the bay. Leave little pockets of shadow so the wood stack still looks intentional.
I learned that after overfilling it once and making the whole bottom feel messy. If your yard leans resort-like, borrow balance ideas from outdoor kitchen hot tub ideas for a resort style yard and keep the wood stack neat, low, and symmetrical. It should look useful first, decorative second.
7Add a hammered copper sink in stone
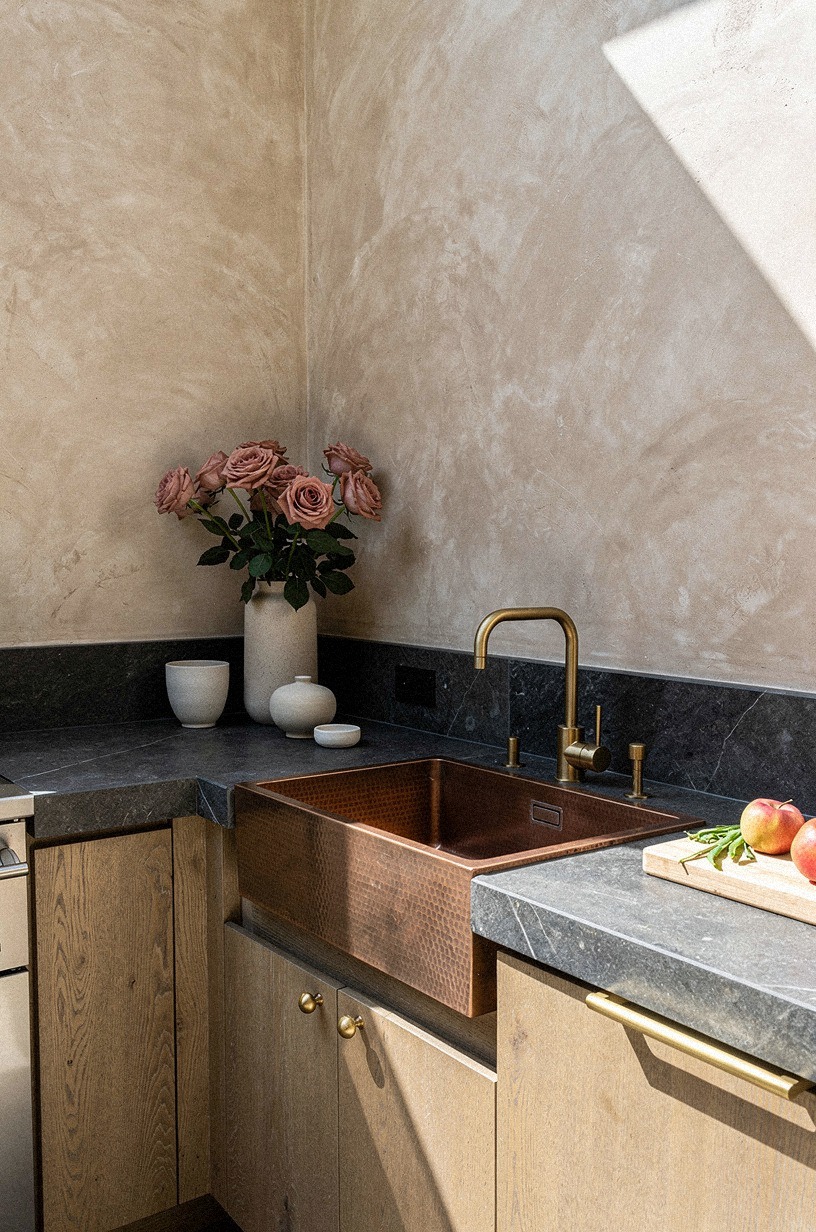
The sink was my splurge, and I'd do it again without hesitation. A hammered copper sink set into stone gives you shine, warmth, and patina all at once, which is hard to beat outdoors.
Stainless is easier to ignore, but that was the problem. I didn't want invisible. I wanted one hardworking detail that could catch late light and make rinsing herbs or washing skewers feel a little less like cleanup.
I paired the copper with a quieter faucet shape so the finish could be the event. Too many statement pieces in one corner and you lose the plot.
The surrounding stone matters here too. Cooler gray stone can make copper look orange in a bad way, while warmer limestone pulls it together.
If you're collecting examples from rv outdoor kitchen ideas for cooking on the road, notice how the best compact setups give one detail the spotlight and let the rest stay disciplined.
8Mount black sconces over the barbecue wall
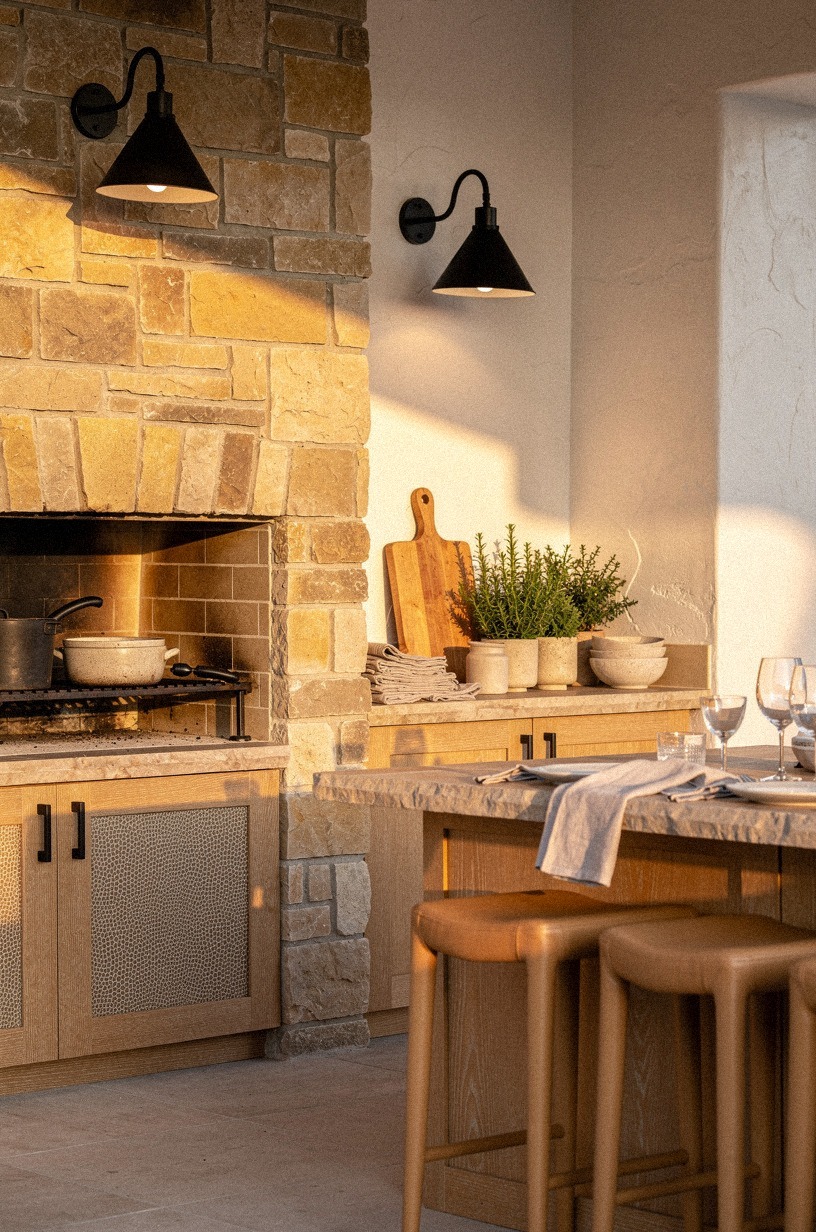
Lighting changed more than the stone did. I mean that.
Once I mounted matte black sconces over the barbecue wall, the whole run stopped feeling flat after sunset and started feeling inhabited. Overhead flood lighting is useful, sure, but it flattens texture and kills mood.
Side light catches the joints in the masonry, the edges of the counter, and even the little sheen on the grill lid.
I followed a version of my own Three-Height Light Stack without overthinking it: sconces high, counter glow in the middle, lanterns low later on. That's the layer you feel, even if you can't name it.
For wiring, I kept placement practical and away from steam and splatter. If you're planning game-day hosting, outdoor kitchen with tv ideas for the ultimate game day setu has good examples of how lighting keeps the wall useful without making it feel like a parking lot.
9Lay flagstone pavers through the cook zone
The cook zone finally felt finished when the ground caught up with the counters. I laid flagstone pavers through the whole working area so your feet feel the kitchen before your eyes do.
That low, symmetrical look matters. When the pavers line up with the stone run, the space reads like one outdoor room instead of a grill parked on patio leftovers.
I also wanted a surface that looked better with a little ash and rain, not worse. Smooth concrete can be clean, but it doesn't soften the transition into a rugged kitchen the same way.
Flagstone has small gaps, tonal shifts, and edges that relax the whole build. If you're squeezing an outdoor kitchen into a tight footprint, the paving ideas in small outdoor kitchen ideas that maximize every inch show why floor material is often the thing that makes a compact layout feel intentional, not compromised.
10Wrap the fridge bay in river rock
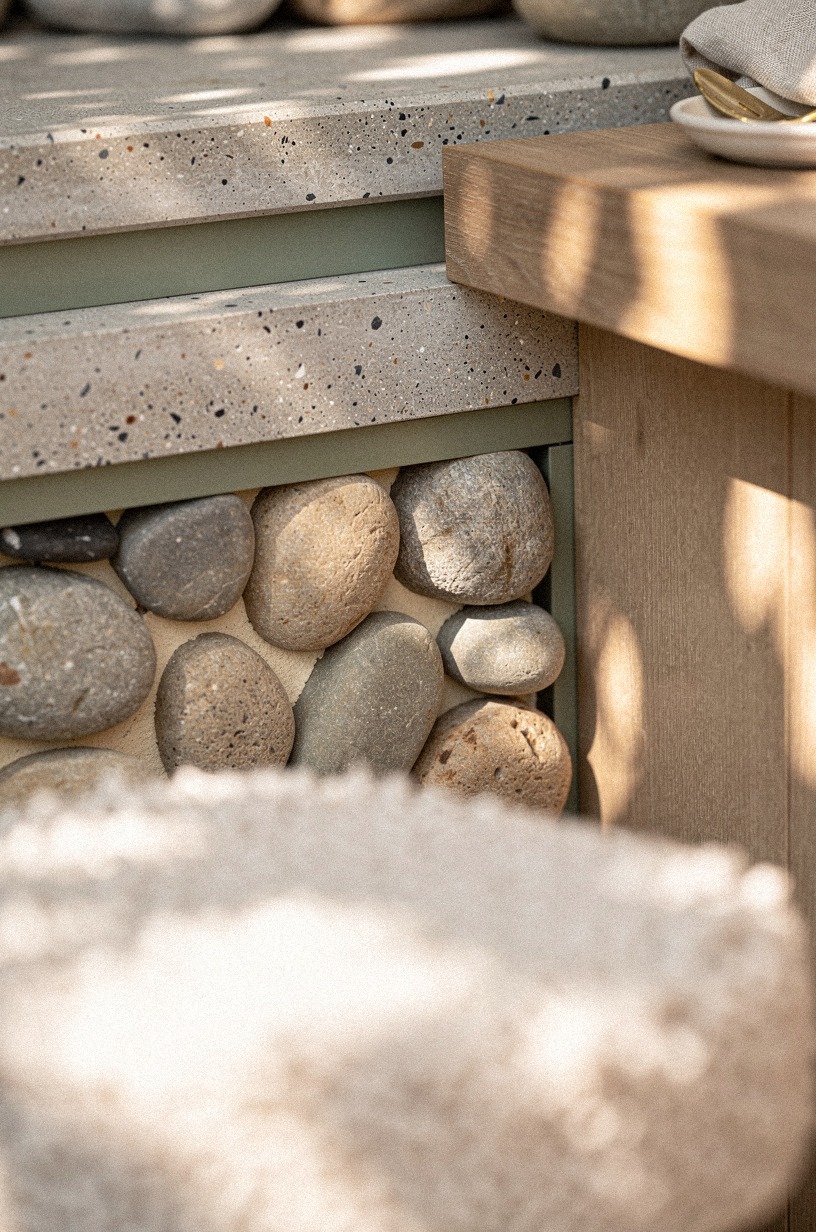
The fridge bay needed one move that felt tactile up close, so I wrapped it in river rock veneer instead of repeating the same flat stone again. That small texture shift gives you a place for the eye to land when you're standing right there reaching for drinks.
I wouldn't cover the whole kitchen in it. Too much river rock can get busy fast.
Around a compact bay, though, it's great.
Close-up details matter more outside because weather strips the room down to essentials. You notice edges, joints, and finish changes in a hurry.
I kept the stones rounded and slightly varied, then let the grout sit back so the surface felt pebbled instead of pasted. But I stopped it at the bay.
Repeating it on the main wall would've looked fussy, and fussy is the fastest way to make rugged stone lose its nerve.
11Install open shelves on the stone backsplash
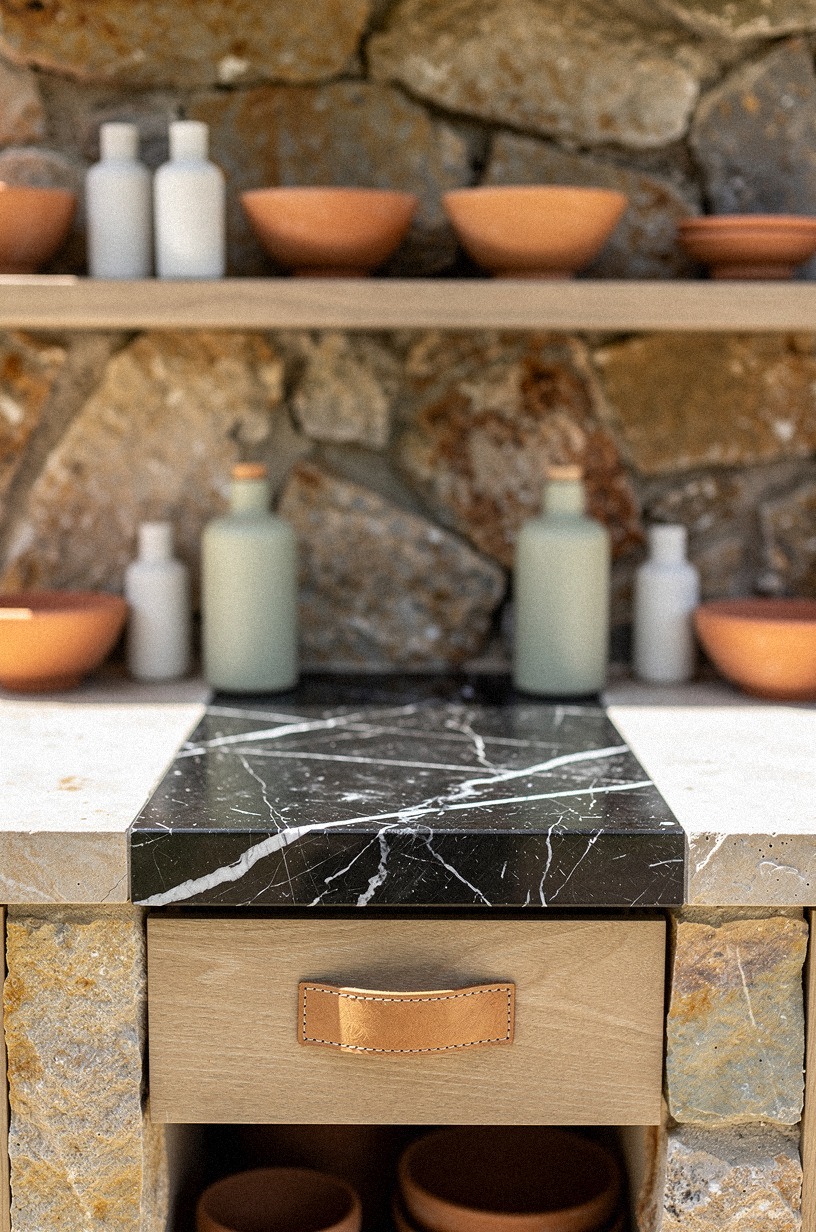
Open shelves were the part I argued with myself about. Do you really need them outside?
Not always. But on our stone backsplash, two slim powder-coated steel shelves made the counter easier to use and the wall easier to soften. You can set oils, salt, and a stack of plates within reach, then leave the counter more open for prep.
That matters when you're plating for a crowd and don't want every tool fighting for six inches of granite.
I mounted them with enough vertical breathing room that the wall texture still showed through. That's the whole point.
On a standard indoor kitchen, you'd think about an 18 in backsplash gap under uppers, but outside I wanted even more air. But if you're trying to keep a stone wall functional without boxing it in, outdoor kitchen ideas on a budget diy friendly has smart low-lift storage ideas you can borrow without cluttering the surface.
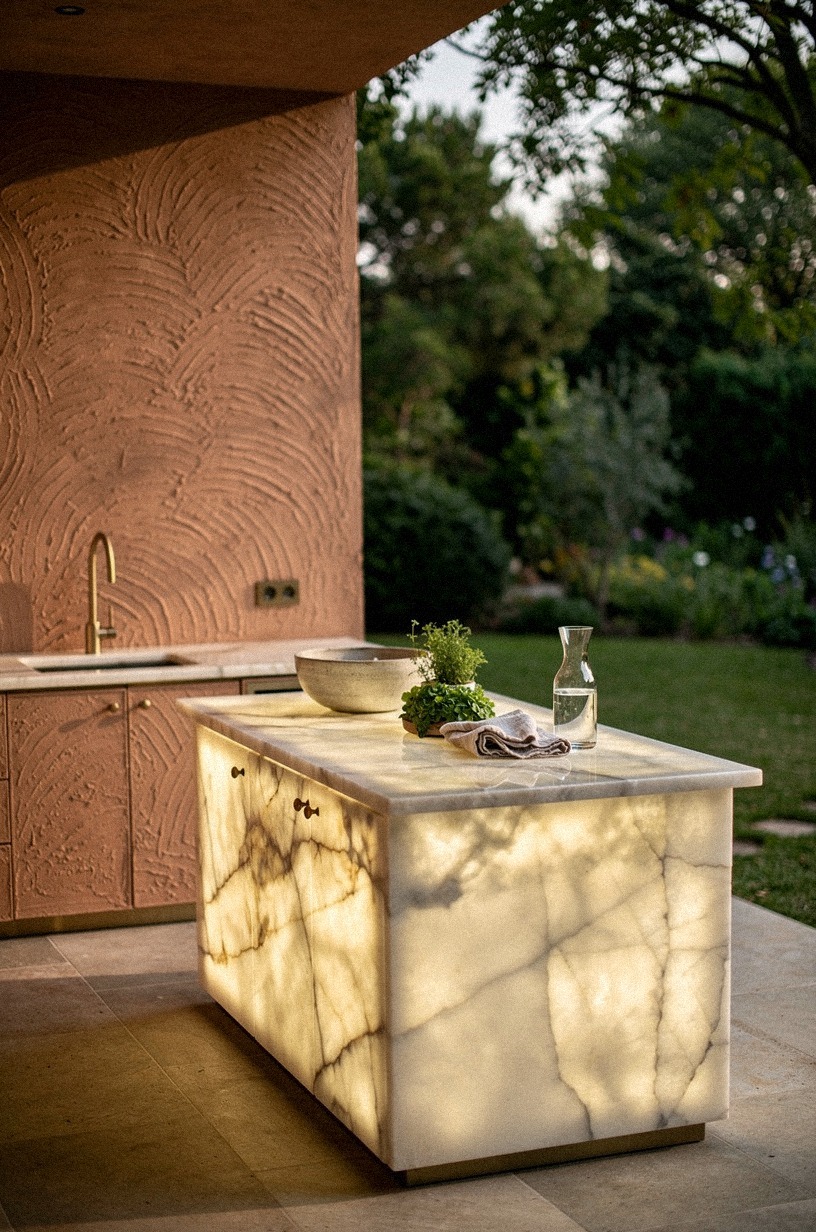
12Pour a polished concrete serving ledge
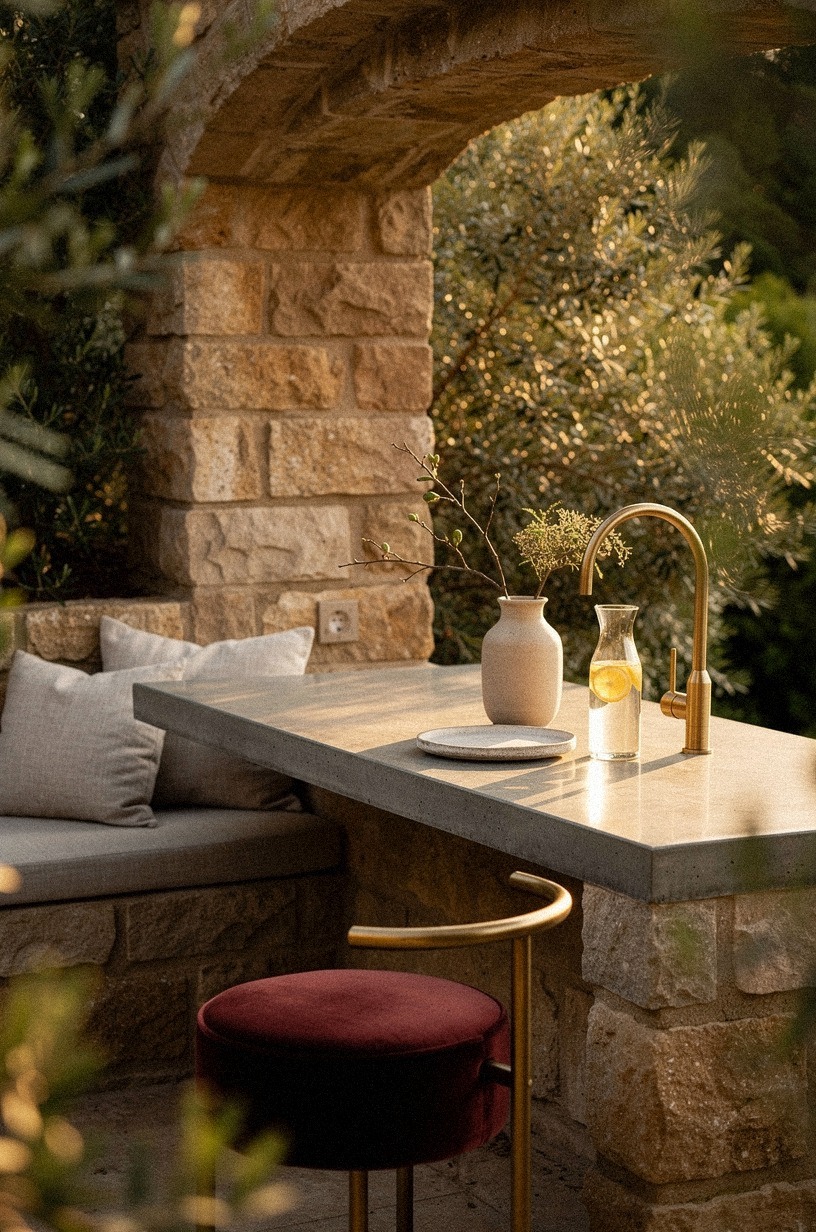
This serving ledge solved a hosting problem I kept pretending didn't exist. People gather near food, and if you don't give them a place to land, they colonize your prep zone.
A polished concrete ledge along the outer edge gave guests a perch for drinks and plates while keeping the working side clear. The foliage-framed view of it is my favorite angle in the whole project because it makes the kitchen feel discovered, not announced.
Concrete also keeps the material palette from getting too precious. Stone, granite, and copper can skew heavy if every surface is richly textured.
A clean concrete plane cuts through that and gives your eye a rest. I kept the sheen low, more soft polish than mirror, because outdoor glare is rude.
If you entertain a lot, do this before you buy another accessory. You'll use it every single weekend! And your prep zone instantly feels calmer.
13Plant rosemary beside the prep counter
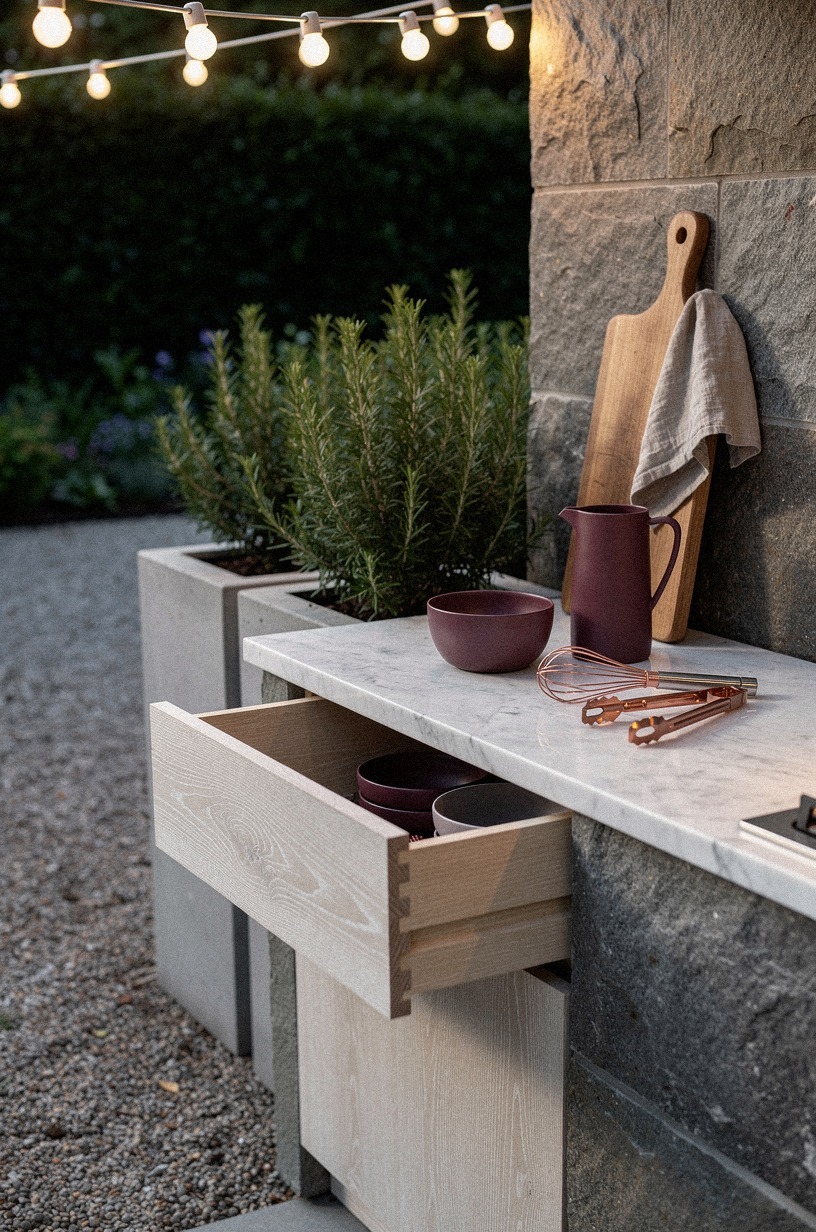
Planting rosemary beside the prep counter was one of the cheapest moves and one of the most satisfying. You step up, brush the plant with your hip, and the whole station smells like dinner might happen soon.
That's not decorative fluff. That's atmosphere doing real work.
The silvery green also cuts nicely against warm stone, especially if your kitchen exterior leans beige, cream, or sandy gray.
I planted it where you could snip from the counter side without crossing the cook path, then kept the bed low so the masonry still read clearly. If you're tempted to cram in lots of plants, don't.
One aromatic herb at hand beats five scattered pots you forget to water. For more compact planting logic, outdoor kitchen pool combos for the ultimate backyard shows how to let greenery frame the zone instead of swallowing it.
14Hang iron hooks above the oven tools
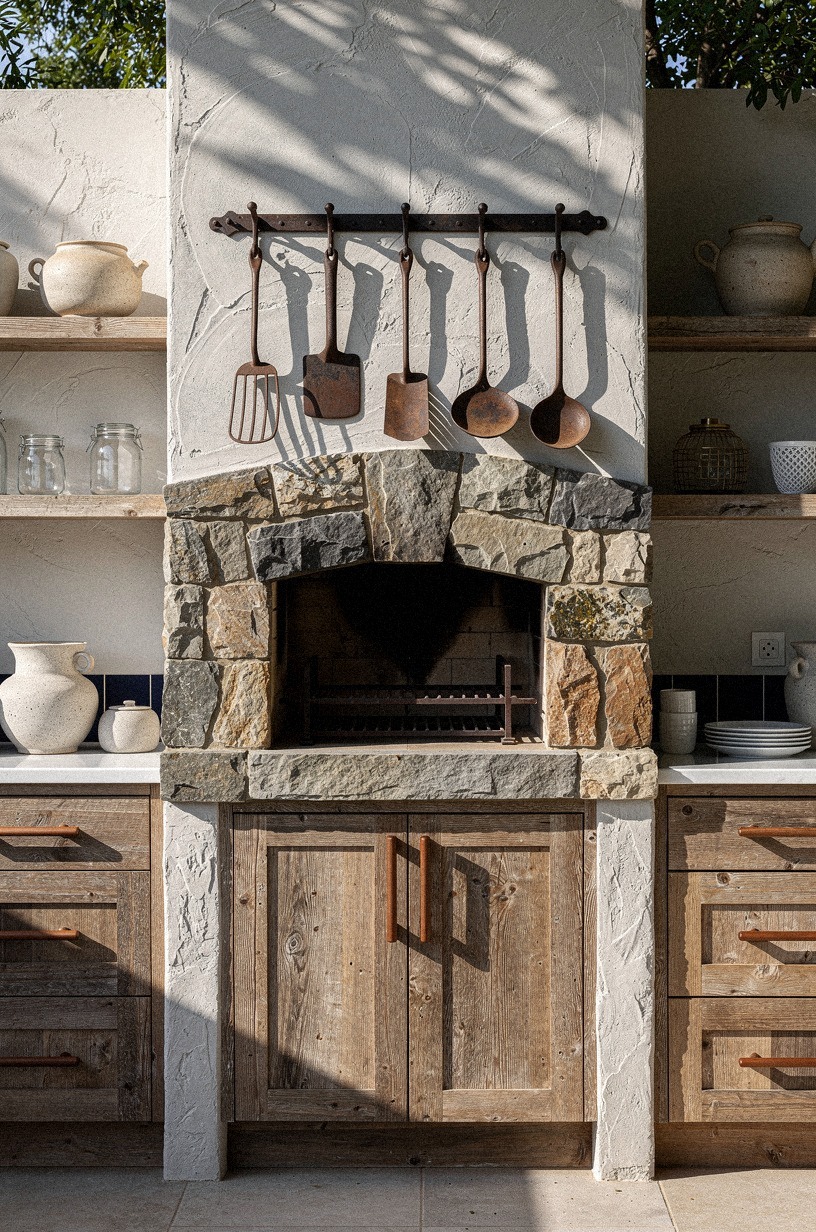
Hanging forged iron hooks above the oven tools gave the wall a little order without making it precious. The peels, brush, and glove finally had a home, and that meant the counter stopped collecting random objects by default.
You know how a project can look done but still function like a mess? This was one of the fixes that closed that gap.
I stepped toward the oven one night, saw the tools lined up, and thought, yes, now the kitchen knows what it is.
I kept the hooks dark and simple so they disappeared into the stone when nothing was hanging there. Fancy hardware would've looked costume-y.
And I mounted them where your shoulder naturally turns, not where they looked cutest in a mock-up. Function first.
Always. If you like disciplined storage ideas, small outdoor kitchen ideas that maximize every inch is worth saving because the best small spaces never waste vertical surface.
15Style clay pots along the counter edge
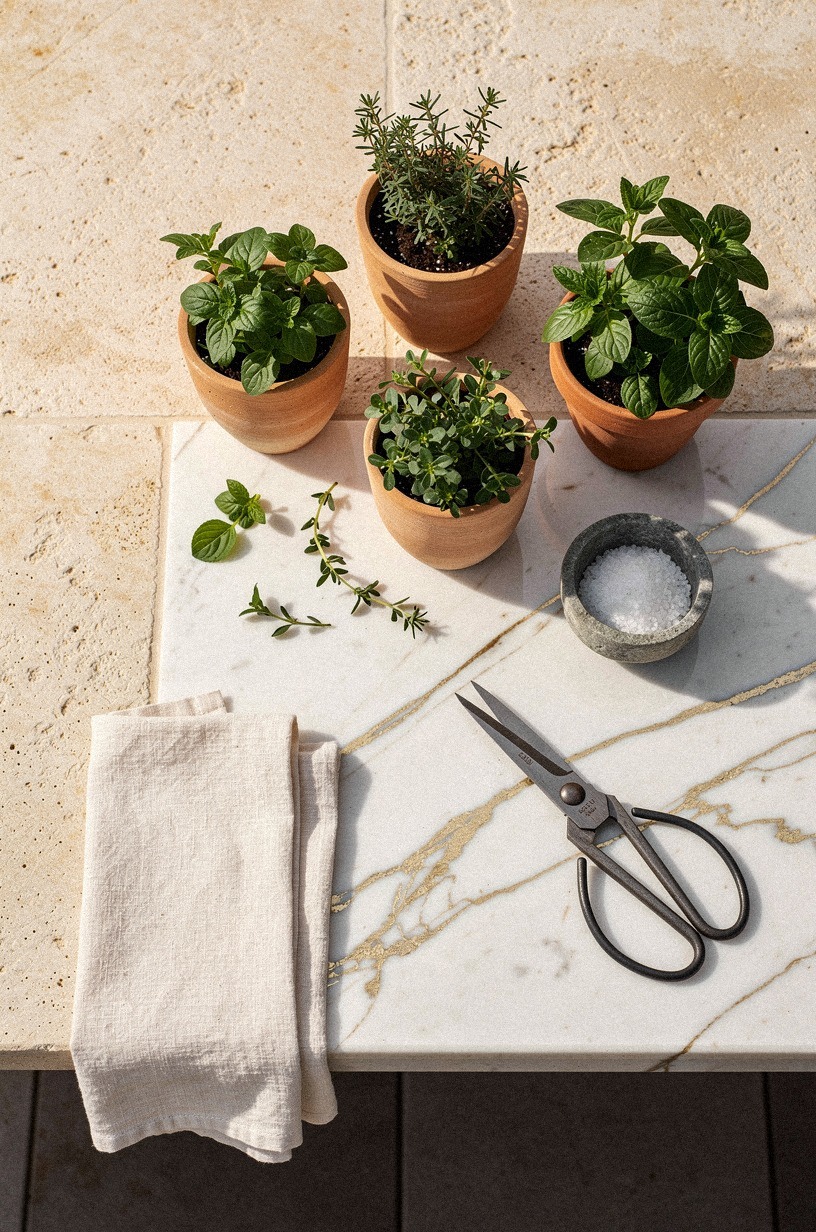
The clay pots were my answer to the question every hardscape makeover eventually raises: where does the softness come from? I lined the counter edge with terracotta herb pots in a small overhead arrangement, not a giant garden center display. That calm repetition mattered.
One pot can look lonely. Ten can look like you're selling basil.
Three or four, in slightly different heights, feels grounded and easy.
I also liked how the matte clay played against the cooler sparkle of the prep tools. That contrast keeps stone from becoming too gray on gray.
If you want the look to stay old-world instead of themed, pick plain pots with mineral bloom and skip anything glazed bright blue. But do keep the herbs practical.
I used thyme, oregano, and another rosemary cutting because if I'm watering them, I want dinner to benefit too.
16Build a pergola over the stone run
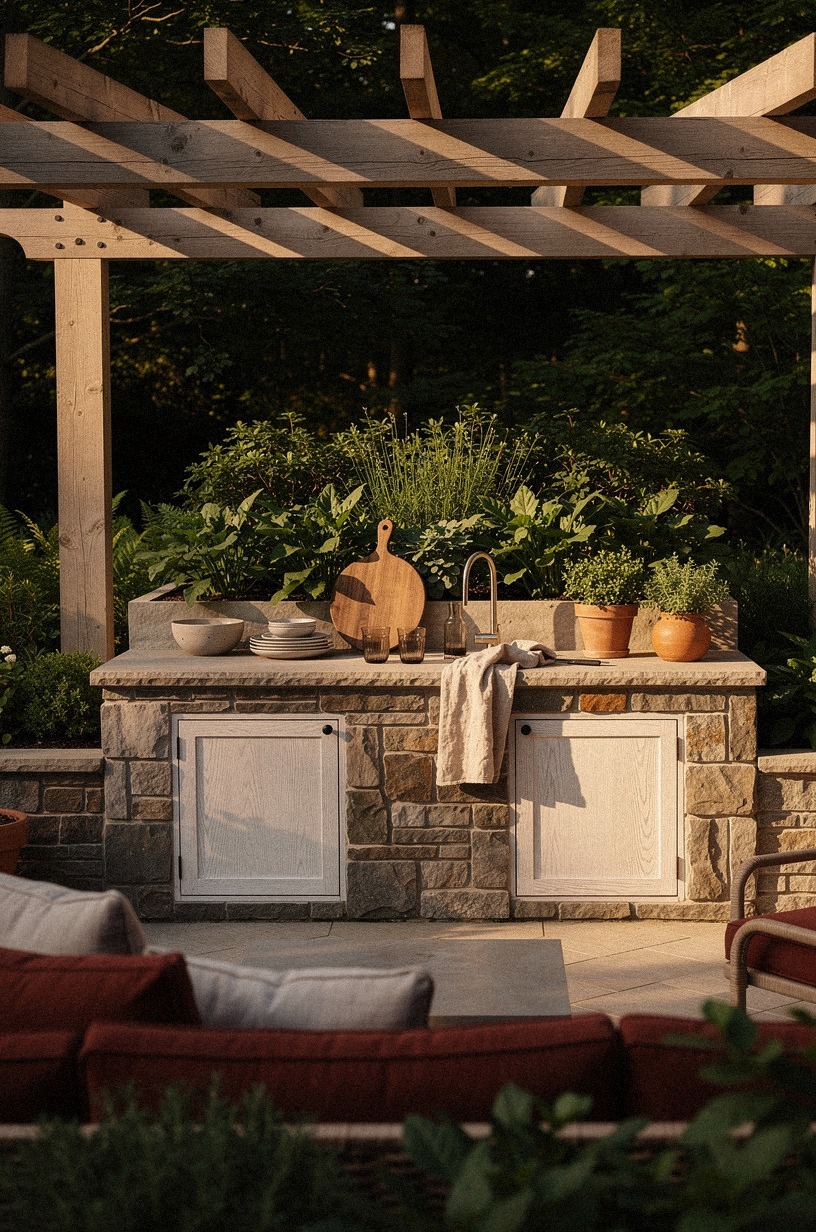
The pergola was the move that made the whole line read as a room. Before that, the stone run looked good, but it still felt exposed in midday sun.
Once the cedar pergola went up, the kitchen gained a ceiling effect without losing air. And that's when the rugged materials started feeling welcoming instead of stern.
Shade changes personality. Fast.
I kept the structure simple and let the stone stay the star. No scrolls, no fake distressing, no heavy stain.
Just straight members and enough depth to throw real shadow across the counters by late afternoon. A soft exterior trim nearby in Benjamin Moore White Dove OC-17 kept the view bright, while a fence section washed in Sherwin-Williams Evergreen Fog SW 9130 pushed the greenery forward. If you're designing the whole yard together, outdoor kitchen hot tub ideas for a resort style yard helps you think in outdoor rooms instead of isolated features.
17Set bar stools against the granite overhang
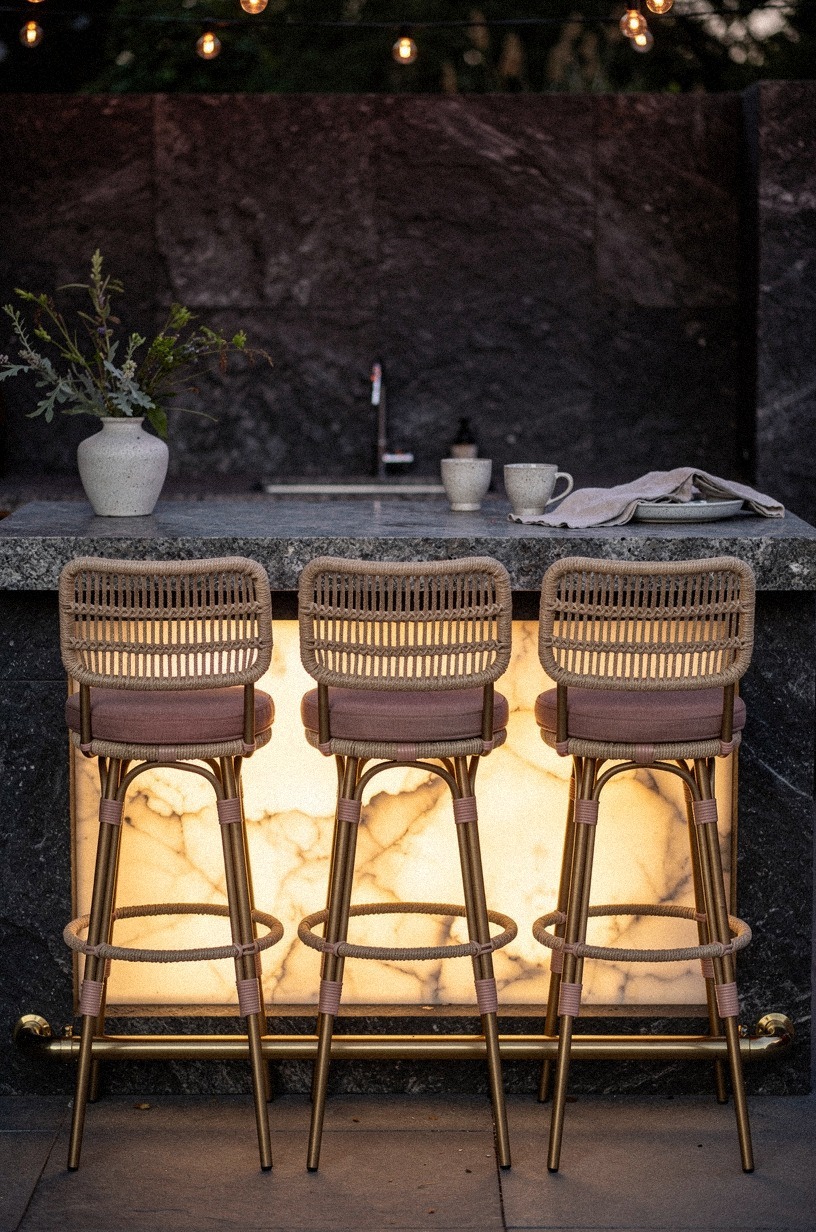
Bar stools were where I nearly got too slick. I first looked at skinny metal options and they made the whole overhang feel like a coffee shop counter.
Wrong mood. I switched to Threshold Dondra counter stools with woven seats, and the granite overhang finally felt relaxed enough for a second drink and a long conversation.
You need stools that can hold their own against stone, not disappear next to it.
This is also where you protect comfort with numbers. I kept the ledge at standard 36 in counter height and made sure knees had a little grace underneath.
Nothing kills lingering faster than stools that look good for six minutes. If your outdoor kitchen has to do dining duty too, outdoor kitchen ideas for small backyards big function littl is packed with smart overhang ideas you can steal.
18Finish with lanterns above the cooking wall
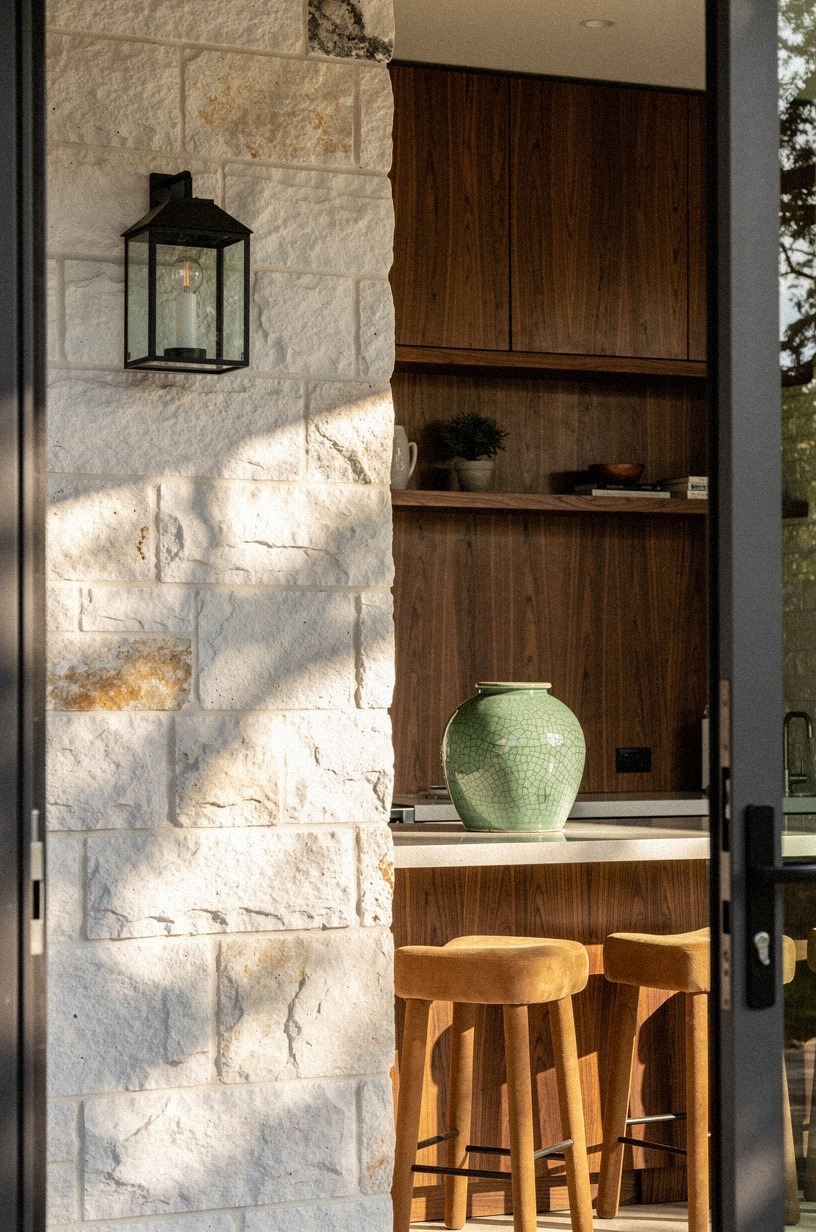
The last layer was lanterns, and yes, they finished it. I hung iron-framed lanterns above the cooking wall where you catch them through the doorway before you even see the counter.
That layered view matters because it pulls you in. You don't walk outside and meet the kitchen all at once.
You glimpse light, then stone, then the working surface. It feels like arrival.
I used them as glow, not task lighting, so the sconces could still do the practical work. That's an easy distinction to miss.
Decorative lights should warm the scene, not bully it. By the time these went up, the whole makeover had settled into itself.
But this was the moment it stopped being a project and started being the place everyone drifted toward after dark. Worth it!
And yes, people noticed right away!
How much it cost, The One-Zone Spend Rule
I kept our makeover inside the cosmetic tier, then spent harder on the pieces that touch your hands and eyes most. The short version: this kind of kitchen makeover can live anywhere from $300 to $1,500 if you're repainting, swapping hardware, and refining surfaces instead of rebuilding the whole footprint. Once you get into full cabinet changes or brand-new appliances, that's a different universe.
My own spend landed at $1,284 over two weekends and a long Friday. Stone veneer and mortar took the biggest share, then the copper sink, then lighting. If you need a budget-first roadmap, outdoor kitchen ideas on a budget diy friendly is the one I'd read before buying a single accessory, because accessories won't rescue a weak layout.
Why did the rugged look finally last, The Three-Surface Rule
What finally made this makeover stick wasn't the stone alone. It was the fact that I stopped treating durability and atmosphere like two separate goals. For years I did that thing so many of us do outside: buy for weather first, then try to layer in personality later. The result always felt half-finished.
Practical, yes. Memorable, no. This time I gave the kitchen three surfaces that age in ways I can live with: rough stone, forgiving granite, and one warm metal accent in copper.
That combination does something laminate and powder-coated everything never quite can. It gets better when the light gets lower.
And that changed how I shopped for every surface.
I also got stricter about what each material was supposed to do. Stone carried the weight.
Granite took the abuse. Copper delivered the small flash that keeps the run from feeling mute.
Once I gave each surface a job, decisions got easier. I didn't need five decorative moments. I needed three hardworking ones.
That's the part I'd missed before.
And here's the honest cost lesson: the money that mattered most was not in cute styling extras. It was in the first two moves you touch every day, the counter and the sink.
I could've saved there and spent more on decor, but I'd have regretted it by the second cleanup. A kitchen isn't a vignette. It's repetition.
If a surface annoys you at 8 pm when you're wiping it down, you'll start resenting the whole project.
But I don't think you need a luxury build to get the old, rugged feel. You need clarity.
Pick the dominant stone first. Decide whether your warmth comes from wood, copper, or planting.
Then hold the line. I even tested a darker paint card, Farrow & Ball Studio Green No. 93, near the fence because I thought the moody contrast might help.
It didn't. In our yard it pulled the stone colder, and cold was exactly what I was trying to escape. That one sample saved me from a bigger mistake.
If you're wondering why some outdoor kitchens age gracefully while others date almost immediately, I think this is why. The lasting ones don't chase novelty.
They make a few material promises and keep them. You feel that consistency in your body before you ever name it.
And once you do, it's hard to go back.
The Questions I Get Asked Most
What is the best Stone Outdoor Kitchen Ideas for a Timeless, Rugged Look for a small kitchen?
The best pick for a small kitchen is a straight stone wall with one tight prep ledge and open legroom. A long wall run saves space better than a chunky island.
Narrow shelves. Slim stools.
Borrow layout ideas from small outdoor kitchen ideas that maximize every inch.
Where can I buy Stone Outdoor Kitchen Ideas for a Timeless, Rugged Look pieces on a budget?
Start with Target Threshold, IKEA, and Wayfair for stools, shelves, and lanterns, then check Facebook Marketplace for stone planters or reclaimed wood. One smart secondhand score beats three cheap filler purchases. If you need more low-cost directions, save outdoor kitchen ideas on a budget diy friendly.
How much does a Stone Outdoor Kitchen Ideas for a Timeless, Rugged Look makeover cost?
Most cosmetic makeovers cost about $300 to $1,500, and the free wins are layout edits, decluttering, and moving planters where they frame the run instead of blocking it. Stone veneer and counters raise the bill first. For broader ranges, compare with rustic outdoor kitchen ideas for a charming cookout space.
Can I create a Stone Outdoor Kitchen Ideas for a Timeless, Rugged Look on a budget?
Yes, and you can get the mood before the remodel. Reface the visible wall, stack real firewood, add one lantern pair, and plant rosemary by the prep zone.
Cheap moves. Strong payoff. If your yard is tiny, outdoor kitchen ideas for small backyards big function littl helps you prioritize what reads first.
Is a Stone Outdoor Kitchen Ideas for a Timeless, Rugged Look worth it in a small space?
Yes, because small spaces reward strong materials. A compact zone with one real stone gesture often feels more finished than a large yard full of separate pieces.
Keep your clearances open and your storage vertical. The small footprint can make the kitchen feel edited, not lacking.
Is Stone Outdoor Kitchen Ideas for a Timeless, Rugged Look a good idea for a rental?
Yes, if you focus on portable warmth and no-damage layers. Freestanding shelves.
Removable sconces where allowed. Pots, hooks, lanterns, and a prep cart wrapped in outdoor-safe panels.
For flexible setups, rv outdoor kitchen ideas for cooking on the road has the same why-buy-it-twice mindset.
Stone over shiny steel, The Light-Back Rule
If I had to pick one, I'd start with the limestone grill wall. Shiny steel alone never warms a yard, but pale stone throws light back at you and makes every other choice look more settled. Pin that move first, then build around it.