How to build an outdoor kitchen for a typical US budget usually starts around $300 for cosmetic fixes and can climb past $25,000 when you add new cabinets, counters, and appliances. I learned that the hard way when I priced shiny pieces first and the boring base work second. Bad order! If you're a beginner, the smartest move is slowing down just enough to build the bones before you chase the pretty stuff.
- Map the grill triangle before buying appliances
- Pour a level pad for the cooking run
- Build a cinder block base for counters
- Frame the grill bay with heat shields
- Run one utility chase behind cabinets
- Add a prep sink beside the cutting zone
- Mount open shelves above the serving counter
- Tuck a trash pullout under the island
- Layer pavers beneath the entire cook space
- Hang task lights over the grill line
- Finish with herb planters beside the prep station
1Map the grill triangle before buying appliances
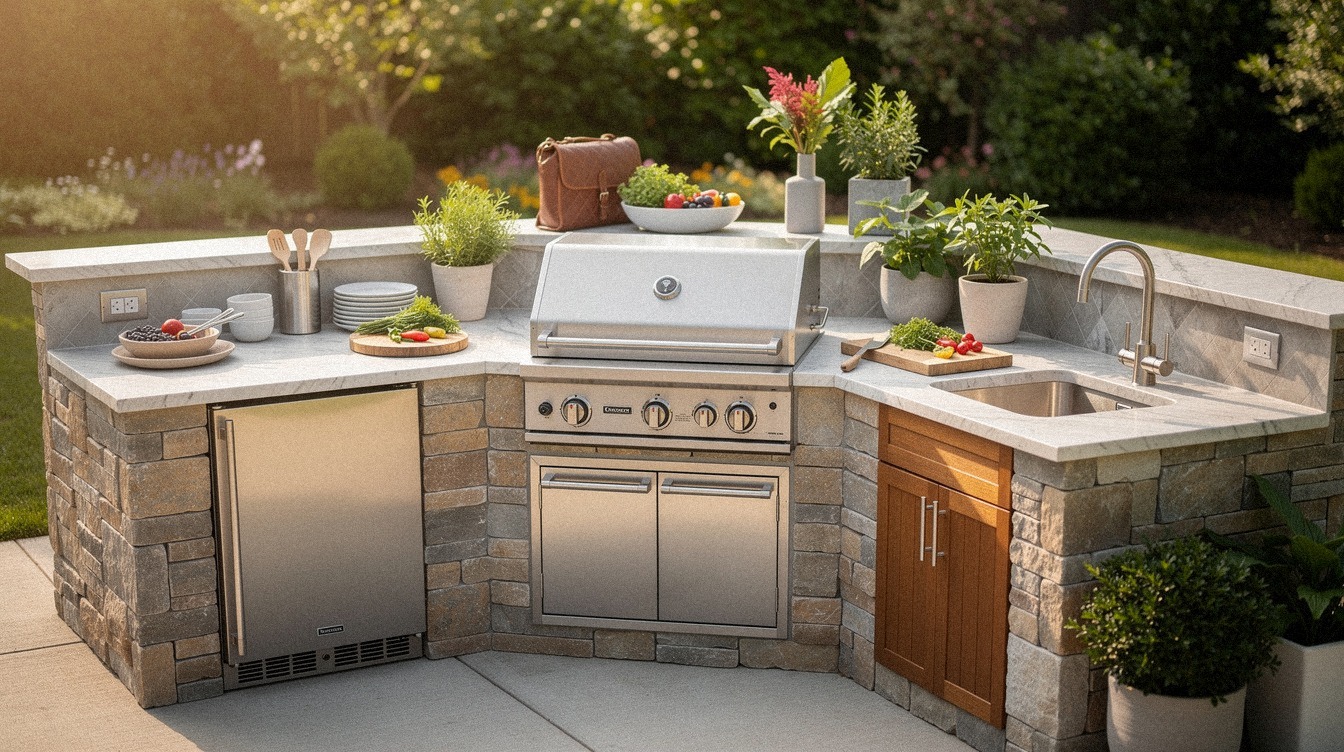
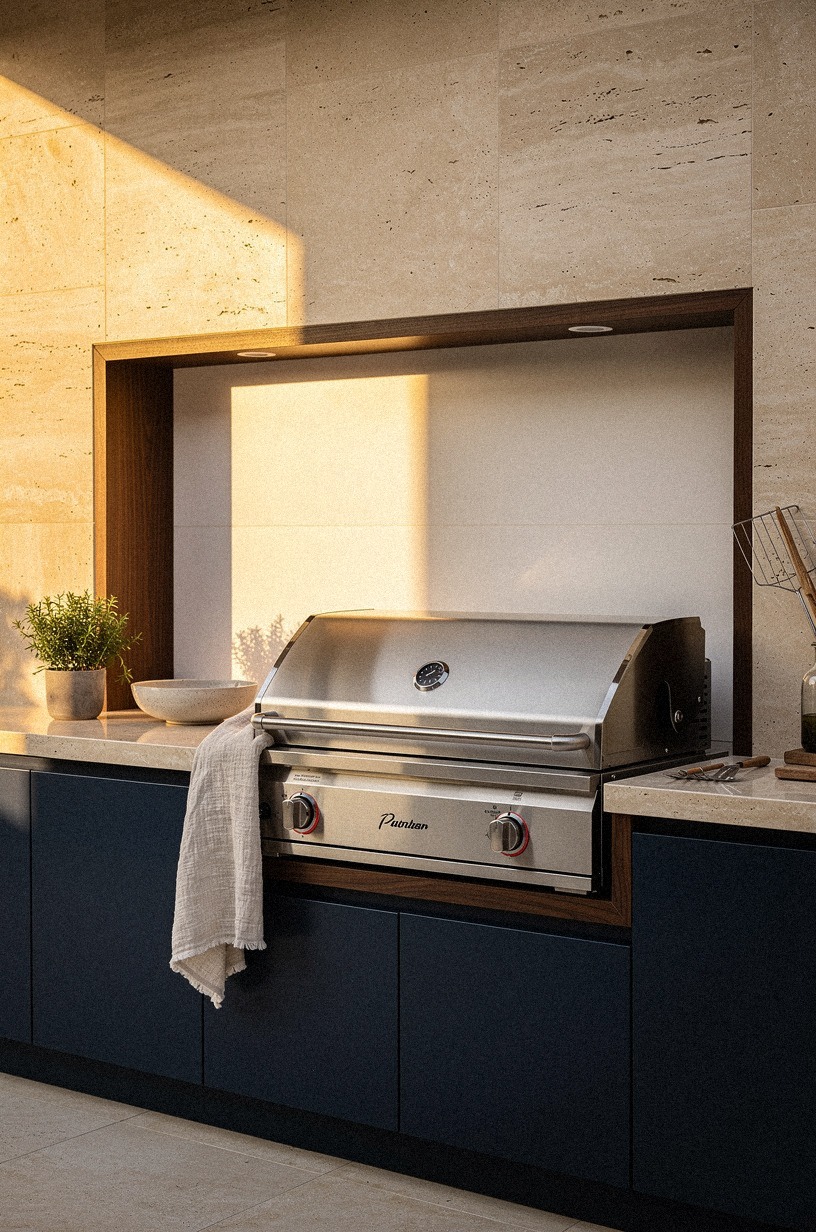
Start with the walk, not the grill. If you're planning an outdoor cooking space, you want your grill, sink, and prep zone to feel connected in one easy triangle so you aren't carrying raw chicken across the whole patio.
In the photo, the layout is centered and calm, with the built-in grill, sink cabinet, and prep counter balanced around cerused white oak doors. That's the feeling you want to protect before you buy anything expensive.
I sketch this in chalk or painter's tape first, and you should too. Mark a standard counter height of 36 in so your body can feel it, then leave at least 42-48 in around the island or main run if people will pass behind you.
If you're working with a tighter footprint, borrow a few spacing ideas from small outdoor kitchen layouts that maximize every inch. The part beginners miss is symmetry.
A centered grill line looks custom even when the budget isn't!
My rule here is the Grill Triangle Check. If you can't move from sink to board to fire in three easy turns, don't buy the appliance package yet.
And if a flashy pizza oven ruins the prep path, skip it. You'll use the prep counter every night.
The showpiece? Maybe twice a month. A slim CB2 stool at the corner of the island pulls the eye without crowding the work zone, and an IKEA KALLAX-grade closed cabinet hides the propane tank without looking garage.
2Pour a level pad for the cooking run
Pour the pad before you start building cabinets, because nothing gets weird faster than a cook line that slowly drifts out of level.
3Build a cinder block base for counters
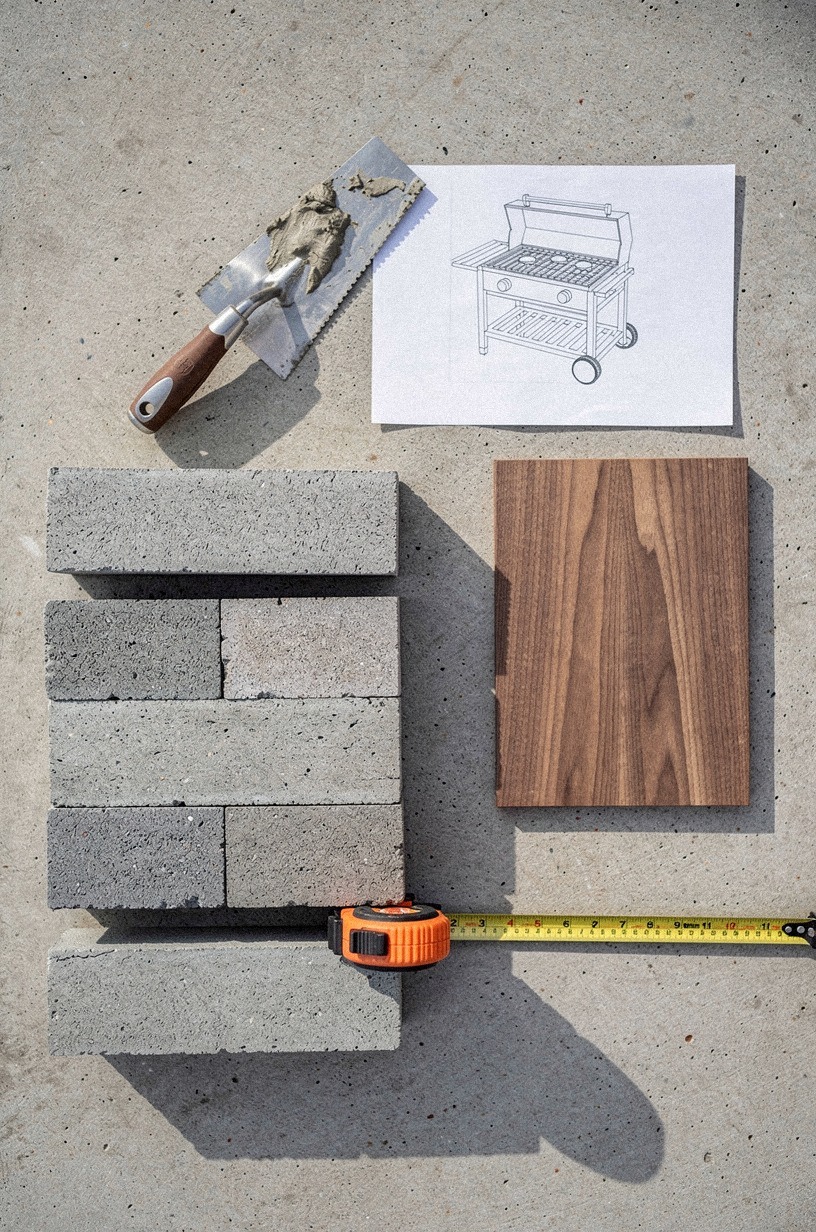
Build the base with cinder block if you're new to this and want structure that forgives small mistakes. In the overhead photo, you can see stacked blocks, a mortar trowel, a tape measure, and a rich book-matched walnut counter waiting for the upgrade. That mix tells you exactly how to think: rough base below, refined finish above.
Here's why I keep coming back to block. It's affordable, predictable, and a lot less intimidating than custom framing if you've never built counters outdoors before.
Lay out the run to support the grill opening, the sink zone, and at least one generous prep span, then stack dry first so you can catch awkward joints before mortar locks you in. If you're chasing a more rugged look, stone outdoor kitchen ideas for a timeless rugged look can help you see where the heavy base style really works.
A Target Threshold-grade planter at the corner softens the block without softening the look.
My preference is to hide the utility of the block with better doors and a stronger top rather than pretend the structure itself is precious. You don't need precious. You need square.
Use a tape measure constantly, check level every course, and leave clean openings where a trash pullout or access panel will live later. Beginners usually overspend on fronts and underspend on the bones.
I'd reverse that every time.
4Frame the grill bay with heat shields
Frame the grill bay like it matters, because it does.
5Run one utility chase behind cabinets
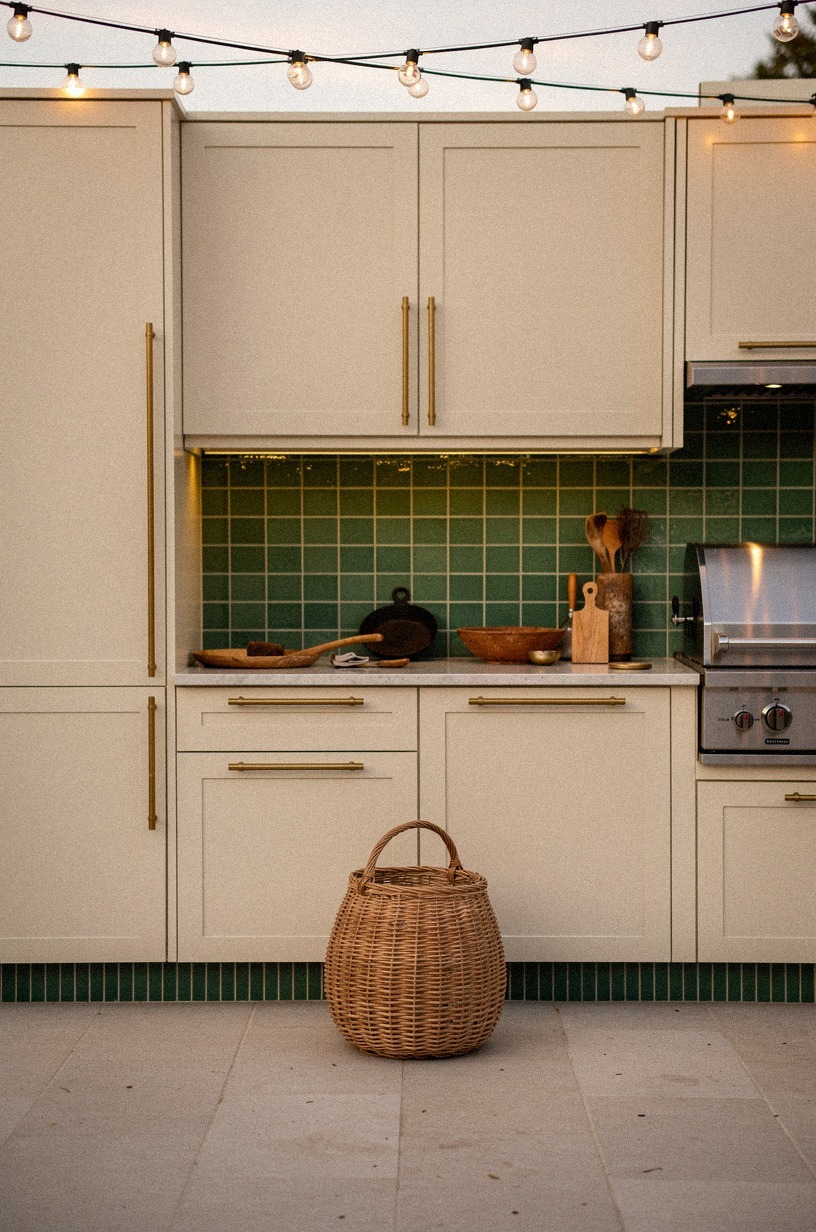
Run one slim service chase behind the cabinets instead of snaking every line through the middle of your storage. In the image, the open channel sits neatly behind cream cabinet boxes with unlacquered brass hardware, and you can see why it works.
The face stays clean. The mess hides in one disciplined lane.
If you're bringing water, drain, gas, or electric to an outside kitchen design idea, giving those lines one shared path makes repairs so much easier later. You'll thank yourself the first time something leaks or a fitting needs attention.
I like a narrow open chase that stays accessible rather than a sealed mystery cavity. Why build yourself a future headache just to save a few inches today?
Use this chase to protect the storage you paid for. Your trash pullout, grill tools, and serving pieces shouldn't have to compete with pipes.
If your kitchen has to sit on a deck, how to build an outdoor kitchen on a deck ideas and tips is worth reading before you lock in plumbing routes. And if you're picking a cabinet color, Sherwin-Williams Evergreen Fog SW 9130 looks especially good with cream boxes and aged metal nearby.
Soft. Practical. Not fussy.
6Add a prep sink beside the cutting zone
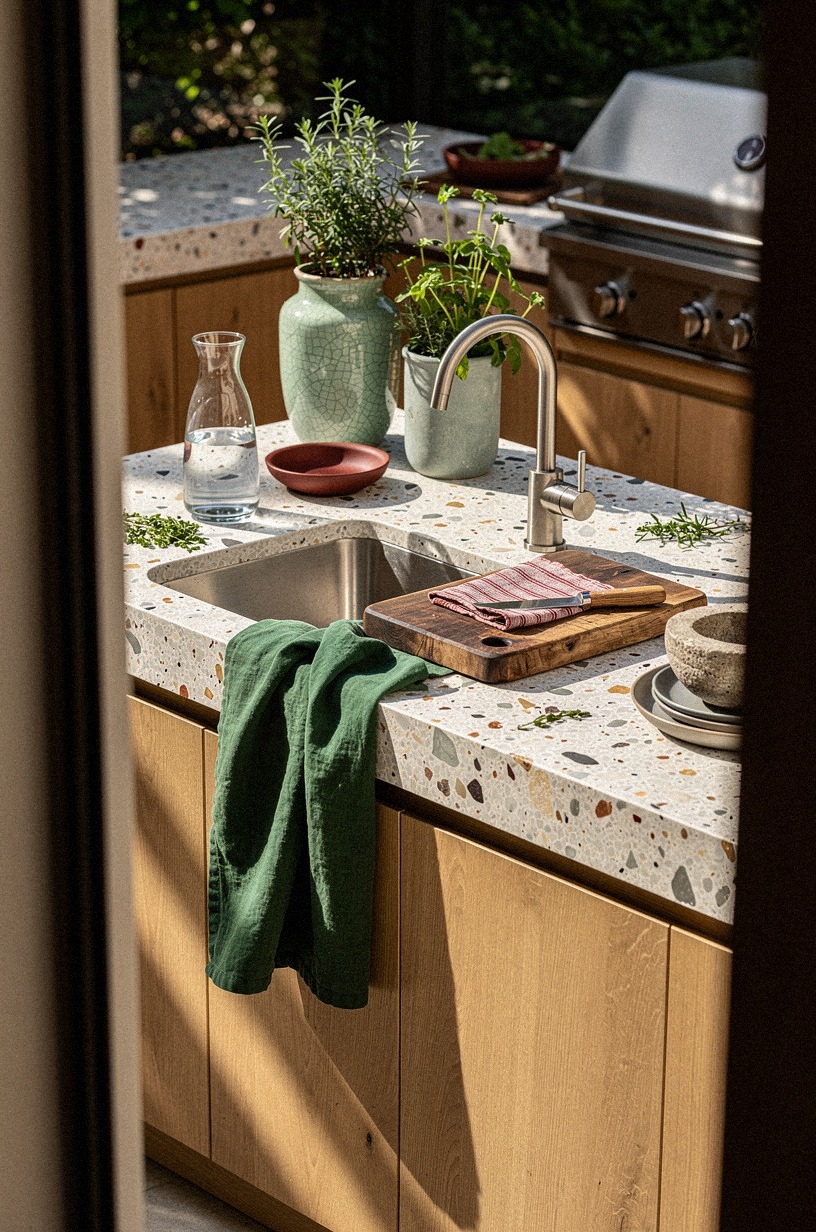
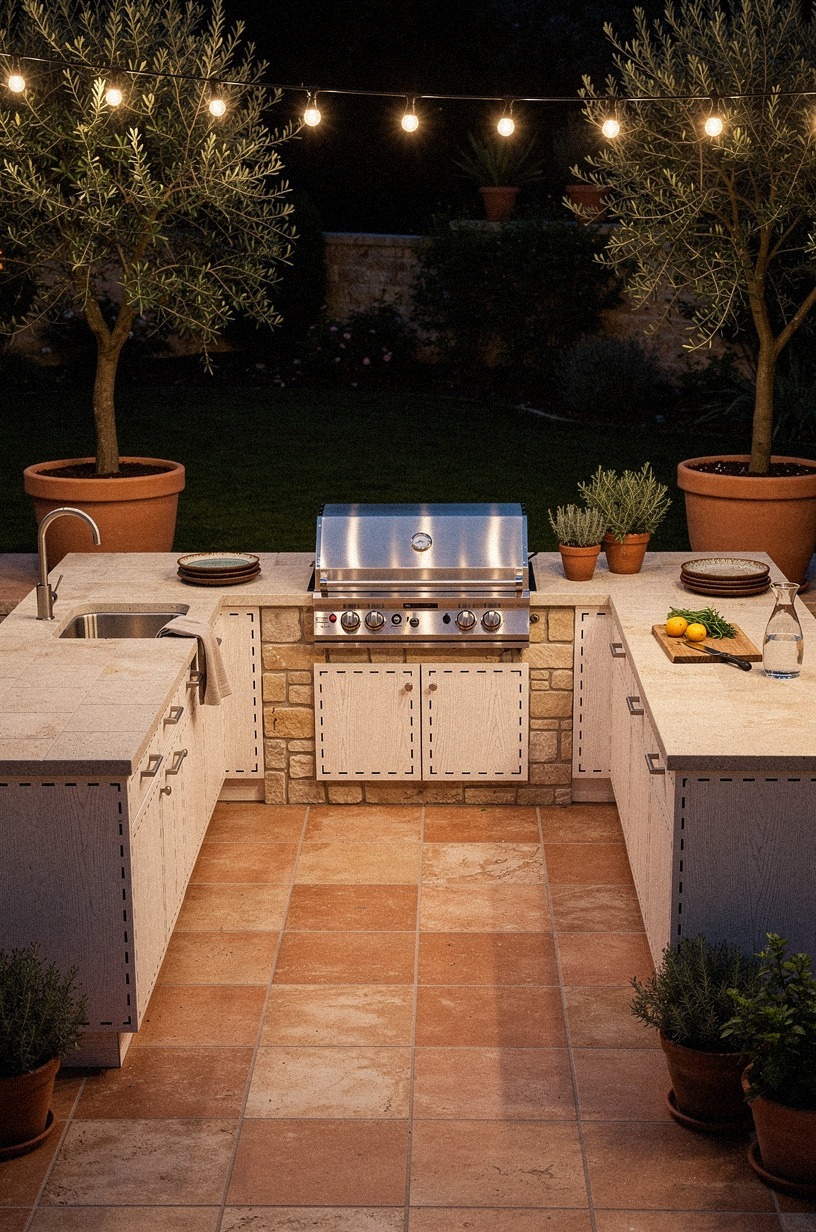
Add the prep sink right next to the cutting zone, not three steps away by the drinks. In the doorway view, the small sink sits inside an oversized-chip terrazzo counter with a cutting board and a simple grill setup beside it.
You can feel the logic. Wash, trim, turn, cook.
This is one of those beginner moves that looks minor and changes everything. A prep sink doesn't need to be huge.
It needs to be close. If you're rinsing herbs, washing your hands, or dealing with sticky marinades, proximity matters more than basin drama.
I went back and forth on this once because a centered sink looked prettier on paper. In use, it was annoying.
Pretty lost to practical in about ten minutes.
Keep the counter edge generous enough for a board, and choose a finish that forgives splashes and knife-heavy prep. Terrazzo does that nicely, especially with visible aggregate that hides a bit of everyday mess.
And if you entertain by the pool, outdoor kitchen pool combos for the ultimate backyard shows how helpful a compact wash-up zone can be when wet hands keep showing up. For tighter footprints, small outdoor kitchen ideas that maximize every inch is useful here too.
You'll use this sink more than you think. An unlacquered brass faucet handles splashes and salt air better than polished chrome ever will.
7Mount open shelves above the serving counter
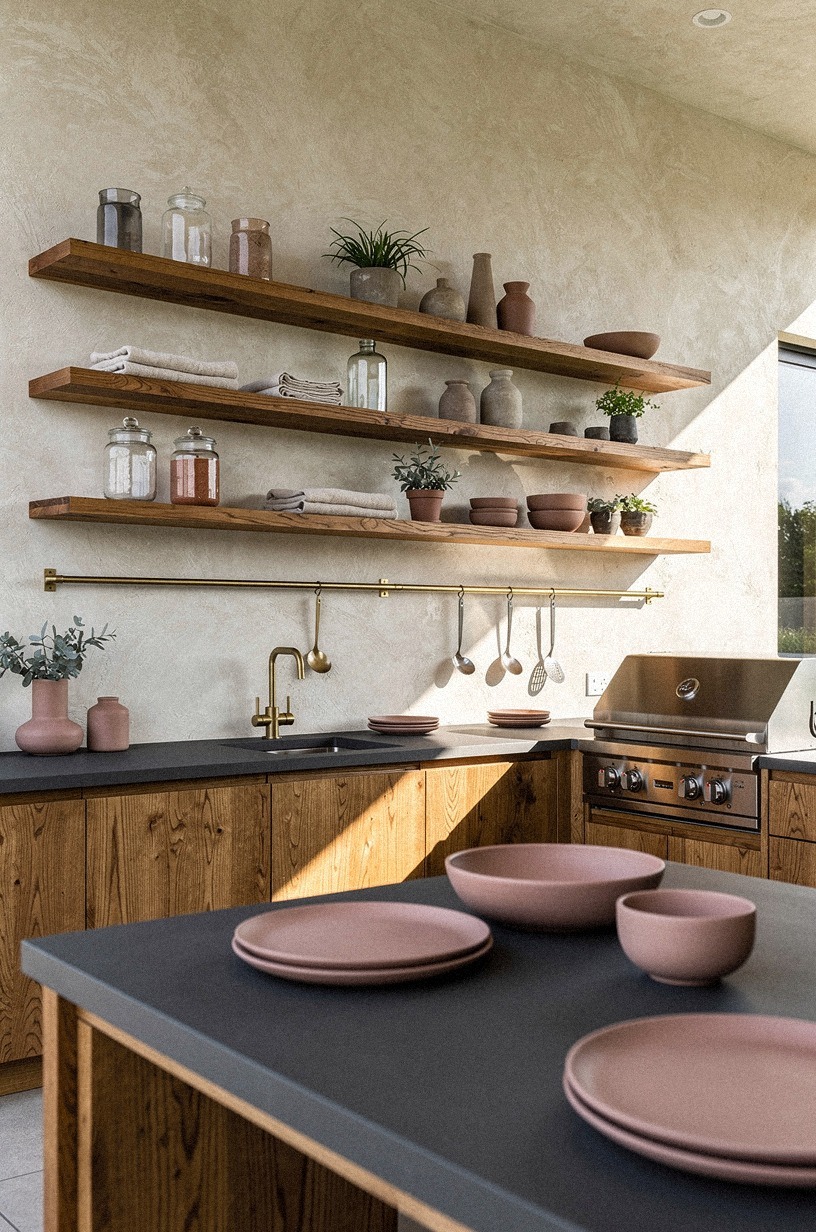
Mount open shelves above the serving counter only after the hard-working zones are settled.
8Tuck a trash pullout under the island
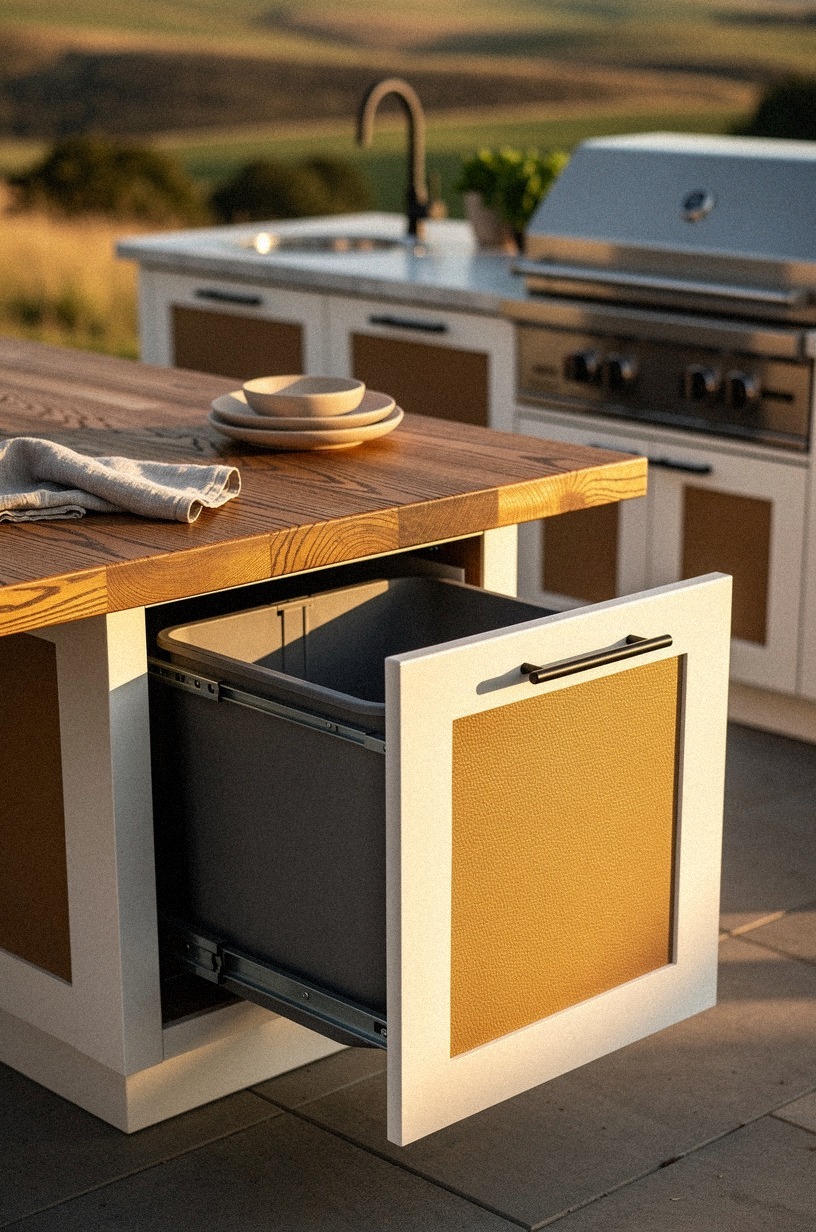
Tuck the trash pullout under the island and keep it close to prep, because scraps travel farther than you think. In the relaxed three-quarter image, the pullout sits partially open under a warm white island with camel-toned panels and black hardware.
That's exactly how it should read. Quiet, useful, almost invisible.
Beginners love to talk about grills and counters, but waste is what keeps the whole kitchen moving. If you have to cross the patio every time you trim packaging, toss peels, or dump paper towels, you'll feel the friction fast.
I like a concealed pullout with room for trash and, if possible, a second bin for recycling. But I wouldn't sacrifice your best drawer bank for it.
Put the bin where the mess begins, not where the cabinet map looks symmetrical on paper.
And make the front sturdy. A cheap, rattly insert will annoy you every single cookout. If you like the layered warmth of camel panels and dark pulls, repeat that look in other rugged spaces like rustic outdoor kitchen ideas for a charming cookout space.
If your setup has to flex around road life or a movable station, RV outdoor kitchen ideas for cooking on the road can spark smarter storage choices. The luxury signal isn't a fancy bin. It's a kitchen that handles ugly tasks without showing them.
A soft-close hinge on the pullout door is the small detail that makes the whole thing feel grown-up.
9Layer pavers beneath the entire cook space
Layer pavers under the whole cook space instead of stopping at the island footprint.
10Hang task lights over the grill line
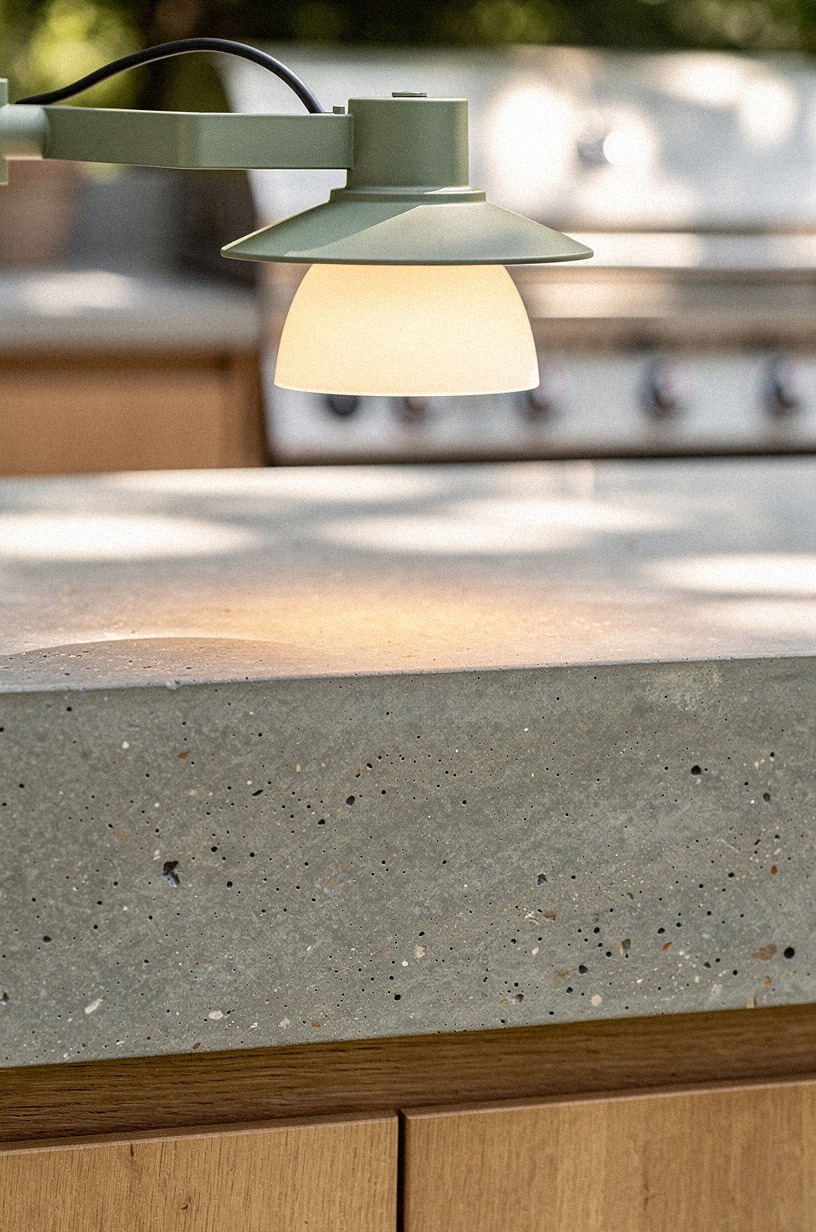
Hang task lights over the grill line even if you think the patio sconces are enough. They aren't. The hero detail in the photo shows a warm cream shade and a sage bracket mounted over a poured concrete countertop, and that close-up gets at something people forget: the grill zone needs focused light, not just ambiance.
The best outdoor kitchen ideas simple enough for beginners still respect evening use. You want light aimed at the grate, your hands, and the controls, not a dim glow somewhere behind you.
I prefer one purposeful fixture over a row of tiny decorative ones. More isn't always better.
A single well-placed task light looks grown-up and works harder.
Tie the finish back to the rest of the palette. A sage bracket with Sherwin-Williams Evergreen Fog SW 9130 nearby or a warm cream shade against Benjamin Moore White Dove OC-17 reads softer than shiny black everywhere.
And if you're planning a larger entertaining corner, outdoor kitchen pool combos for the ultimate backyard has good examples of layered evening lighting. The goal isn't brightness for its own sake.
It's confidence after sunset.
11Finish with herb planters beside the prep station
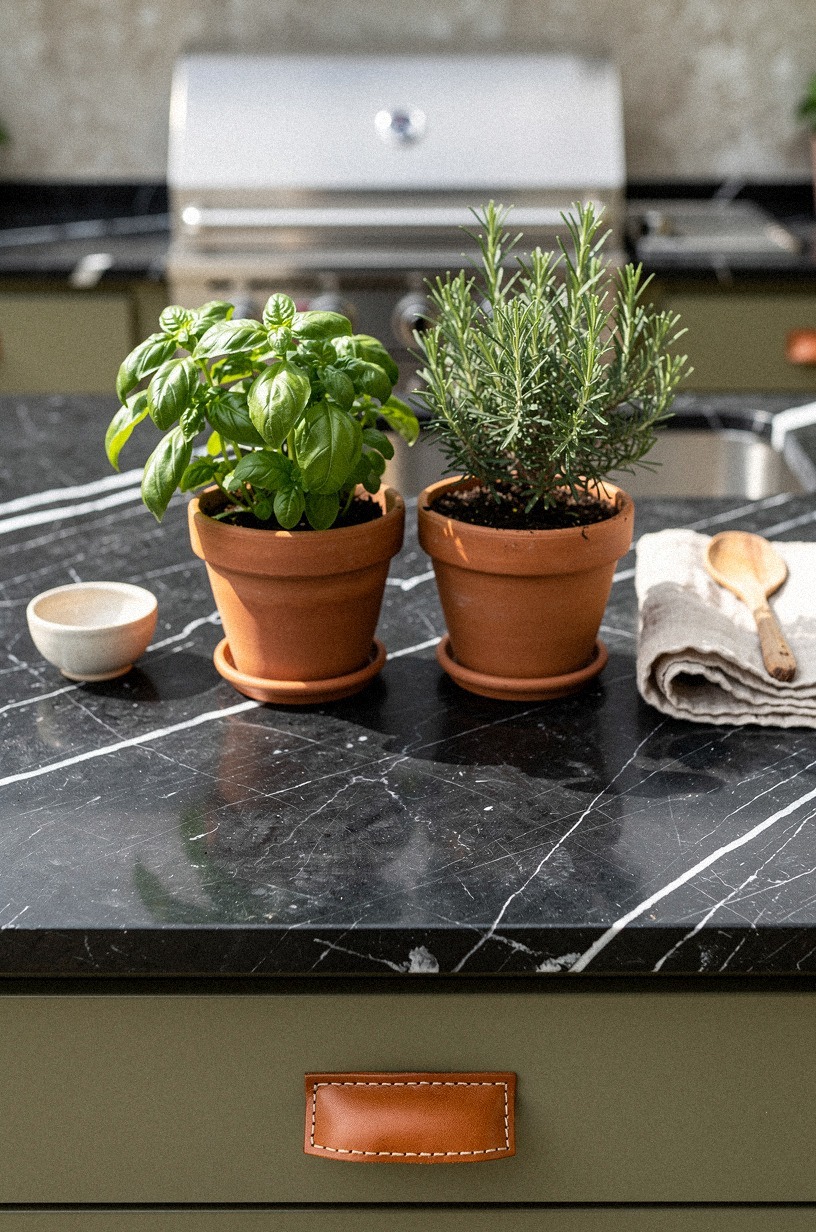
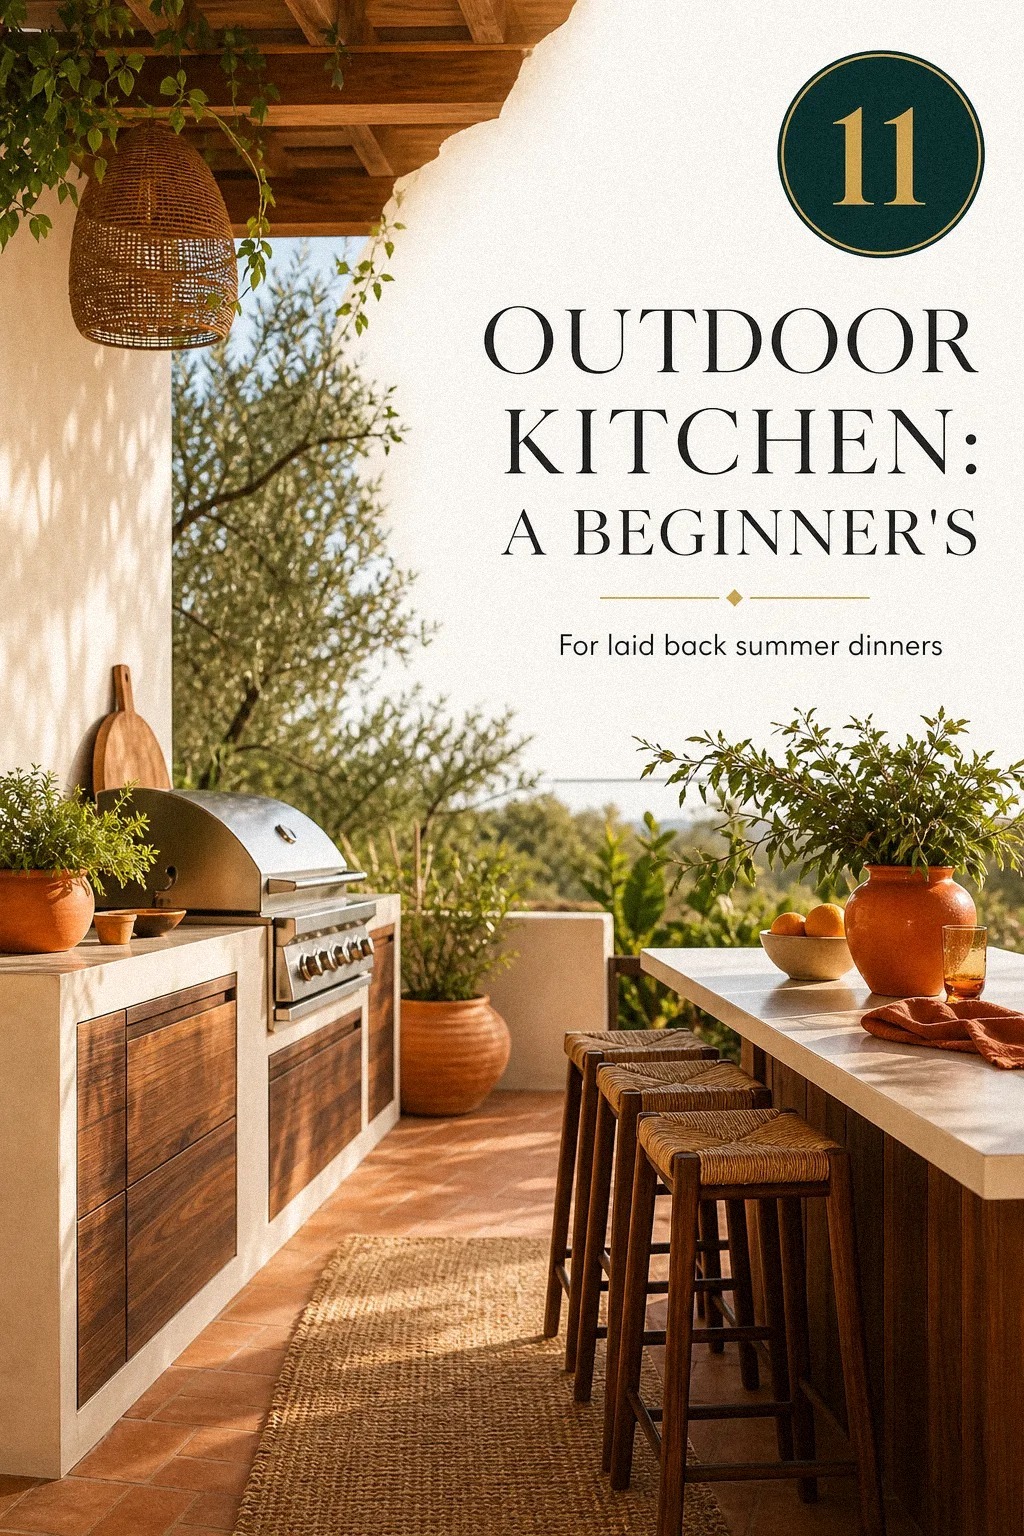
Finish with herb planters beside the prep station, because this is the rare pretty detail that's also deeply useful. In the ground-level image, terracotta pots of basil and rosemary sit beside the prep surface in a centered composition that feels settled, not staged.
That's the mood. Functional softness.
Keep the planters low enough that they don't block the work zone, and use herbs you genuinely reach for. Basil, rosemary, mint if you entertain with drinks.
If you're always cooking outside in small batches, a pair of pots is enough. You don't need a full raised bed pretending to be a garnish station. I tried that once, and it looked romantic for about a week before it turned into maintenance.
But clay wins here. Terracotta warms up stone, concrete, and painted cabinets better than black plastic ever will.
If your palette is light and tailored, the earthy note keeps the whole outside kitchen design from feeling sterile. One clipped rosemary, one loose basil, maybe a small thyme pot (nothing fussy). If you want more earthy references, stone outdoor kitchen ideas for a timeless rugged look pairs beautifully with this approach.
That's plenty. Fresh herbs at arm's reach. Worth it!
A Target Threshold-grade terracotta pot on a book-matched walnut ledge is the move that ties it all together.
What should a beginner actually buy first?
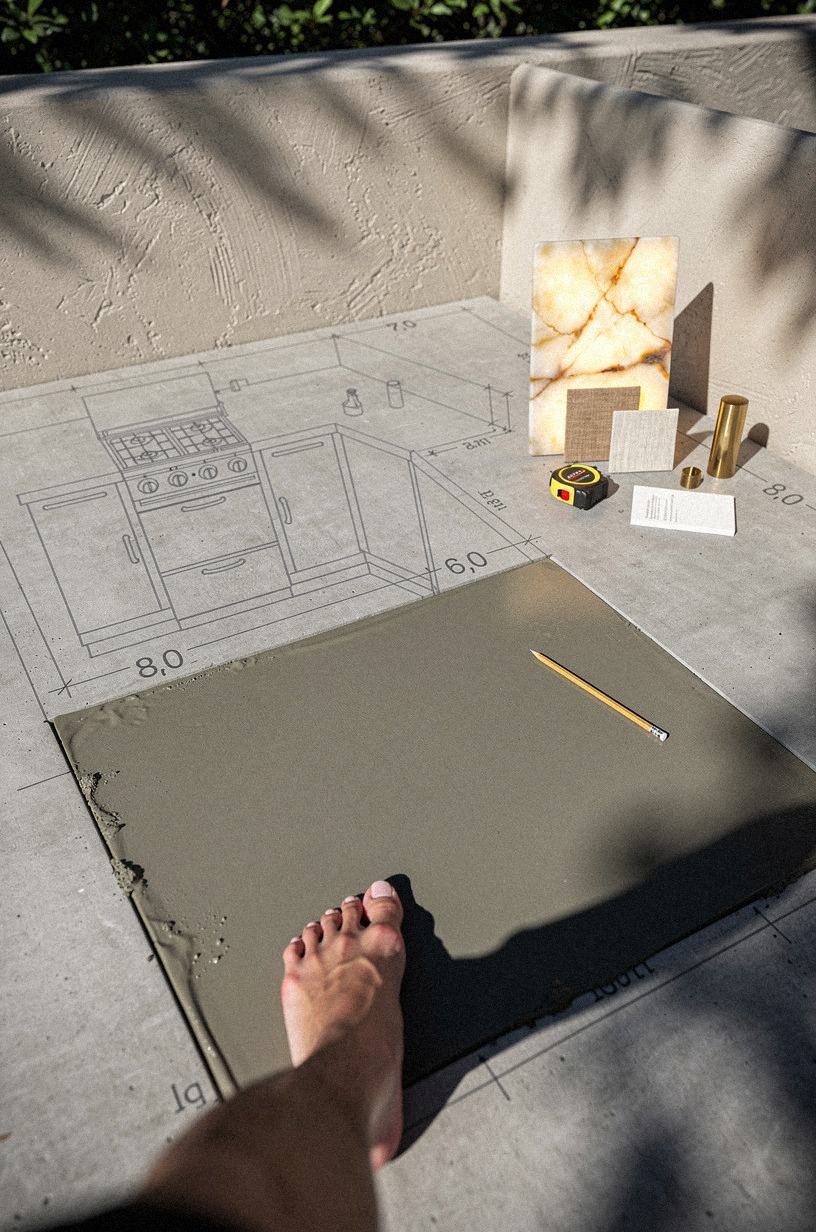
If I had to write a beginner's first shopping list, it wouldn't be the grill. It'd be a tape measure, a chalk line, two cans of marking paint, and a 4-foot level. You can build almost any outdoor kitchen with those four tools and the patience to use them three times more than you think you need to.
The reason I push this so hard: the most expensive mistakes I've watched happen aren't from buying a fancy fridge or a cheap grill. They come from buying anything before the bones are right.
A wobbly grill cart. A sink that's two steps too far.
Pavers that fight the cabinet door swing. Every one of those is a "should have measured first" problem, and each one costs more to fix than to prevent.
So before you fall down the appliance rabbit hole, lock in your footprint. Mark the triangle.
Pour the pad. Buy what the structure needs first.
The pretty stuff will wait, and it'll look better once everything underneath it is honest. A single Farrow & Ball Studio Green accent on a back wall or a CB2-grade bouclé cushion on a teak bench is the kind of detail that finishes the space without locking you into anything permanent.
The "Foundation First" rule that keeps everything square
Here's the rule I wish someone had pinned to my garage wall ten years ago: nothing else matters if the foundation isn't true. A 2-degree slope sounds tiny on a tape measure. By the time it reaches the top of your counter, your cutting board slides, your grill lid doesn't sit right, and your cabinets look like they're tired.
I treat the foundation like the most expensive piece of the build, even when it's the cheapest material. Concrete pad, cinder block base, paver field.
Each one is a chance to reset square and level for the layer above. Spend a Saturday with a level, a rubber mallet, and a long straight edge.
Boring afternoon, but the whole kitchen reads better for it. I learned this the hard way on a 3/4-inch solid white oak top that fought me for a week because I trusted a crooked base.
If you're building on a deck or a softer surface, how to build an outdoor kitchen on a deck ideas and tips is the read that will save you from sinking money into a frame that flexes. Trust the process. Square first, pretty later.
What "weather-ready" really means for cabinets
Most beginners assume "outdoor cabinet" means any cabinet that lives outside. It doesn't.
Real weather-ready means marine-grade plywood boxes, unlacquered brass hardware that's allowed to patina, drawer fronts that can take a summer thunderstorm without swelling, and finishes rated for UV, not just moisture. Skip any of those and you'll be re-buying cabinets in three summers.
I'd rather start with fewer cabinets and better ones than fill the run with bargain boxes. A single West Elm-grade door front in a real outdoor build beats four big-box specials every time.
If your budget is tight, modern outdoor kitchen ideas with clean sleek lines shows how a slim, well-chosen run can carry more weight than a sprawling one with weak doors. A CB2-style unlacquered brass pull on a honed travertine counter is the kind of small upgrade that lasts ten years without showing its age.
And don't forget the inside. Soft-close hinges in a weather-safe rated finish.
Rollers that can handle grit. A small vent near the bottom of each cabinet so trapped moisture escapes.
These are the moves nobody posts about, but they're why some kitchens look new five years in while others look tired after one. Farrow & Ball Studio Green on a back-panel adds depth without competing with the cabinet color.
Why Benjamin Moore White Dove is the move for evening lighting
I've watched people spend $40,000 on a build and then ruin it after sunset with bad lighting. The most common move is to rely on the patio sconces that came with the house.
They weren't designed for cooking. They light the deck, not the grate, and they leave your hands in shadow right when you need them most.
The fix is layered light with a clear hero. One task fixture over the grill line, aimed where your hands actually work. A softer spread over the prep counter, low enough that it doesn't glare off a honed travertine top.
Maybe one string-light run for ambience, on a separate dimmer so it never competes with the cooking zones. Benjamin Moore White Dove OC-17 nearby or a warm cream shade softens the whole effect.
Skip cool-white bulbs outdoors. They'll make food look gray and people look tired.
Warm 2700K, fully dimmable, on a separate switch from the ambient string lights. The difference is the kind of thing you'll notice every night for years. If you want help planning a layered plan, coastal outdoor kitchen ideas for breezy beach house vibes shows how soft glows pull a whole yard together after dark.
A bouclé runner underfoot and an aged bronze bracket overhead read softer than any cool-white combo.
Should you DIY the whole build, or hire out parts?
Honestly? It depends on what scares you. Most beginners can handle the pad, the cinder block base, the pavers, the shelves, and the trash pullout without much drama.
Those are forgiving stages with low consequence for small mistakes. The plumbing, the gas line, and the electrical should almost always go to a licensed pro, even if you do everything else yourself.
The mistake I see is when someone hires out the bones because they look intimidating and then tries to DIY the appliance install. That's the wrong order.
The appliance install is where safety matters and where a permit might be required. The pad is just a pad, and a 3/4-inch solid white oak countertop will forgive small variations in the base if you measure twice.
If you're renting, skipping the gas line entirely and leaning on a portable propane IKEA-grade cart grill is a perfectly good answer. Reversible, cheap, and it cooks exactly as well as most built-ins. For mobile setups, RV outdoor kitchen ideas for cooking on the road has smart ideas for keeping the cook zone flexible.
A terracotta herb planter and an IKEA HEMNES-grade teak stool travel anywhere.
What beginners get wrong about outdoor kitchens (and what works instead)
The biggest mistake beginners make isn't choosing the wrong grill. It's treating the project like an appliance purchase instead of a sequence problem. I've seen people spend thousands on a shiny setup and still end up with an outdoor kitchen that feels awkward because the path is off, the trash is too far away, the utilities ate the storage, or the surface underfoot never really became a room.
You can fix mediocre hardware later. You can't fake a good layout once everything hard is locked in.
If I were coaching you through this in person, I'd tell you to think in layers. First, circulation. Then the pad or pavers.
Then structure. Then heat protection and utilities.
After that, the sink, shelving, lighting, and only then the decorative finish that makes the whole build feel like your style instead of a contractor default. That's the order people resist because it isn't the fun part.
But it's also why some outdoor kitchens feel collected and useful while others feel like a grill parked between cabinets. The whole build is closer to a sequence of small rooms than a single showpiece.
I also think beginners get spooked by the word build. It sounds bigger than it is.
But most of the expensive mistakes come from skipping decisions, not from lacking talent. If you know your counter wants to land at 36 in, if you protect at least 42-48 in of movement around the active zone, and if you give your utilities one sane path, you've already handled a big chunk of the hard thinking.
Pair that discipline with a Sherwin-Williams Evergreen Fog SW 9130 wall color, a terrazzo prep surface, and a real honed travertine or book-matched walnut top, and the bones do half the design work for you.
Here are the cost ranges I keep in mind before anyone starts adding premium finishes:
And if you're deciding where to spend, this material table helps keep the splurge panic in check:
The honest truth? I'd spend first on the surfaces and spacing that affect every single use, then add the style layer you can see from across the yard.
A kitchen that flows well feels custom even when the pieces aren't. The reverse almost never works.
The Questions I Get Asked Most
What is the best small outdoor kitchen build for a tight backyard?
The best small-space version is a straight grill-and-prep run with a compact sink beside it. Tight layouts cook better when you stop forcing an island. Think one clean wall, a slim landing zone, and weather-friendly storage.
If you need examples, small outdoor kitchen ideas that maximize every inch is a smart place to start.
Where can I buy outdoor kitchen pieces on a budget?
IKEA, Target, and Wayfair are the first places I'd check for stools, trays, lighting, and easy storage pieces. Budget builds improve fast with simple accessories. Facebook Marketplace is great for planters and outdoor tables, too.
Buy the bones new if safety matters, then thrift the styling layer.
How much does a beginner outdoor kitchen build cost?
A cosmetic refresh usually lands around $300 to $1,500, and a fuller refresh often runs $3,000 to $12,000. That's the practical range I use. Free wins still count: reworking your layout, moving planters, clearing clutter, and tightening the grill triangle cost you nothing but thought.
Can I build an outdoor kitchen on a real budget?
Yes, and you really can make it look good without a huge spend. Budget DIY works when you pour a simple pad, use block for the base, and choose laminate over stone.
Painter's tape layout. Marketplace stools.
Terracotta herbs. That's enough to shift the whole mood.
Is a built outdoor kitchen worth it in a small yard?
Yes, it's worth it, and smaller spaces often force better decisions. Small footprints waste less money because every inch has to earn its place. Keep the sink near prep, skip oversized appliances, and protect your clearance so the cook line still feels easy instead of cramped.
Is an outdoor kitchen build a good idea for a rental?
Yes, if you keep the build reversible and focus on movable layers. Rental-friendly outdoor kitchens can lean on freestanding prep tables, portable shelving, removable lighting, and grouped planters. For flexible setups, how to build an outdoor kitchen on a deck ideas and tips helps you think through lighter interventions.
Do outdoor kitchens need a permit?
Often yes, especially if you're running gas, plumbing, or new electrical. Permits protect resale value and keep your insurance valid.
Check your local building department before the pad pour. The cost is small, the paperwork is annoying, and skipping it can derail a sale later.
Where I'd Start First
If I had to pick one, I'd start with the grill triangle. A bad path ruins every cookout, while a good one makes basic materials feel custom. Pin the layout, then browse small outdoor kitchen ideas that maximize every inch before you buy finishes.