I hosted my first real party the summer the deck gave up. Twelve people, two kids, one dog who thinks he's people, and a grill that took fifteen minutes to light because the propane had been sitting since March. The outdoor kitchen was supposed to handle the crowd, but what I actually had was a sad little corner with a rolling cart and a string of lights. We cooked. We ate. We apologized. By the time the last guest left, I had a list of thirteen things I'd do differently, and this is the list.
If you're planning to feed more than four humans at once outside, you'll want a layout that breathes, surfaces that work, and lighting that doesn't make everyone look like they're in a waiting room. Most of it is a weekend, a few hundred dollars, and the willingness to actually measure your space instead of guessing. Here's what it looked like before, and what it looks like now.
Here's what it looked like before
A rectangle of stained concrete, a small Weber gas grill on a wheeled cart, and one plastic side table that the wind had tipped over twice in the previous month. The "outdoor kitchen" was a phrase I'd been using in my head, but on the ground it was a corner where the AC unit used to be. No counter space, no sink, no place to set a drink down without putting it on the grass.
The string lights were nice. The string lights were doing all the work.
And every time we had friends over, I cooked alone, because there was nowhere for anyone to stand next to me.
- Build the L-Shape (not a straight counter)
- Float the Bar, Don't Build It In
- Run the Three-Source Light Stack
- Anchor the Zone With a Rug (the right rug)
- Swap the Stainless Box for Stone or Stucco
- Why Bother Hanging a Real Work Light Over the Grill?
- Why Build a Drink Station Instead of Just Setting Out a Cooler?
- Why Add a Ceiling (Even a Soft One)?
- Why Mix Seating Types Instead of Buying One Big Table?
- Frame the Grill Wall (The Two-Wood Rule)
- Install the Ceiling Fan (the 42-Inch Rule)
- Layer the Planters (Three Heights, Three Materials)
- Stock the Pizza Stone (the Crowd-Saver)
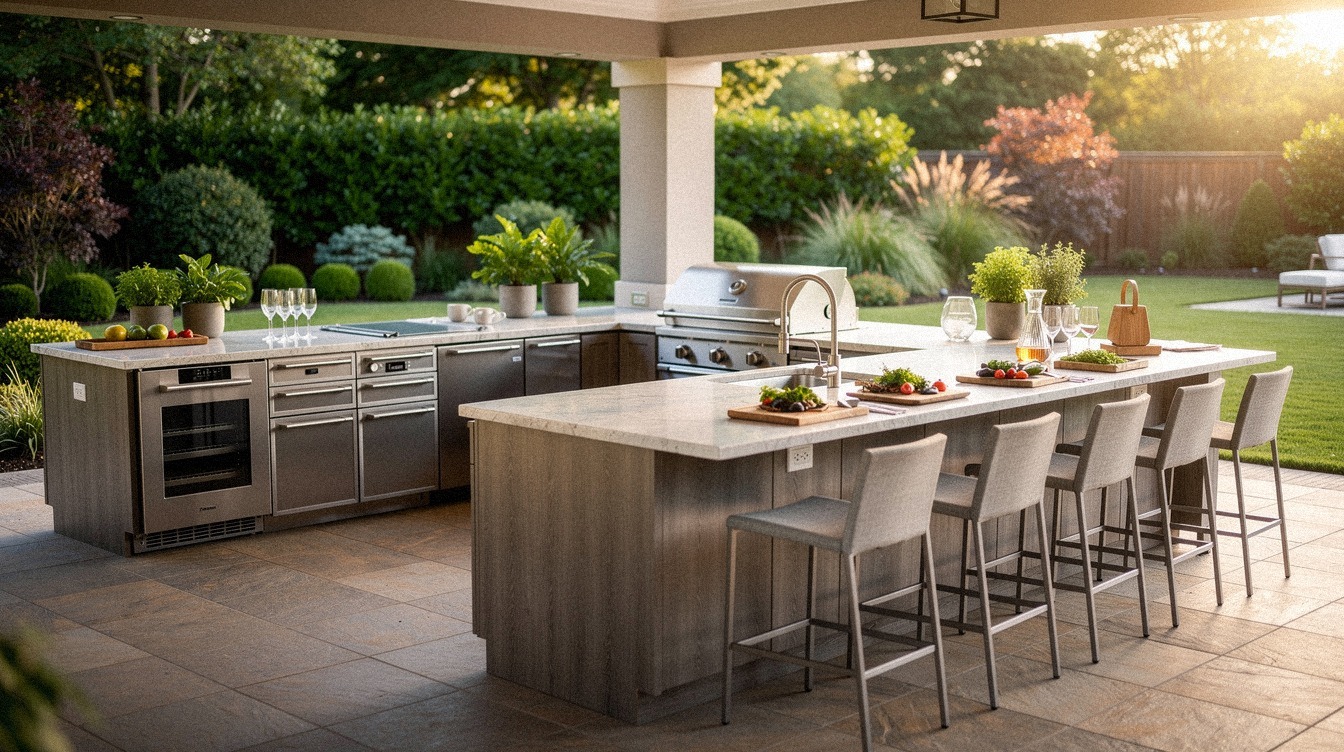
1Build the L-Shape (not a straight counter)
The single biggest mistake people make is lining everything up in a row against a wall. A real outdoor entertaining layout is an L, with the grill on one leg and prep/serving on the other. Why?
It forces guests into a triangle around the cook instead of a line. Everyone has somewhere to put a drink, and you're not trapped in a corner staring at a backsplash while you flip burgers. A 7-foot leg and a 4-foot leg is enough for a crowd of ten, and the difference between a real crowd and an awkward cluster is mostly geometry!
The leg with the grill is your hot zone, so leave 42 to 48 in of clearance on the front side and 24 in on the back. The other leg is your cool zone, perfect for a drink station, a cutting board, and a basket of lemon halves. I framed mine in pressure-treated 2x4s, sheathed the front in cedar fence pickets, and finished the faucet, cabinet pulls, and bar arm in unlacquered brass that I let develop a soft patina over the first summer.
The wall behind reads warm white, the cedar wears camel, and the black hardware ties it back to the grill hood. About $220 in materials.
You can read more on this kind of layout in my stone outdoor kitchen ideas guide. It's the single change that made my deck feel twice the size, no renovation.
If you're also thinking about the dining side, the indoor outdoor kitchen ideas for seamless entertaining guide pairs well with this L, because it covers the threshold between inside and out, which is the part most people skip!
2Float the Bar, Don't Build It In
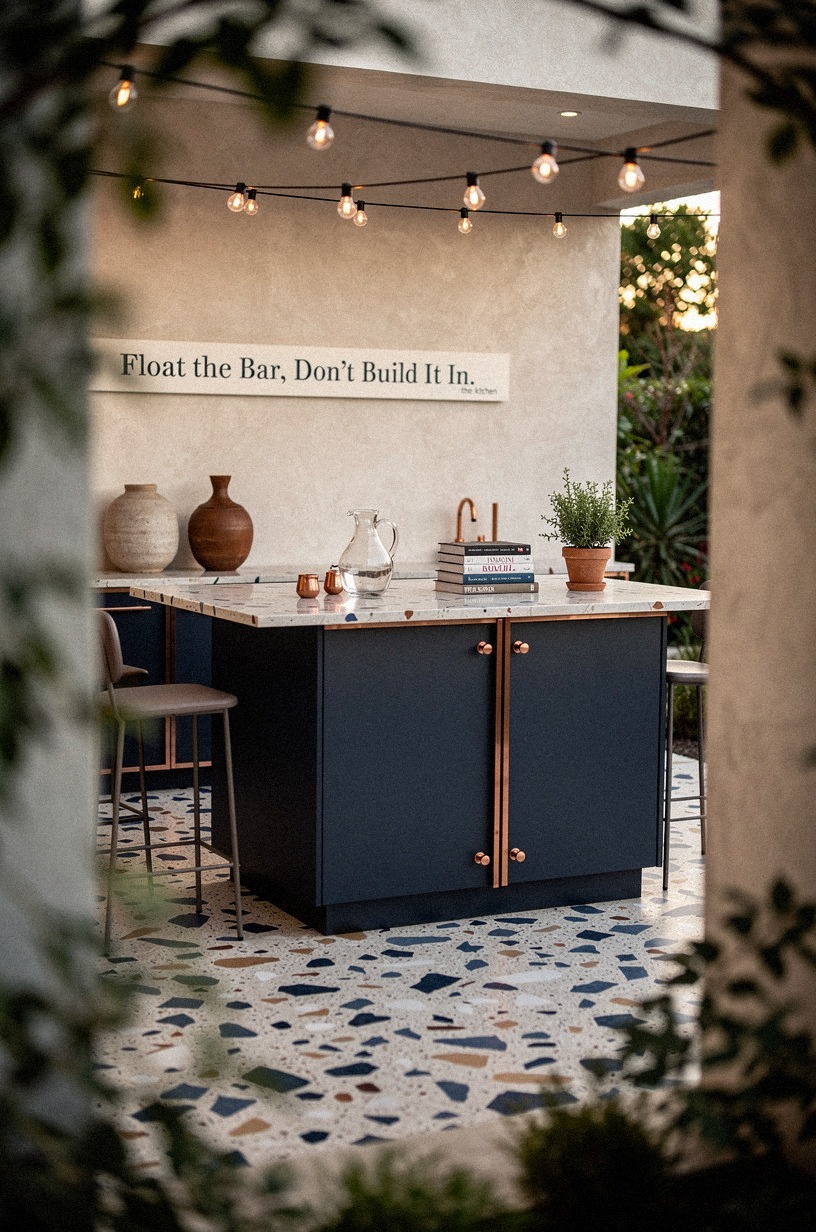
This is the move I'm most proud of, and it's also the one I almost didn't do. A standalone bar, just a 6-foot counter on legs, positioned about 4 feet from the cooking L, changes the entire flow of a party.
Guests migrate to it. They sit.
They stop hovering near the grill. And the cook actually gets to cook.
I bought a pair of IKEA outdoor GERSBYN shelf units (about $60 each), dropped an oversized-chip terrazzo slab across the top (a stone yard cuts one for about $120), and painted the bases in midnight blue exterior eggshell with copper corner brackets and an ivory pinstripe along the bottom rail. The bar holds eight stools around the outside, and the shelves underneath store cups, napkins, and the ridiculous number of citronella candles one apparently needs.
Total cost: under $350. If you want a more polished look, an Article outdoor bar cabinet in teak runs closer to $900 but lasts forever.
For small patios, the floating bar idea saves you from knocking an elbow into a built-in every time you open the oven door. It's the kind of move that works just as well in a tight space; my small outdoor kitchen ideas guide goes deep on this.
If you want a layered look for serious entertaining, the rustic outdoor kitchen ideas for a charming cookout space roundup is a great companion read for a bar like this, because the wood tones and metal accents stack beautifully.
3Run the Three-Source Light Stack
I made the lighting mistake everyone makes the first summer. One string of bistro lights, one bright overhead, and call it done. Wrong.
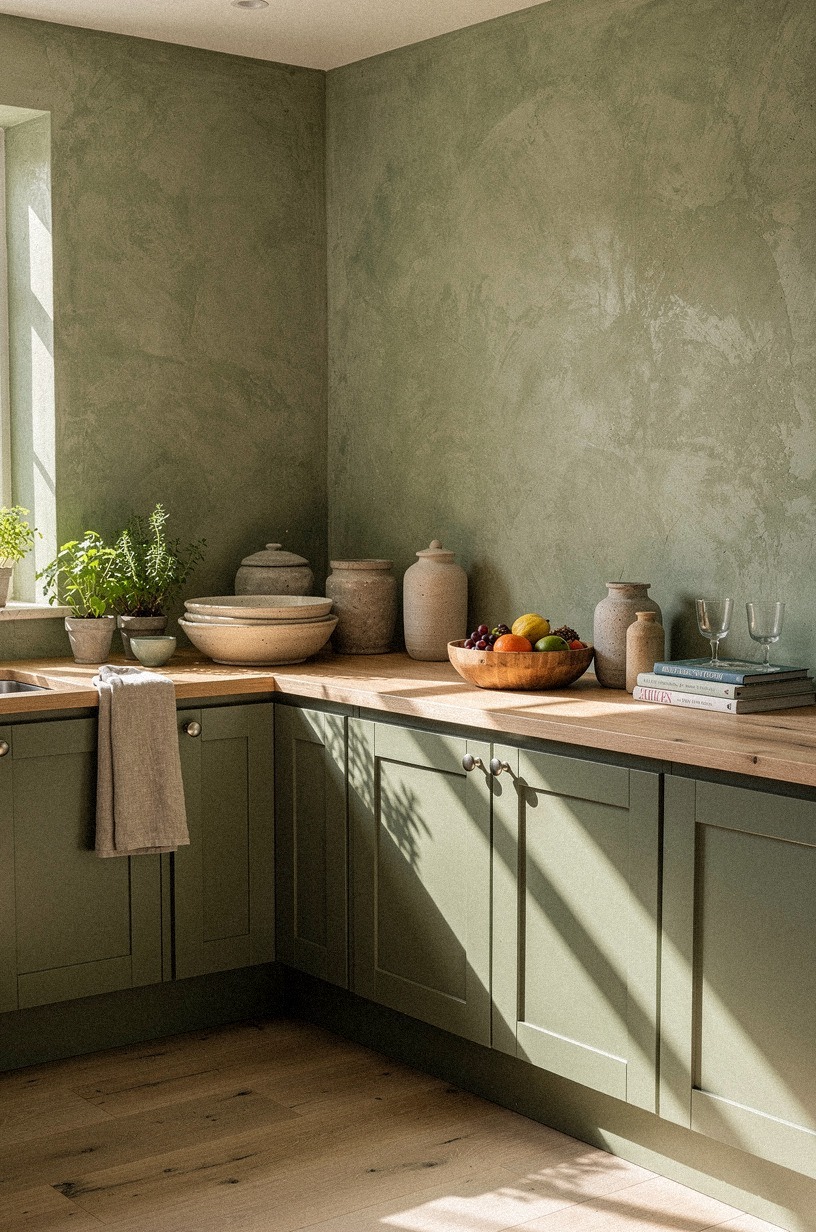
Outdoor entertaining after sunset needs three sources at three heights, and they need to be on separate dimmers or at least separate switches. I finished the back wall in hand-applied Venetian plaster tinted a soft sage green, with warm cream on the trim and a natural wood mantel along the top, and that surface is half the reason the stack reads warm instead of institutional.
Here's the stack I learned to run after hosting a dinner where half the guests left because they couldn't see their plates.
Top layer (8 to 9 feet up): string lights or a single pendant over the bar. Soft, ambient, the warm color of a candle. Mid layer (4 to 5 feet): a pair of sconces flanking the grill wall, dimmable, warm white.
Low layer (12 to 18 inches): a few solar path lights or a strip of LED under the bar lip, just enough to stop anyone from kicking a cooler. The rule is making every layer warm white (2700K or lower), not the cool white that comes stock in most fixtures. Cool light at a party makes everyone look like they're being interrogated!
Three sources at three heights, all warm. It's the rule you want.
4Anchor the Zone With a Rug (the right rug)
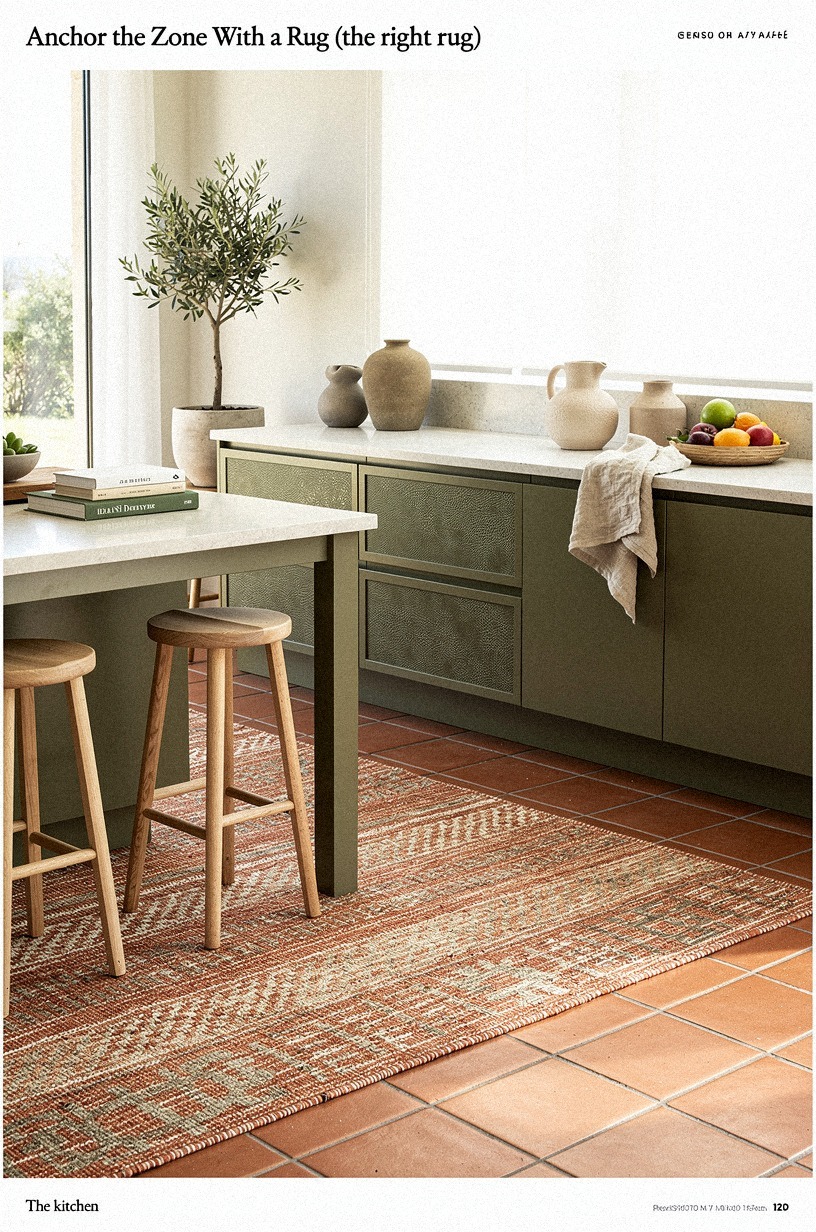
A 9x12 outdoor rug in a terracotta and olive weave over stone-toned concrete is the cheapest way to define an outdoor "room." The deck stops feeling like a leftover surface and starts feeling like a destination, and a pair of shagreen-wrapped planters along the edge give it the kind of detail that makes the zone read as designed instead of assembled. The rug does most of the work; the shagreen just confirms it.
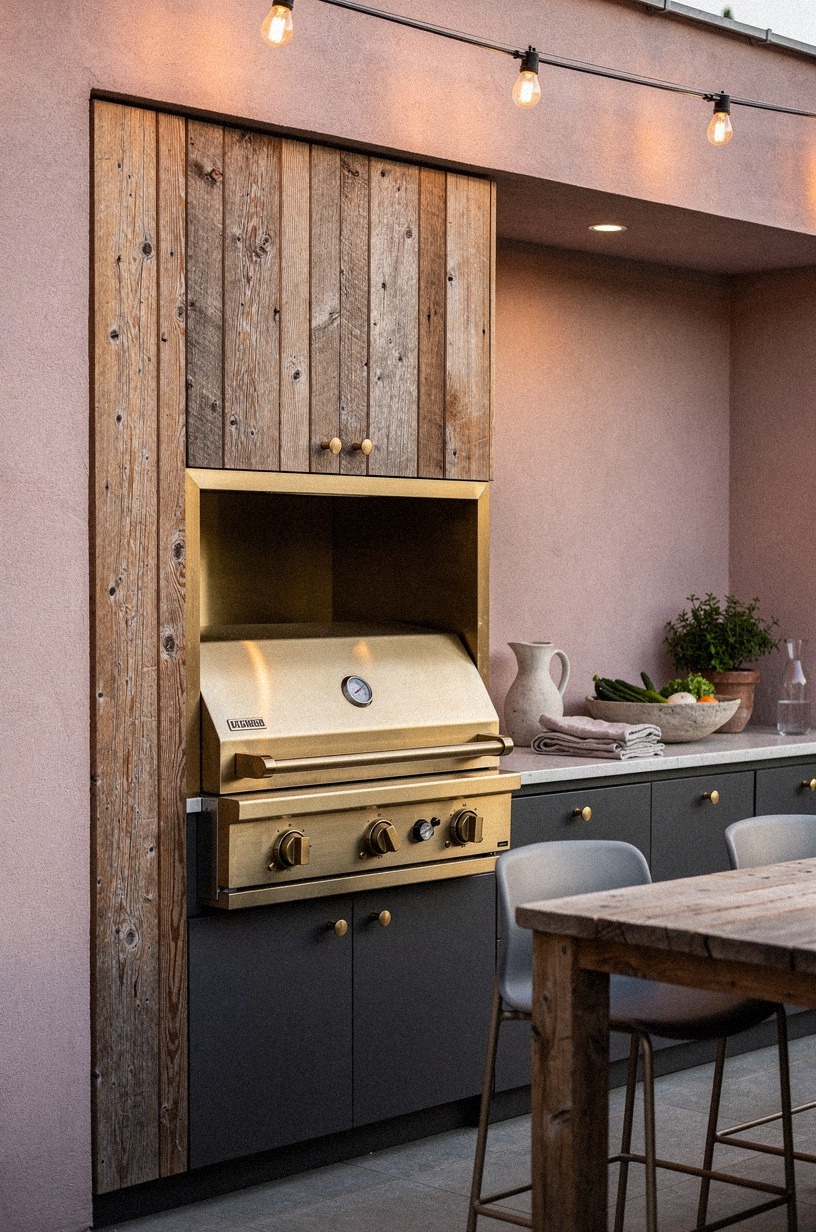
5Swap the Stainless Box for Stone or Stucco

Everyone pictures an outdoor kitchen as a stainless-steel island, the kind with a built-in fridge and a sink and a little bar. Those are beautiful, and they also start at $8,000 once you add a plumber and an electrician.
For most of us, a stone-faced or stucco-faced base on a simple frame gives you 80% of the look at 15% of the cost. I faced mine in stacked ledger stone panels from a local masonry yard, about $9 per square foot, glued directly to cement board, then hung a panel of washed Belgian linen in linen and clay tones on the adjacent wall and switched the hardware to aged brass pulls. The soft textile breaks up all that stone so the grill zone doesn't read as a bunker.
The result looks heavier and more permanent than a stainless box, which is what you want for entertaining. Stainless reads as "commercial kitchen." Stone reads as "this house has a courtyard." If stone isn't your thing, a coat of limewash over exterior-grade stucco in a soft warm white (try Farrow & Ball Bone No.15 on a sample board first) gives the same effect, paired with aged brass sconces and a curtain of washed Belgian linen to one side. Either way, the goal is something that looks like it was always there, not a fridge that wandered out of the garage.
6Why Bother Hanging a Real Work Light Over the Grill?
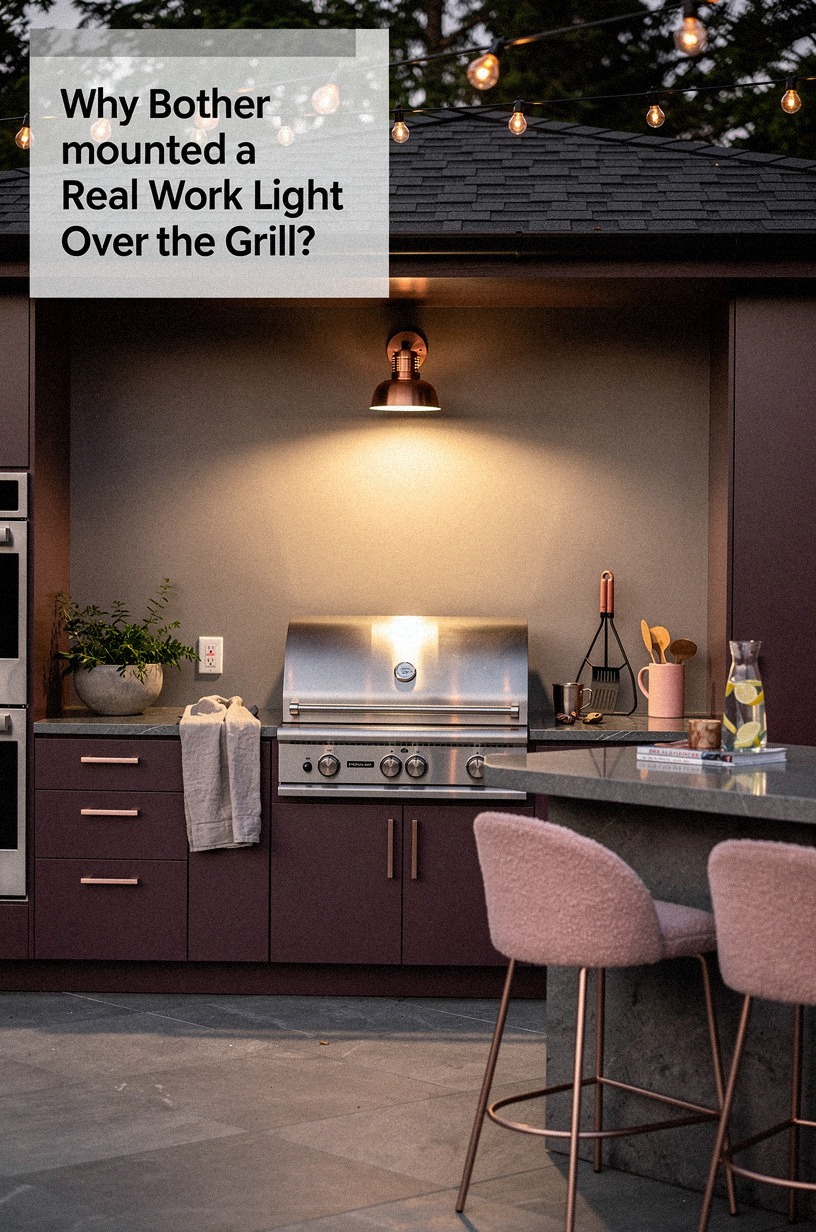
This is the small detail that has saved me from undercooked chicken more times than I want to admit. A real work light in a plum-toned housing with a rose gold arm and a small organic bouclé shade mounts about 30 inches above the grill hood and throws a clean, warm pool of light exactly where your hands and the food are. The grey cast of a cheap clip-on is what makes a $700 steak look like cafeteria meat.

7Why Build a Drink Station Instead of Just Setting Out a Cooler?
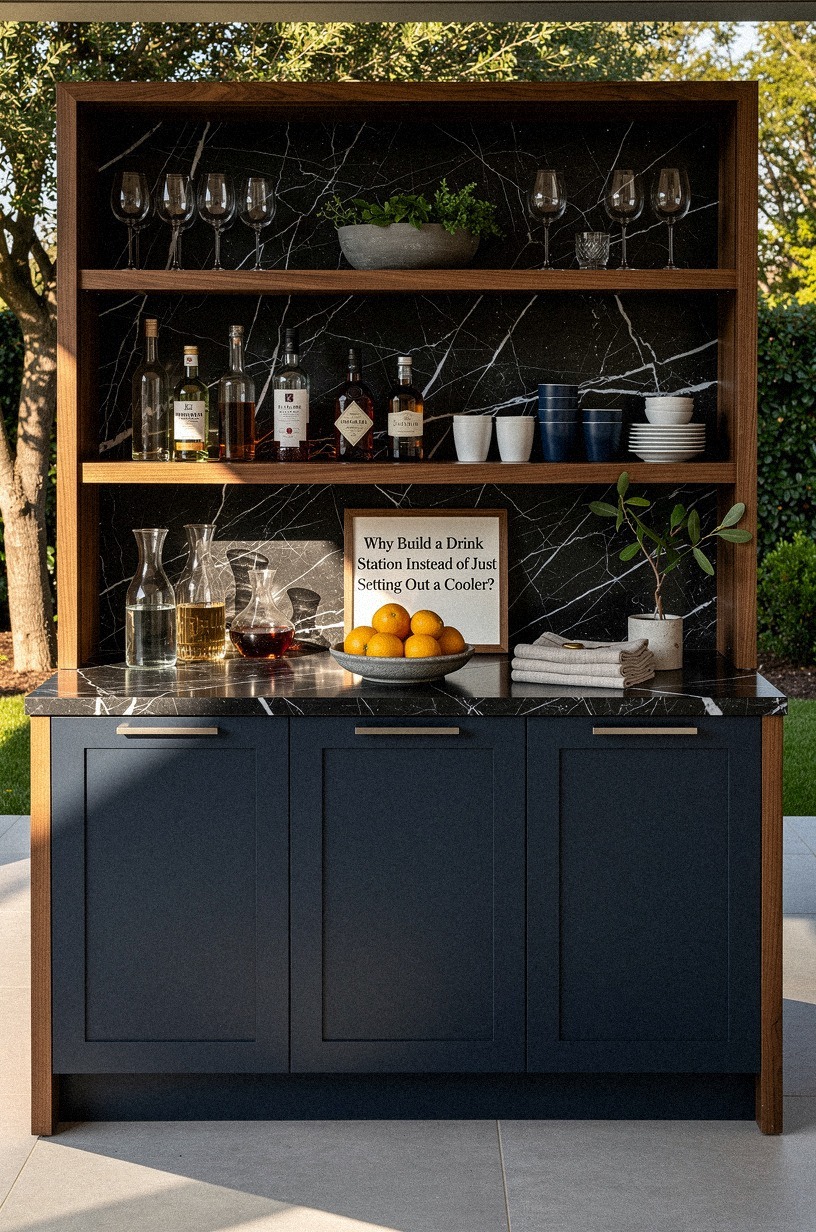
A cooler is a thing you put drinks in. A drink station is a thing people walk up to and never leave.
The difference is a small table, a few vessels, and a clear sign that says "help yourself." I built mine into the bar leg of the L, with a Nero Marquina black marble slab as the top (white veining on black, $140 for an offcut), two navy ceramic bowls full of ice, and a walnut tray holding glassware. The marble makes every bottle look like it's in a bar, not on a folding table. Guests can see all the options without opening anything, and they can grab a drink without flagging me down mid-flip.
The detail to a good drink station is variety without excess. Two white wines, one red, two beers, a big batch cocktail in a glass dispenser, and a tray of sparkling water with cucumber.
That's it. People don't need a full bar, they need a clear choice fast.
World Market and Crate & Barrel both sell good ceramic ice bowls for under $40, and a walnut cutting board from Williams Sonoma doubles as the bottle display when the party's over. I lined the inside of my navy bowls with a tea towel tucked under the ice so the ceramic doesn't sweat all over the marble. It is a small detail, but it's the detail that makes the station look finished instead of improvised.
8Why Add a Ceiling (Even a Soft One)?
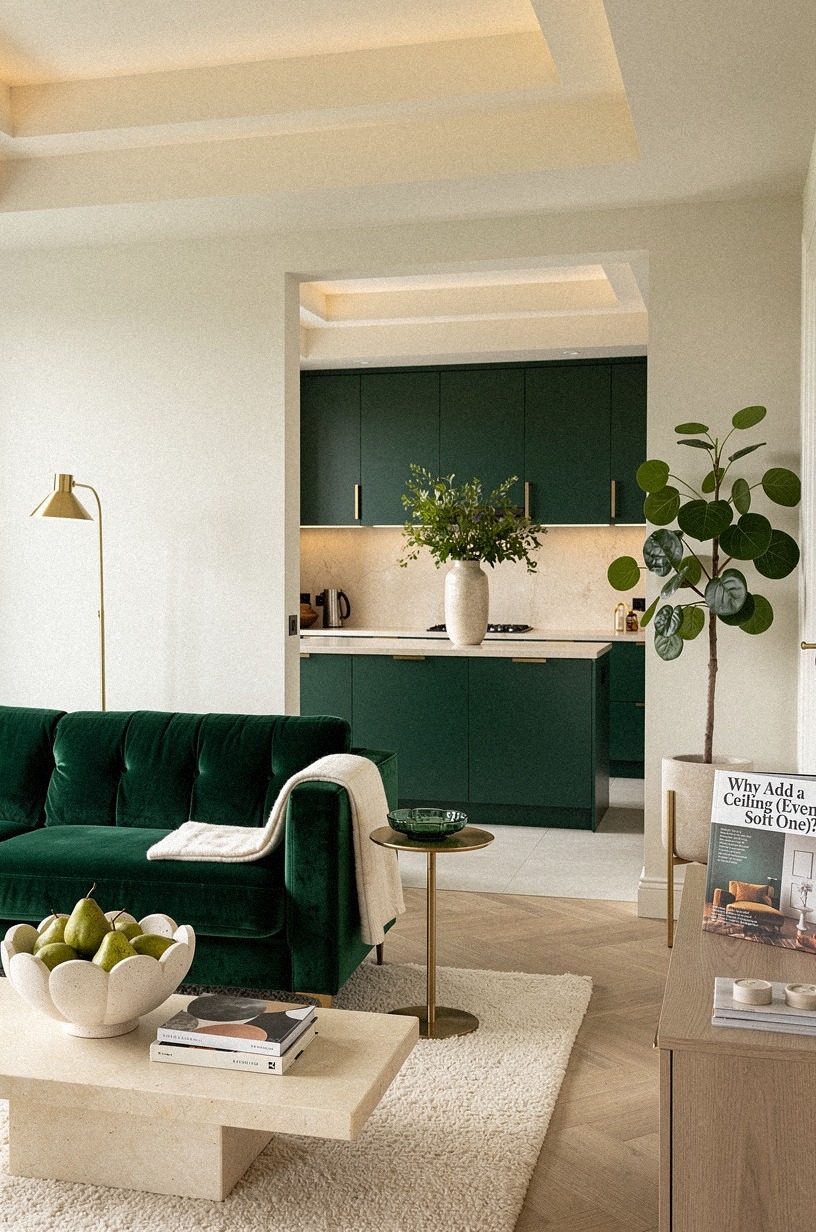
A patio with no overhead feels like a parking lot. A patio with an overhead, even a soft one, feels like a room. The classic move is a pergola, and yes, those work, but they're also $1,500 to $4,000 installed.
For a tenth of that, you can hang a retractable sun sail in a tight-weave outdoor fabric, anchored to the house on one side and a freestanding post on the other.
I went with a 12x12 Coolaroo sail in emerald, about $130, plus $80 in mounting hardware, and sewed a strip of deep-pile mohair velvet in cream and gold along the underside seam so the edge reads as fabric when you look up from the table. The emerald cuts the glare, blocks about 90% of the sun, and the velvet trim hides the hardware. The downside is wind, so I sewed simple grommets on each corner and use bungee cords instead of rigid ties.
When a storm rolls in, the whole thing comes down in three minutes. For a more built-in feel, a simple cedar slat pergola with the slats running east-west will give you dappled light all afternoon.
Either way, you want overhead. It is the single biggest visual upgrade you can make to a flat outdoor space.
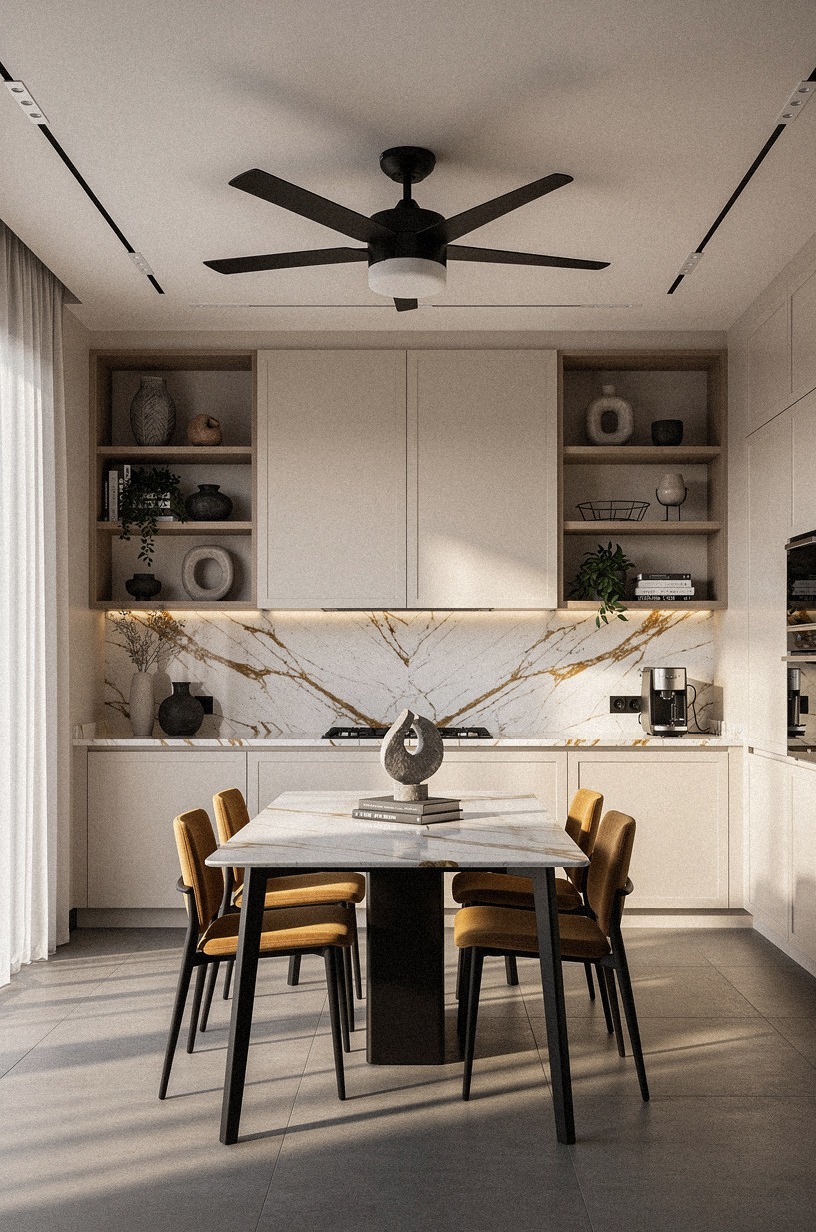
9Why Mix Seating Types Instead of Buying One Big Table?
Here's the thing nobody tells you: a single 8-foot dining table is the wrong move for a real crowd. People want options.
They want to be in groups of two or three, not eight. They want a couch, a bench, a stool, a chair, a ledge.
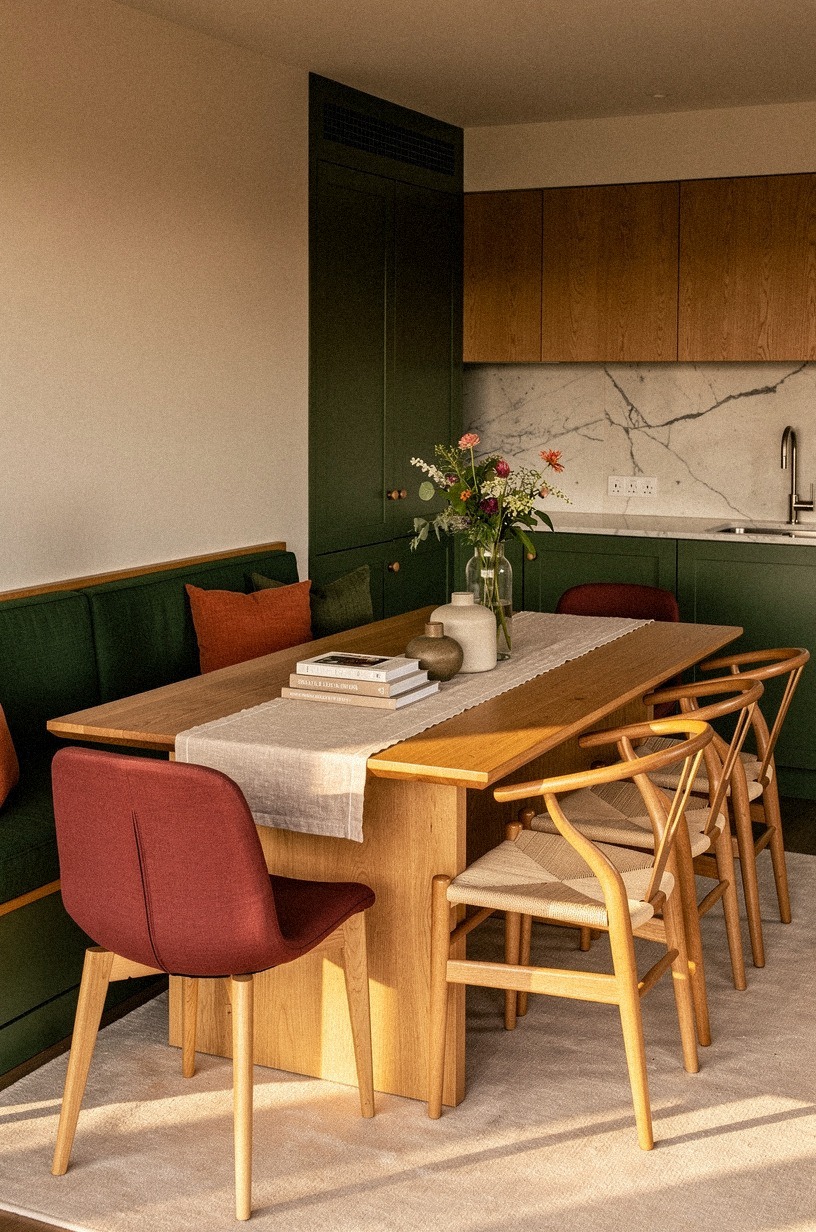
They want to move around. So the smartest thing I did was stop trying to seat everyone at one table and instead scattered three or four seating zones across the deck, anchored by a Carrara marble-topped dining table with subtle grey veining and finished with forest green cushions on the bench seating and rust linen napkins folded at each setting.
I have a 6-foot farmhouse table from World Market ($450, marble top sourced separately for $220) for the main dinner. Around the corner, a small bistro set for two.
Near the bar, two lounge chairs and a low side table for the people who want a coffee and a conversation. And on the deck rail, a 10-foot natural oak bench I built from 2x4s for $60, which holds four people comfortably and doubles as a serving surface during the meal. The mix of seating types is what makes a party feel relaxed instead of assigned.
For more on this kind of layered outdoor setup, the summer outdoor kitchen ideas for the best backyard bbqs roundup has a lot of inspiration, and if you want to add a pool, the outdoor kitchen pool combos for the ultimate backyard post shows the seating layouts that work best in a wet/dry split.
10Frame the Grill Wall (The Two-Wood Rule)
A bare wall behind the grill is a missed opportunity. The easiest upgrade is to clad it in reclaimed weathered teak planks, which run about $3.50 per square foot at any architectural salvage yard, then hang a teak mantel at 36 inches off the counter for tools, a small plant, and a single piece of art.
The wood softens the heat and gives the whole zone a finished feel. But here's the rule you want: don't use the same wood for the wall and the ceiling, or the whole space starts to look like a sauna.
I did weathered teak on the back wall and ipe decking on the ceiling (a tropical hardwood that weathers to silver if you don't oil it), then painted the trim in dusty rose, the brackets in charcoal, and the hooks in brass. The contrast between the warm teak and the cooler ipe reads as intentional, not matchy.
The teak mantel holds a cast iron hook rail, a small olive tree in a terracotta pot, and a vintage thermometer. The whole wall cost about $400 in materials and a long Saturday.
It's the part of the deck that gets photographed the most. If you want the look without the carpentry, peel-and-stick wood-look wall panels from a brand like Timberchic install in an afternoon and look surprisingly real. For another approach to making the wall behind the grill feel finished, the rustic outdoor kitchen ideas for a charming cookout space guide shows the reclaimed-wood version that pairs naturally with this kind of project!
11Install the Ceiling Fan (the 42-Inch Rule)
I held off on this for two summers because I thought it was an extravagance. Then I installed a 42-inch damp-rated fan in a Calacatta marble-look housing with gold veining, a warm white body, camel blades, and black accents along the motor, and the entire deck feels ten degrees cooler the moment it goes on. The soft hum is the cleanest white noise you'll ever own, and it pushes the smoke away from the table instead of into every guest's eyes.
12Layer the Planters (Three Heights, Three Materials)
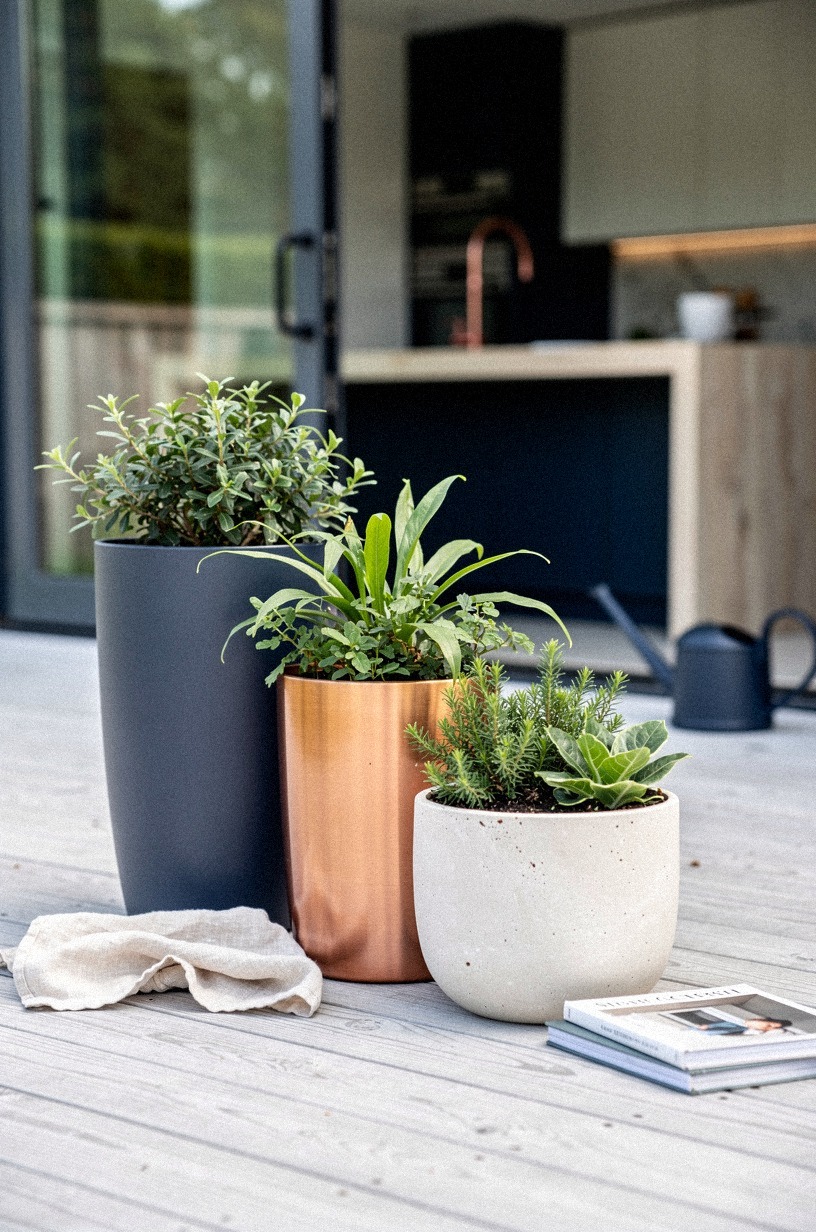
Planters are the easiest way to soften a hard outdoor space, but the move is layering, not just placing a pot in a corner. I do three heights, all in cerused white oak: tall (5 to 6 feet) olive trees, mid (2 to 3 feet) boxwood topiaries with copper banding, and low (under 18 inches) trailing ivy and herbs in ivory ceramic bowls nested inside the oak sleeves. The three heights create depth, the single wood species keeps it from looking like a garden center, and the midnight blue wall behind makes every green read greener.
I have a Mediterranean olive by the bar in a cerused oak planter, three boxwood spheres along the grill wall in matching oak with copper rings, and a long oak planter on the dining table full of rosemary, thyme, and mint. The planter on the table doubles as a centerpiece, and people actually snip from it. For a real crowd, I also set two tall oak planters by the entry to mark where the "outdoor room" begins.
The whole plant budget was about $300 the first year, and the olive comes back every season in its pot. It's the kind of detail that makes the deck feel like a courtyard in Provence without spending courtyard-in-Provence money.
If you're cooking on the road, the rv outdoor kitchen ideas for cooking on the road post is a great companion read, because the planter layering rules are the same even when your "deck" is a 20-foot bumper!
13Stock the Pizza Stone (the Crowd-Saver)
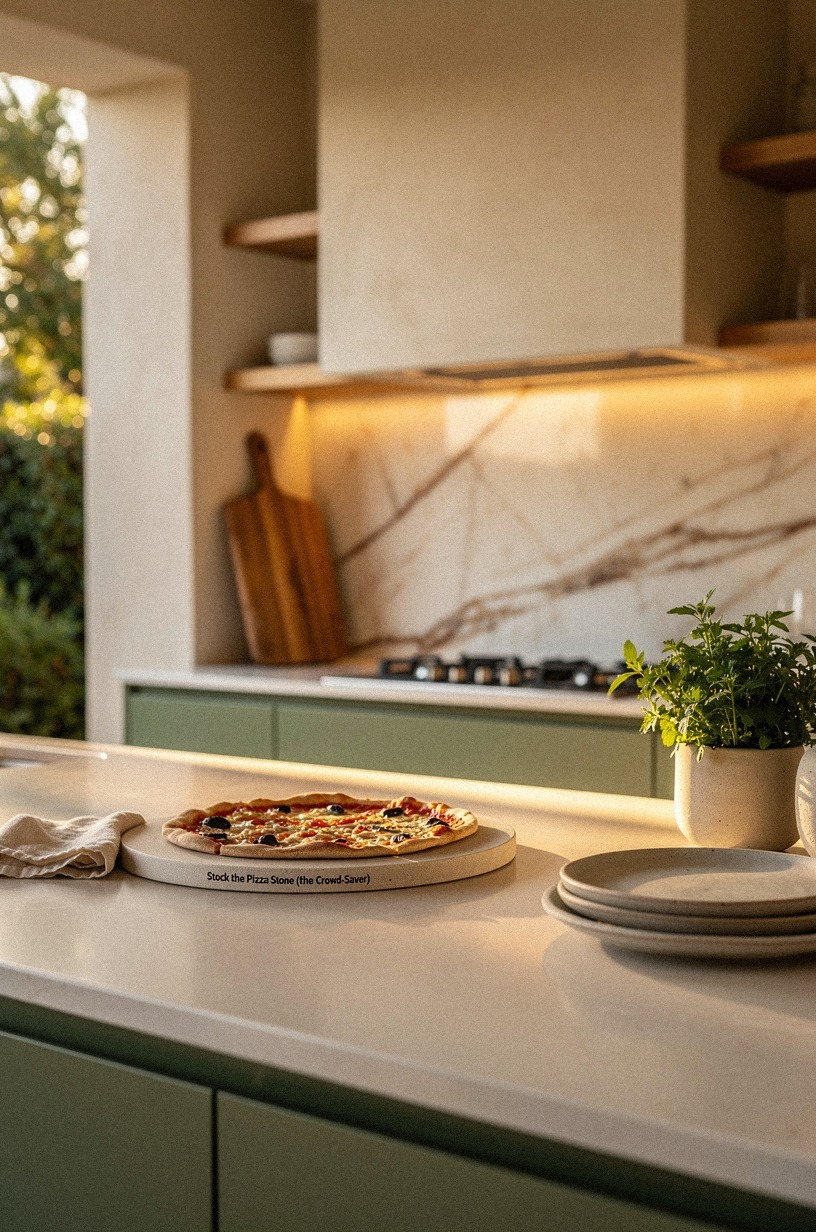
The last move is a small one, but it's saved me during every single party. A 14-inch cordierite pizza stone sitting on a backlit translucent onyx shelf above the grill, framed by a natural wood ledge against a wall finished in soft sage green Venetian plaster with warm cream trim, plus a stack of pre-rolled fresh pizza dough from the grocery store.
When the main food is done and people are lingering, you can fire a few pizzas in 90 seconds each on the grill with the lid closed. The onyx glows once the grill is hot, and the crowd suddenly has something to do. Kids can build their own.
Adults pretend to be Italian for ten minutes. It's become the closing ritual of every party I host, and it's the only reason the last guests leave before midnight.
The rule is to heat the stone on the grill for 15 minutes before you launch the first pizza, and to keep the dough at room temperature for an hour before you roll it. I set out small bowls of toppings and let people assemble their own.
It is, by a wide margin, the most fun part of the night! If you want to go further, a Ooni Karu 16 portable pizza oven is around $400 and will change your hosting life.
But the stone alone gets you 80% of the way. For more on setups that make cooking for a crowd feel less like work, my outdoor kitchen with tv ideas for the ultimate game day setup covers a different angle on the same problem.
How much it cost
I added a column for "effort" because the dollar number is only half the story, and I learned that the hard way. A $400 build that takes a weekend is a much better deal than a $200 build that takes three weekends and a marriage.
Here's the real budget, line by line, with the hours and the rough time. The totals are honest, and they include the two things I bought twice because I measured wrong the first time.
The labor was mine and one friend's, in exchange for dinner and beer. If you hired out the carpentry and the masonry, you'd be looking at roughly double. Either way, it's a fraction of the $25,000+ a full built-in would run, and it does the same job for the way we actually use the space.
For context, here's how a typical outdoor kitchen budget breaks down in the US, depending on what you're really doing. Most cosmetic refreshes fall in the budget tier. A real remodel lives in the mid or high tier, and that's where contractors and permits start showing up.
A quick reference for the materials, if you're pricing the project yourself. I tracked everything per square foot and per door once I started seeing the same numbers come up in three different quotes, so I trust these as a real starting point.
The One I'd Do Tonight
The floating bar. I built mine on a Saturday in early June, and the first party after that, I cooked the entire meal without anyone asking me where the tongs were.
The deck feels like a room now, and I don't dread the next invite. That's the whole point.
A Few Things Worth Answering
What is the best outdoor entertaining setup for a small deck?
A 7-foot by 4-foot L-shape with the grill on the long leg and a 6-foot floating bar on the short leg, leaving at least 42 inches of clearance in front of the grill for traffic. For really tight spaces (under 80 sq ft), an IKEA GRILLSKÄR compact grill cart plus a wall-mounted drop-leaf counter handles four to six people without crowding. The small outdoor kitchen guide linked above has a tighter rundown for sub-100-sq-ft patios.
Where can I buy outdoor entertaining pieces on a budget?
IKEA for the bar bases and shelving, Target's Threshold line for planters and lanterns, World Market for the dining table and drink tubs, and Home Depot or Lowe's for the cedar framing lumber. For second-hand, Facebook Marketplace is the move for dining sets, fire pits, and planters.
I've found three good bar stools in the last year for under $40 total. Thrift stores in college towns are gold for brass and copper pieces. None of these are affiliate links, they're just where I shopped.
How much does an outdoor entertaining makeover cost?
About $3,000 to $5,000 for a real DIY refresh that handles a crowd of 10 to 12, including framing, surfacing, lighting, seating, and the drink station. A full contractor-built outdoor kitchen with a built-in grill, stone counters, and a sink lands between $15,000 and $40,000 in most US markets.
The budget depends mostly on whether you're running new gas and water lines, which is where the cost doubles. For a rough rule, every $1,000 you spend should cover about 6 to 8 guests comfortably.
Can I create an outdoor entertaining setup on a budget?
Yes, and the cheapest version is a rolling Weber Q on a porch, a 6-foot folding table, two IKEA TÄRNÖ bistro sets, and a string of warm-white bistro lights overhead. Total: under $300.
Add a galvanized drink tub and a 9x12 outdoor rug and you have a real entertaining zone. The rule is to spend on the grill (you use it every week) and save on the furniture (people don't sit on it that long at a party).
The free version is just moving your indoor dining table outside for a meal, which honestly works better than you'd think.
Is an outdoor entertaining setup worth it in a small space?
Yes, and small spaces actually have an advantage, because the cook and the guests stay close, which is the whole point. The key is to skip the full built-in and go with a floating bar, a drop-leaf counter, and a single dining surface that holds four to six.
The island clearance should be 42 to 48 inches all around so people can pass behind seated guests. In a 10x10 space, that means a 4-foot round table, not a 6-foot rectangle.
Is an outdoor entertaining setup a good idea for a rental?
Yes, and renters actually have it easier in some ways because the bar, planters, and rug are all removable. Skip the stone-veneer base and the cedar wall planks (those need to attach to a permanent structure). Go with the floating bar on lockable casters, planters in saucers (to protect the deck), and a freestanding pergola or a tension-mounted sun sail instead of a built structure.
The drill-free move is the Command Outdoor Hooks for the string lights. You can leave the place looking exactly like you found it, except better.