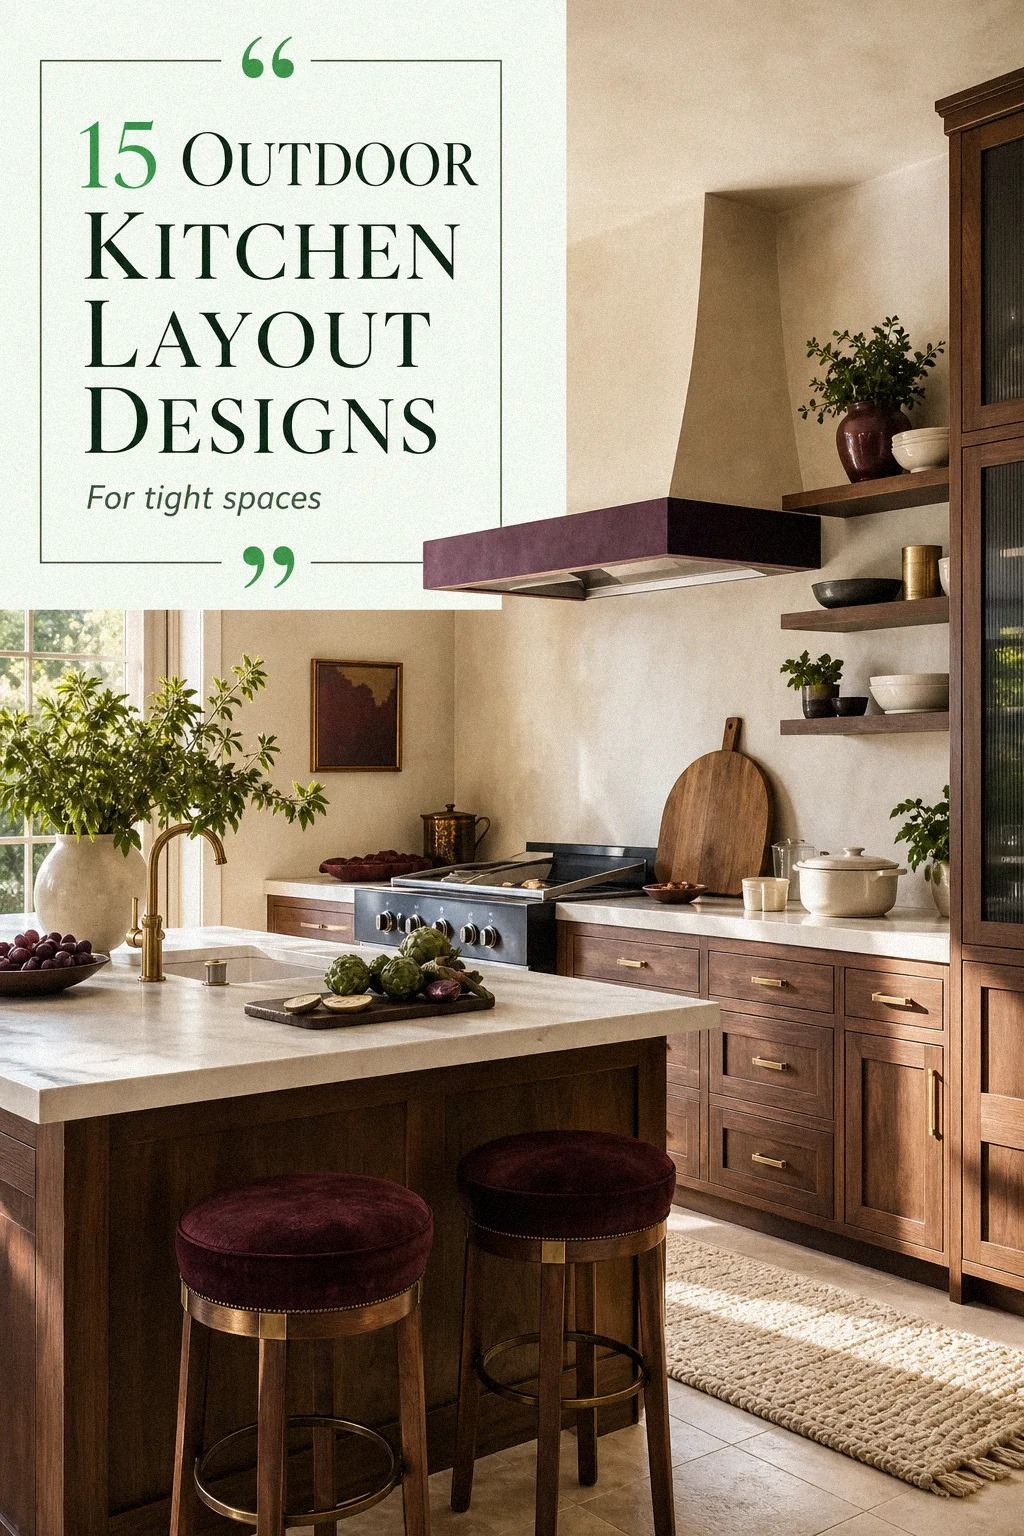
Outdoor kitchen layout ideas mattered more than I expected, because the short answer is this: if your layout is wrong, you can spend $300-$1,500 and still hate cooking outside. I learned that the sweaty way, after one too many dinners spent sidestepping stools, smoke, and a fridge door that opened into my shin. Then the L-shape finally clicked. Fast.
Don’t overthink: Where does traffic really go at dinner?.
Here's what it looked like before
Before I touched a tape measure, our patio had the full pieced-together outdoor cooking setup. The grill sat too close to the back door, the prep table wandered depending on what I was making, and the cooler always ended up where someone needed to walk. Nothing matched, but that was not even the real problem.
The problem was movement.
I could get food cooked, sure, but you could not help without colliding with me. If you carried plates out from the kitchen, you crossed the hot zone.
If you wanted a drink, you hovered where I needed to turn with tongs in my hand. I kept thinking I needed prettier finishes, maybe Farrow & Ball Studio Green (No.93) on the fence or a nicer stone slab, but the fix was layout first.
Once I treated the patio like a real work triangle instead of a random cluster of good-looking stuff, the whole space started acting expensive. Honestly, that single reframe saved me from one brutal remodel.
- What does a grill wall actually do for you?
- Where does traffic really go at dinner?
- Placed the sink beside the serving window
- Turned the island toward the garden view
- Tucked the fridge under the shaded counter
- Left landing space on both grill sides
- Should the prep counter run along the fence?
- Centered the pizza oven near the table
- Added a narrow drinks station by the door
- Built storage under the longest stone counter
- Kept the hot zone away from seating
- Angled the bar stools toward sunset
- Grouped the smoker beside the wood stack
- Left a clear path to the kitchen door
- Lit each work zone first
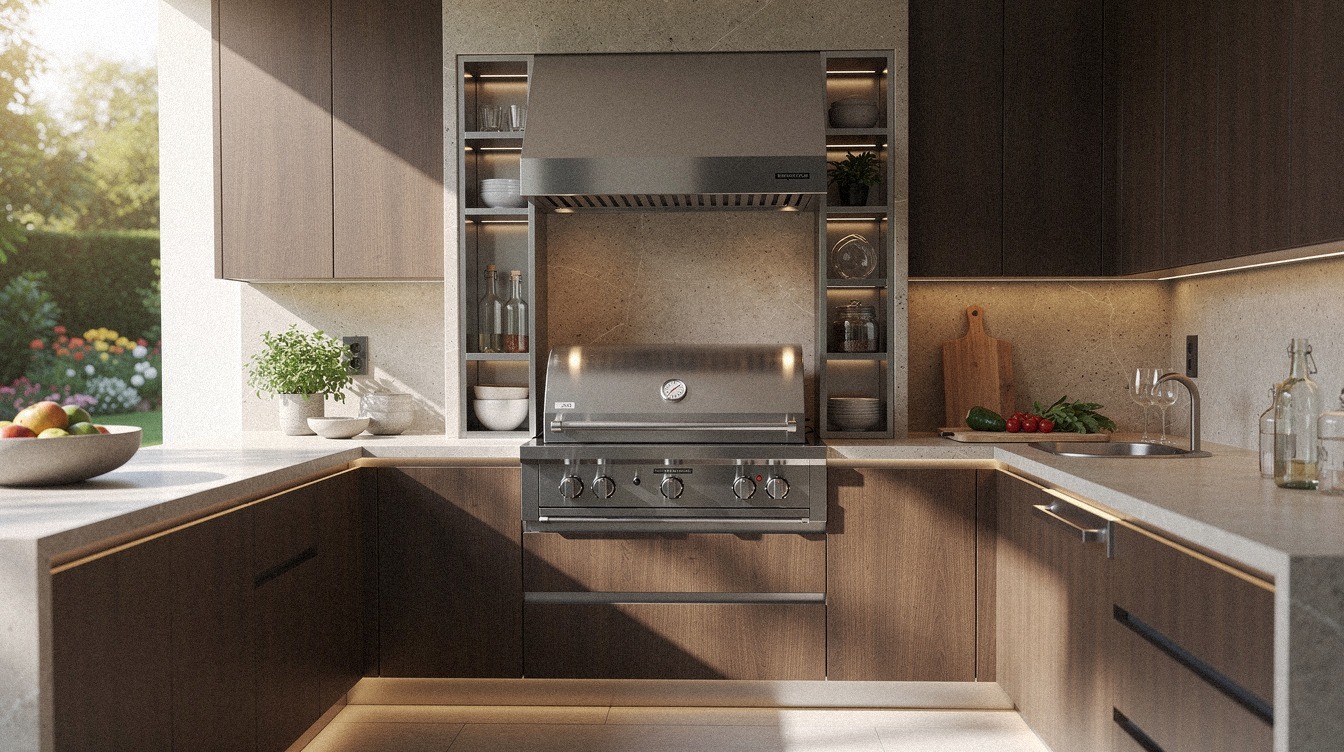
1What does a grill wall actually do for you?
This is the question I should've asked before I sketched anything. The grill wall is not just a place to park a grill.
It's the loudest object on the patio, and your eye reads it first whether you're cooking or not. You want symmetry where the heat lives, because every guest will look at it before they look at you.
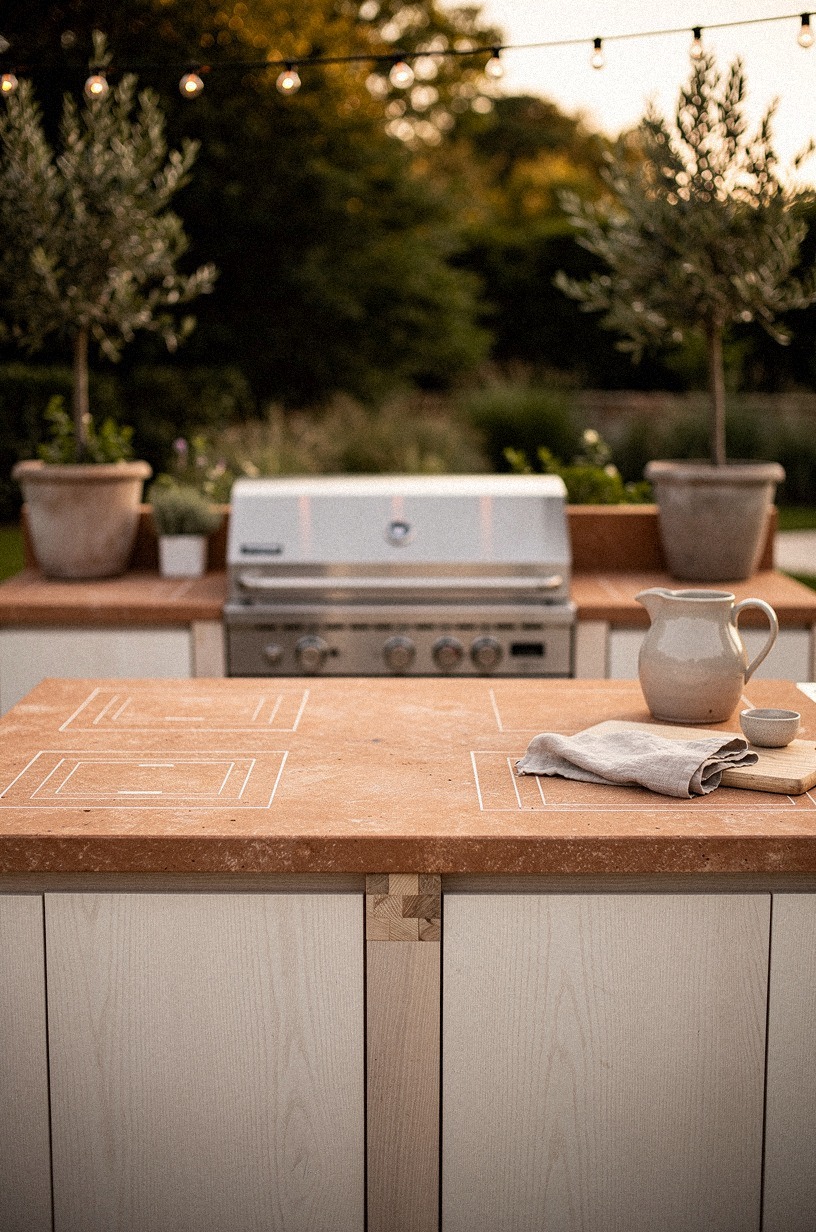
I started with painter's tape, graph paper, and a very humbling pencil sketch on the stone counter. My first plan looked fine in my head, then I drew the grill block, a sink block, and drawer space on paper and realized the doors would crash into each other at standard 36 in counter height.
That quick sketch saved me from buying the wrong base cabinets and a too-wide grill cutout. I used 3/4-inch exterior-grade plywood templates first, then penciled the appliance footprints right on kraft paper laid over the counter run.
But the smartest move was centering the grill wall inside the L instead of jamming it to one side. Centering gives you a generous landing zone on both sides, which you'll use every single dinner.
If you're still deciding how much stone you really need, my favorite reference is stone outdoor kitchen ideas for a timeless rugged look. It helped me stop designing around gadgets and start designing around the actual wall.
2Where does traffic really go at dinner?
This is the unglamorous question that decides everything.
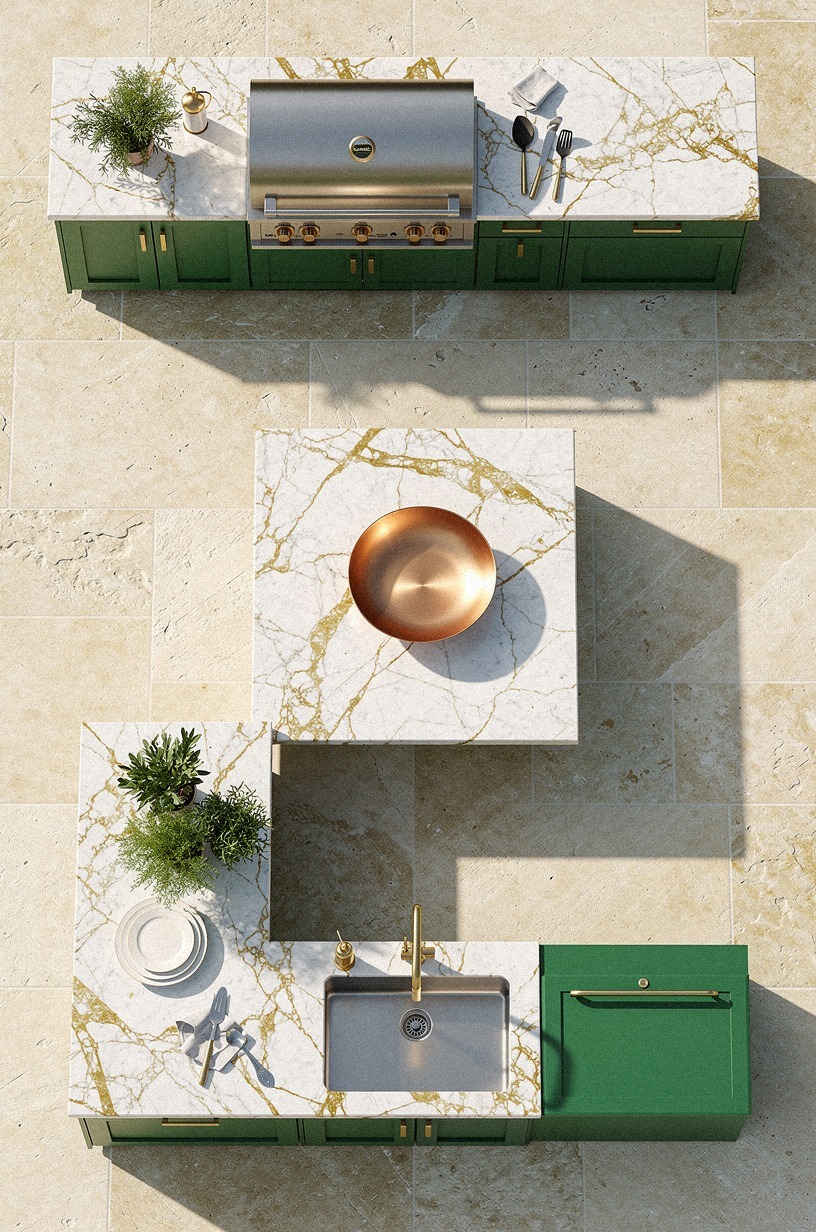
3Placed the sink beside the serving window
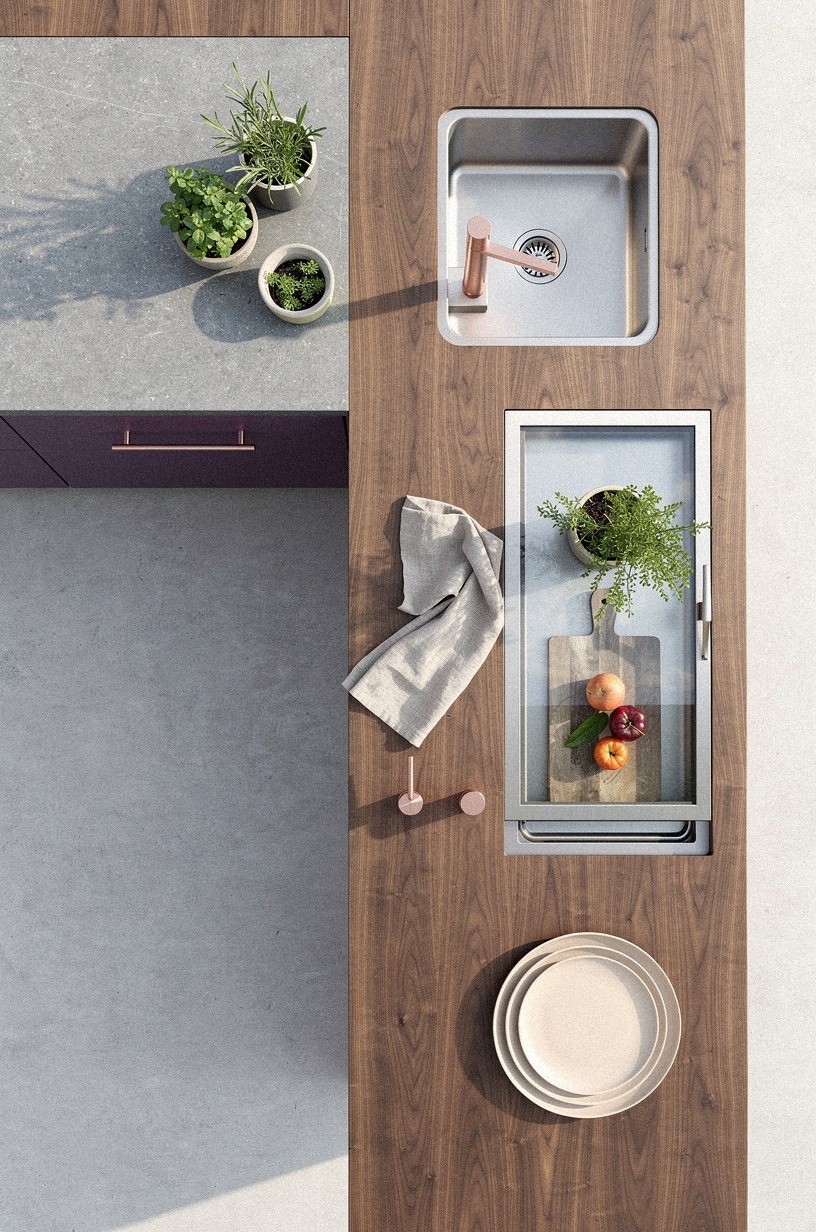
This was the first move that made the setup feel thought through. You should keep the sink where dirty hands, herbs, and platters naturally pass, not tucked at the far end like an afterthought. In my case, that meant placing it right beside the serving window so I could rinse, plate, and hand things across without dripping all over the counter.
From above, the logic finally looked clean: grill on one leg, prep in the middle, sink at the handoff point. I chose a compact Ruvati bar sink and paired it with a simple Delta Essa faucet because I didn't need farmhouse drama outside, I needed reach and easy cleanup.
Honestly, that placement cut the number of pointless steps in half. If you're mixing entertaining with a water view or pool zone, outdoor kitchen pool combos for the ultimate backyard shows the same idea in bigger spaces.
Put the water where the passing happens. You'll feel the difference the first night.
4Turned the island toward the garden view
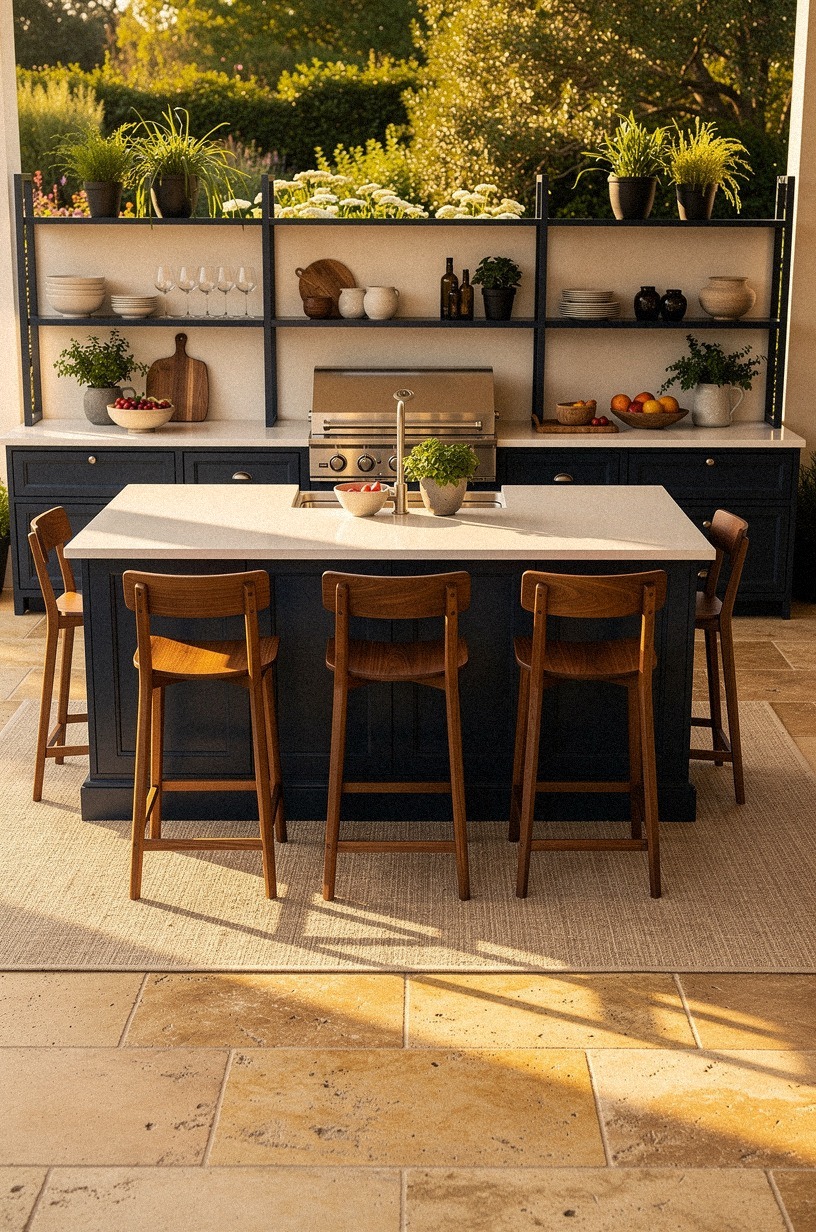
I fought this one. I kept wanting the island square to the house because it sounded proper, but it made everyone face the wall and my hydrangeas got ignored. So I rotated the island toward the garden view, and suddenly people lingered instead of perching for five minutes and disappearing.
You should point your social side toward the prettiest thing you already have. That is the whole Sightline First Rule I came back to over and over.
My island is finished in honed limestone-look porcelain, and once it turned toward the planting beds the stone started catching that late gold light in a way the old orientation never did. The real win was conversational: I could prep while looking out, not while staring at siding.
If you want the whole patio to feel less like a grill station and more like a room, rustic outdoor kitchen ideas for a charming cookout space has some strong examples of letting the landscape do part of the decorating.
5Tucked the fridge under the shaded counter
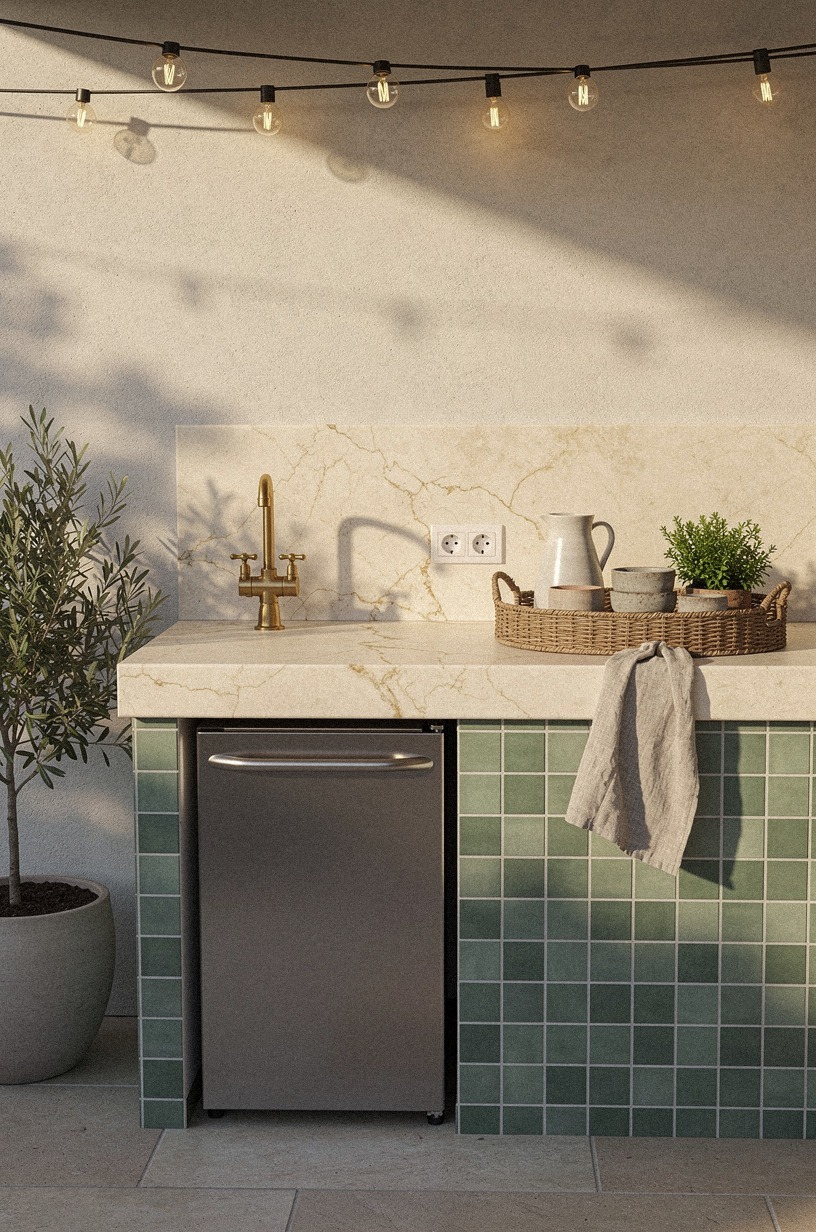
Cold storage sounds minor until you're opening a sun-baked mini fridge every six minutes. I learned that fast. You should tuck your fridge under the shadiest counter run you have, especially if the door swings toward the prep side and not into your traffic path.
Mine went under the covered leg of the L, beneath a slab of leathered granite, and it worked better than the more photogenic spot I had planned first. The shade helped, but so did the location near the drinks and garnish zone. That meant I wasn't crossing in front of the grill every time I needed butter, seltzer, or a tray of sliced peaches.
Don't hide it so well that you create a second commute. Keep it close to where people reach, just outside where you turn to cook.
I chose a GE GWE19JSLSS outdoor-rated fridge because the stainless front handles splash without complaining. If you're weighing compact layouts, outdoor kitchen ideas on a budget diy friendly has smart examples of letting one shaded counter do double duty.
6Left landing space on both grill sides
Counter space by the grill is the easiest thing to underestimate, and the most expensive thing to retrofit.
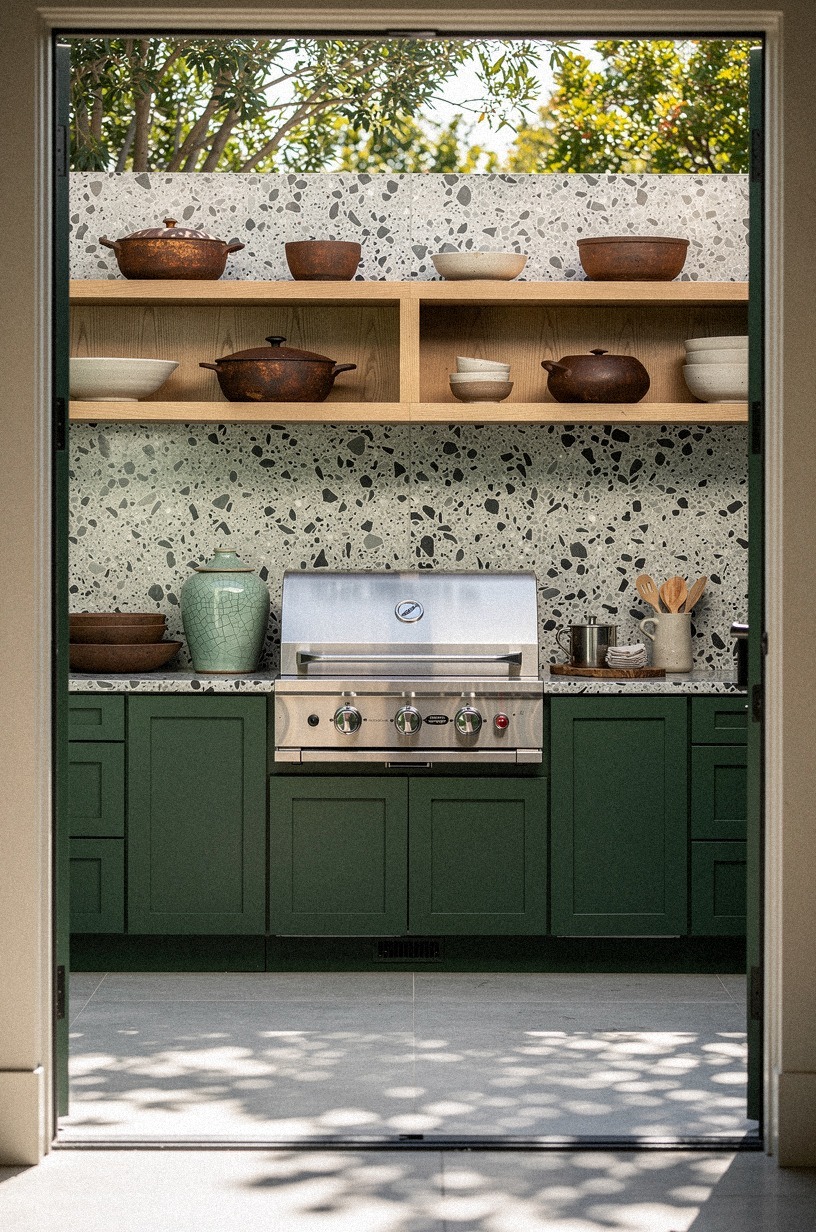
7Should the prep counter run along the fence?
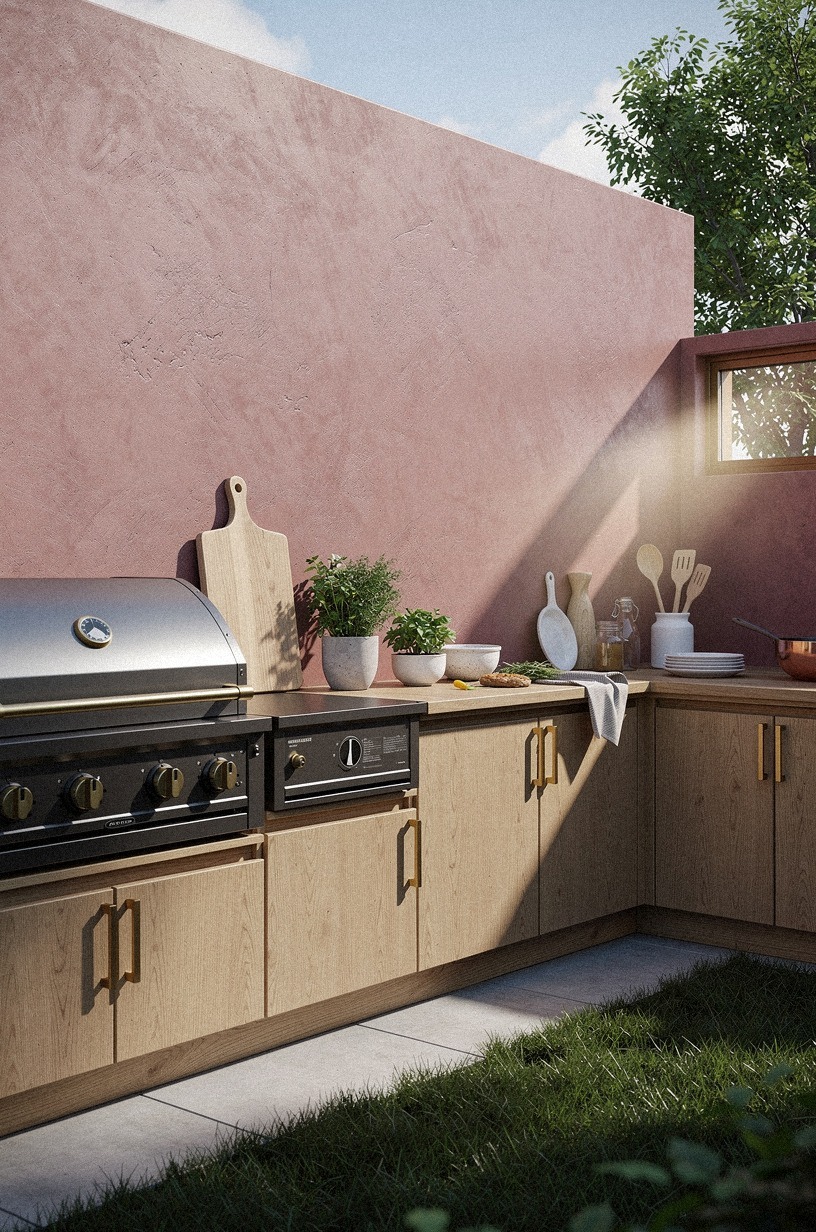
This is where the whole project started feeling obvious in the best way. Rather than floating prep in the middle, I ran a long counter straight along the fence line, and it gave me one uninterrupted zone for trays, boards, herbs, and the messier parts of dinner. You should use the edge of the patio for the longest task, because a fence can anchor visual clutter without making the center feel blocked.
And once that line was established, the rest of the layout stopped arguing with itself. I painted the fence Sherwin-Williams Evergreen Fog (SW 9130) and kept the counter in a pale quartzite-look slab so the whole run read clean from corner to corner.
What really sold me was how wide the center suddenly felt. A prep wall keeps your outdoor kitchen patio design from becoming an obstacle course.
I also copied one idea from rv outdoor kitchen ideas for cooking on the road: keep the most repetitive task in the straightest line possible. Turns out, that advice works beautifully in a backyard too.
8Centered the pizza oven near the table
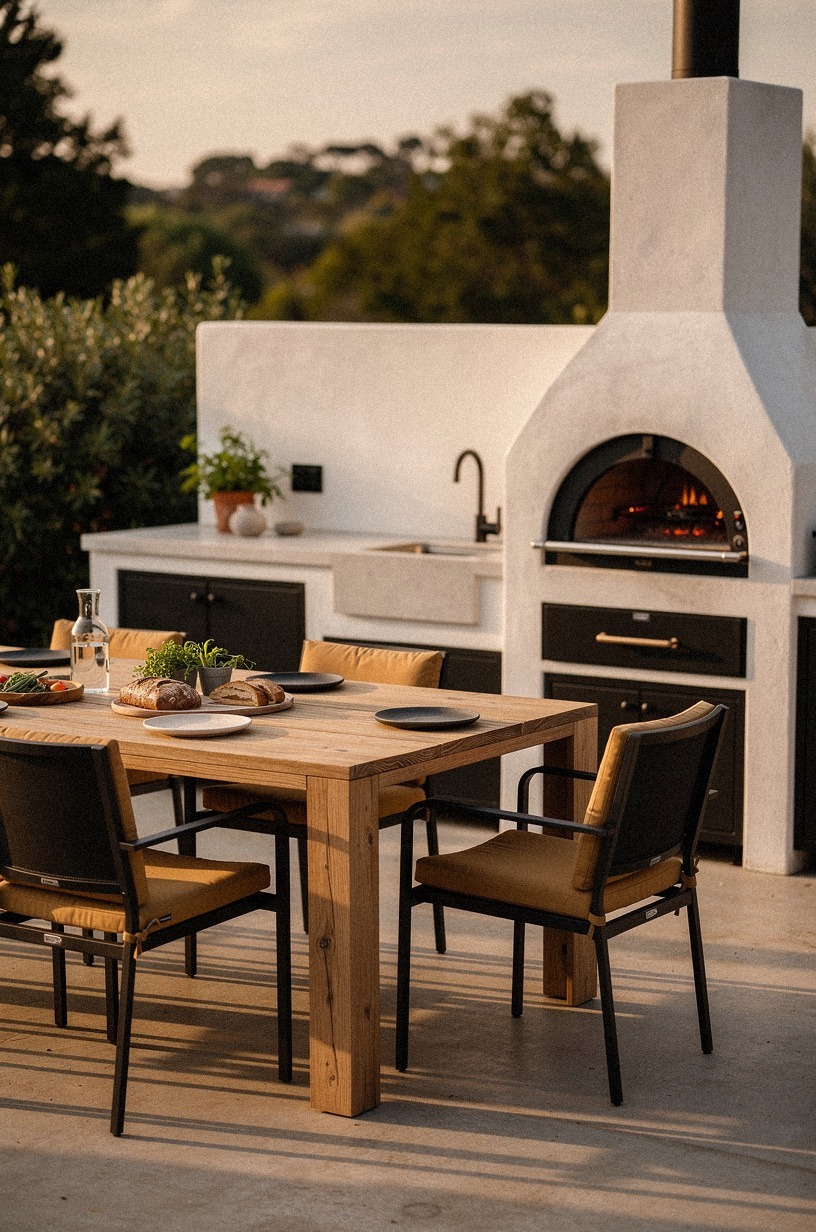
I almost put the pizza oven beside the grill because it looked balanced on paper.
9Added a narrow drinks station by the door
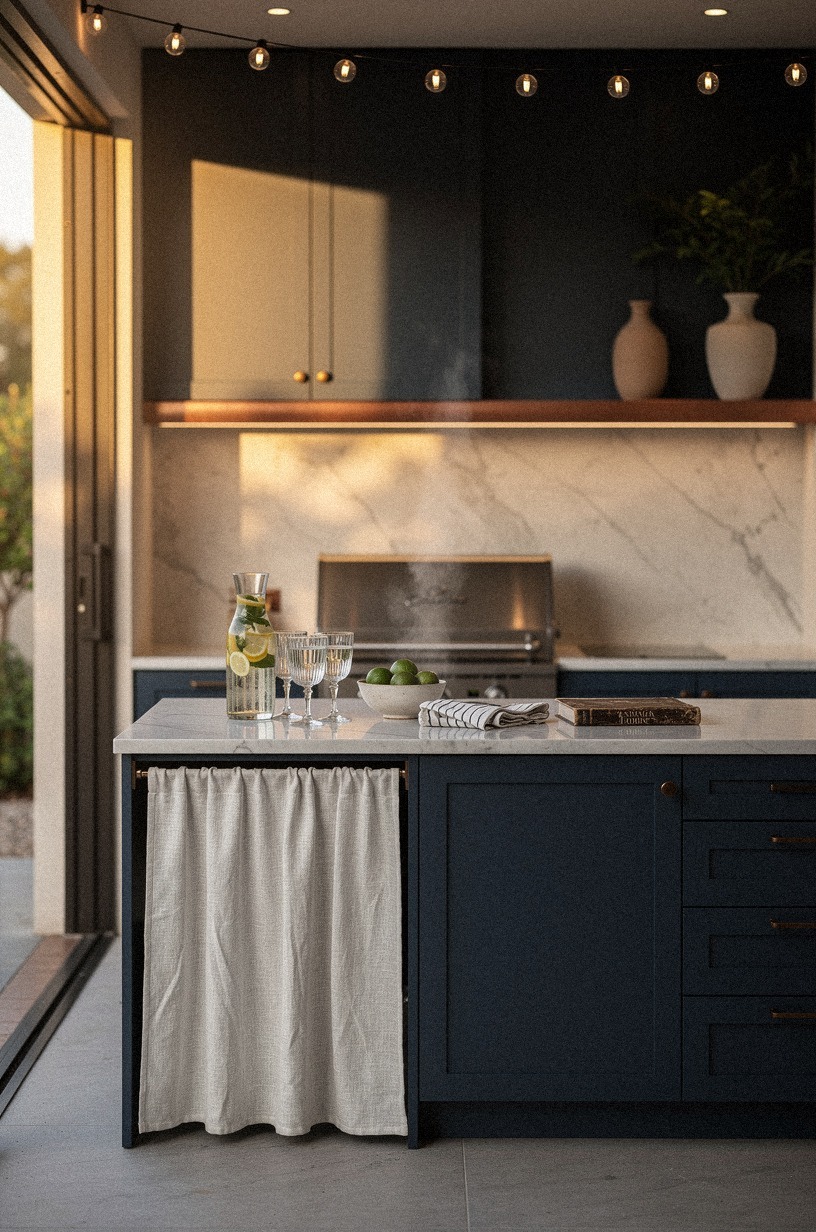
This little station saved my nerves more than the expensive stuff did. You should place drinks close to the door, not the grill, because guests should be able to help themselves without entering your work area. Mine is narrow on purpose, just enough for a bucket, glasses, and a shallow shelf underneath.
I used a slim cabinet depth, around 16 in, with a CB2 outdoor tray on top and a lidded bin below for napkins and openers. Because it sits by the threshold, people grab sparkling water on their way out and never bunch up around the fire or the knives.
The low perspective from the patio taught me something else: narrow pieces look elegant when they don't interrupt the long floor line. If you're working in a small outdoor cooking space, small outdoor kitchen ideas that maximize every inch proves that not every useful station needs full counter depth.
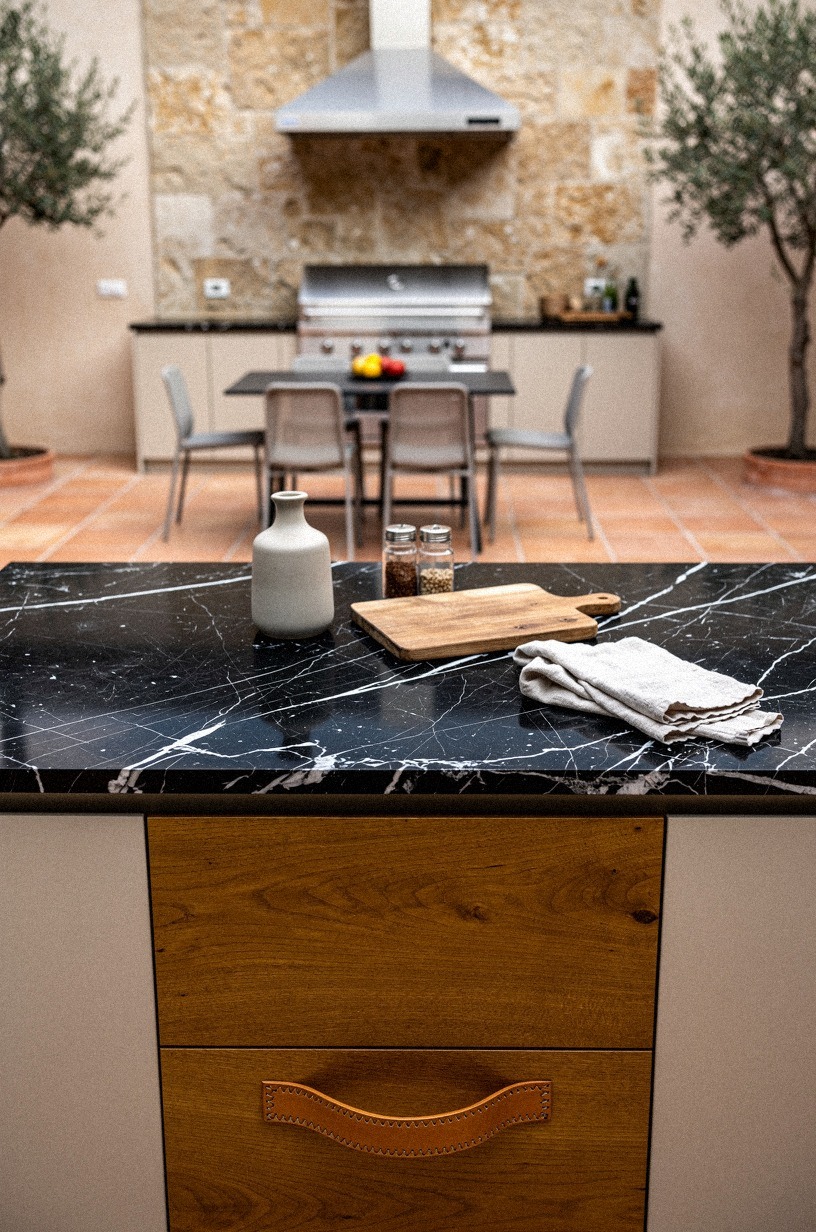
10Built storage under the longest stone counter
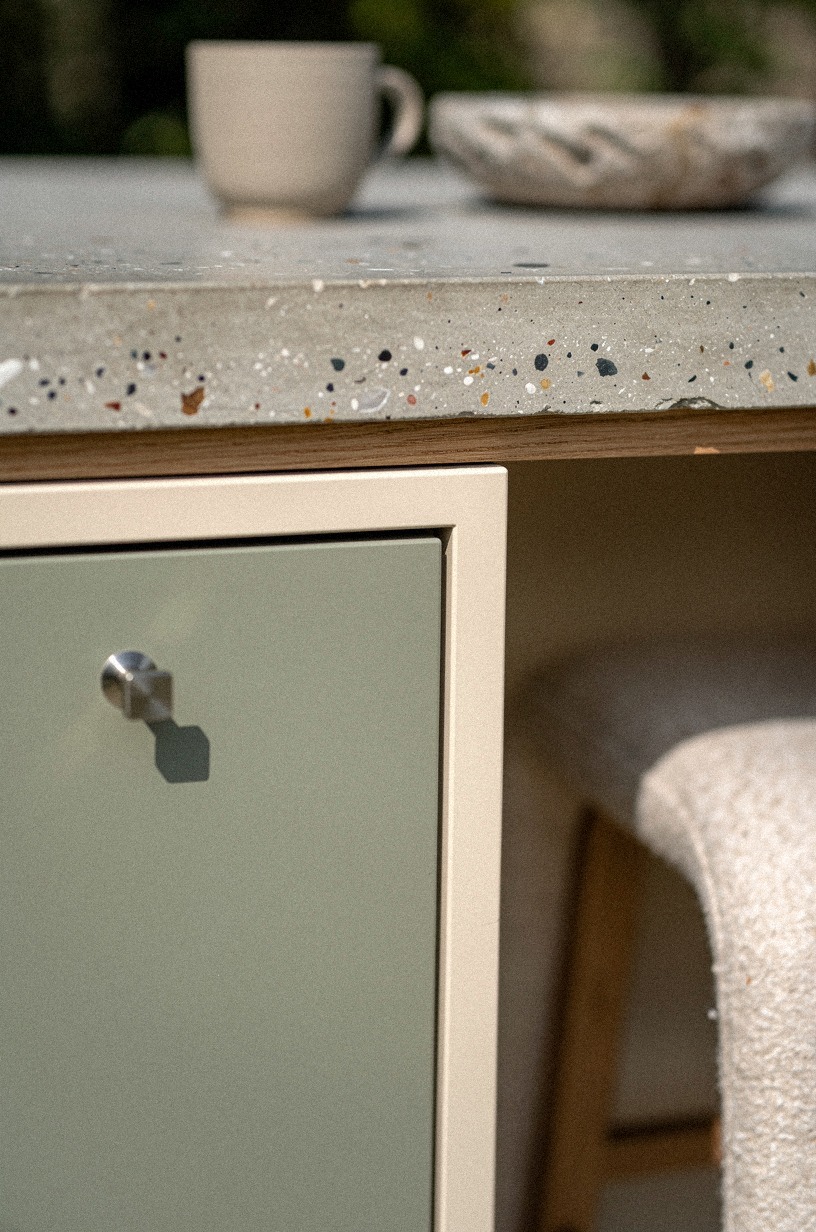
This is the part I should've done first. I kept treating storage like the optional layer that happens after the pretty decisions, and that was backwards. You should build storage under your longest counter because every extra foot you give yourself there removes visual noise somewhere else.
Under mine, I fitted weather-sealed drawers for grill tools, boards, foil, and linen runners, all tucked behind marine-grade powder-coated fronts that don't mind heat or splash. The macro details matter here: soft-close hardware, finger pulls that don't snag aprons, and bins sized for things you really use instead of aspirational junk.
The biggest win was the counter surface staying clear. Once I stopped parking brushes, gloves, and paper towels on top, the stone started reading like architecture instead of a workbench.
I tucked a slim IKEA KALLAX birch-effect cabinet in the corner for vinyl cushions and tablecloths, the kind of grounding detail that makes the whole kitchen set outdoor look composed. For more rugged storage ideas that still look grounded, I kept coming back to stone outdoor kitchen ideas for a timeless rugged look.
11Kept the hot zone away from seating
Some layouts look fun in photos and feel stressful in real life. Stools jammed beside the grill are one of them. You should keep your hot zone away from seating so the person cooking can pivot, season, and plate without asking everyone to scoot every ninety seconds.
I left the grill and oven side as the true work edge and moved the lounge-facing stools down the cooler leg of the L. That meant the stone work surface near the flame stayed open, while the social counter picked up the softer materials like Belgian flax linen napkins and a little tray for lemon wedges. The real change was psychological.
Once guests had their own side, I stopped cooking defensively. If you're tempted to cram everything together, outdoor kitchen ideas for small backyards big function littl is a good reminder that separation often makes a small layout feel bigger, not smaller.
12Angled the bar stools toward sunset
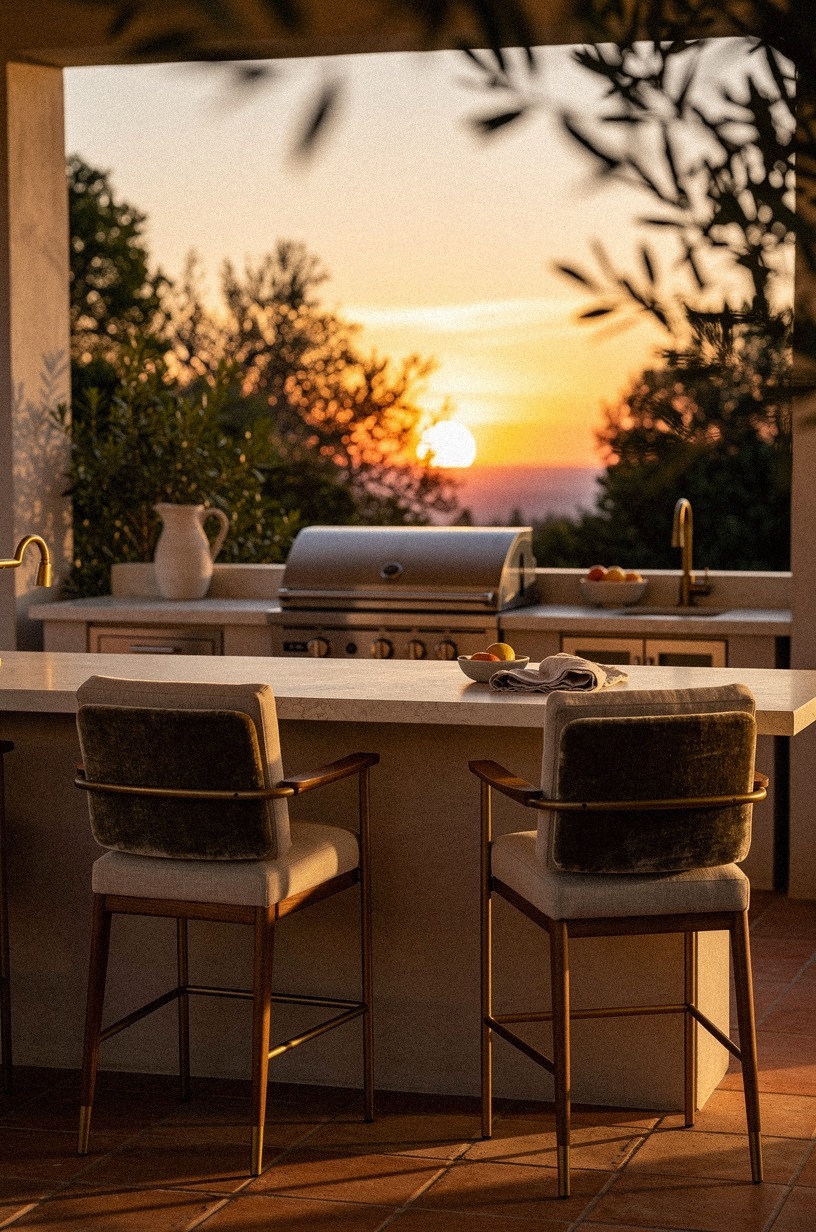
I didn't expect stool angle to matter. It did. You should turn bar stools toward the sunset or the best evening light, even if only slightly, because people sit longer when the view feels intentional and not like they're waiting at an airport gate.
Mine are simple powder-coated frames with teak slat seats, and I pivoted them just enough that your shoulders naturally open toward the yard. Through the foliage, the whole bar line started looking composed instead of stiff.
Because the stools weren't squared up like soldiers, the patio finally felt lived in. I almost bought bulkier seats first, but they would've blocked the walkway and made the counter feel heavier than it is.
The teak weathers into a soft driftwood gray after two summers, which is the patient, slow look I wanted all along. For more ideas that lean into atmosphere without making the layout precious, rustic outdoor kitchen ideas for a charming cookout space helped me think about posture as part of design.
13Grouped the smoker beside the wood stack
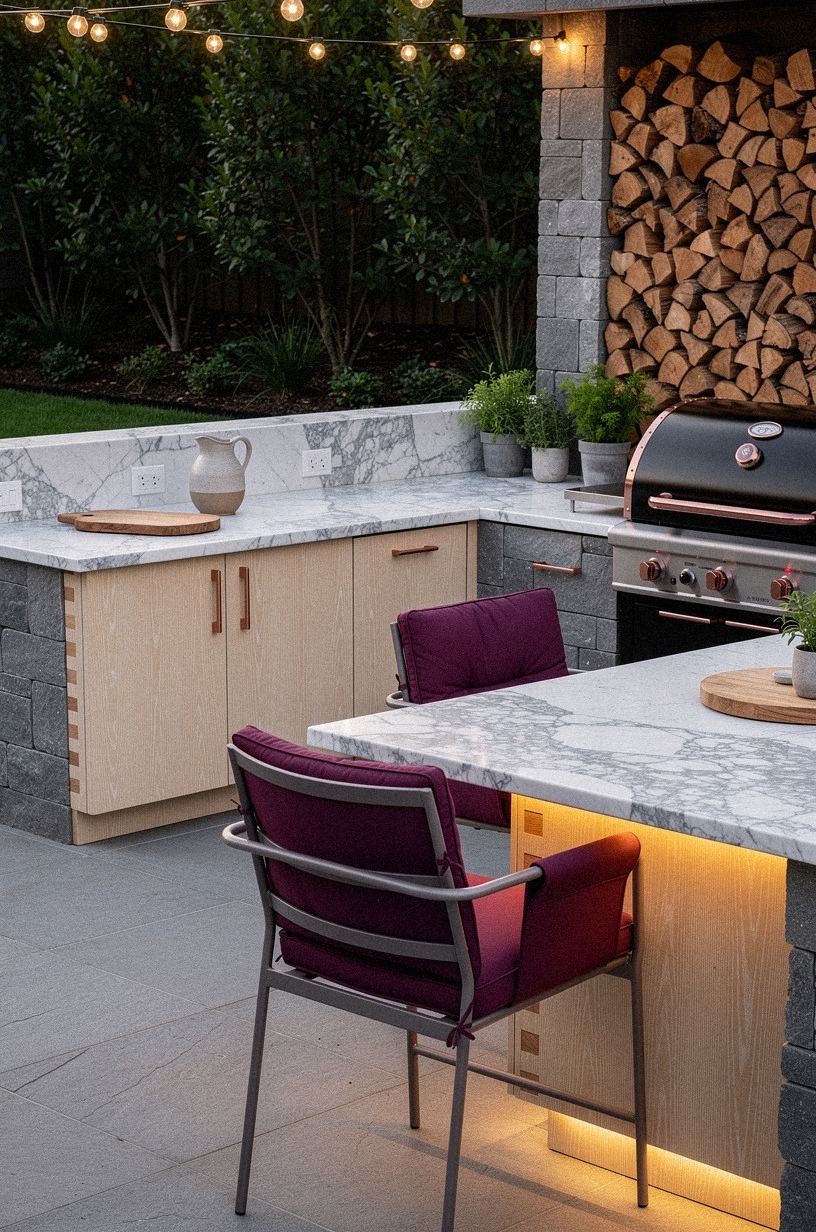
This was one of those moves that looked obvious only after I did it. You should keep the smoker beside the wood stack if you use it often, because fuel, tools, and smoke management belong in one zone and not scattered like props around the patio.
I built a simple niche with stacked logs beside the smoker and let that whole corner read darker and heavier than the grill wall. The body of the smoker sits against split-face stone veneer, and the wood stack gives it enough visual weight that it doesn't feel like a lonely black barrel parked at random. The practical side mattered just as much.
When your chunks, gloves, and brush are right there, you don't keep crossing the whole kitchen set outdoor with dirty hands. For rooms that lean rugged in a good way, stone outdoor kitchen ideas for a timeless rugged look and rustic outdoor kitchen ideas for a charming cookout space both made me bolder about embracing the heavier side of the layout.
14Left a clear path to the kitchen door
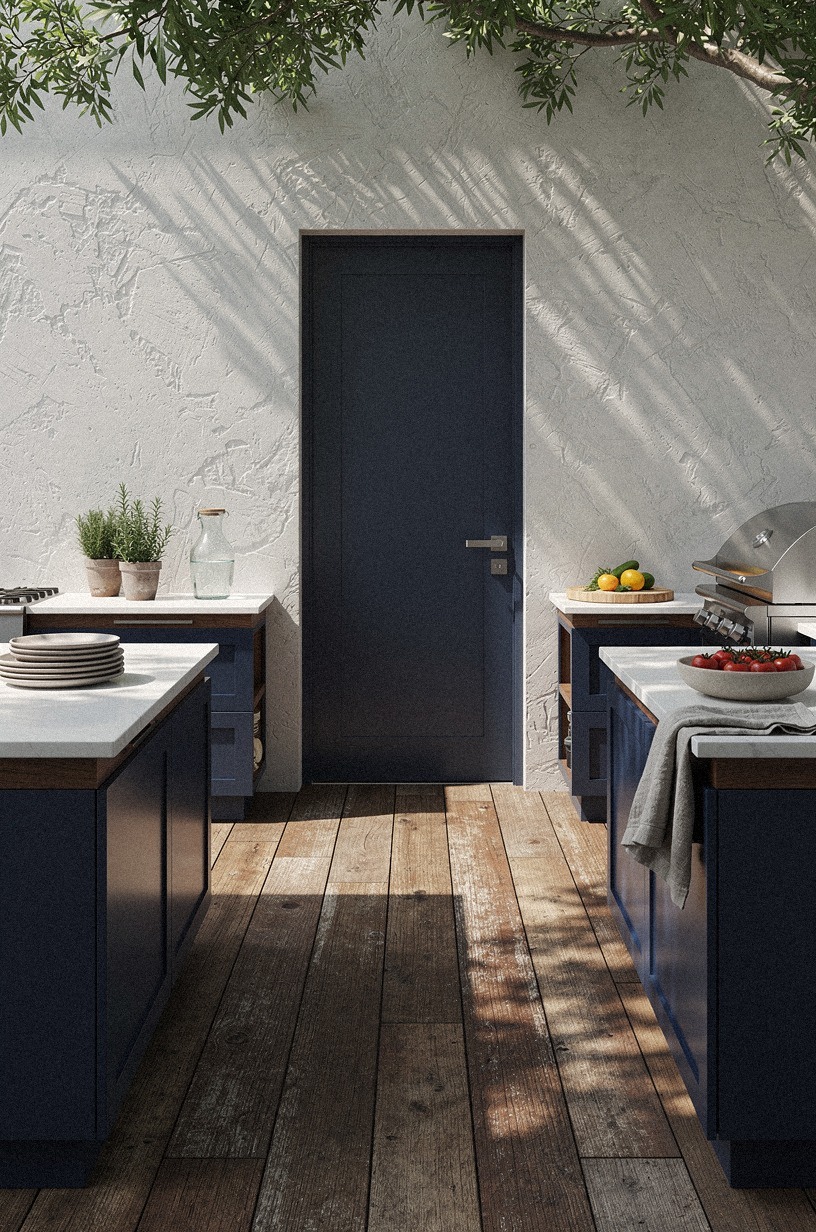
This was non-negotiable once I paid attention to weeknight use.
15Lit each work zone first
Lighting came last in my old setups, and that is exactly why they never worked at night. This time, I lit each work zone first, then styled the trays and pots after. You should do it in that order too, because good layout disappears after sunset if your counters, grill, and door path drop into shadow.
From above, the plan looked almost diagram-level clear: task light at prep, focused light at the grill, softer light near drinks, and a warm line washing the fence. I used small downlights around the main counter and kept the decorative pieces secondary, with 2700K LED lighting doing the real heavy lifting.
The first night we cooked outside after installing the lights, the patio felt like a real room. Yes, I still added the herb pots and the pitcher after, but only after I knew I could slice, plate, and carry food safely.
If your yard is a full entertaining setup, outdoor kitchen with tv ideas for the ultimate game day setu is a good reminder that mood matters, but usable light matters more.
The Layout Tax: How much it cost
I didn't do a full luxury rebuild, and I'm glad. For layout planning, the smartest thing you can do is understand the spending bands before you buy one seductive finish. Even in an outdoor project, these kitchen pricing tiers helped me decide what counted as cosmetic, what counted as a real refresh, and what would've tipped me into a full remodel.
For material benchmarks, I kept these in mind while comparing outdoor-rated finishes and deciding where to spend. Quartz can land around $60-$120 per square foot, laminate around $10-$40, zellige around $15-$35, and repainted shaker fronts around $150-$400 per door. My actual spend landed in the middle because I reused what I could, paid for better counters where heat and weather mattered, and refused to let accessories eat the budget.
Less than dinner out for a year of hosting. Worth it!
The Sightline First Rule
If you asked what finally made this layout work, I'd say it wasn't the grill brand or the stone choice. It was deciding that sightline, traffic, and task order matter more than matching appliances.
I spent way too long trying to copy outdoor kitchens that looked polished in photos but ignored how a real dinner moves. You know the ones. Gorgeous counter.
Gorgeous stools. Nowhere to set a platter when the chicken comes off.
The turning point was admitting that I don't cook outside like a showroom stylist. I cook with smoke in my face, a bowl of marinated vegetables on one hip, and someone asking where the opener went.
Once I accepted that, the choices got easier. The grill wall needed symmetry. The prep run needed length.
The drinks needed exile from the hot zone. And the seats needed a view or they'd never hold anyone longer than ten minutes.
I also learned that outdoor kitchen layout ideas get sold backwards all the time. People start with the statement piece. The pizza oven.
The chunky stone. The dreamy stools. But layout is a sequence problem before it's a decorating problem. First, where do you stand?
Then, where do you turn? Then, what are you reaching for with messy hands? If those answers are clumsy, no amount of Benjamin Moore White Dove (OC-17) on the trim or fancy drawer pulls will save the experience.
Would I do anything differently now? Yes. I'd mock up the fridge door sooner, and I'd stop underestimating the social side of the patio. Guests don't want to study your appliance package.
They want to face the garden, lean somewhere comfortable, and stay out of your way without feeling banished. That is a harder balance than Pinterest makes it look.
But once you get it right, the whole yard changes tone. Dinner gets slower.
Cleanup gets easier. And the space starts working on ordinary nights, not just the nights when you've lit every candle.
The Questions Worth Answering First
What is the best Outdoor Kitchen Layout Ideas: L-Shape, U-Shape & More for a small kitchen?
An L-shape is usually the best pick for a small setup because it gives you usable corner flow without boxing you in. You can pair one long prep run with one shorter cooking leg, then borrow ideas from small outdoor kitchen ideas that maximize every inch and even a slim IKEA cart for extra storage.
Where can I buy Outdoor Kitchen Layout Ideas: L-Shape, U-Shape & More pieces on a budget?
I'd start with Target Threshold, IKEA, and Wayfair for stools, trays, and compact storage that don't look flimsy. Facebook Marketplace is still my favorite second-hand move for stone-look tables and metal carts. And if your bones are good, outdoor kitchen ideas on a budget diy friendly is full of cheap upgrades that read much pricier.
How much does a Outdoor Kitchen Layout Ideas: L-Shape, U-Shape & More makeover cost?
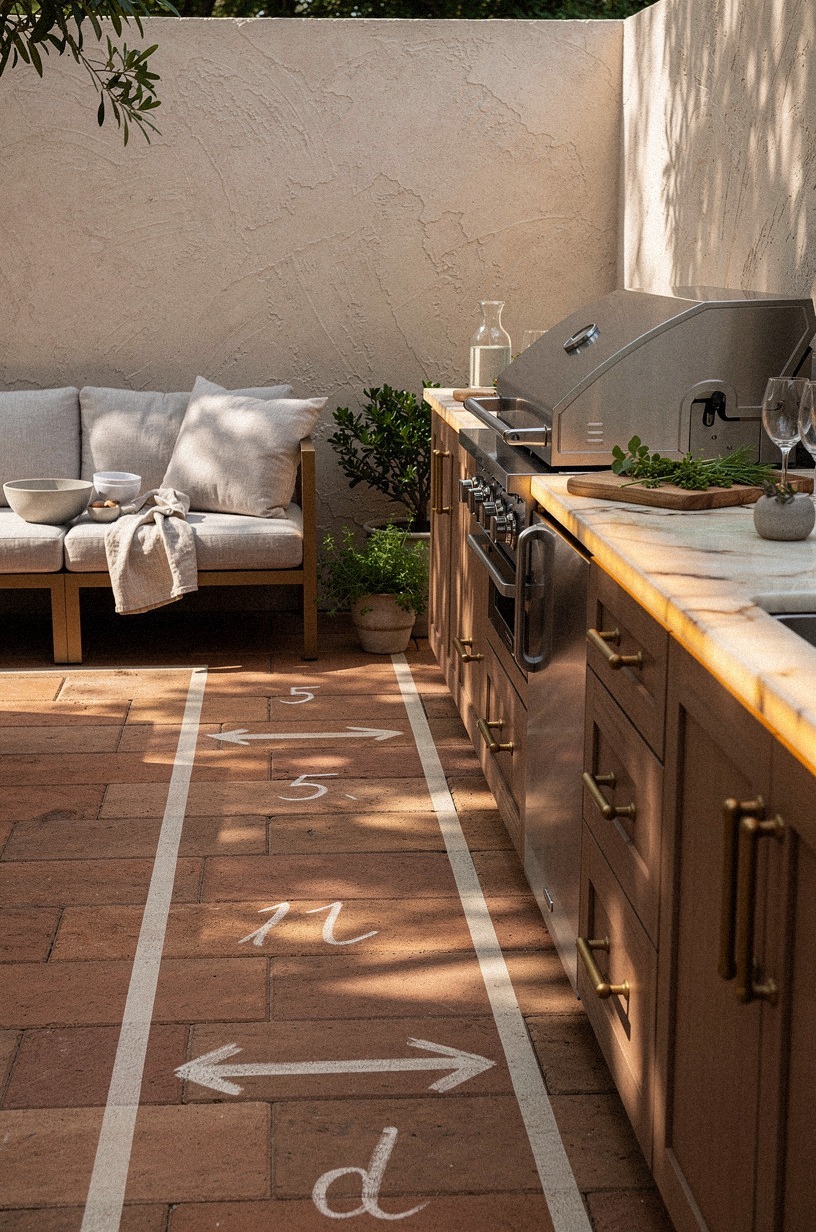
Most outdoor kitchen layout makeovers land somewhere around $300 to $12,000, depending on whether you're repainting and reworking flow or replacing counters and appliances. The free part is layout testing. Tape, chalk, walking paths, and moving stools cost almost nothing, and they can save you from one very expensive mistake.
Can I create a Outdoor Kitchen Layout Ideas: L-Shape, U-Shape & More on a budget?
Yes, and you probably should start that way because layout fixes are cheap first. Taped walkways.
A relocated drinks station. Second-hand stools turned toward the yard.
One long prep surface instead of two cramped ones. That is how you learn what deserves your money.
That lesson sticks!
Is a Outdoor Kitchen Layout Ideas: L-Shape, U-Shape & More worth it in a small space?
Yes, especially in a tight patio, because a small layout exposes bad flow faster. When every inch counts, the right L-shape or straight prep wall keeps you from crossing yourself all night. I like a 42 in path and one clear landing zone more than I like squeezing in extra seats.
Is Outdoor Kitchen Layout Ideas: L-Shape, U-Shape & More a good idea for a rental?
Yes, if you focus on reversible function upgrades instead of built-ins. Think rolling prep carts, removable lighting, portable pizza ovens, and freestanding storage that can move with you. rv outdoor kitchen ideas for cooking on the road is useful here because portable layouts teach you what matters before you commit.
The Traffic Path Rule: Where I'd Start First
If I had to pick one, I'd start with the traffic path. A bad walkway poisons every other decision, because even gorgeous counters can't rescue a layout that makes you sidestep people with hot food. Pin this one for later and tape the route before you buy a single appliance.