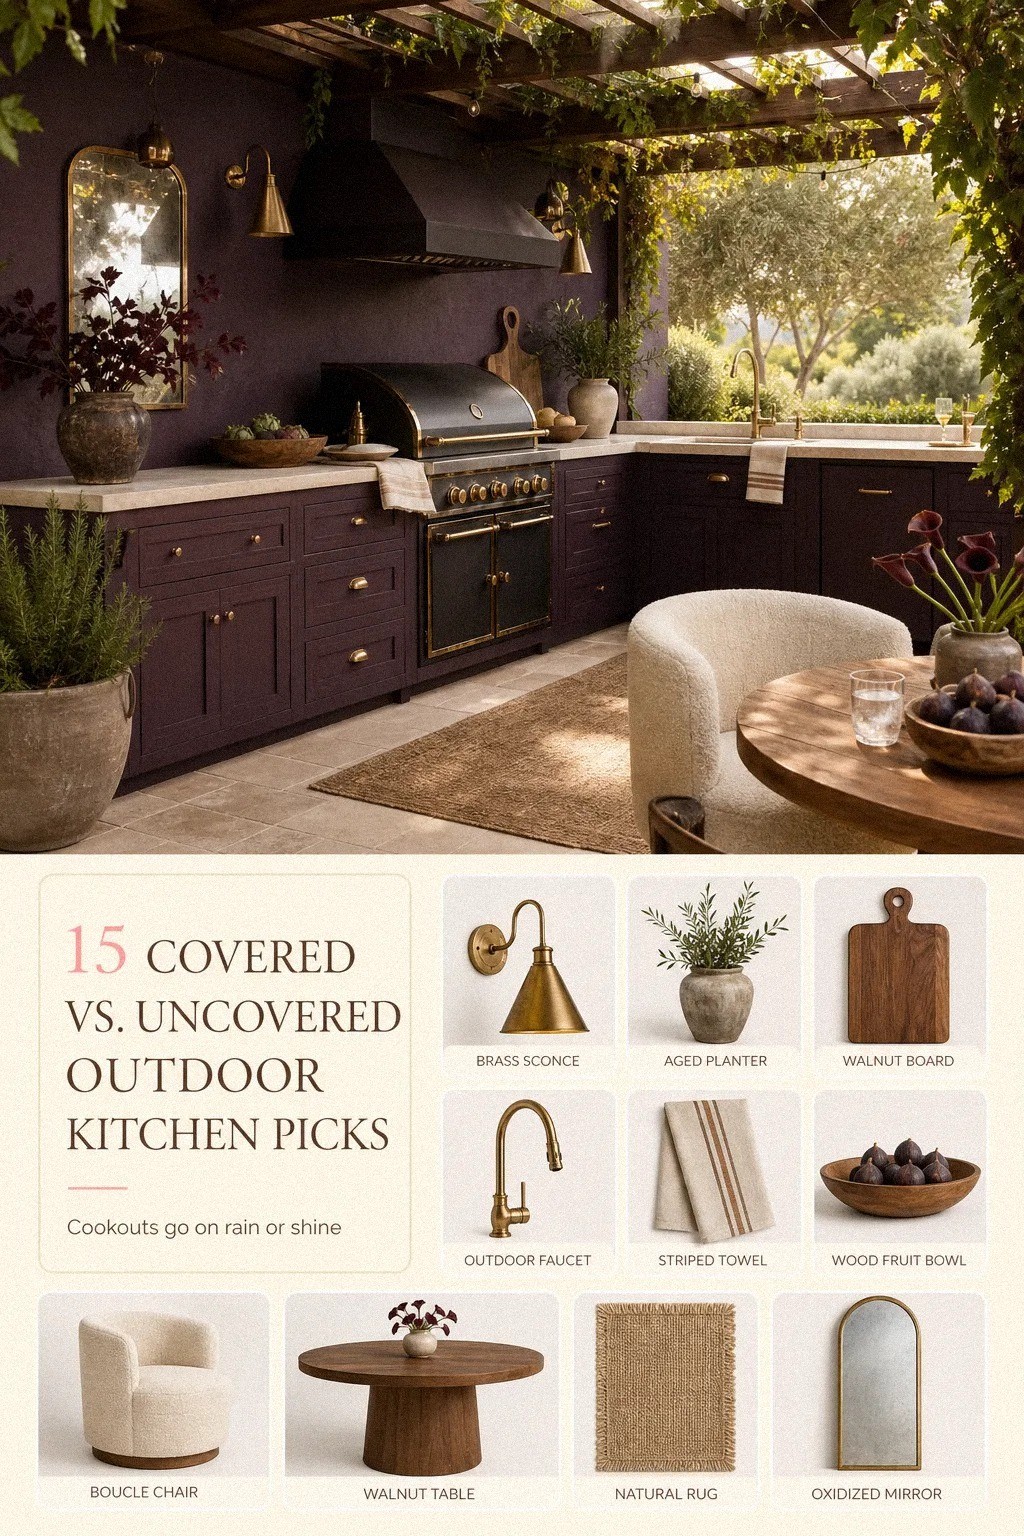
Covered vs. uncovered outdoor kitchen choices get easier once you decide what needs shade and what deserves sky. I learned that the expensive way, after putting every single function under one roof and wondering why the yard felt heavy by July. Most real yards don't need more structure. They need the right structure, in the right spot, for the way you cook.
- Choose a pergola roof over the grill wall
- Leave the prep island open to blue sky
- Frame a fireplace kitchen under cedar beams
- Set the sink beneath the covered patio edge
- Run stone counters beyond the roofline
- Add retractable screens around the cook zone
- Build a freestanding grill station in sunlight
- Hang pendants where the ceiling protects them
- Plant shade trees beside the uncovered bar
- Use pavers to separate covered dining
- Tuck storage cabinets under the roof overhang
- Pour a weatherproof counter for open-air prep
- Mount heaters above the covered serving ledge
- Angle the pizza oven toward the patio view
- Layer lanterns across the uncovered cooking path
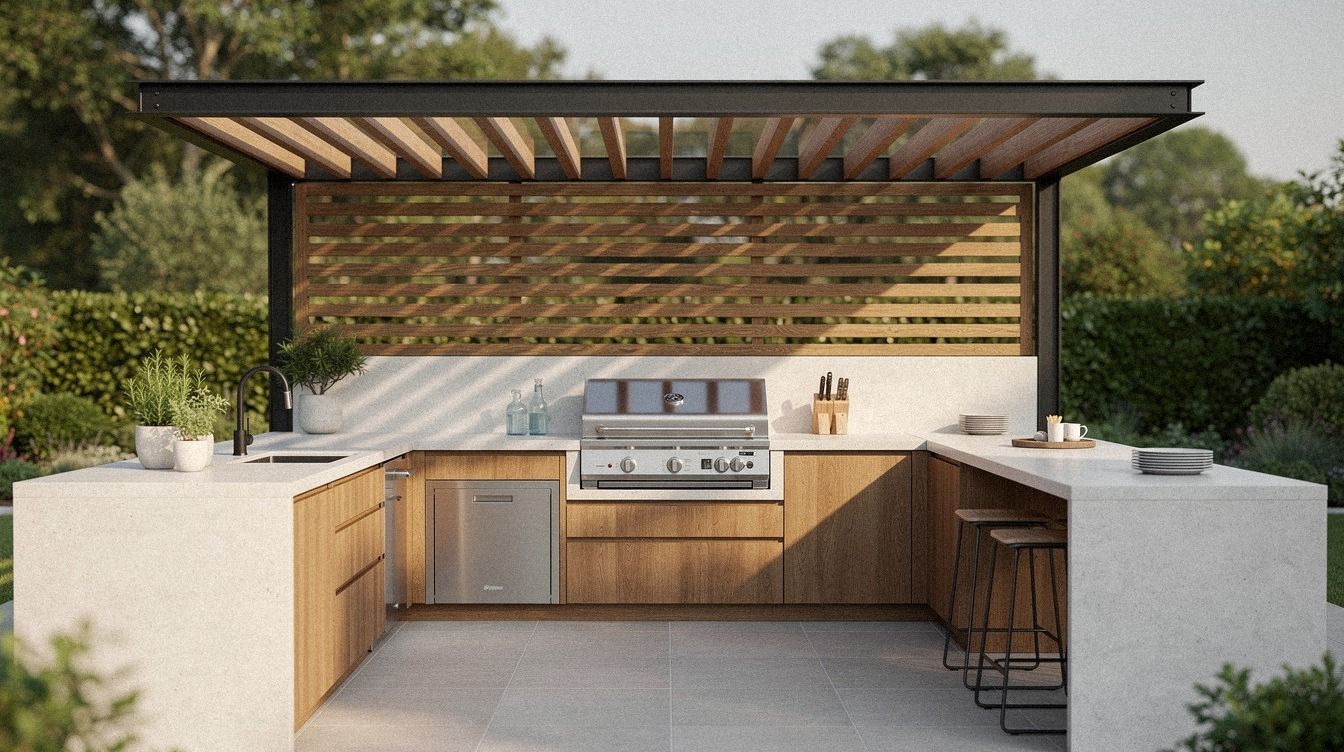
1Choose a pergola roof over the grill wall
Start with coverage where heat and grease live, not where every seat lives. A pergola over the grill wall keeps your hottest task in the protected zone, and it lets the rest of the yard breathe. If you're building an outdoor covered kitchen patio design, this is the move that looks expensive without swallowing the whole lot.
I like a grill wall with cerused white oak cabinetry below because the pale grain keeps the structure from reading too dark, especially when the photo setup is symmetrical and calm. You can echo that balance with two matching sconces, a centered hood line, and one exposed dovetail detail if your cabinet maker offers it.
For counter material, the guide in the best outdoor kitchen countertops ranked compared is worth a look before you lock anything in. I'd skip a solid full roof here if your yard is modest.
Too much cover over the grill wall can make smoke linger, and that is the exact problem you were trying to solve.
2Leave the prep island open to blue sky
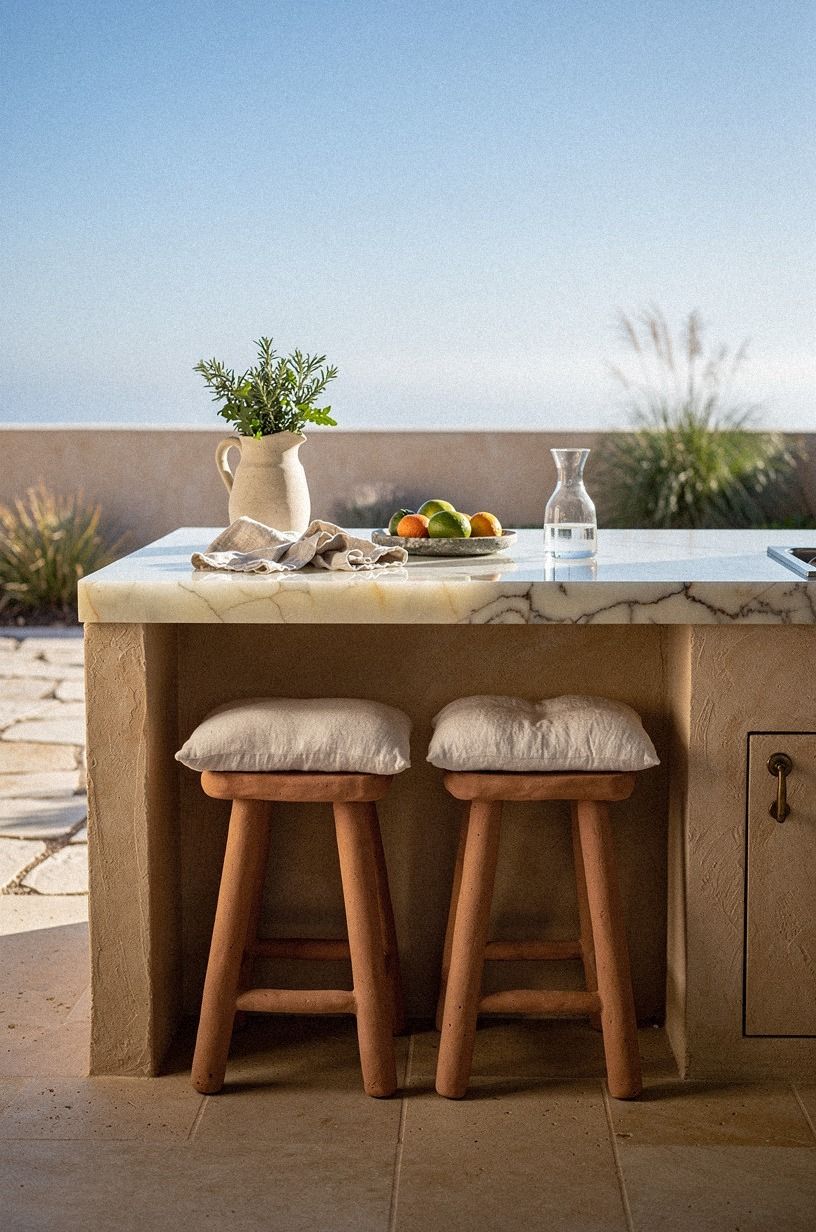
Leave your prep island uncovered if that zone is where you want light, movement, and a little drama. You feel the difference right away when you're walking toward a glowing counter and the sky is doing half the design work for you. For outside kitchen ideas covered patios, this is the best reminder that not every surface needs a ceiling.
An island with a translucent onyx counter looks especially good in the open because backlight gives it that soft, lit-from-within quality by late afternoon. Pair it with clay stools, linen cushions, and a bit of aged brass so the palette stays earthy instead of slick.
Standard counter height is 36 in, and you want 42 to 48 in of clearance all around if people will move behind you while you're chopping. I made the mistake of crowding stools too close once, and it turned a pretty island into a traffic knot fast.
If your yard is small, small outdoor kitchen ideas that maximize every inch will help you keep the sky view without losing circulation.
3Frame a fireplace kitchen under cedar beams

If your outdoor kitchen also has to carry fall nights, cover the fireplace zone first.
4Set the sink beneath the covered patio edge

Put the sink right at the line where the roof ends and the open yard begins. That small placement shift keeps you dry while you rinse, but it still gives you a visual connection to the sky and the planting beyond. You get protection without the boxed-in feeling, which is the sweet spot for most families.
A sink zone looks crisp when the roof line centers over warm travertine and navy cabinetry, especially in a front-on layout with a white backsplash that bounces light. Keep the faucet tall enough for sheet pans, but don't oversize it just because big fixtures are trending.
I wouldn't. A giant commercial-style arc can bully a quiet patio edge and make the whole station feel restaurant-y in the wrong way.
If you need inspiration for stone and cabinet balance, stone outdoor kitchen ideas for a timeless rugged look shows why grounded materials age better outdoors than glossy ones do.
5Run stone counters beyond the roofline
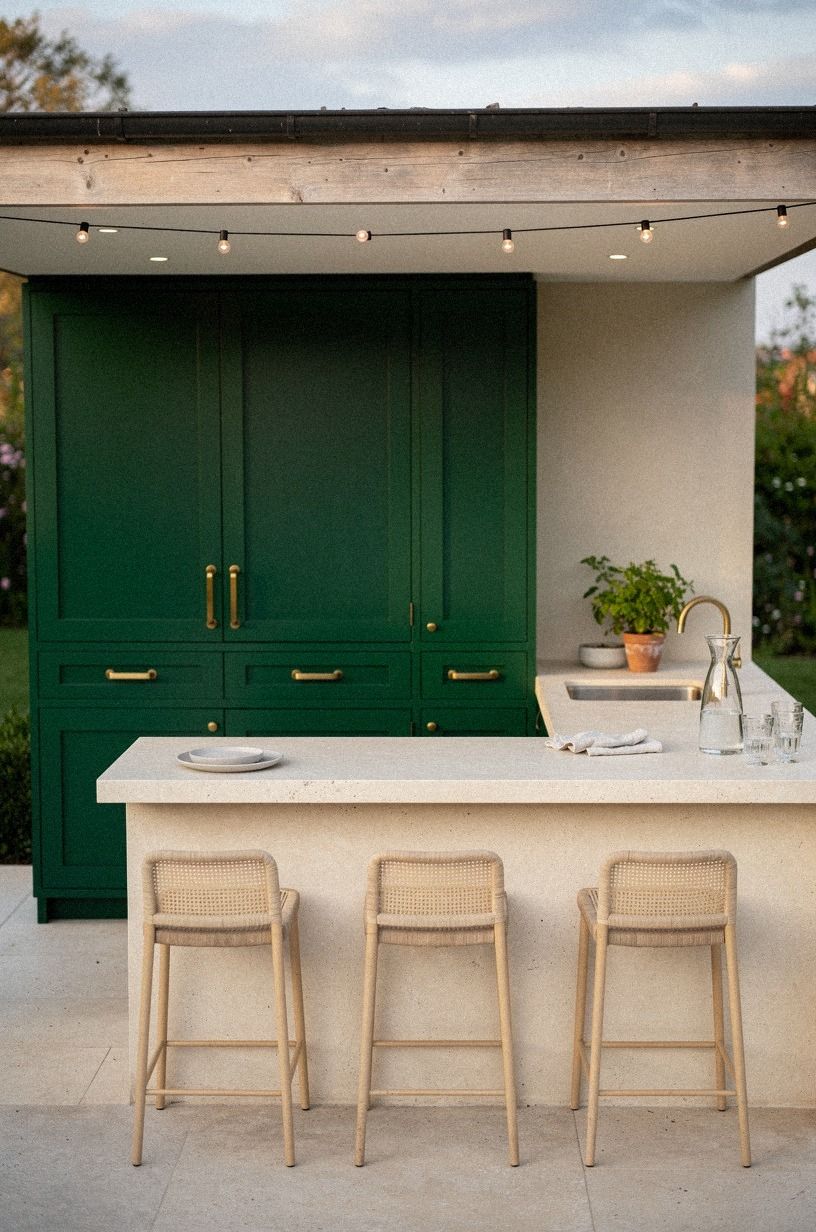
Let the counter keep going after the roof stops. That is how you make a covered zone and an uncovered zone feel related instead of chopped into two unrelated projects. A continuous run is especially good if you're torn between shelter and openness, because you don't have to pick one side for everything.
The prettiest version is a covered emerald cabinet wall that transitions into an uncovered cream prep run with the same stone counters all the way through. You can use Benjamin Moore White Dove (OC-17) on nearby trim if you want the cream side to stay soft rather than yellow.
And if your open section gets brutal sun, this is where dense stone earns its keep. Quartz is clean, sure, but I'd rather trust a surface selected for real heat exposure than one chosen only for showroom polish.
You can compare finish tradeoffs in the best outdoor kitchen countertops ranked compared, and it helps before you commit to a long run like this.
6Add retractable screens around the cook zone
Screens are what you add when the problem isn't rain. It's wind, bugs, glare, and that side-blown smoke that ruins one chair every night. A covered cook zone wrapped with retractable panels lets you tune the space instead of locking it into one permanent condition.
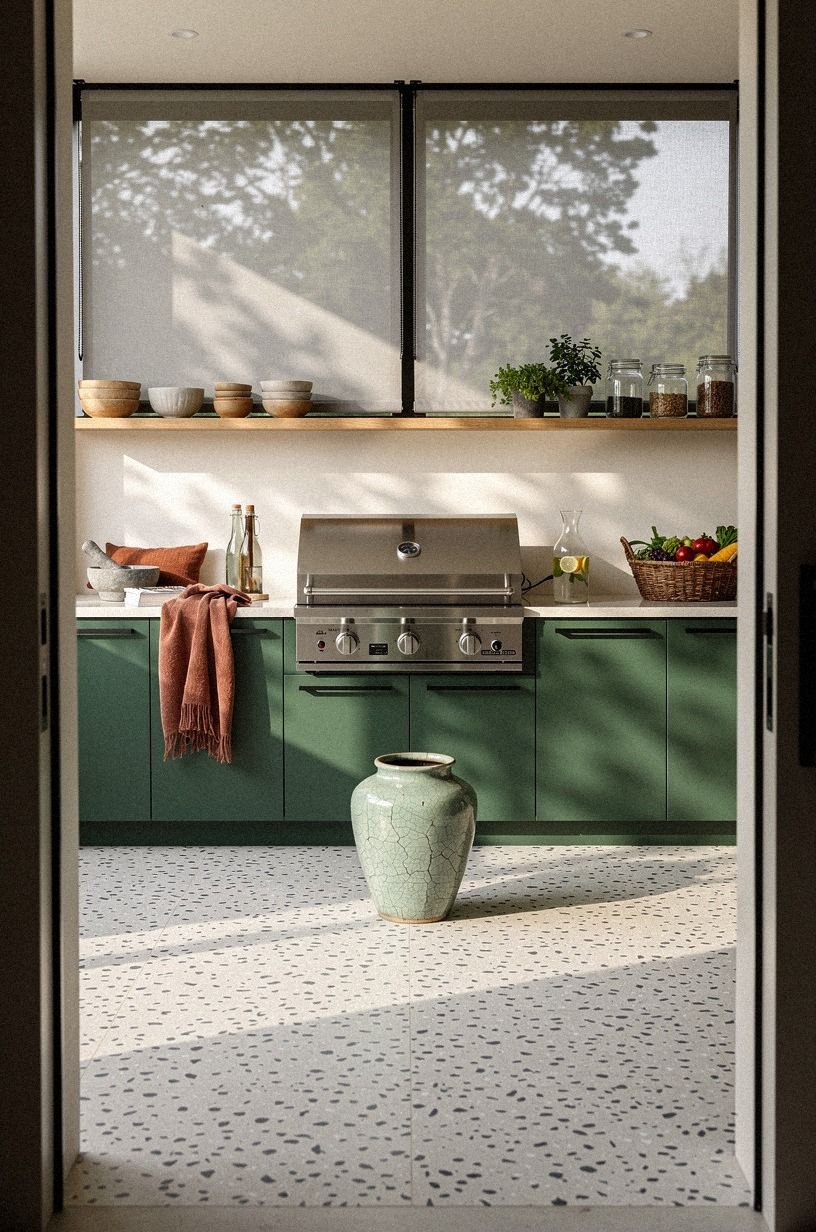
Forest green cabinetry with rust textiles looks rich behind retractable screens, especially when you're viewing the zone through a doorway and the layers have depth. Sherwin-Williams Evergreen Fog (SW 9130) works well on the adjacent trim if you want a softer green nearby without making the whole palette muddy.
But don't screen every side unless your site is truly exposed. You need some relief, some openness, some air.
When people enclose an outdoor kitchen too aggressively, it stops feeling like the yard and starts feeling like a porch that forgot what it was. For more enclosed-layout examples, rustic outdoor kitchen ideas for a charming cookout space is a good companion.
7Build a freestanding grill station in sunlight
A freestanding grill station is the cleanest case for going uncovered. When the grill island stands on its own in sunlight, you keep the messiest job out in the open and avoid building an expensive roof just to hover over one appliance. That matters if your real question is budget, not style!
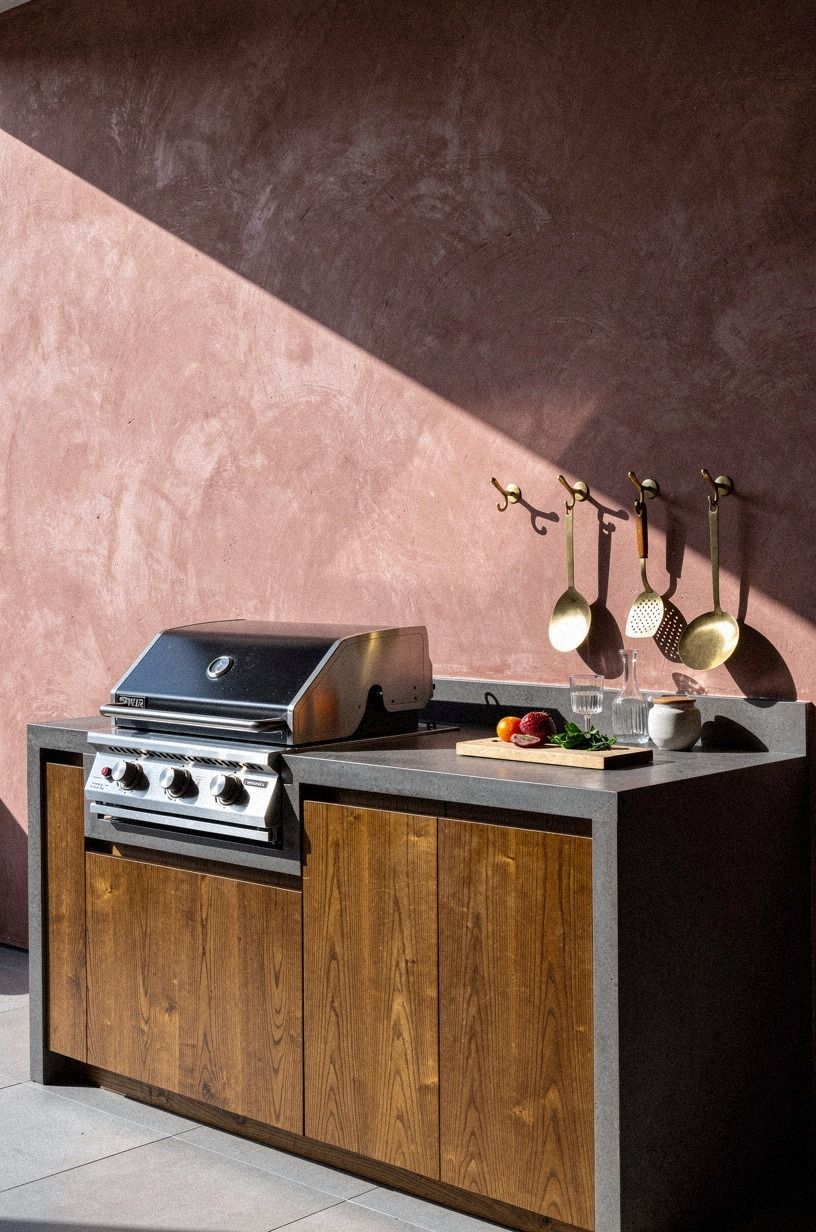
I like a charcoal setup against a dusty rose plaster wall with brass hooks and a simple ledge because it feels edited, not underbuilt. Use a charcoal grill island with enough side landing space for trays, then stop.
That is the part people keep missing. They add too many base cabinets to a station that only needed sunlight, storage for tools, and one good prep ledge.
If you cook in tighter footprints, rv outdoor kitchen ideas for cooking on the road shows how little you really need when every inch has a job. And yes, a freestanding station can still look deliberate if the wall, hooks, and flooring repeat your patio materials.
8Hang pendants where the ceiling protects them
Save your pendants for the covered part. That sounds obvious, but you'd be shocked how many outdoor kitchens try to make decorative lighting do weatherproof work it was never meant to do. Hang them where the ceiling helps you, and let the uncovered side rely on lanterns, landscape light, or moonlight.
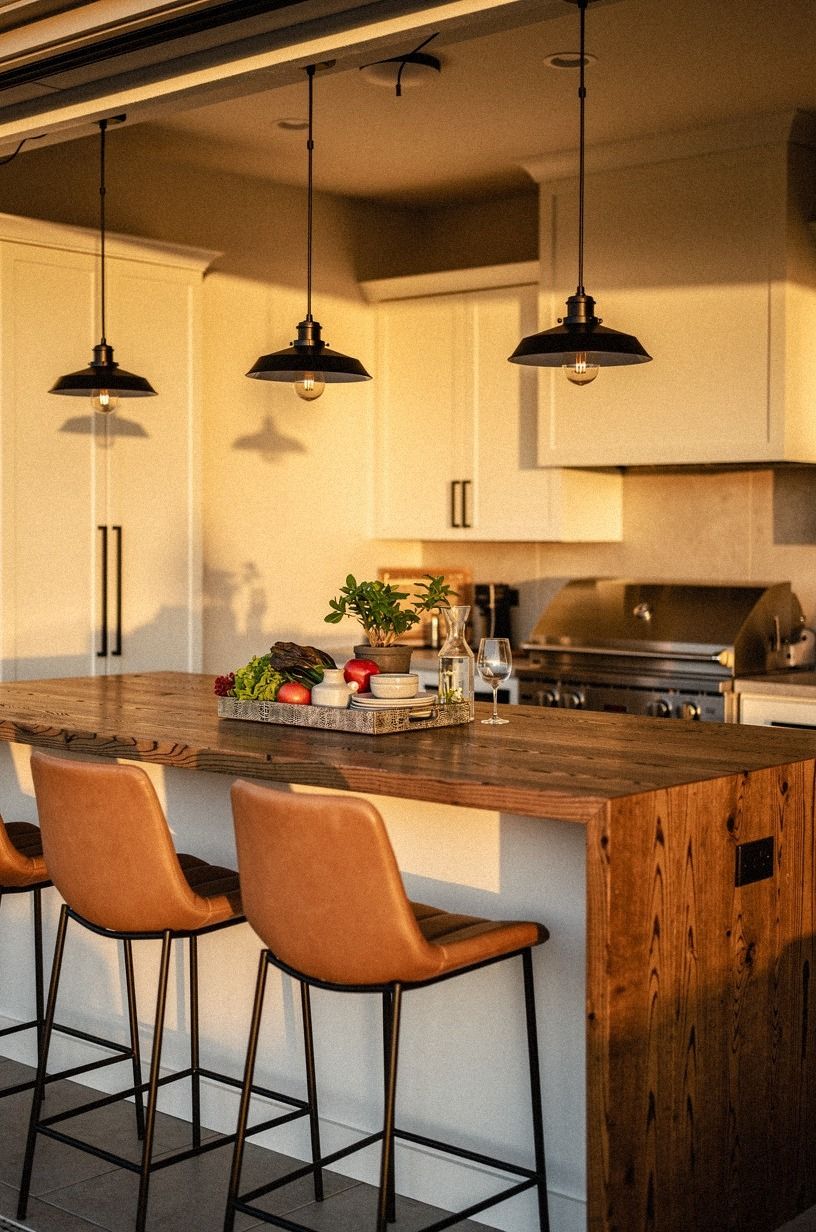
A relaxed three-quarter view works best when the protected grill wall sits to one side under pendant lights, with warm white shades and a darker back run behind them. Farrow & Ball Studio Green (No. 93) on a door or service wall can make that lit pocket feel deeper at night.
I always prefer fewer, larger pendants over a busy row of tiny ones. Why pay for a nice fixture only to make it look nervous? For more entertainment-focused layouts where lights matter, outdoor kitchen with tv ideas for the ultimate game day setu shows how protected lighting keeps screens and serving areas readable after dark.
9Plant shade trees beside the uncovered bar
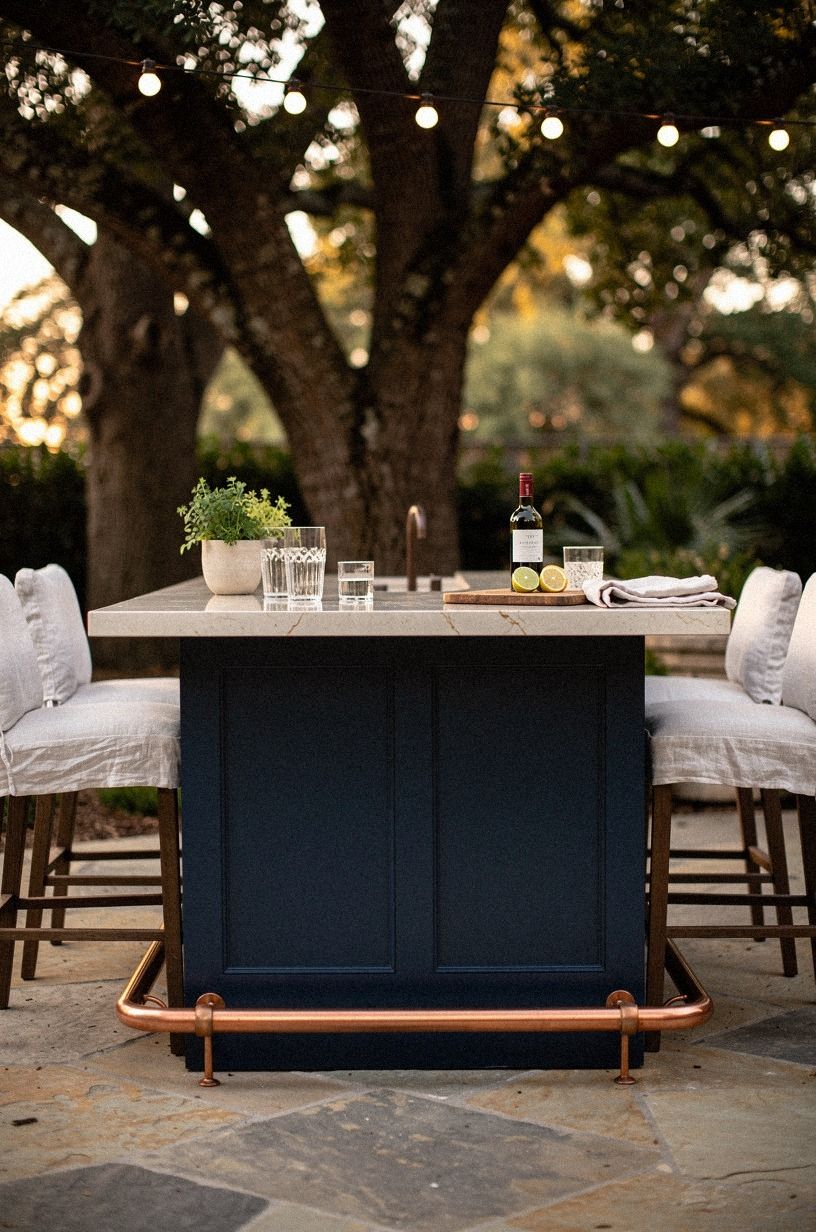
If you want an uncovered bar to work at noon, borrow shade from the landscape instead of the roofline. Trees give you filtered light, movement, and a softer edge than another hard structure would. This is one of the smartest ways to keep an open bar feeling relaxed instead of exposed.
A symmetrical midnight blue bar with a copper rail and an ivory stone counter looks even better when shade trees flank it and break the glare. Use midnight blue cabinetry if you want the bar to hold its shape visually under shifting light.
Then keep the seating pale so the whole thing doesn't go too heavy. But choose canopy carefully.
I'd rather have one clean-limbed tree in the right spot than three small decorative trees that drop debris into every drink. If you need more open-air inspiration for entertaining, summer outdoor kitchen ideas for the best backyard bbqs gives you more bar-friendly layouts without overbuilding them.
10Use pavers to separate covered dining
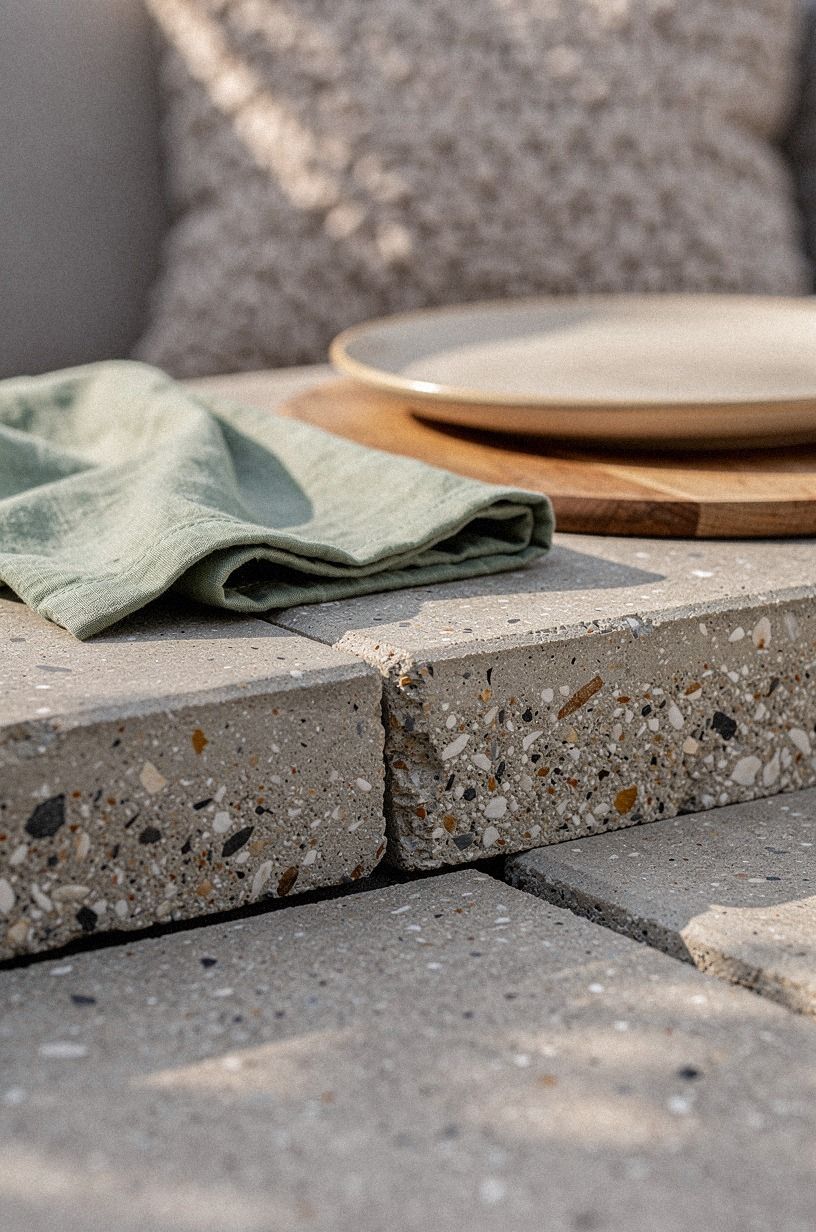
Flooring can do the zoning if the roof already carries enough visual weight. Pavers under covered dining tell you where to sit, linger, and set the table, while a different finish at the kitchen keeps prep from blurring into dinner. That is a practical split, not just a pretty one.
The detail I love is the crisp joint where pavers meet a poured concrete counter edge with visible aggregate. That material change reads intentional even in a tight yard.
Keep the joint clean, and make sure the dining table lines up with it instead of drifting a foot off. I did that once, and the whole zone felt accidentally placed for weeks until I fixed it.
If you're balancing multiple hardscape surfaces, small outdoor kitchen ideas that maximize every inch has helpful examples of how to separate functions without adding walls.
11Tuck storage cabinets under the roof overhang
Put your storage where the overhang already works for you.
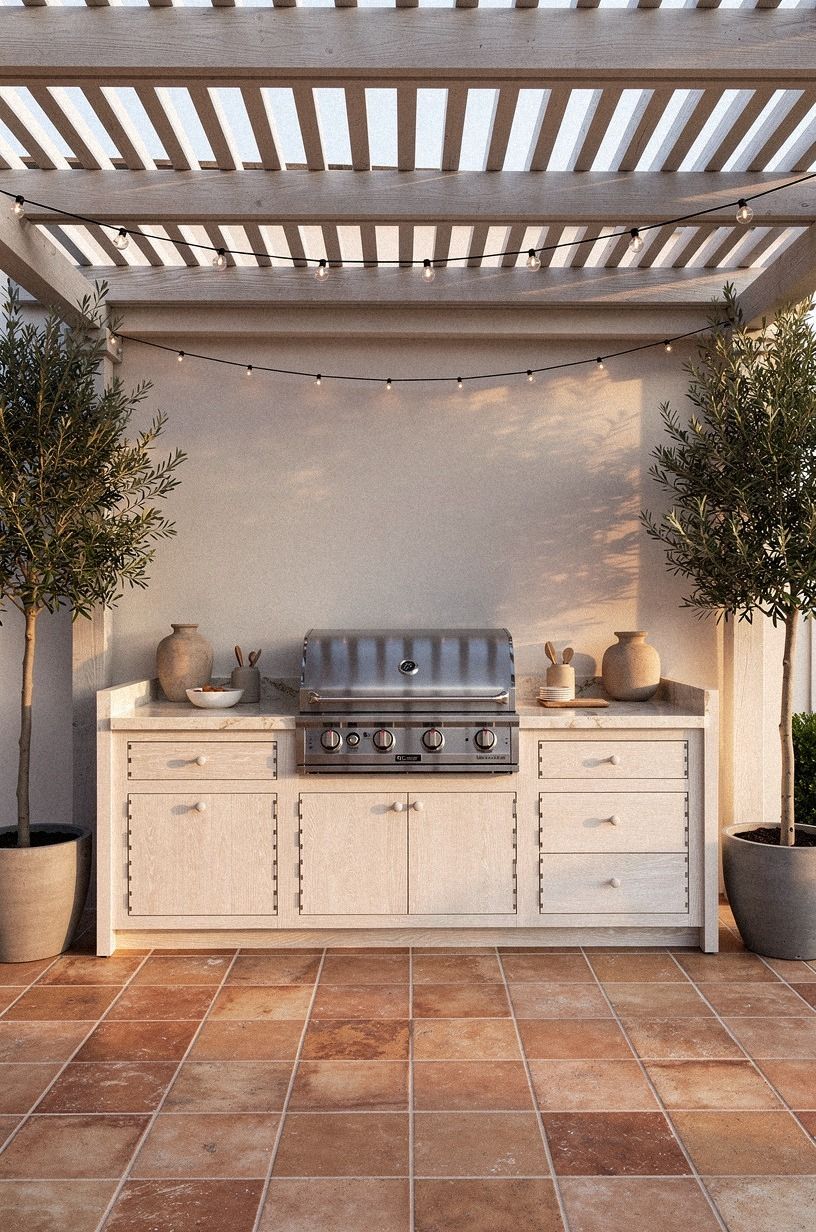
12Pour a weatherproof counter for open-air prep
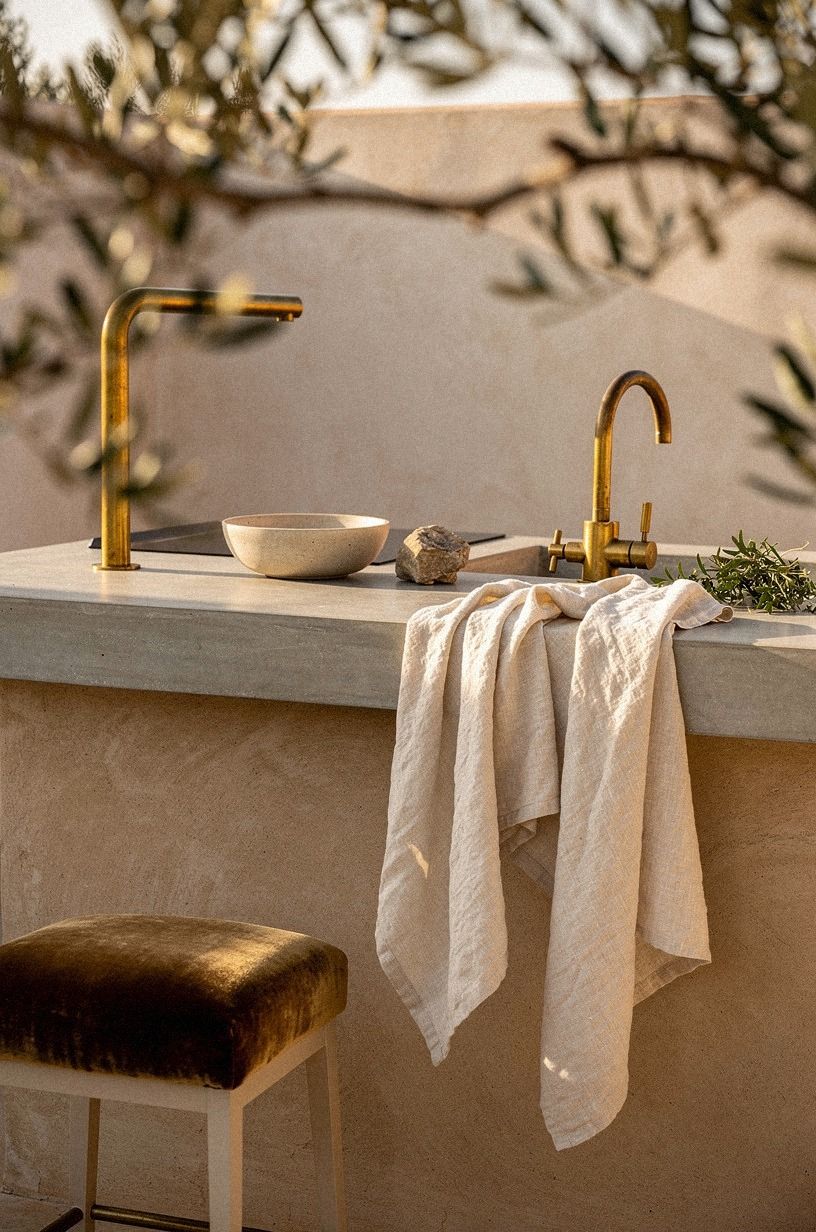
Open-air prep needs a surface that isn't precious. If the counter will sit beyond the roof, choose the material that can take sun, dust, storms, and the occasional neglected planter ring without making you panic. Real yards aren't photo studios.
A concrete worktop framed through olive foliage feels especially right here, with the uncovered counter set off-center on a clay plaster base and linen towels nearby. Use poured concrete if you want the counter to read grounded and calm, then soften it with one towel rail and one bowl rather than five styled objects. For a budget gut check, typical countertop costs run $60 to $120 per sq ft for quartz and $10 to $40 per sq ft for laminate, though laminate makes more sense under cover than in full exposure.
I wouldn't spend premium money on a fussy finish for a fully open prep run. Save your splurge for the area you touch at night and in bad weather.
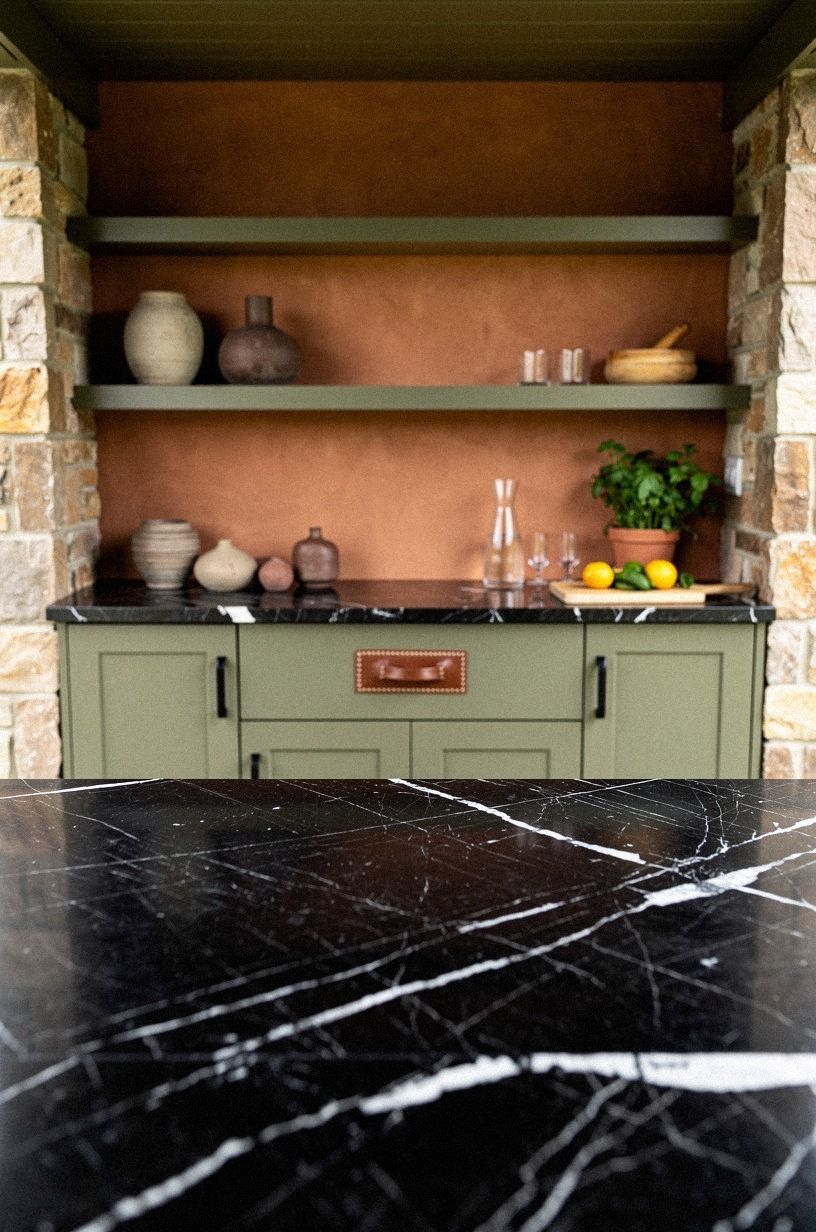
13Mount heaters above the covered serving ledge
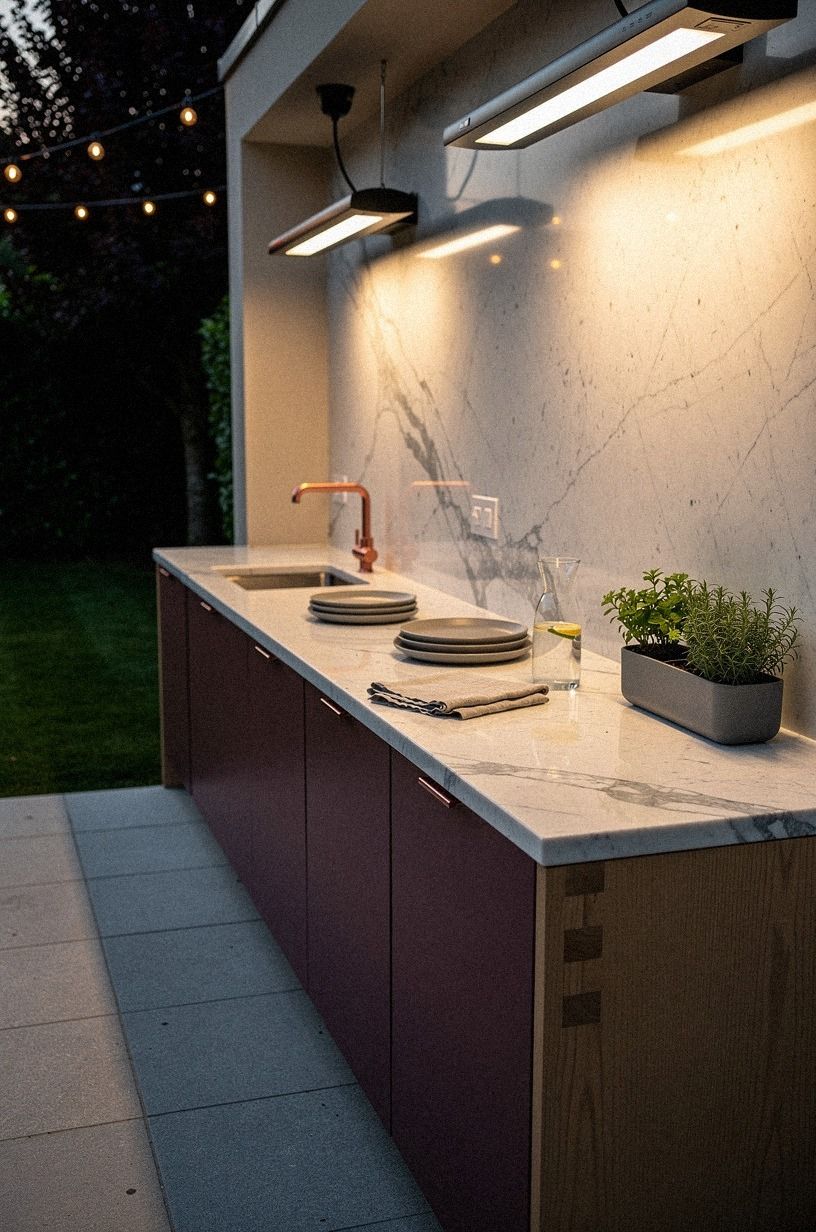
Heat should follow the social edge, not the hottest appliance. Mount heaters above the covered serving ledge so the place where people stand with drinks stays useful into the colder months. You will get more real-life hours out of that move than you will from upgrading the grill knobs.
Truly.
Carrara marble with soft gray veining and plum cabinetry can handle a heater line above because the materials already have enough visual softness below. Use mounted patio heaters high and clean so the ledge stays open for platters, glasses, and elbows.
And keep that ledge generous. A shallow bar sounds fine until two people try to set down plates at once.
If you're building around football nights or movie nights, outdoor kitchen with tv ideas for the ultimate game day setu helps you think through where warmth and serving overlap.
14Angle the pizza oven toward the patio view
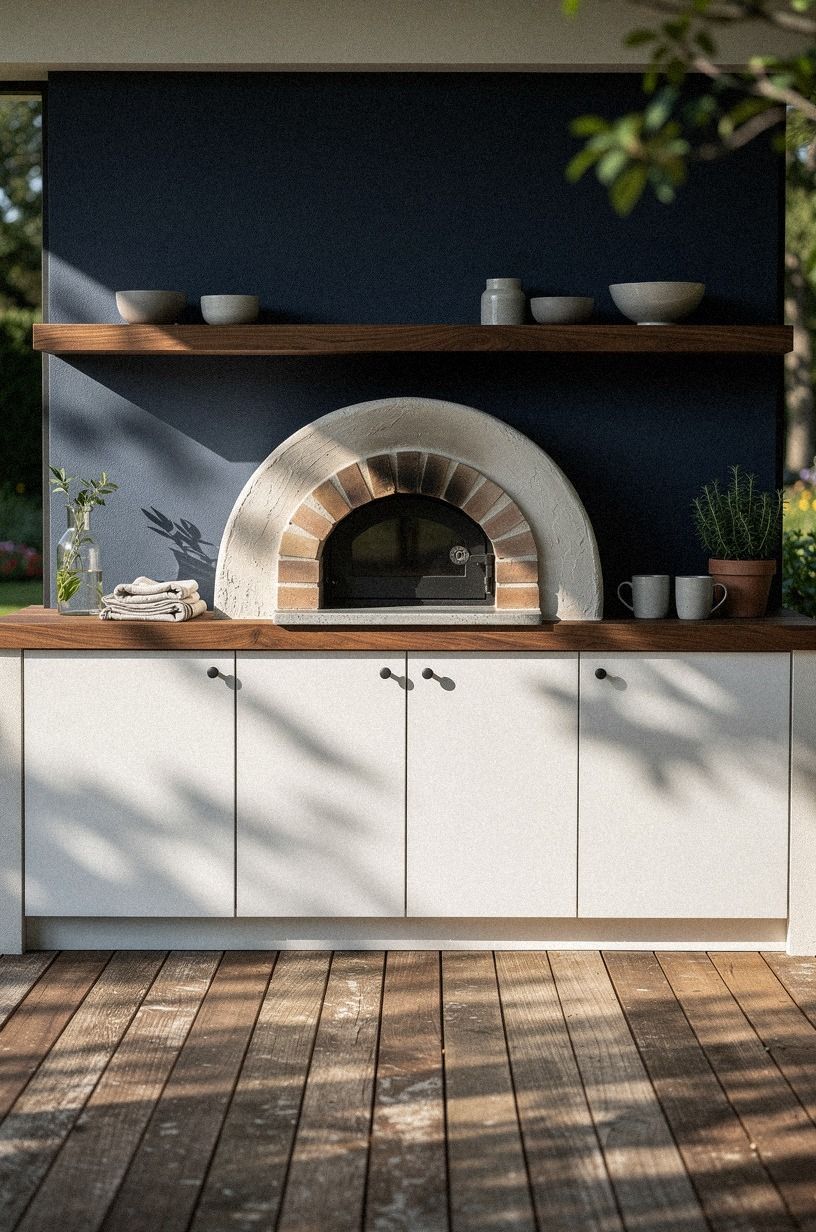
A pizza oven shouldn't stare at a blank fence if the whole point is gathering.
15Layer lanterns across the uncovered cooking path

Lanterns are the easiest way to make an uncovered cooking path feel intentional after dark. They don't fight the sky, and they don't ask you to build a roof just to get some evening atmosphere. If your kitchen path sits open, light the journey instead of over-structuring the destination.
An overhead view of an emerald, gold, and cream walkway beside Calacatta marble is the exact reminder that paths can be styled too. Layer lanterns in different heights, keep the spacing loose, and let one side stay darker so the glow feels believable.
And please don't line them up like runway lights. A little irregularity is what makes the whole thing feel lived in.
For more open-air path and material ideas, stone outdoor kitchen ideas for a timeless rugged look is full of surfaces that look better once the sun drops.
What Does the Roofline Cost Rule Tell You?
The real budget jump usually isn't the counter or the cabinet paint. It's the roof structure, electrical work, and all the little decisions that follow once you commit to cover. If you're asking which side costs more, the honest answer is that the covered version gets expensive faster because structure multiplies every finish choice.
That table is kitchen-wide, not roof-only, but it explains why I tell people to cover the function that truly needs protection first. Then leave one prep or bar zone open. You keep the costs from snowballing, and you usually get a prettier yard too.
Why Does the Split-Sky Rule Feel Better?
The outdoor kitchens I keep saving, and the ones people ask me about later, almost never win because they have more stuff. They win because the layout made one clear decision early.
Covered for heat, shade, and repeat tasks. Open for light, movement, and that little bit of sky that keeps the whole yard from feeling over-managed.
That is the split most real homes need, and honestly, I had to get it wrong once before I really understood it.
I used to think a roof made every outdoor kitchen better. More finished, more valuable, more practical.
Then I spent time in a yard where the covered zone swallowed everything: grill, sink, island, bar stools, dining table, heaters, plants, even the path. It wasn't ugly.
It was just tired. The whole setup felt like it was trying too hard to be an indoor kitchen that happened to sit outside.
You could feel the missing contrast before you could name it.
Now I use what I call the Split-Sky Rule. Cover the places where weather ruins function.
Leave open the places where weather creates mood. That means the grill wall, the sink edge, and deep storage usually want a roof.
The prep island, the walk-up bar, and the cooking path often get better when they stay open. If a yard is tiny, that contrast matters even more because one uncovered slice keeps the whole composition from going flat.
Materials matter here too. Benjamin Moore White Dove near stone keeps covered zones from reading heavy. Farrow & Ball Studio Green gives a protected wall some depth at night. 3/4-inch solid white oak or cedar warms up a pergola line without making it feel bulky.
But color isn't the first call. Sequence is.
You need to decide where your body wants shelter and where your eye wants relief.
And here's the part nobody respects enough: a yard isn't judged from one perfect standing spot. You see it while carrying a tray, stepping out with wet hands, looking back from the lawn, and glancing at it through a window in February.
That is why mixed coverage works. It gives you rhythm.
A roofline, then sky. Stone, then planting.
Shade, then one bright open counter. Once you get that rhythm right, the whole kitchen calms down. That is when it starts looking expensive, even if you didn't overspend!
The Questions Worth Answering First
What is the best Covered vs. Uncovered Outdoor Kitchen: Which Is Right for You? for a small kitchen?
For a small yard, the best answer is a covered grill wall plus one open prep island because you keep the footprint light while protecting the messiest task. An IKEA KUNGSFORS rail or compact shelf works well nearby. You can also borrow ideas from small outdoor kitchen ideas that maximize every inch.
Where can I buy Covered vs. Uncovered Outdoor Kitchen: Which Is Right for You? pieces on a budget?
Start with Target Threshold, IKEA, and Wayfair for stools, rails, lanterns, and easy storage. Then check Facebook Marketplace for teak dining chairs or outdoor bar stools.
One good secondhand find usually beats three flimsy new ones. For surface planning, the best outdoor kitchen countertops ranked compared helps before you shop.
How much does a Covered vs. Uncovered Outdoor Kitchen: Which Is Right for You? makeover cost?
A cosmetic makeover usually runs about $300 to $1,500, while a broader refresh lands around $3,000 to $12,000. Full remodel territory starts near $25,000 and climbs fast.
Free changes count too. Furniture shifts, lantern placement, and clearing visual clutter can fix more than people think.
Can I create a Covered vs. Uncovered Outdoor Kitchen: Which Is Right for You? on a budget?
Yes, and the cheapest wins are often layout moves. Open the island to the sky.
Move storage under the overhang. Add lanterns instead of wiring new fixtures.
A can of paint, better stool spacing, and one weather-tough prep surface can change the whole read for a lot less than a new roof!
Is a Covered vs. Uncovered Outdoor Kitchen: Which Is Right for You? worth it in a small space?
Yes, it's worth it because small spaces benefit from clearer zoning faster than large ones do. Cover one hardworking wall, then let one bar or prep run stay uncovered so your eye still gets depth. That is usually smarter than roofing the entire footprint.
Is Covered vs. Uncovered Outdoor Kitchen: Which Is Right for You? a good idea for a rental?
Yes, if you focus on reversible upgrades. Freestanding grill stations, removable lantern hooks, outdoor rugs, and portable storage all help.
Skip built-ins you can't take with you. If you're leaning portable, rv outdoor kitchen ideas for cooking on the road has the right mindset.
The One-Zone Start Point
If I had to pick one, I'd start with the covered grill wall. It protects the messiest task, keeps the budget from spreading everywhere, and still leaves room for sky. Pin that layout for later and let the island stay open.