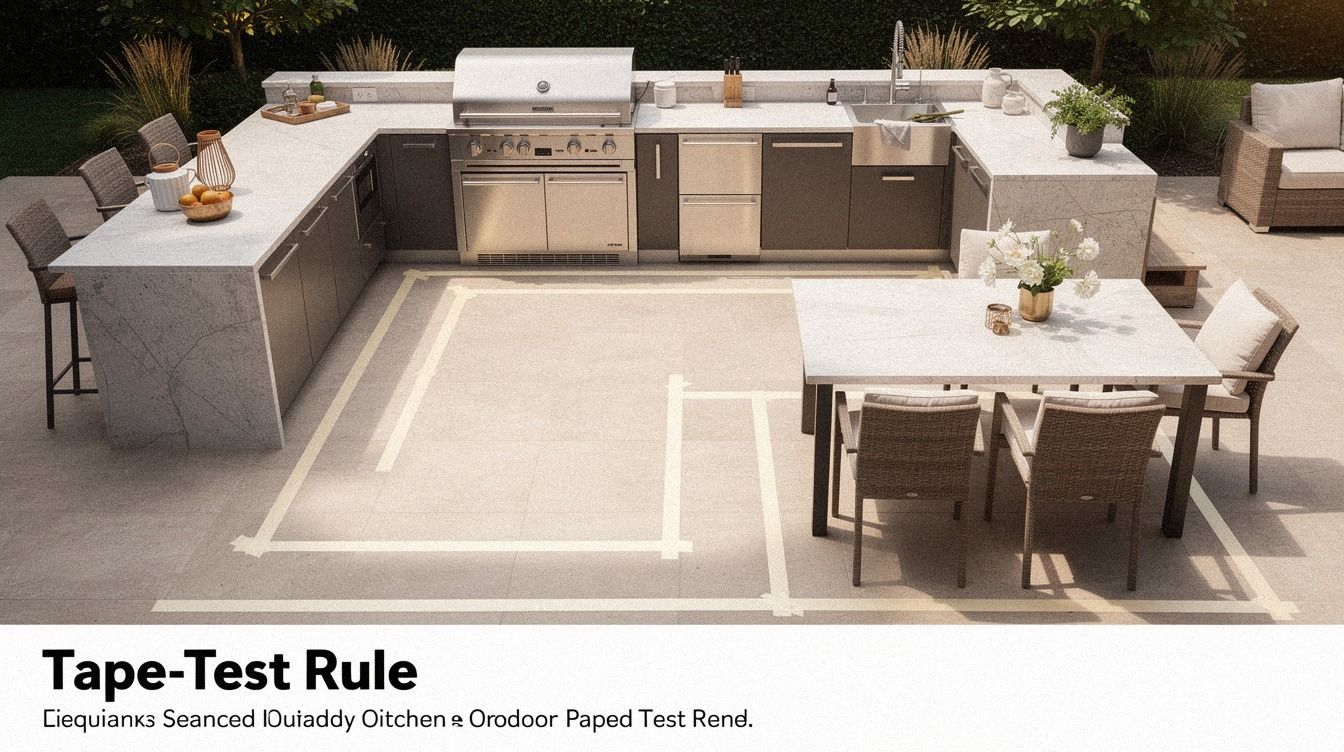
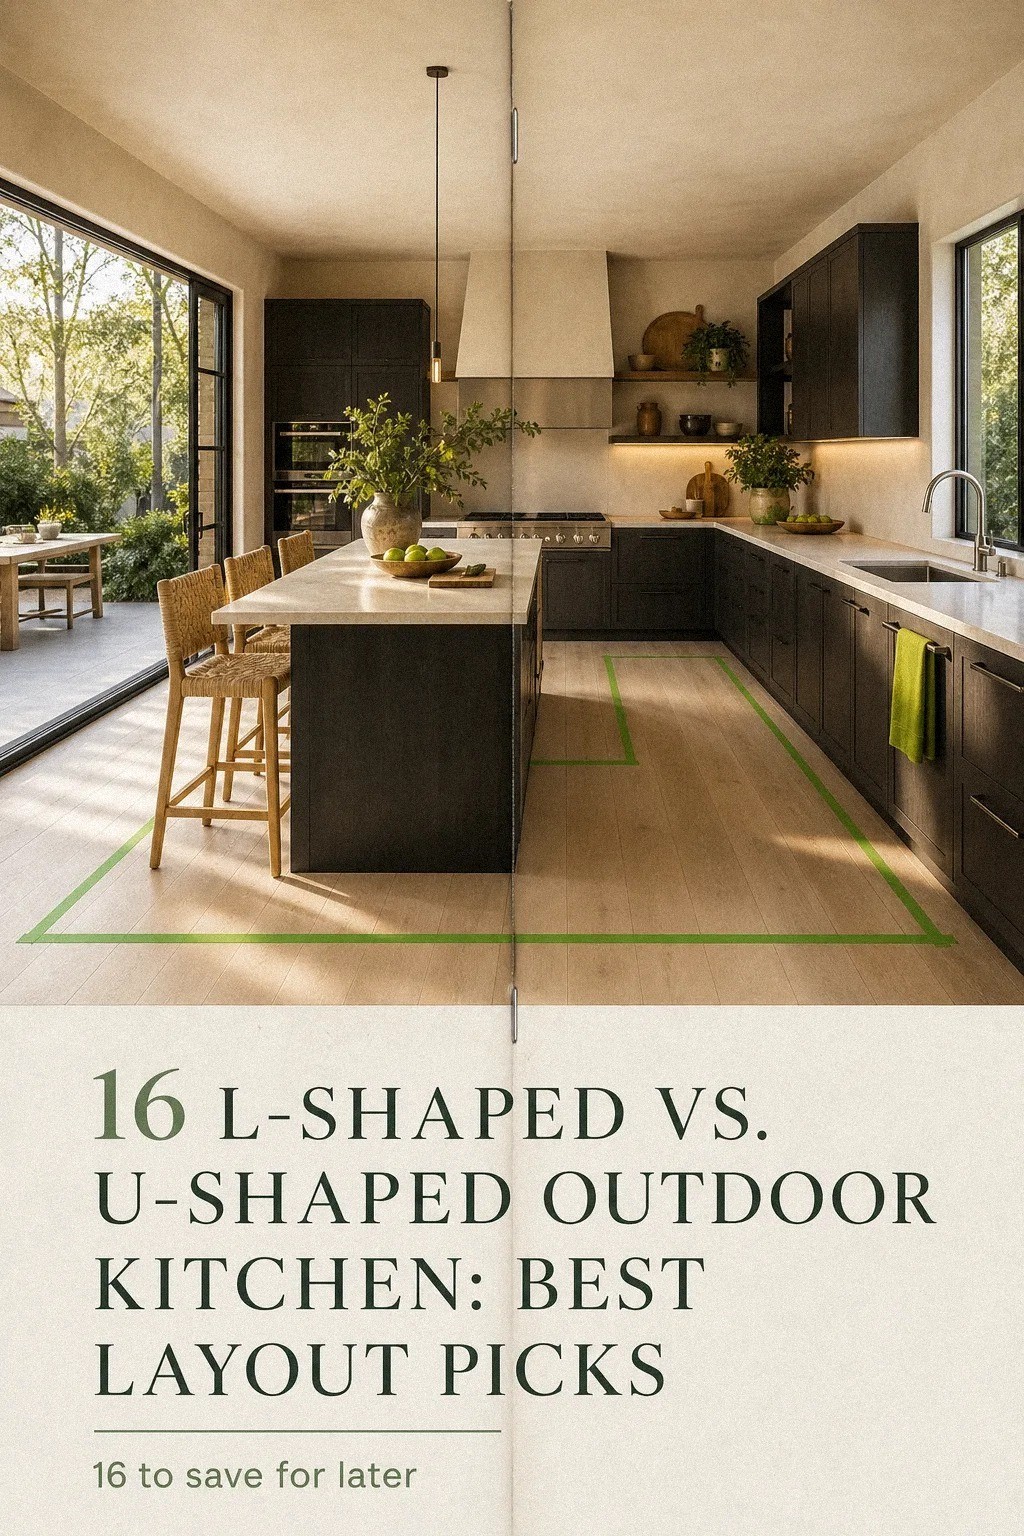
How to choose between an L-shaped and U-shaped outdoor kitchen comes down to space first: if you can hold 42 to 48 in of clear movement and still keep a 36 in work surface, the right layout gets obvious fast. I learned that after taping off a patio that looked generous until the grill lid opened and the stool line pinched the whole thing. Your eye will forgive a plain finish. It won't forgive a cramped cook zone.
- Start with the patio footprint in tape: The Tape-Test Rule
- Measure three clear paths around the grill
- Choose an L-shape for narrow patio corners: Are you trying to save the walkway?
- Choose a U-shape for full cooking courtyards
- Anchor the grill on the longest counter
- Place the sink beside the prep stretch
- Set the fridge under the shaded return
- Build the U-shape around a center walkway: The Center Walkway Rule
- Run L-shaped counters along fence lines over floating them in the middle
- Turn the bar side toward garden seating
- Leave landing space beside every hot zone
- Frame the cooking wall with stone cladding
- Add storage drawers below the prep corner
- Layer pavers under the entire kitchen zone
- Hang task sconces above each work surface: The Three-Height Light Stack
- Finish with stools on the serving edge
1Start with the patio footprint in tape: The Tape-Test Rule
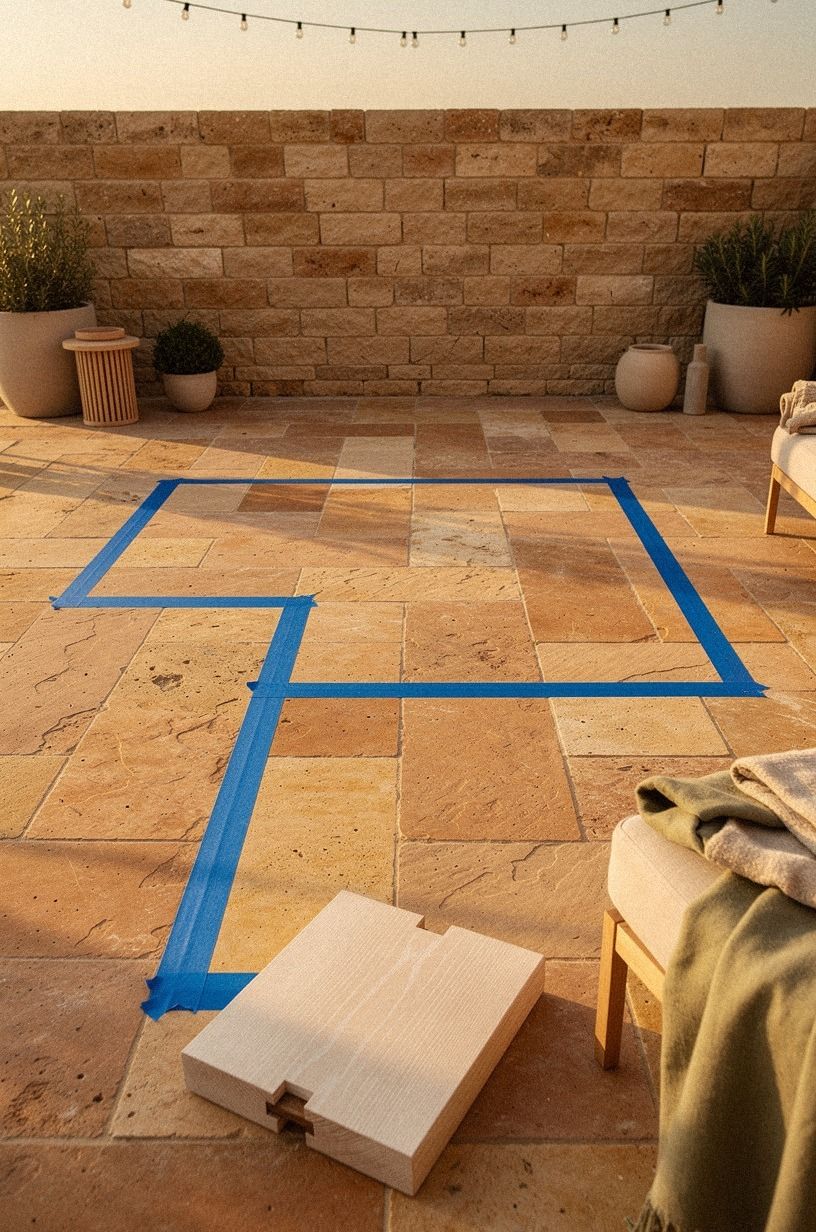
Before you price stone or grills, map the whole footprint in painter's tape right on the terrace. You want both outlines visible at once, because an L-shape can look too small on paper and feel just right once you stand in it, while a U-shape can feel luxurious until you realize the middle lane is eating your seat space. I like blue 3M tape because it reads clearly on beige pavers and pulls up clean.
Stand at your future grill wall, then tape a 36 in deep counter run and a 42 to 48 in clear aisle. That simple move tells you whether your outdoor kitchen patio design should hug one corner or wrap you on three sides. If you need more inspiration for footprint options, this guide to outdoor kitchen layout ideas shows how different shapes sit on real patios.
And don't cheat the corners. I did that once, and the return leg looked fine until we carried out a tray and clipped the tape with our knees. Your body catches layout mistakes faster than a sketch does, so walk the taped lines like you're carrying a hot sheet pan.
Typical cost by tier (US averages):
2Measure three clear paths around the grill
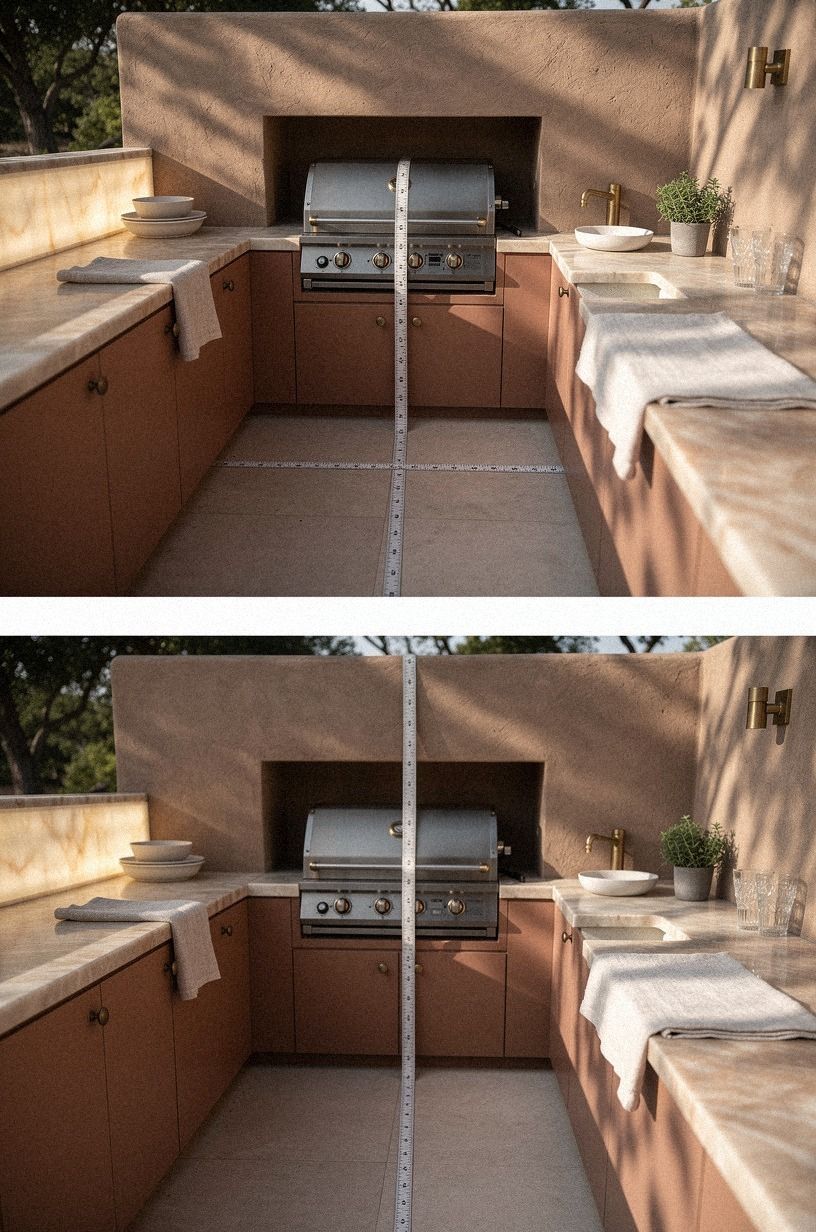
Next, measure the three paths that matter around the grill station: approach, side step, and exit. You need one clear line to walk up with food, one to pivot while the lid is open, and one to leave without brushing a hot surface. If even one of those paths feels tight, your kitchen set outdoor plan is asking for stress.
Use a tape measure and mark the walkways on the ground in chalk or low-tack layout tape. I aim for 42 in when I can, because 36 in works on paper but starts to feel mean once you add a trash pullout or a guest drifting too close with a drink. This is where small patios reveal themselves, and it's why I keep coming back to small outdoor kitchen ideas that maximize every inch before locking a layout.
But don't only measure with empty hands. Hold a platter, swing the lid, and fake the turn to the prep run. Your shoulders will tell you the truth in about ten seconds.
3Choose an L-shape for narrow patio corners: Are you trying to save the walkway?
If your patio narrows toward a fence, plant bed, or property line, choose an L-shaped counter and push it to one edge. That's the shape that protects your movement lane instead of trapping it, and it's usually the better call when you still want a table, loungers, or a fire pit nearby. A narrow patio corner wants breathing room more than symmetry.
I like an L when one leg can handle the grill leg and the other can carry prep, with the open side facing traffic. You get the feeling of a complete outdoor cooking space without spending the whole terrace on cabinetry. For compact setups and simpler runs, I keep one tab open with small outdoor kitchen ideas because those examples respect clearance instead of pretending every yard is a resort.
And here's my blunt opinion: skip the urge to force a third side just because a U-shape photographs well. In a tight yard, the extra counter return often steals more comfort than it adds function.
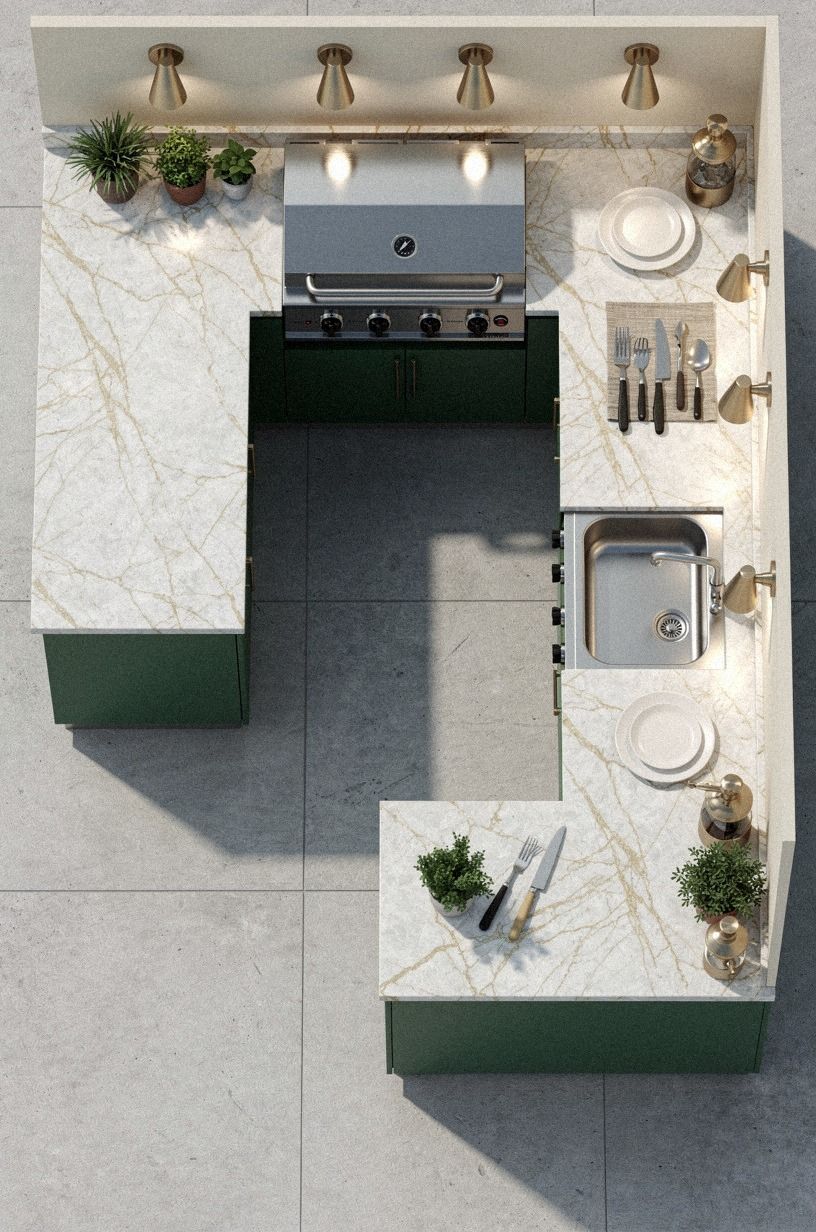
4Choose a U-shape for full cooking courtyards
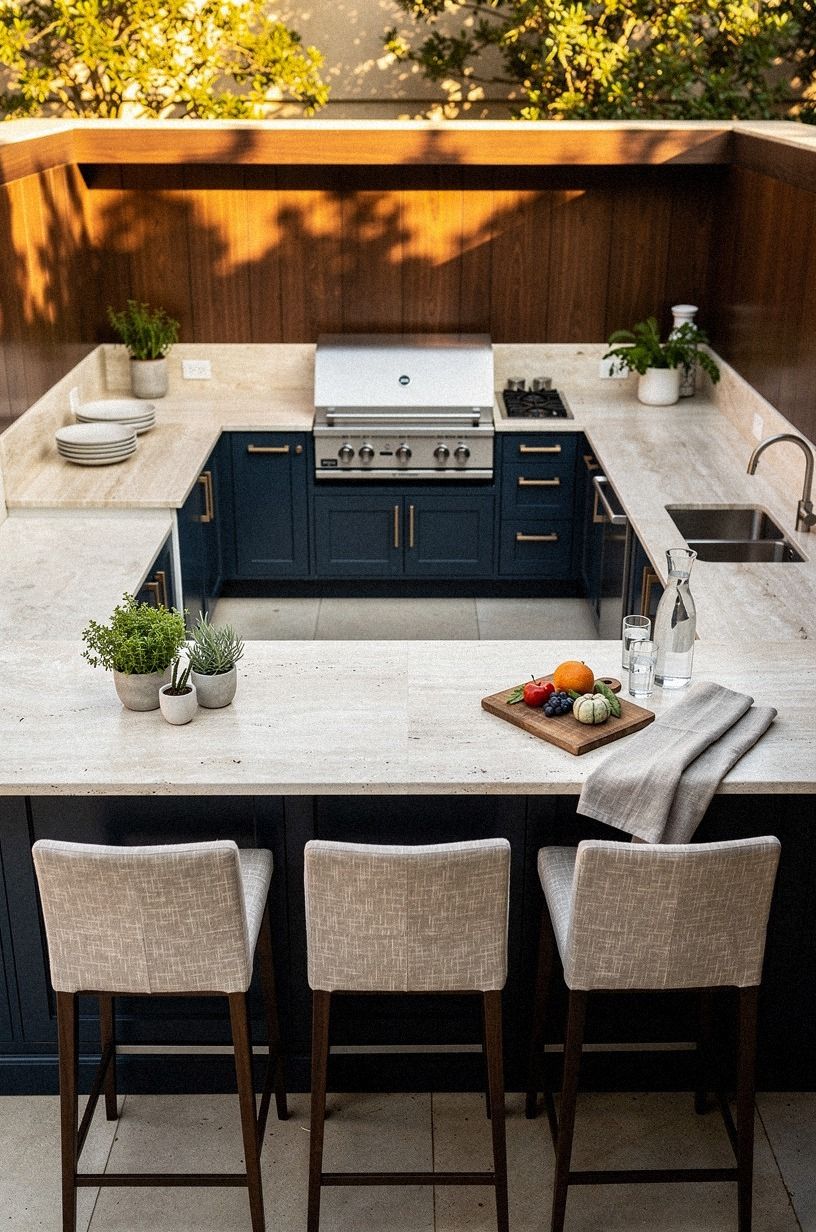
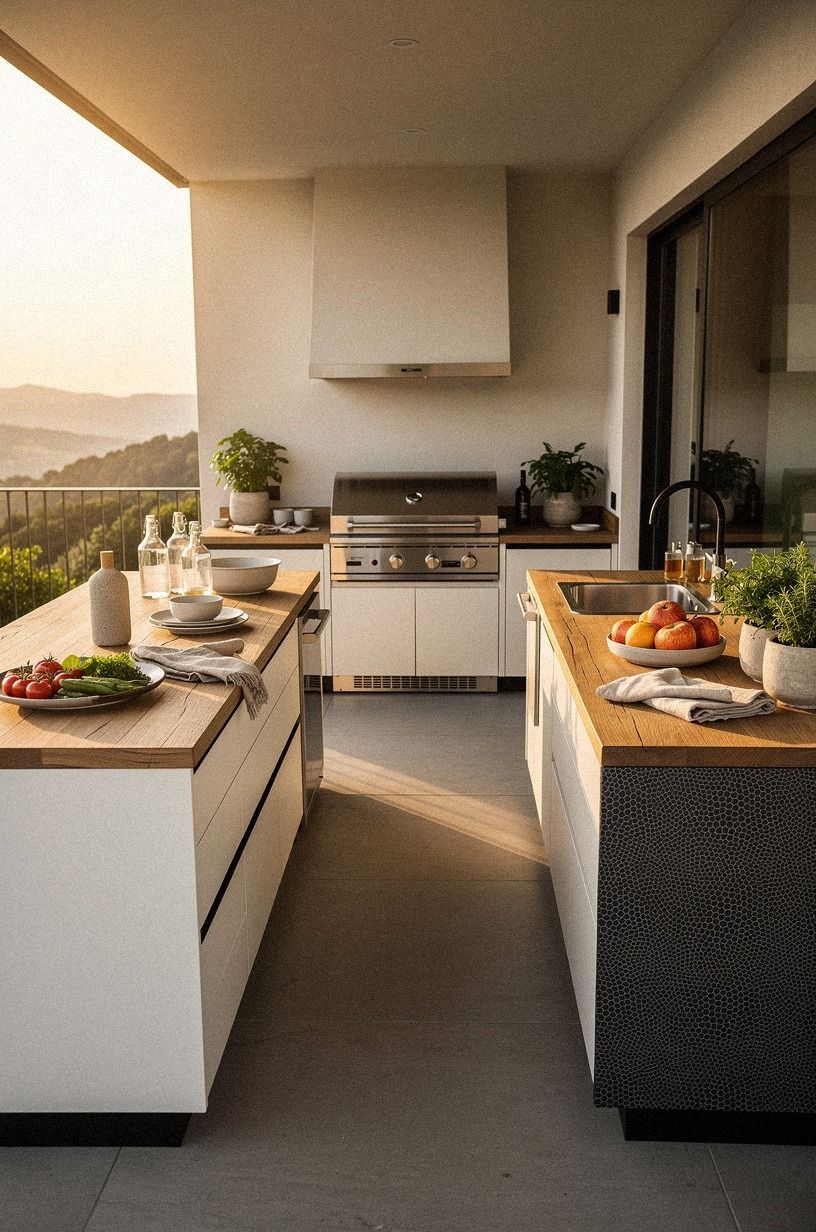
If your patio is a true courtyard with room to circulate, a travertine worktop in a U-shape makes more sense. You get three connected runs, a real center aisle, and enough landing space that the whole thing works like an outdoor room instead of a grill with side tables. This is the layout for people who cook, plate, and serve outside in one sweep.
A U-shape earns its footprint when the center walkway still holds 42 to 48 in after the counters are in. That's the number that keeps the layout from turning into a maze. If you're leaning toward a heavier material language, stone outdoor kitchen ideas for a timeless rugged look is worth reading before you choose the cladding and top.
What makes the U-shape special is containment. Your tools, fridge door, sink, and grill stay close, so you don't keep crossing the patio for one forgotten tray. Worth it, if your yard can spare the width!
5Anchor the grill on the longest counter
The grill belongs on the longest uninterrupted run, not centered for looks. A long stainless steel grill wall gives you proper landing zones on both sides, keeps the lid arc away from a corner, and makes either layout read calmer.
Symmetry can wait. Safe reach matters more.
Try to leave visible drop zones on the left and right, even if one side is only a cutting board width and the other side does the heavier prep. In a real kitchen, that balance is what stops the hot grate moment from feeling rushed. I compare surfacing options every time with the best outdoor kitchen countertops ranked and compared because the grill run takes the hardest wear.
But I wouldn't center the grill on a short return just to frame the wall. It looks tidy for one photo, then you live with nowhere to set tongs, corn, or a platter fresh off the heat.
6Place the sink beside the prep stretch
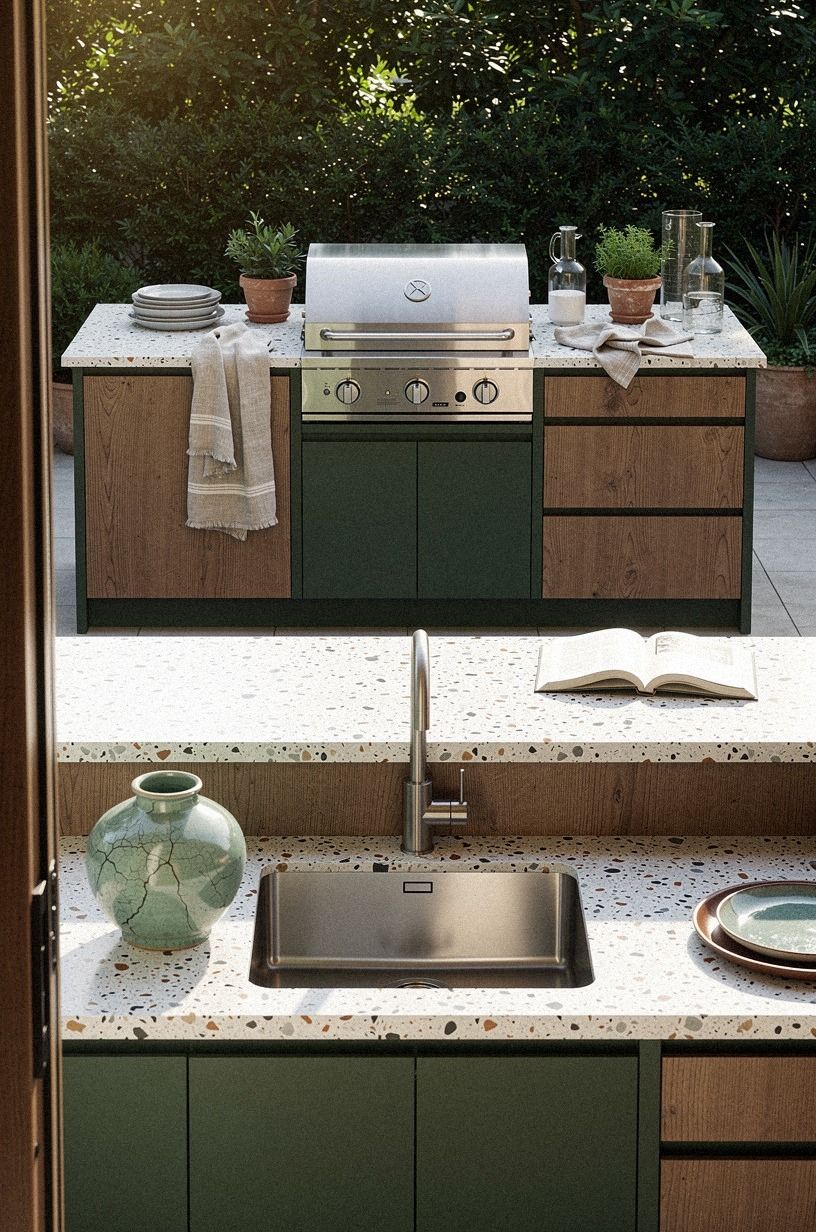
Put your sink beside the longest prep zone, not on its own lonely wing. A compact undermount sink next to a wide landing area makes rinsing herbs, skewers, and fruit feel natural, and it keeps the wet work from colliding with the flame zone. You want water close to prep, not cutting straight across it.
If you can, keep one side of the sink open for at least a full prep board and keep the faucet line simple. I like a matte black or aged bronze fixture here because it reads clean against pale stone and doesn't try to become the star. For warm-weather setups that include serving and cleanup together, summer outdoor kitchen ideas for the best backyard BBQs shows how that rhythm works in practice.
And don't hide the sink on the far return unless plumbing forces you. Every extra step between rinsing and chopping turns a good layout into a mildly annoying water run.
7Set the fridge under the shaded return
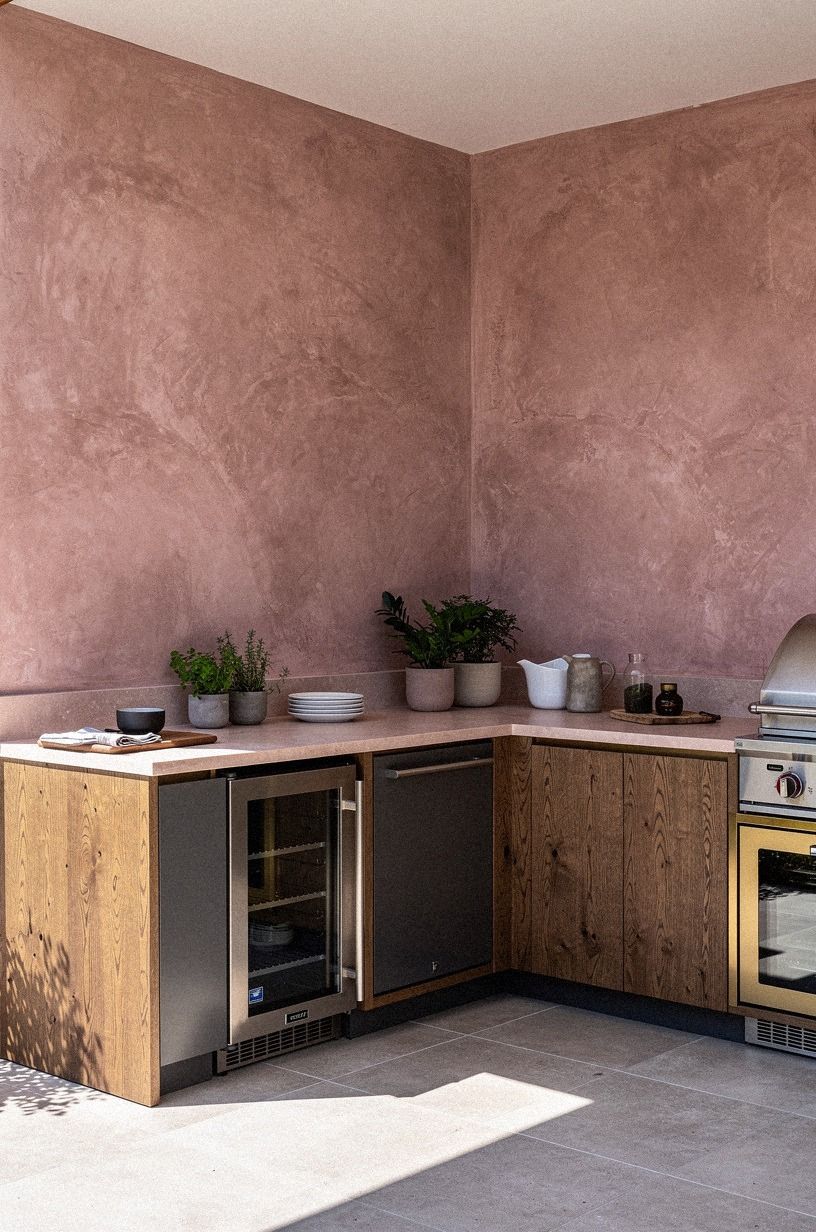
Your undercounter fridge should live on the shaded return whenever possible.
8Build the U-shape around a center walkway: The Center Walkway Rule
A U-shape only works when the middle path is treated like a room, not leftover space. I call this the Center Walkway Rule: if the aisle doesn't feel open with two people crossing, the layout is too deep or the counters are too greedy. Parallel runs should frame movement, not squeeze it.
Keep the back cooking wall visually strong, then let the side legs stay quieter with fewer visual breaks. That makes the center path feel intentional and keeps your eye from bouncing between cabinets. When I want to study generous three-sided plans, I still pull ideas from outdoor kitchen layout ideas because those examples show how open aisles hold the whole composition together.
Would you rather have one extra drawer or a walkway that feels easy every single time? I'd take the walkway. You notice circulation on every cookout, while the missing drawer is forgotten by week two.
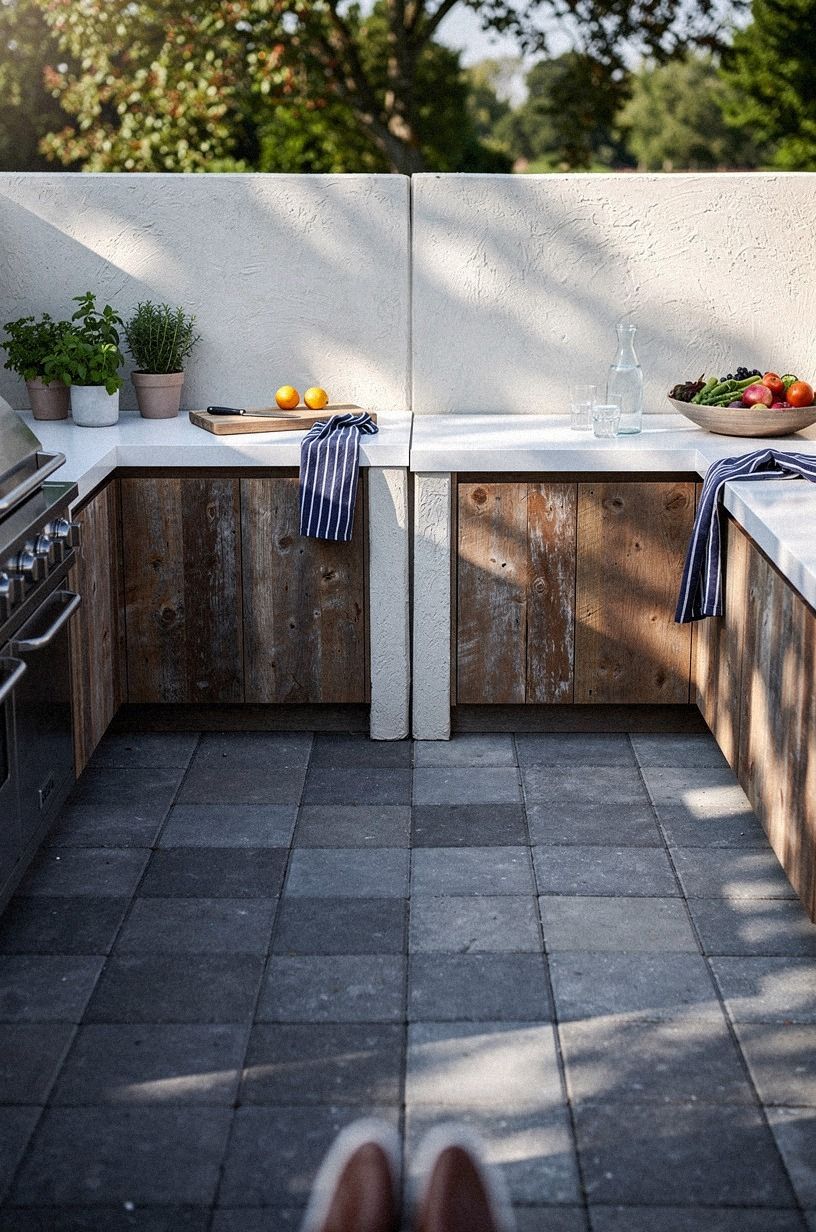
9Run L-shaped counters along fence lines over floating them in the middle

An L-shape gets better when it follows the edges you already have. Running counters along a fence or boundary wall with a powder-coated steel frame keeps the center of the patio open and lets the kitchen disappear into the architecture instead of floating awkwardly in the middle. That move is especially good when the fence already defines a natural cooking corner.
The longer leg should do the heavy work, while the short leg takes prep space, a sink, or serving. This is also where darker fencing can help the kitchen look more built-in, especially if you tie the palette to Sherwin-Williams Evergreen Fog SW 9130 on adjacent trim or planters. For warmer, more relaxed examples, rustic outdoor kitchen ideas for a charming cookout space shows how edge-hugging layouts feel lived in instead of stiff.
And please don't pull the counters six inches off the fence for no reason. That little leaf gap collects debris, wastes depth, and makes the whole thing look undecided.
10Turn the bar side toward garden seating

Your serving edge should face the life of the yard, not the blank wall.
11Leave landing space beside every hot zone
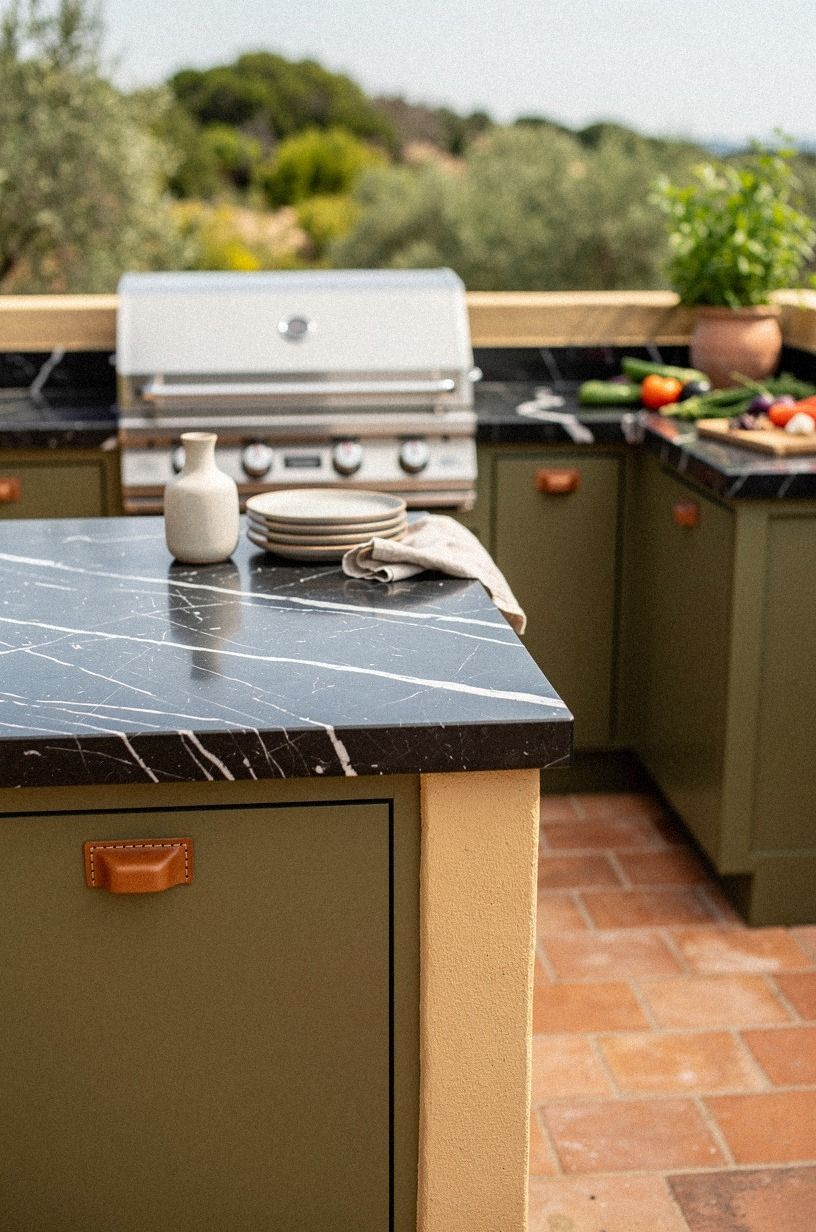
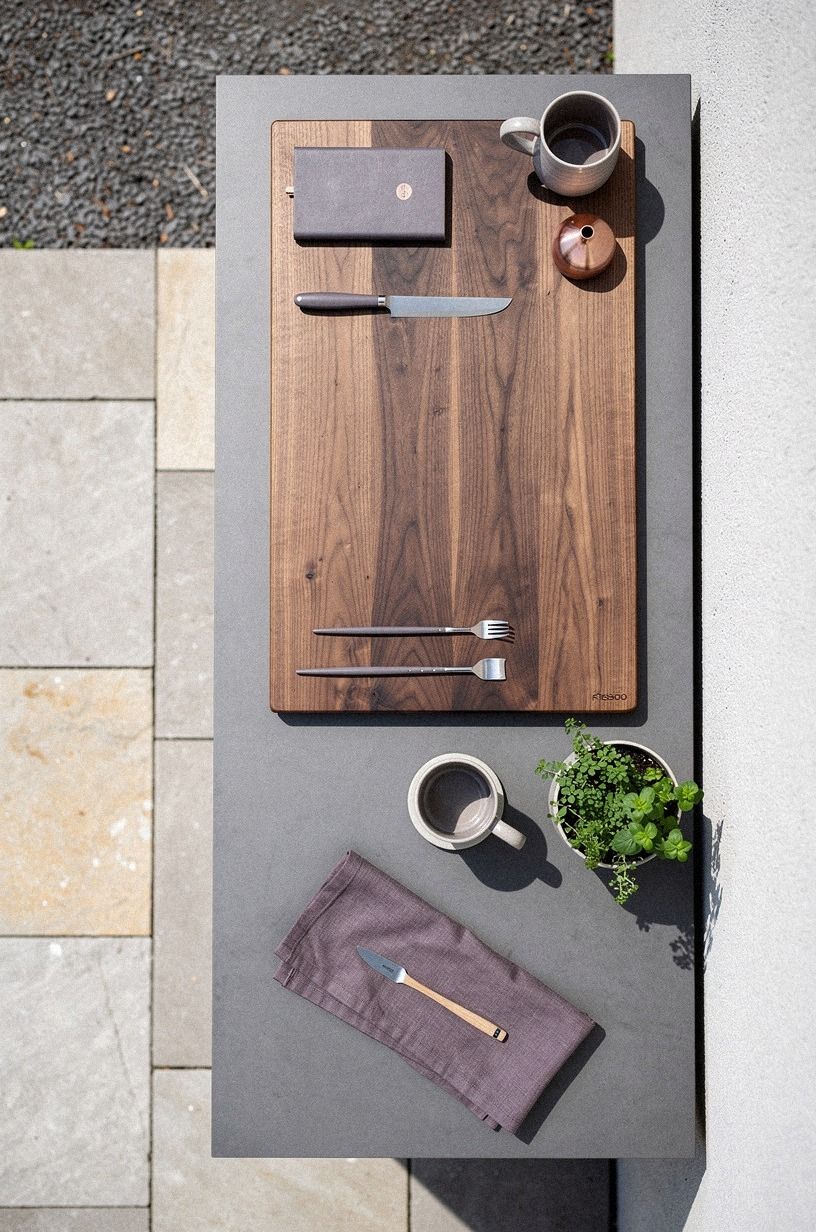
Every hot zone needs landing room right beside it. On a dark Nero Marquina marble or another heat-tolerant top, that spare stretch is where tongs, platters, corn, and grill baskets can land without panic. People obsess over the size of the grill and ignore the part that keeps the grill usable.
I try to preserve a real landing zone on both sides, even if one is modest. The longer side usually becomes the active transfer point, and that's where you want the surface to feel bulletproof. If you're still choosing tops, the best outdoor kitchen countertops ranked and compared breaks down what handles heat, grease, and weather best.
And this is where I get opinionated: don't give the prime landing space to a decorative planter or pizza oven accessory. Hot food needs that square footage more than styling does.
12Frame the cooking wall with stone cladding
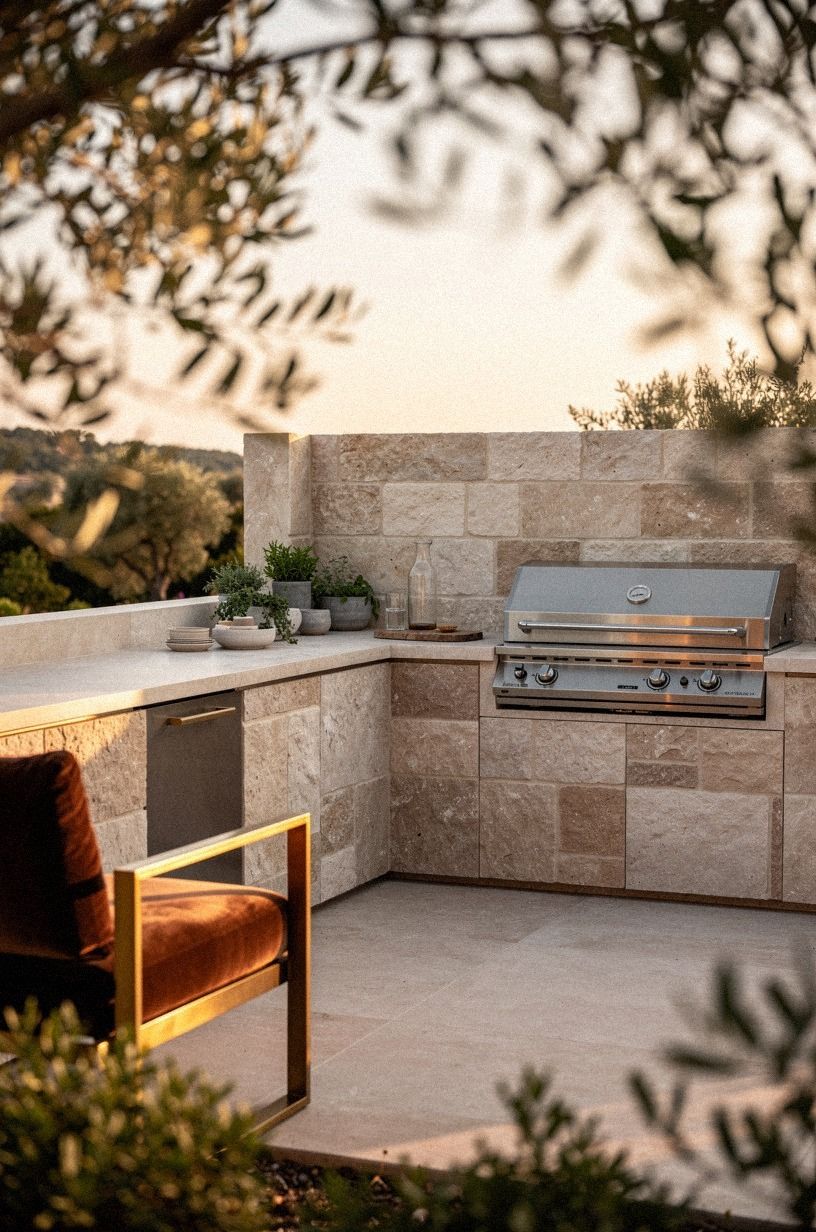
The cooking wall needs a visual frame so the whole layout doesn't dissolve into patio furniture. Cladding that wall in stacked limestone or another textured stone gives the grill a proper backdrop and makes even a simple L-shape feel finished. The wall becomes your anchor, especially when olive foliage or planting softens the edges.
This step matters because outdoor kitchens can read temporary if the vertical plane is ignored. A framed grill wall says the kitchen belongs to the house, not that it was rolled in for one season. If you want to see how much character stone adds, stone outdoor kitchen ideas for a timeless rugged look is the obvious next click.
But I'd avoid fussy ledgestone in five colors. One quieter material with real depth ages better than a busy mix that starts yelling at you by August.
13Add storage drawers below the prep corner
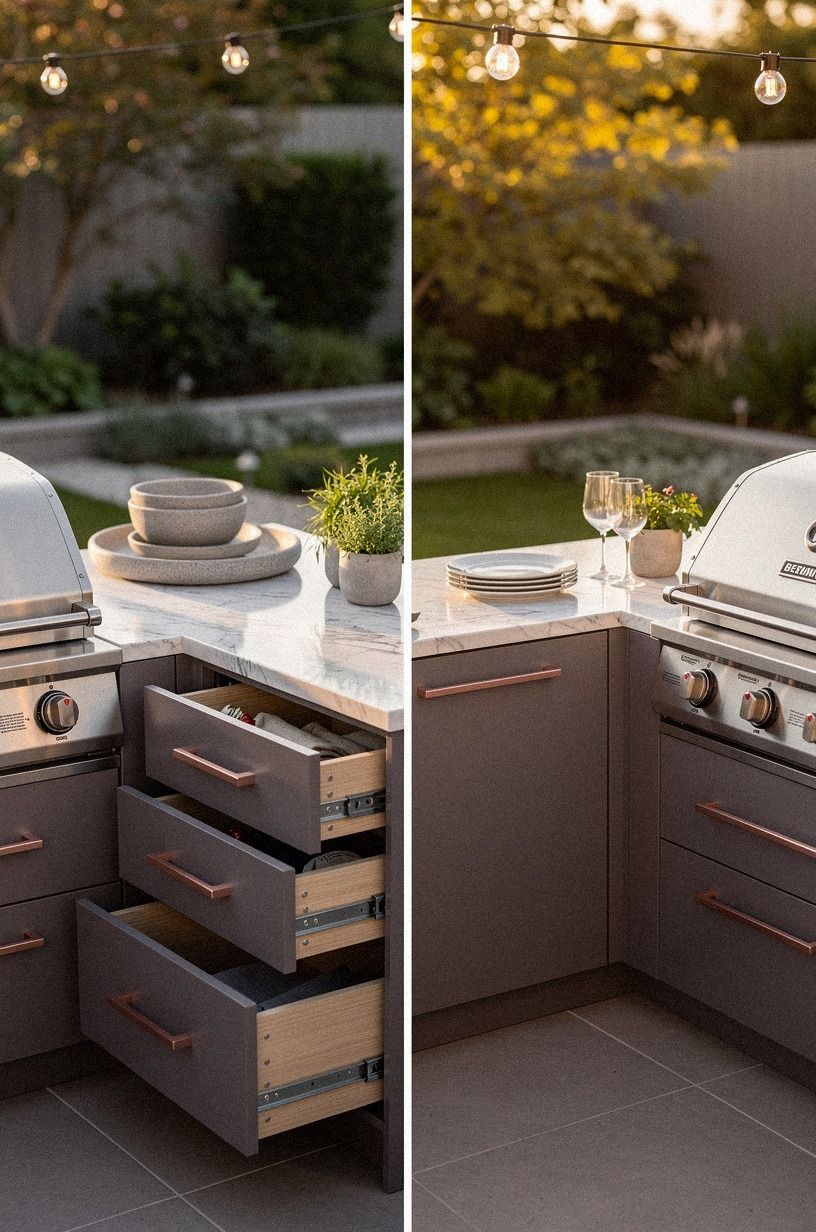
Use the prep corner for drawers, because that's where tools multiply. Deep weatherproof drawers under the corner return give you one spot for knives, towels, skewers, boards, and grill brushes without forcing you to cross the whole kitchen mid-cook. Corners should store the things you reach for fastest.
I like drawer storage more than doors here, since you can see everything at once and you're not crouching into a dark cavity. If you're balancing cabinet modules on a smaller budget, small outdoor kitchen ideas that maximize every inch has the right mindset: less filler, more usable pullout space.
And don't waste this corner on a fake end panel just to keep the lines clean. Clean is nice. Functional is nicer when your hands are sticky and the burgers are already on.
14Layer pavers under the entire kitchen zone
Run pavers under the full kitchen footprint, not only under the cabinets.
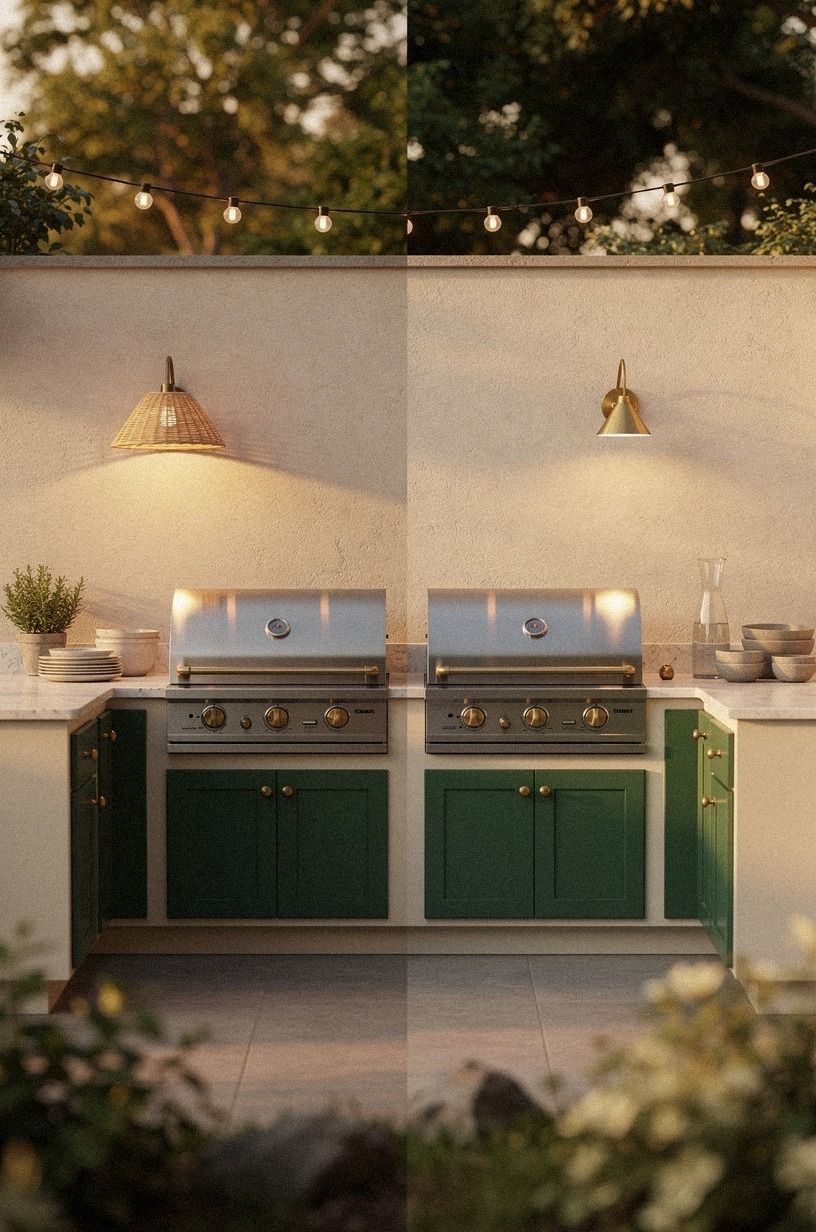
15Hang task sconces above each work surface: The Three-Height Light Stack
Good layout dies in bad light. Hang a damp-rated sconce or focused task light above each real work area so the grill, prep stretch, and sink each read clearly after sunset.
You don't need a giant lighting plan. You need the surfaces that matter to stop disappearing at dusk.
I use The Three-Height Light Stack here: wall sconces for task, a softer ambient source nearby, and low landscape glow at the edge of the patio. That mix feels warmer than one brutal overhead fixture, and it helps both L and U plans read as complete rooms. If you're styling for night use as much as daytime, summer outdoor kitchen ideas for the best backyard BBQs has smart after-dark references.
But keep the light aimed at the counter edge, not your eyes. Glare is the fastest way to make a beautiful outdoor kitchen feel cheap.
16Finish with stools on the serving edge
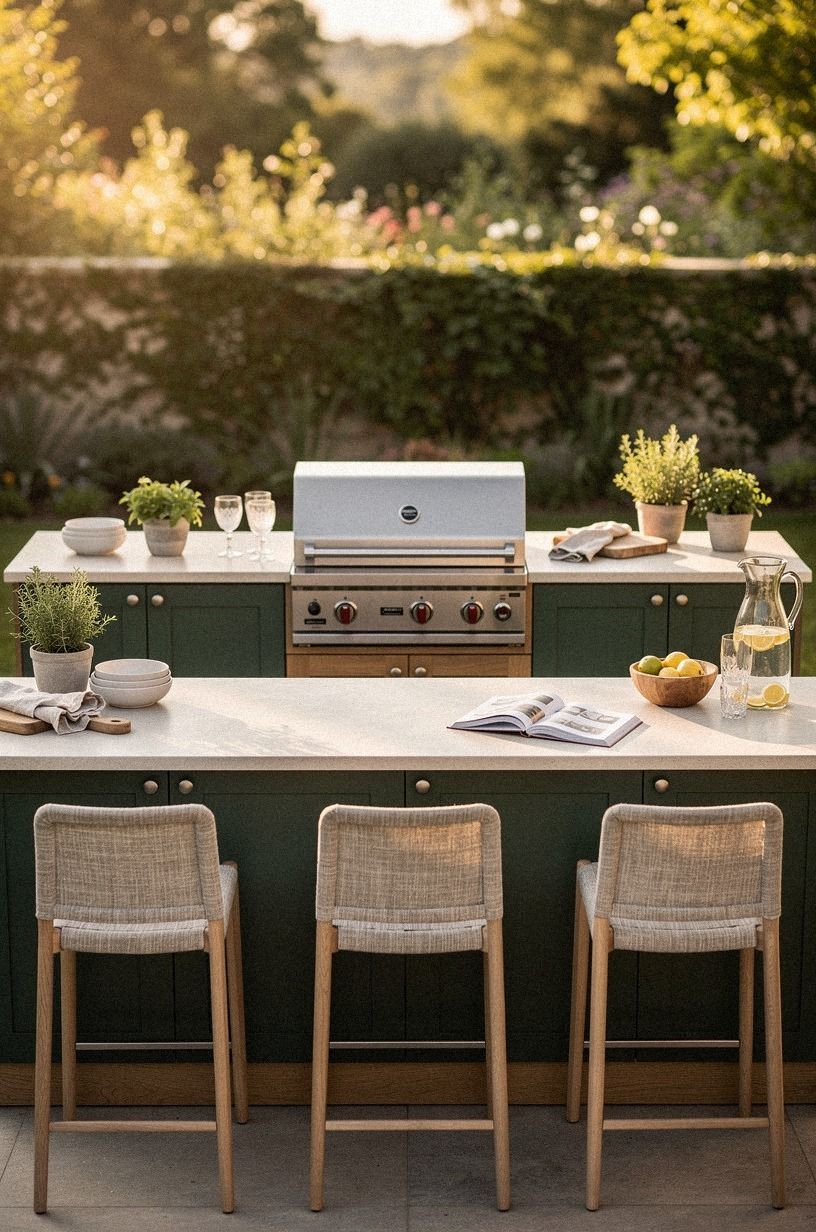
Last step, put stools only on the serving edge and keep them out of the work lane. A row of teak counter stools or powder-coated metal seats turns the outer leg into a place people want to linger, while the inner side stays free for chopping, plating, and carrying hot food. That's the line between a layout that looks finished and one that works finished.
Leave enough room that pulled-back stools don't choke the main path. This is where the taped footprint from step one earns its keep, because seat depth changes everything once guests arrive. If you want more examples of layouts that make room for gathering, outdoor kitchen layout ideas is helpful for comparing where bar seating belongs.
And choose fewer stools than you think you need. Two good seats beat four cramped ones, every single time!
Why layout beats finish every time
I've seen people spend a fortune on an outdoor kitchen and still hate using it because the shape was wrong from day one. The mistake usually starts with a mood board.
A beautiful stone slab, a great grill, a handsome faucet, maybe even the dream finish in Benjamin Moore White Dove OC-17 on a nearby wall. None of that matters if the walkway pinches, the fridge door blocks the prep run, or the grill lid opens into your elbow. Layout isn't the glamorous part, but it's the part you feel every single time you cook.
Here's the decision frame I come back to. Pick the L-shape when your patio has a corner, a fence line, or a narrow terrace that needs to stay open.
Pick the U-shape when you have enough width for a true center aisle and you plan to cook, wash, plate, and serve without leaving the kitchen zone. That's it. People overcomplicate this because they want the answer to sound more designerly than it is.
It isn't. You are choosing between a shape that preserves openness and a shape that creates containment.
I also think outdoor kitchens get over-finished too often. I'd rather see a modest L-shape with a generous prep run, a shaded fridge return, and one good stone wall than a fancy U-shape squeezed into a patio that can't support it.
The second one photographs well for five minutes and irritates you for five summers. And yes, I've made that kind of decision before.
I once pushed a return too deep because the rendering looked balanced, and by the first dinner outside we were turning sideways to pass each other. Lesson learned.
If you're spending real money, spend it on what your body notices. Better clearances. Better landing space.
Better lighting over the prep stretch. Then pick materials that age well, like Farrow & Ball Studio Green No.93 on trim, honed stone, or sturdy metal fronts that won't ask for babying.
The finish should support the plan, not rescue it. Nobody tells you this because finishes are easier to sell. But the part that worked, every time, was always the footprint!
What People Always Want to Know
What is the best L-Shaped vs. U-Shaped Outdoor Kitchen: Best Layout Guide for a small kitchen?
An L-shape is usually the better choice for a small patio because it protects your walkway and leaves room for seating. More open floor area is the win. Think one long grill run, one short prep leg, and compact stools like a simple IKEA-style profile.
Where can I buy L-Shaped vs. U-Shaped Outdoor Kitchen: Best Layout Guide pieces on a budget?
Start with Target Threshold, Wayfair, and IKEA for stools, storage pieces, and outdoor-friendly basics. Facebook Marketplace is worth checking too. Good secondhand finds, weathered teak, simple metal frames, and leftover stone offcuts can cut your spend fast.
How much does a L-Shaped vs. U-Shaped Outdoor Kitchen: Best Layout Guide makeover cost?
A cosmetic version can start around $300 to $1,500, while a heavier refresh often lands closer to $3,000 to $12,000. The savings usually come from keeping the footprint and skipping appliance upgrades. Free win, better tape planning before you build.
Can I create a L-Shaped vs. U-Shaped Outdoor Kitchen: Best Layout Guide on a budget?
Yes, and the cheapest gains are usually the smartest ones. Lower planning risk is the benefit. Tape the footprint first, reuse the grill you own, add pavers only where the zone needs definition, and choose one solid serving counter instead of full cabinetry.
Is a L-Shaped vs. U-Shaped Outdoor Kitchen: Best Layout Guide worth it in a small space?
Yes, especially if you cook outside often. A small patio forces better choices because you notice every inch. Keep the counters on one edge, protect a 42 in path, and let the seating face the yard instead of crowding the grill.
Is L-Shaped vs. U-Shaped Outdoor Kitchen: Best Layout Guide a good idea for a rental?
Yes, if you keep the build light and removable. Flexibility is the reason. Freestanding counters, portable prep tables, clip-on lighting, and loose pavers can mimic the layout logic without locking you into permanent masonry or plumbing.
Where I'd Start First
If I had to pick one step, I'd start with the patio footprint in tape. It's the only move that exposes a bad layout before you buy one heavy thing. Get the walking lane right first.
Every finish choice after that feels easier.