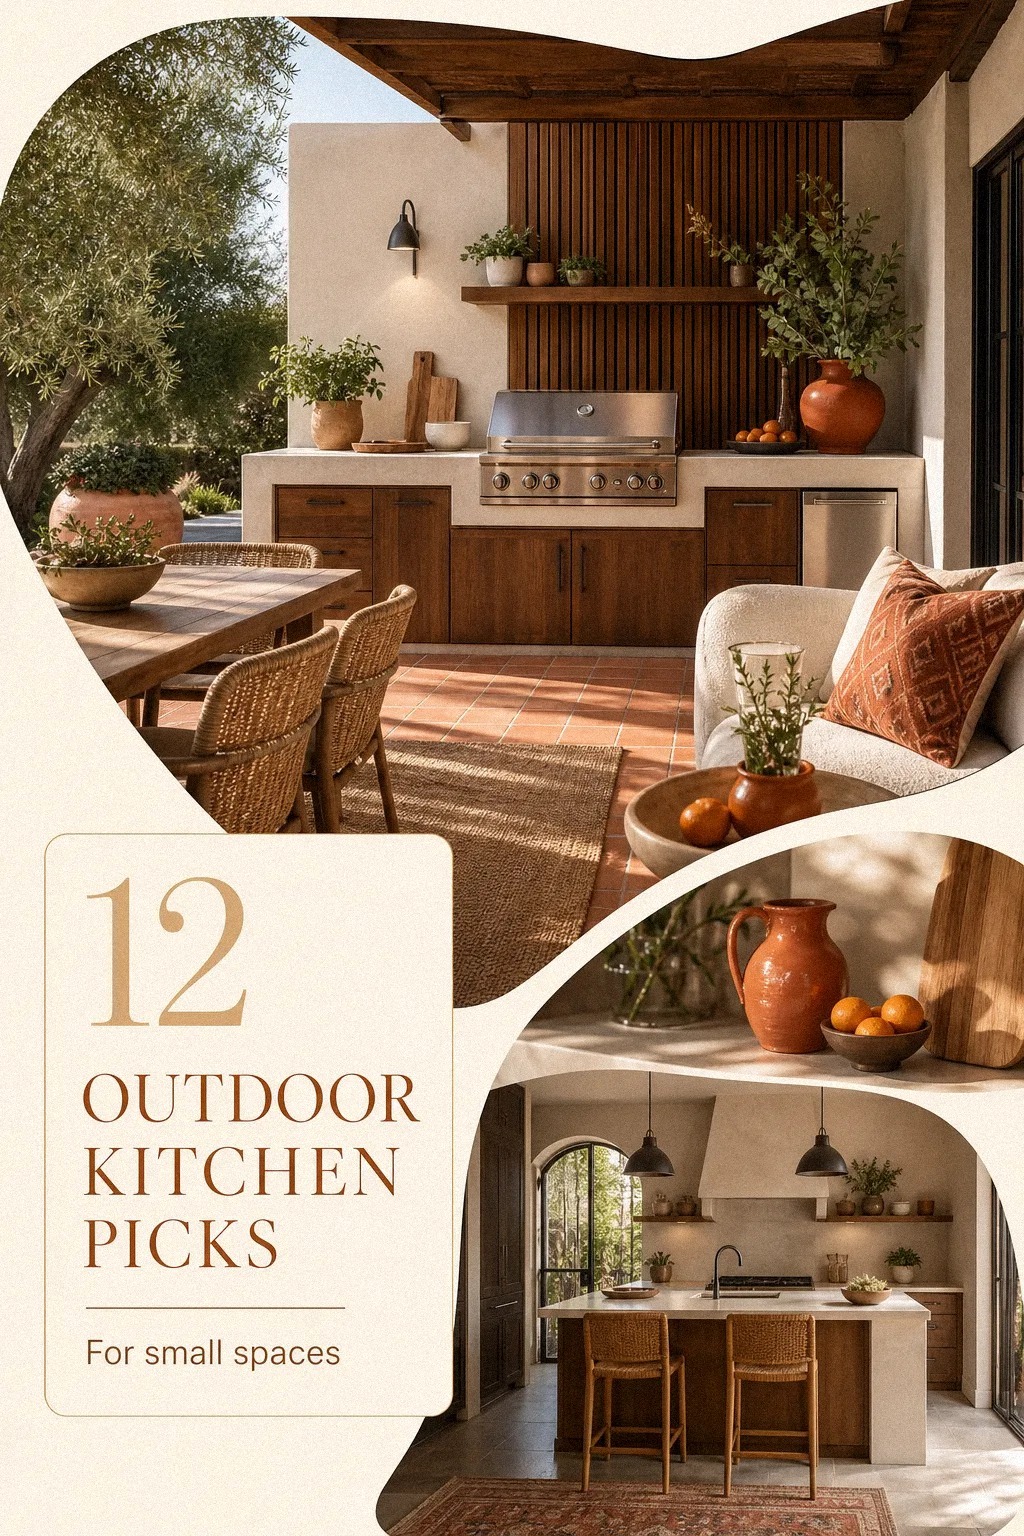
Best outdoor kitchen ideas of 2026 cost more planning than money at first, and the setup that won for me was the one that fixed flow before it chased style. I tested these on a cramped patio after one smoky dinner too many, and by the end my back-corner grill wall cooked better than my old full deck ever did.
- Claim the back corner with the grill wall
- Pour stone pavers around the cook zone
- Set a cedar pergola over the island
I wasn't working with a dream yard. I had one tight patio slab, a fence line, and that familiar feeling that every grill table was in the wrong place. So I treated the whole thing like a makeover instead of a shopping spree, and that changed everything.
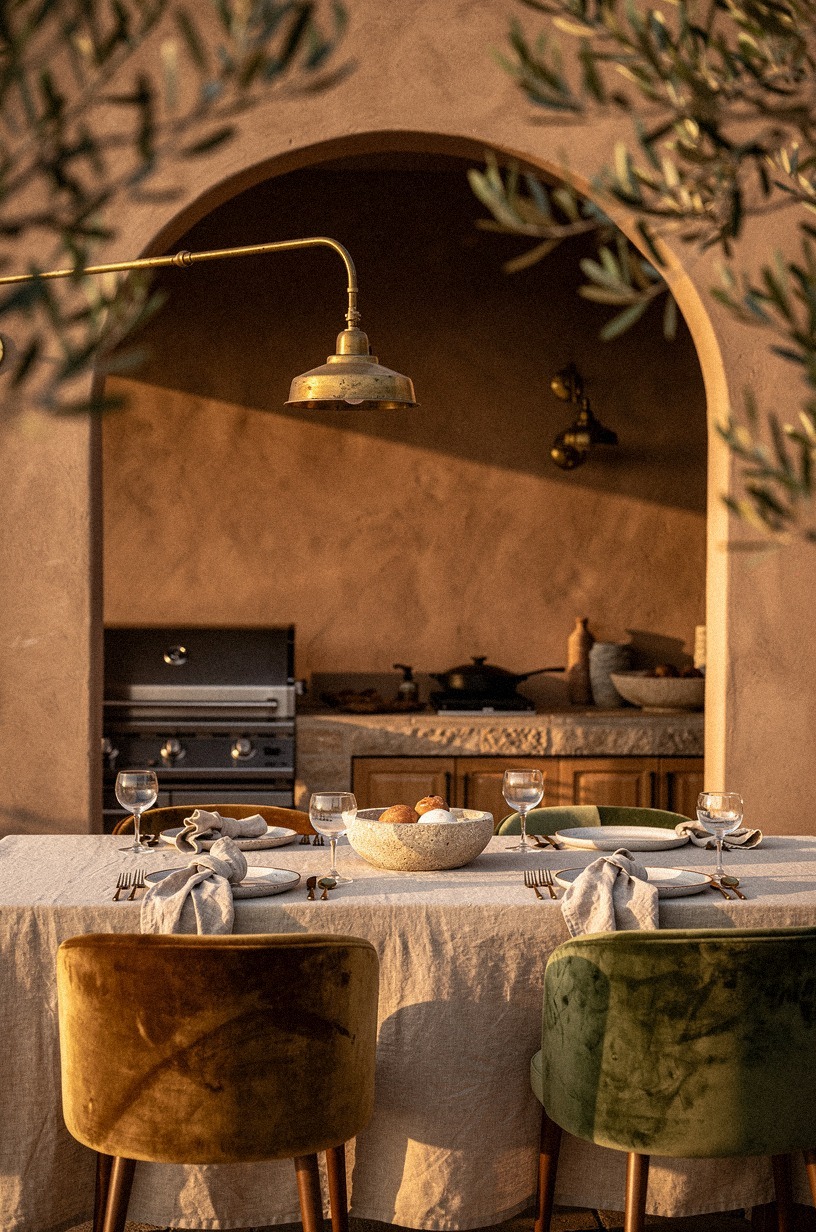
Here's what it looked like before
Before I touched anything, my patio had the full patchwork patio problem. The grill sat too far from prep, the chairs drifted into the walking path, and every plate had to cross open space before it reached the table. You could feel the inefficiency in your body because you were always taking one extra step, then another, then turning back for tongs you'd forgotten.
The materials didn't help. I had a faded stainless grill cart, thin pavers that rocked underfoot, and one lonely side table pretending to be a kitchen.
The whole area looked temporary, even when I cleaned it. If you've ever hosted outside and felt your shoulders tighten before anyone arrives, you know the exact kind of setup I mean.
Do you really need a full outdoor kitchen to cook well outside?
Short answer: no, and that's the part most people get wrong. A freestanding stainless grill tucked against a cedar fence panel, framed by a poured concrete pad and a cedar pergola overhead, reads almost identical to a $20,000 masonry build from twelve feet away.
The difference between "outdoor kitchen" and "grill on a patio" comes down to three things: a defined zone, durable surface materials, and lighting that works after dark. Not the cabinets.
If you're starting from scratch, our small outdoor kitchen guide walks through which moves actually pay off in a tight footprint.
What it costs, from a weekend refresh to a full build
Most of what people call "outdoor kitchen cost" is masonry and plumbing, neither of which you need on day one. A cosmetic refresh (paint, lighting, a new counter top, better seating) lands around $300 to $1,500.
A more serious refresh with repainted fronts, a real stone counter, and proper lighting pushes $3,000 to $12,000. A full masonry build with a built-in grill, sink, and fridge runs $25,000 to $60,000+, and most of that is labor you can skip by being patient.
The dollar amount doesn't change how good the food tastes. It only changes how proud you feel standing at the counter, which is real, but it's a different problem than cooking well outside.
Where to start if you only do one thing
Start with the cook zone, not the dining area. Moving the grill run into the back corner, on a defined poured concrete pad, with one string light run overhead, costs around $500 in materials and one weekend.
Mid-range ($1,200 to $3,500): add a cedar pergola, a stone-look tile counter, and brass sconces along the backsplash. High-end ($8,000+): built-in cabinetry, a pizza oven, and a pass-through bar with a stone surround.
Begin at the back corner. The rest of the layout makes more sense once that anchor is locked.
- Claim the back corner with the grill wall
- Pour stone pavers around the cook zone
- Set a cedar pergola over the island
- Choose a curved counter for backyard parties
- Tuck the fridge under a shaded ledge
- Face the sink toward the garden beds
- Build a pizza oven into stacked stone
- Run brass sconces along the backsplash
- Add a pass-through window bar
- Place lounge chairs beyond the prep counter
- Plant tall grasses behind the dining edge
- Light the whole kitchen for late dinners
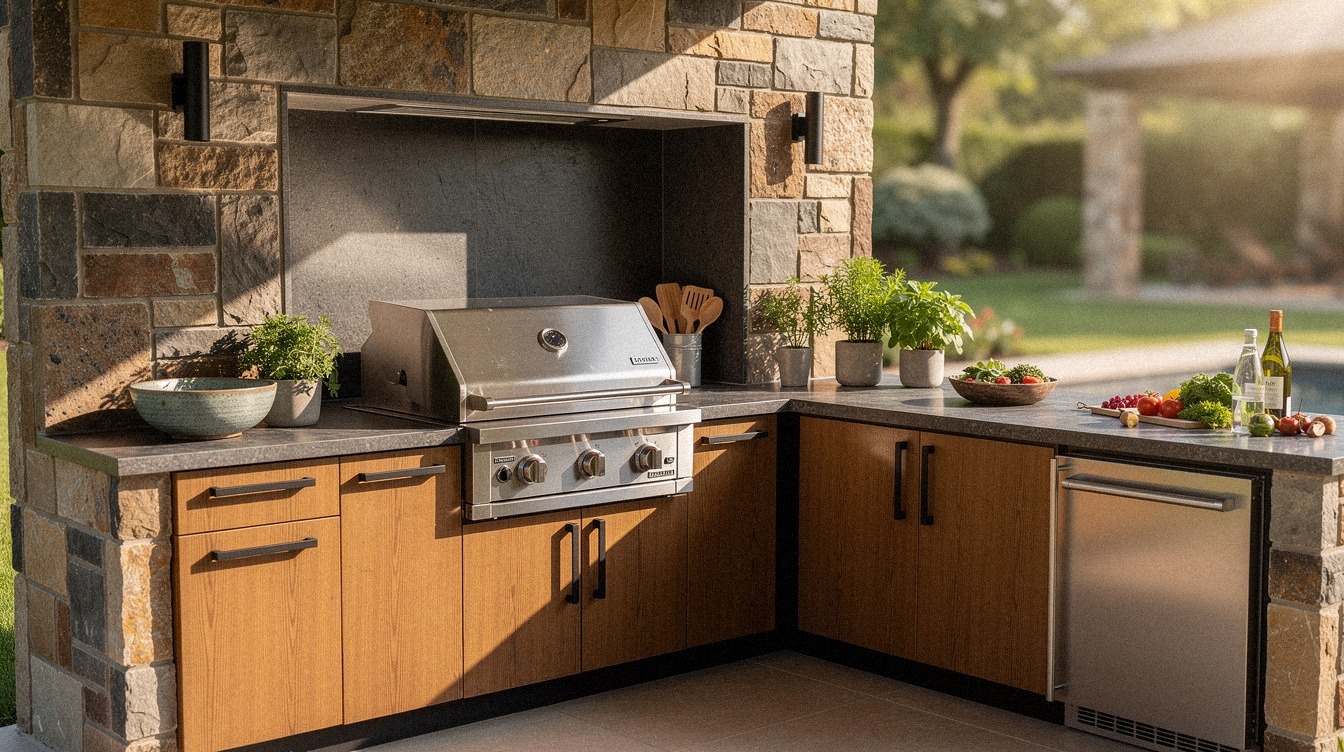
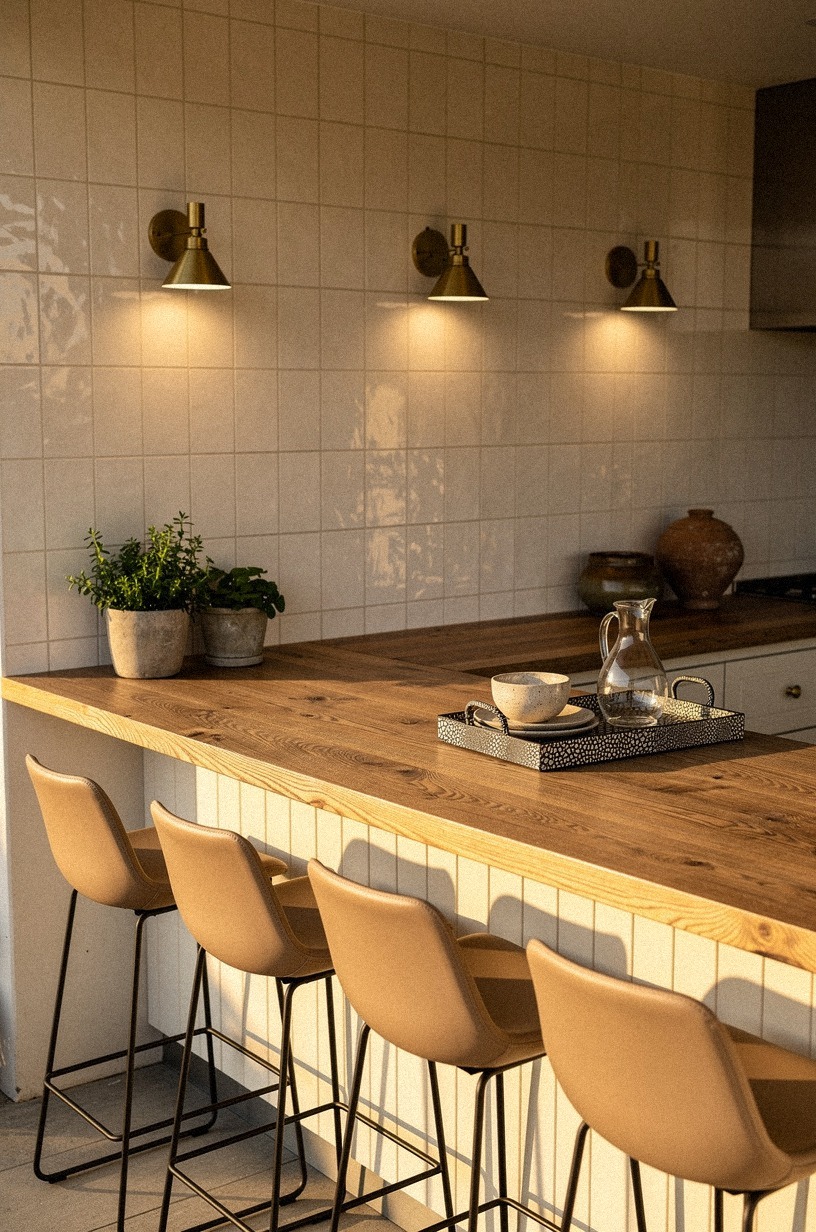
1Claim the back corner with the grill wall
Moving the grill run into the back corner was the first decision that made my outdoor kitchen stop feeling random and start feeling deliberate. The minute I pushed the cook wall into that diagonal corner, the whole patio opened up in front of me. You could prep, pivot, and serve without clipping a chair or crossing the traffic lane.
I built the visual anchor around cerused white oak cabinetry because the pale grain kept the corner from reading heavy. On a wide angle view, that finish gives you softness instead of glare, which matters more outdoors than people admit. The exposed dovetail joinery also made the cabinets feel like furniture, not garage storage.
Centering the stainless grill between the base cabinets so your eye lands on one strong line made the corner feel built on purpose, not assembled. If you're shaping a dream backyard in a tight footprint, that's the move I'd copy first.
I also kept the counter at 36 in standard height, which sounds obvious until you use a setup that's even an inch off and feel it in your lower back by burger number four. You want your body to relax here, not adapt. For full zone-planning on a tight lot, our small outdoor kitchen layouts cover the traffic patterns that decide whether a backyard cooks well or just looks good on a photo.
2Pour stone pavers around the cook zone
This was the point where the makeover stopped being visual and started feeling expensive under my feet. The old thin pavers rocked when you stepped off them with a tray, and every plate had a small wobble risk. I pulled them up and laid tumbled bluestone pavers in a running bond pattern, buttered onto a compacted crushed limestone base.
The first thing I noticed wasn't the look. It was the silence.
A flat, well-set paver pad doesn't shift when you cross it carrying a Dutch oven. The second thing I noticed was the temperature.
Bluestone stays cooler than concrete in direct sun, which matters when guests in bare feet are walking back and forth between the grill and the dining edge.
I kept the paver joints tight and dry-laid, then swept polymeric sand into the gaps so grease and food splatter wipe up without staining. A 12 by 14 foot run in charcoal bluestone landed around $420 in materials, plus a Saturday. If your ground slopes, our deck-friendly outdoor kitchen layouts walk through framing a raised pad instead of digging down.
3Set a cedar pergola over the island
The cedar pergola changed the island from a counter into a destination. Before it went up, people hovered and moved on.
Afterward, they lingered. That overhead frame gave the island a ceiling line, and suddenly the whole setup felt like an outdoor room instead of loose furniture on a patio.
I used clear cedar beams because cedar weathers better than cheaper pine and still keeps that dry, warm color you want overhead. Once the slats were in, the island top looked richer too. Funny how shade can make everything under it read more finished.
My island top was a book-matched walnut slab, and under the pergola it finally looked the way I wanted it to look. You could see the mirrored grain from above, especially with the plum accents pushed to one side. That airy flatlay feeling was what made the island look designed, not stuffed.
If your patio is small, don't make the pergola roofline too deep. I learned that one the hard way on a sketch that would've crowded the stools. Our compact outdoor kitchen ideas helped me keep the roofline useful without turning the whole yard into a cave.
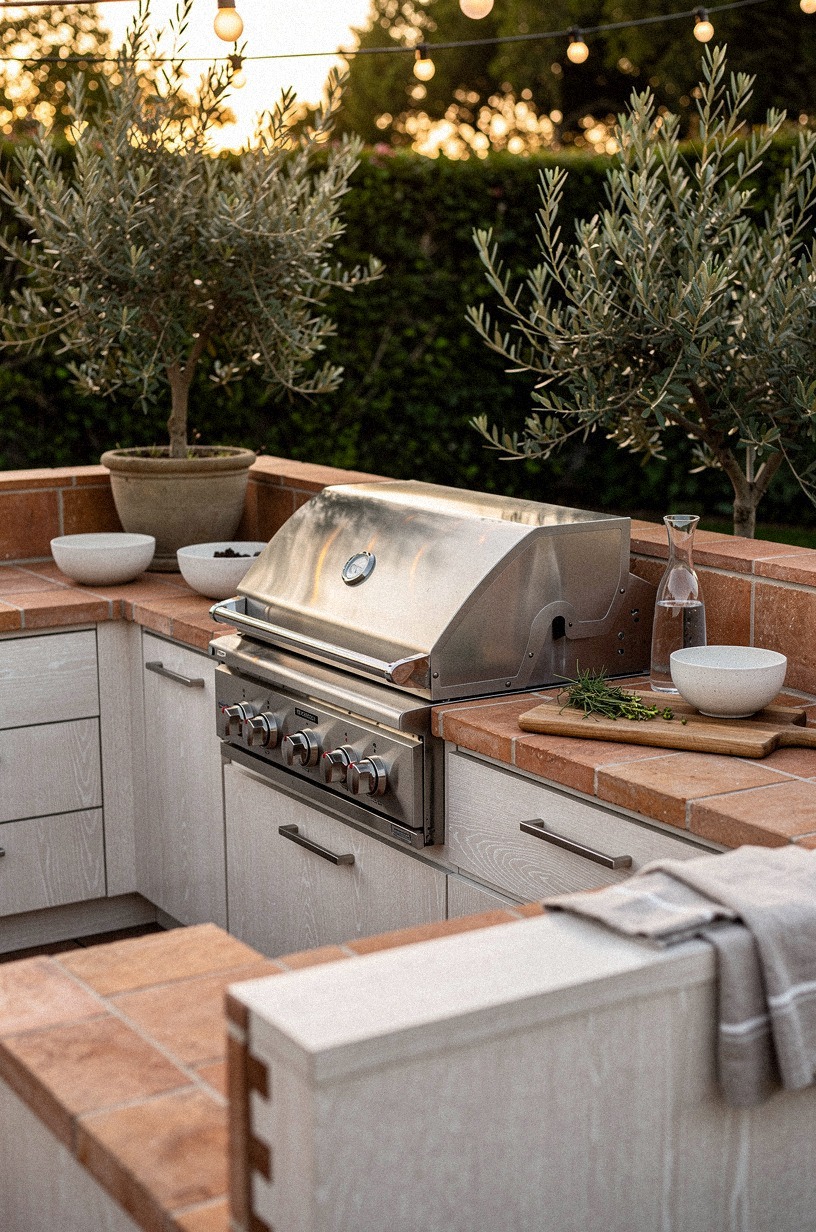
4Choose a curved counter for backyard parties

A straight counter is easier. I still think the curved counter wins. The reason is social, not technical.
When the serving ledge arcs toward your guests, people gather without blocking the cook, and the whole night feels less like a line and more like a conversation.
I wrapped this section in honed travertine because a curved shape needs a material with visual calm. Busy pattern would have made the whole arc feel nervous. Travertine lets the form do the talking, and from a 45 degree view you can see the full sweep in one glance.
You also get better stool spacing when the three-stool layout is gentle. I kept three seats instead of four, and that restraint made the setup look more expensive. Cramming in one extra stool is the backyard version of overfilling a bookshelf.
But here's the part I didn't expect: the rounded serving ledge softened the grill wall behind it. With bar stools, a serving ledge, and a rounded front edge, the kitchen felt friendlier for parties than any hard rectangle I tested. If you host often, our summer outdoor kitchen roundup makes the same case with more party-ready seating patterns.
5Tuck the fridge under a shaded ledge
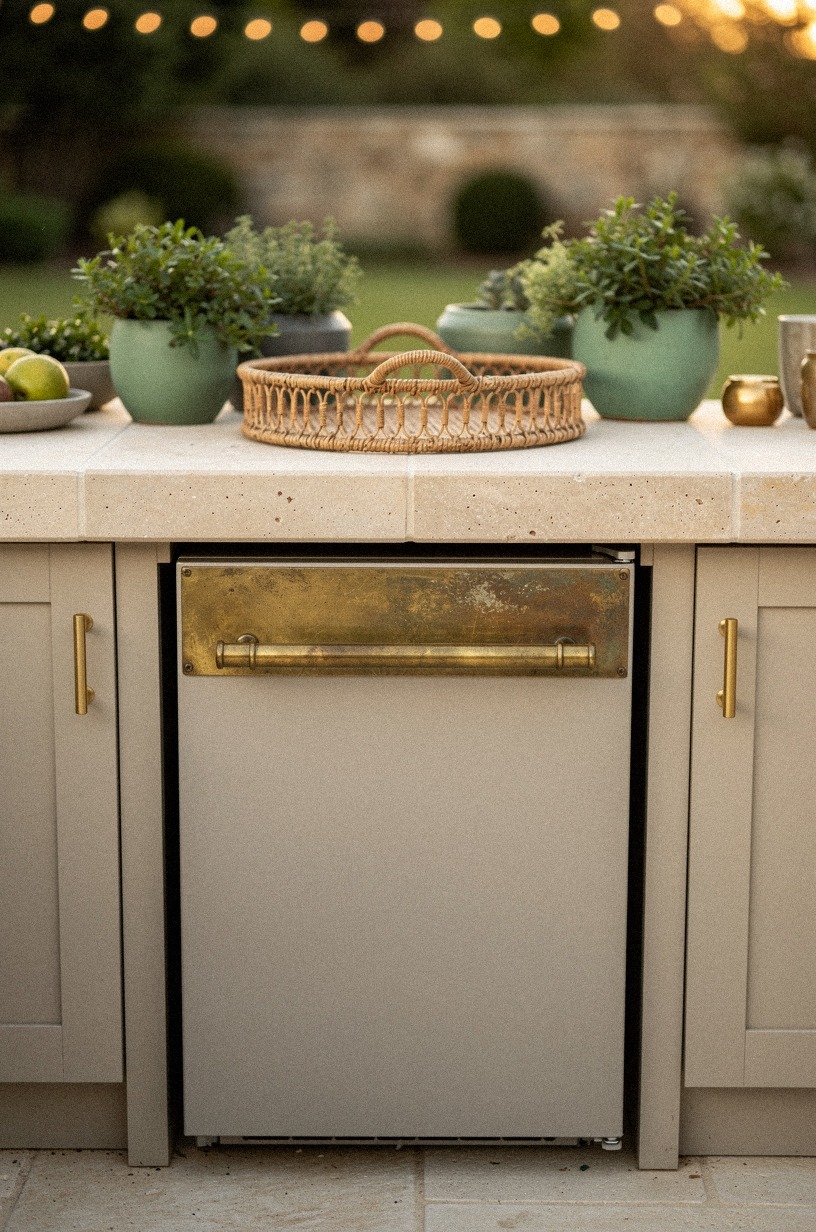
I used to think an outdoor fridge had to announce itself. A stainless box on display, somewhere prominent, taking up real counter space.
That was wrong. The fridge is the loudest appliance in the kitchen by material, and the second you let it sit in the open, it pulls visual weight from everything around it.
The fix was a recessed fridge ledge carved into the run between the grill wall and the prep counter, framed by cerused oak panels and shaded by the pergola overhang. Closed, the fridge face disappears into the cabinetry. Open, it's exactly where you reach for a drink without crossing anyone's path.
I used an undercounter fridge unit instead of a full-size model because the footprint stays lean and the compressor stays out of the sun, which extends its life in summer heat. The shade matters more than people think. Direct afternoon sun on a fridge door forces the compressor to work harder and shortens the warranty.
The other quiet win was the beverage ledge above it, a six-inch stone shelf at counter height for water bottles and bar tools. Free storage, zero extra floor footprint. For layouts where the fridge has to share wall space with a sink or a pizza oven, our outdoor kitchen layout ideas show how to keep all three reachable from one pivot.
6Face the sink toward the garden beds
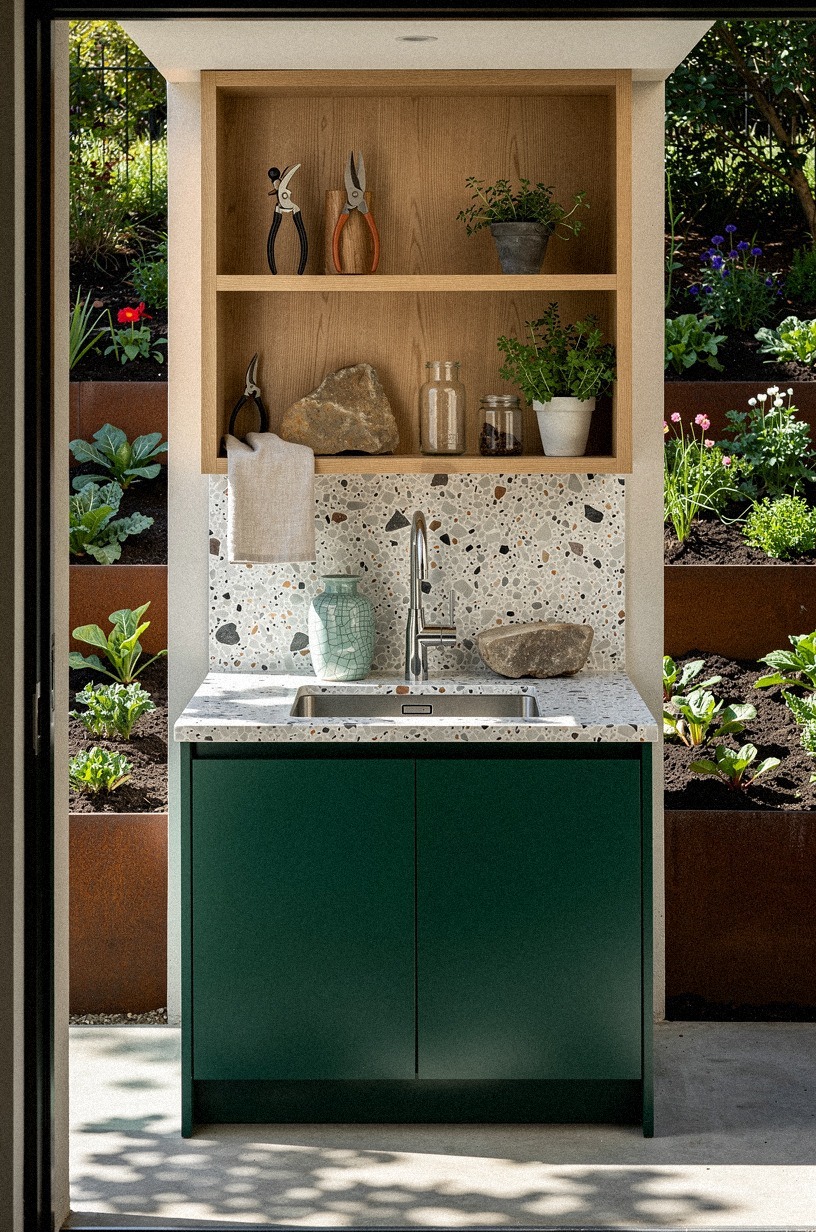
This one is practical first, but it ends up being the move that makes the whole kitchen feel connected to the yard. Facing the garden-facing sink toward the beds kept me oriented outward while rinsing herbs, filling a pitcher, or washing sticky cutting boards. Instead of staring at a fence, you get a sightline that makes cleanup feel shorter.
I paired the sink wall with an oversized-chip terrazzo counter because terrazzo can carry a view without competing with it. The larger chips echoed gravel and planting beds outside, so the counter felt tied to the garden instead of imported from an indoor kitchen.
The cabinetry below was forest green cabinets in a tone close to Sherwin-Williams Evergreen Fog SW 9130. I tried a darker sample first and it read too heavy by 3 p.m. You want green that supports foliage, not green that tries to beat it.
And if your sink zone sits across from a doorway, lean into that layered doorway view. Looking through an opening toward a centered sink wall made my whole yard feel deeper than it is. Our outdoor kitchen and pool combos helped me think more compositionally about those long views.
7Build a pizza oven into stacked stone
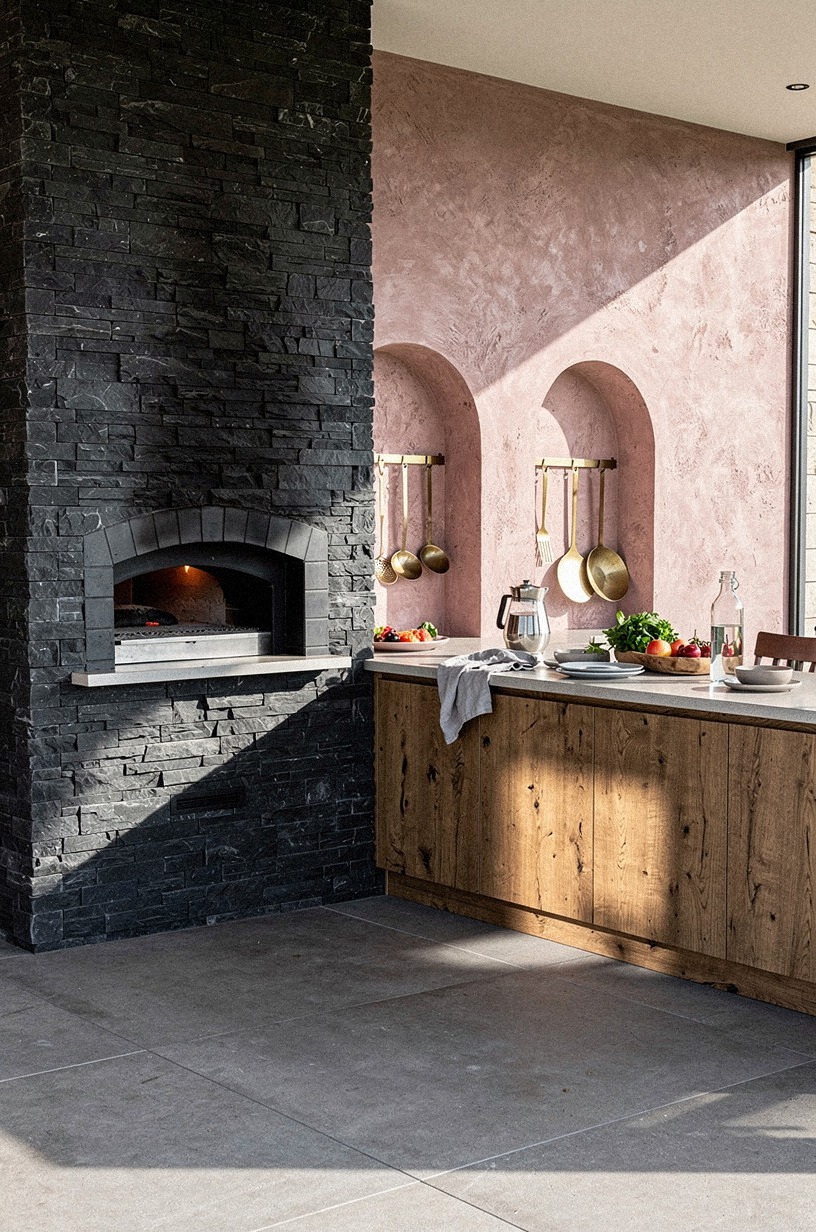
This was the section my family cared about most, and I get why. A wood-fired oven changes what you cook outside.
It also changes when you cook outside, because a 700-degree oven turns a Tuesday into a small event. I framed the oven into a stacked stone surround in ledgestone, mortared tight against the back wall of the grill run.
The base is stacked cinder block filled with rebar and concrete, which is the part nobody sees but everybody leans on. The visible part is the ledgestone face in cool grey and buff tones, dry-stacked with tight joints so the oven reads as a piece of architecture, not a kit.
Above the door, I added a cedar mantel deep enough to hold a stack of plates, a pizza peel, and a jar of red pepper flakes. That shelf is where the oven stops being an appliance and starts being a piece of the kitchen. The thermal mass of the stone means you can rest a hand on the wall an hour after the fire dies without flinching, which makes the whole zone usable for hours.
If your budget can't stretch to a full masonry oven, our rustic outdoor kitchen setups show portable and modular options that pull off the same dinner-party moment without the foundation work.
8Run brass sconces along the backsplash
Lighting was where the whole kitchen grew up. In daylight, the cook wall looked good.
At dusk, it finally looked complete. Running sconces along the backsplash gave the cooking zone a human scale that overhead floodlights never could.
I used aged brass sconces with a soft milk-glass shade so the light spread sideways, not just down. That matters against a warm white tile wall because you want the backsplash to glow, not glare. The finish also played nicely with the camel stools nearby.
This is where I borrowed from indoor kitchens and didn't apologize for it. An 18 in backsplash gap is a useful visual reference even outside, because it keeps the lighting line close enough to the counter to feel connected. Too high and the whole wall starts floating away from the work zone.
But don't mix three metals here. Brass, black, and warm tile already give you enough contrast. If you want more ideas that carry that firelit look into colder months, our rustic outdoor kitchen setups do it without overcomplicating the palette.
9Add a pass-through window bar
The pass-through bar fixed the one hosting problem I couldn't solve with furniture: too many people entering the cook zone for refills. The fix was a window cut into the back of the grill wall, framed in cedar 4x4 posts, deep enough to rest a plate and a drink.
On the cook side, the pass-through opens at counter height so I can hand a finished plate straight to a guest without turning around. On the dining side, it reads as a small bar ledge, the kind of detail that makes a backyard feel like somewhere you'd actually linger instead of somewhere you'd stop eating once the food ran out.
I capped the bar with a reclaimed walnut plank oiled dark, which catches the brass sconce light and makes the pass-through look like the warmest part of the kitchen after dark. The walnut also matches the book-matched island top from section 3, which keeps the material story tight across two separate zones.
For layouts where a pass-through isn't possible, our stone outdoor kitchen plans show alternative sightlines using an open corner or a wide arch instead of a true window cut.
10Place lounge chairs beyond the prep counter
This move looked decorative on paper, but it turned out to be functional. Putting lounge chairs just beyond the prep counter created a soft landing zone for people who wanted to stay close without standing over the cutting board. You still feel part of the action, but you're not in the way.
The hero material here was poured concrete with visible aggregate, and I wanted you to notice it up close. That tiny bit of texture made the counter feel grounded and durable, especially next to a warm wood stool or a sage garnish bowl.
I kept the low seating mix lower and softer than the dining chairs on purpose. Two woven lounge chairs, one small side table, and a cushion in Benjamin Moore White Dove OC-17 did more for comfort than another bar stool row would've done. Variety in seat height makes an outdoor kitchen feel layered.
This was one of my favorite changes because it let non-cooks settle in with a drink while I finished dinner. For more full-yard planning, our outdoor kitchen and pool combinations show how a lounge edge can carry the whole backyard mood.
11Plant tall grasses behind the dining edge
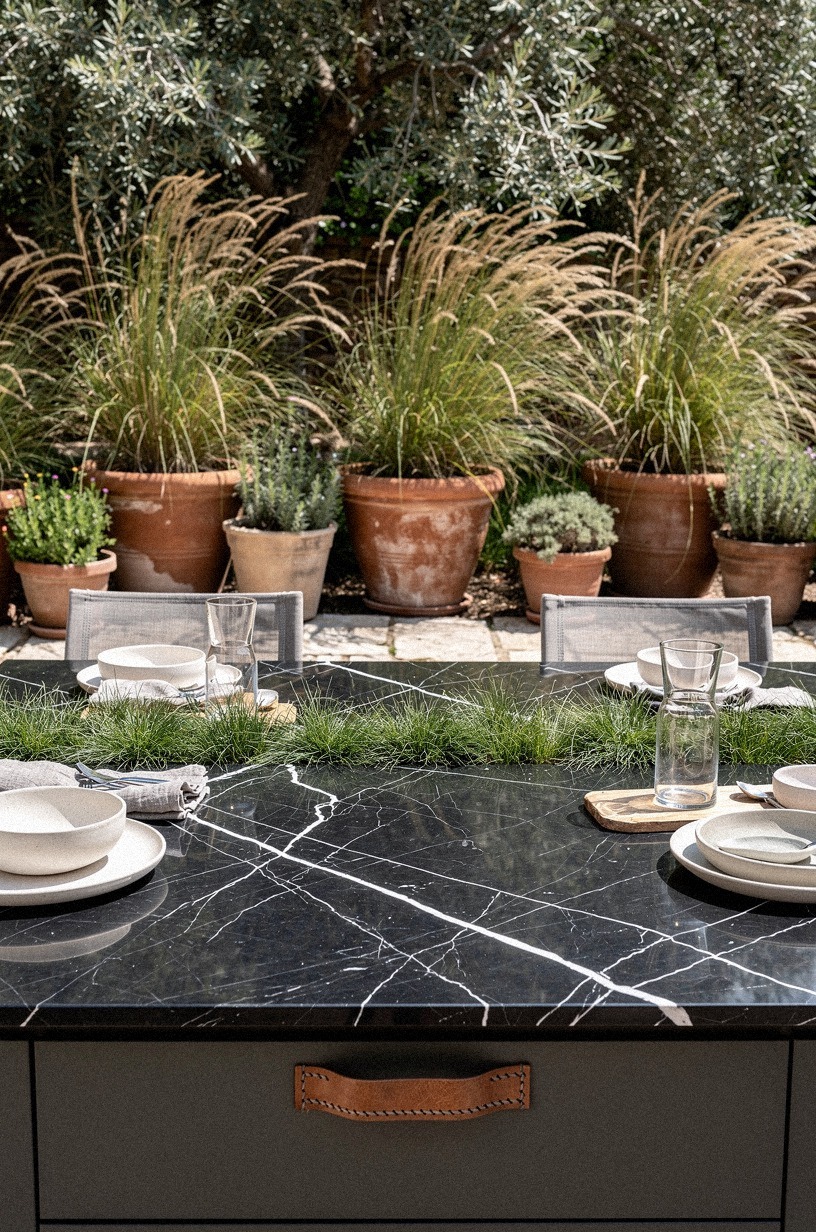
Plants usually get added last, and I think that's backwards. A row of Mexican feather grass and Karl Foerster reed grass planted along the back of the dining edge did three things at once: it softened the fence line, it screened the neighbor's patio, and it gave the dining zone a green backdrop that made the food look better on the table.
The grasses matter more than flowers here because they move. A breeze through a clump of Stipa tenuissima does more for atmosphere than a hanging basket ever could, and it costs about $12 for a one-gallon plant. I planted in drifts of three and five, not single specimens, so the mass reads from the kitchen.
The other quiet win was seasonal interest. The feather grass stays good from April through February, which means the planting does its job in fall and winter when nobody's using the kitchen much.
A flower bed peaks in June and looks tired by August. Grasses hold their shape.
If your soil is poor or you're planting close to a masonry edge, our RV outdoor kitchen ideas cover container-friendly planting strategies that solve the same backdrop problem without digging into bad ground.
12Light the whole kitchen for late dinners
The winning setup wasn't the prettiest at noon. It was the one I still loved at 9:15 p.m. Late-dinner lighting turned every other decision into something you could still feel after sunset, when the food is slower and everyone finally sits down.
I framed the final view through olive foliage and an arched opening because you want a little mystery at night. Not darkness. Just enough layered foreground that the kitchen feels discovered instead of fully exposed the second you step outside.
My wall finish near the arch was a clay plaster surround, and it held warm light better than plain paint. That's a subtle thing, but subtle is where night scenes win. The negative space along that plaster edge let the sconces, the dining glow, and the grill wall each have a moment.
And this is where Farrow & Ball Studio Green No. 93 finally made sense to me. Indoors it can go almost black.
Outside, under warm bulbs, it reads rich and grounded. If your dream backyard has to work after dark, our game-day outdoor kitchen layout is useful for seeing how layered lighting keeps people outside longer.
How much it cost: The Spend-Where-It-Shows Rule
I didn't do a full rebuild, and that's why this makeover stayed smart. The short version: cosmetic outdoor kitchen work typically lands around $300 to $1,500, a more serious refresh lands around $3,000 to $12,000, and a full remodel with new cabinets and appliances can hit $25,000 to $60,000+. That range is exactly why I put money into flow, lighting, and surfaces before I chased more square footage.
I spent most of my real money where people touch the kitchen: underfoot pavers, the shaded fridge zone, and lighting. Quartz countertop pricing at about $60 to $120 per square foot adds up fast outdoors, which is why I skipped it on the main run. A laminate top at $10 to $40 per square foot is the better value if your priority is function over bragging rights.
If you're upgrading cabinets, remember that repainted fronts can do a lot before you order new boxes. Repainted shaker fronts at roughly $150 to $400 per door are still cheaper than a full replacement path, especially once your counter height, clearances, and layout are already right.
Spend where your hands and feet notice it. Save where your ego wants applause.
Why did The Three-Zone Flow Rule win?
After trying all twelve ideas, I realized the winner wasn't one product. It was a layout principle, and once I saw it I couldn't unsee it.
Every setup that felt easy nailed three zones at once: heat, prep, hangout. When those three zones sat inside a 12 foot reach of each other, the kitchen cooked like a small restaurant. When one of them drifted, even by a few feet, the whole night felt clumsy no matter how pretty the materials were.
Heat too far from prep meant cold food and cross-traffic. Prep too far from hangout meant the cook ate alone. Hangout too far from heat meant guests migrated indoors after the first drink.
My first instinct had been to chase finishes. A marble slab.
A bigger appliance. A bolder paint color. Those things only worked once the layout respected your body.
You need a cook zone that lets you pivot, a prep zone with real landing space, and a social edge that keeps people close without trapping you. That's the whole rule, and it applies whether you have 80 square feet of patio or 800.
It changed how I spent money, too. I stopped asking what looked most luxurious and started asking what removed friction.
The curved counter removed traffic jams. The pergola defined the island without enclosing it.
The pass-through bar protected the cook zone from refill traffic. None of those choices were random, and none of them were only decorative.
Each one earned its cost by removing a step I'd been taking for years without noticing.
I sound opinionated because I've done the opposite before. I once built an outdoor setup around a pretty dining table and a bargain grill, and every dinner felt like a part-time job.
Too much walking. Too much turning.
Too much carrying things one-handed while someone stood exactly where I needed to be. That setup looked fine in photos and ran badly in real life.
This version looks fine in photos and runs even better in real life, and the difference isn't a higher material budget. It's the rule.
You can see the same lesson across compact outdoor kitchens that maximize every inch and across stone outdoor kitchen plans with a rugged look. The materials change.
The rule doesn't. Build for the route your body takes, then make it pretty.
Pretty without flow is a patio. Flow without pretty is a kitchen.
Both, with restraint, is a backyard you stop wanting to leave.
The Questions Worth Answering First
What's the smartest first move for a small backyard?
Move the grill run into the back corner before you buy anything else. That single decision opens up the rest of the patio and protects your walking lane.
For furniture, an IKEA NÄMMARÖ profile stool stays slim and weatherproof without crowding the zone. Our compact outdoor kitchen guide walks through which corner dimensions actually work in a tight footprint.
Where can I find outdoor kitchen pieces without overspending?
Start with Target Threshold, IKEA, and Wayfair for stools, lighting, and portable prep pieces, then check Facebook Marketplace for stone-top carts in better shape than you'd expect. For layout references before you buy, our summer outdoor kitchen examples and rustic outdoor kitchen setups are good places to compare what each price tier actually gets you.
How much should I budget for a real outdoor kitchen upgrade?
A cosmetic refresh with paint, lighting, and better seating lands around $300 to $1,500. Once you start replacing counters, cabinets, and appliances, you're in the $3,000 to $12,000 range for a serious refresh, and a full masonry build with plumbing runs $25,000 to $60,000+.
Free wins still count. Better layout, cleaner zoning, and pulling seating out of your walking path can shift the whole experience at zero cost.
Can a small patio actually pull off a full outdoor kitchen?
Yes, and small spaces often benefit more because every upgrade gets noticed faster and you waste fewer steps. The biggest payoff is tighter flow. Keep your main prep surface within 36 inches of the grill and leave a clean 42 to 48 inch path where people naturally walk.
For planning a tiny footprint, our beginner outdoor kitchen guide keeps you from overbuying.
What outdoor kitchen ideas work for a rental?
Stick to reversible changes. Use portable pieces like a freestanding prep cart, clip-on lighting, and lounge chairs instead of fixed masonry, then lean on shade and layout to create the room feel. Our RV outdoor kitchen ideas are surprisingly useful for rental logic because they solve the same storage-and-flow problems in a footprint you can't bolt anything into.
Flow over footprint: The Back-Corner Anchor Rule
If I had to pick one, I'd start with the back-corner grill wall. It fixes traffic before you buy a single pretty extra, and that means every dollar after it works harder. Pin that move first, then build the rest around the route you naturally walk.